
|
| |
|
|
|
|
 |
|
|
Making a Townhouse
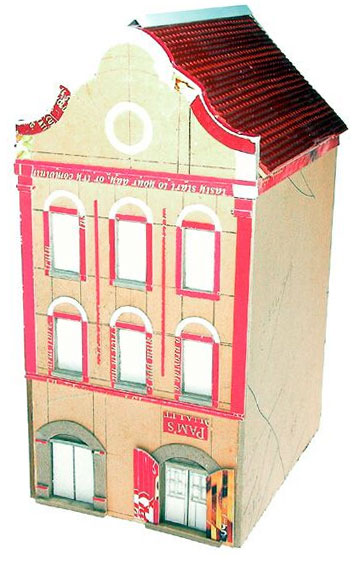 |
Making a European Town House
Most of Northern Europe’s towns have multiple level houses in their central or down town streets, Dieppe is no exception.
If you look at the existing photographs from the Dieppe raid, as well as more recent ones, you can see that the town front along the Promenade is made up of a wide variety of different buildings. Instead of sticking rigidly to copying the Dieppe buildings I thought I would just stick to the general style. I also looked through other books, magazines and model catalogues until I found something I liked.
Size
For scale I decided to stay with 1/100, some people like to scale their buildings down so they are smaller than the scale of their miniatures, but since Flames of War is a 1 to 1 ratio game I’m going to stick to 1/100.
To get a good idea of size I used a 1/160 scale European building I had already and scaled the measurements up to 1/100.
Some Basic Measurements
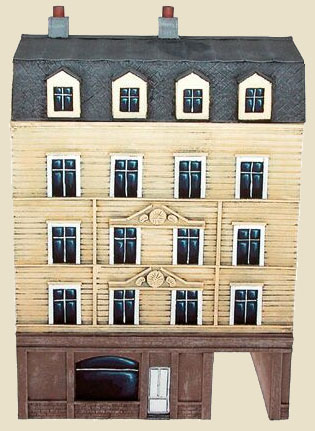
5-story building (below left)
Up stairs windows: 11mm wide x 19mm deep
Attic windows: 9mm wide x 12mm deep
Alleyway: 31mm wide x 39mm deep
Doors: 27mm x 11mm
Bottom floor: 50mm
1st-3rd floors: 35mm each
|
|
4-story building (the one I’m making, above)
Up stairs windows: 11mm wide x 21mm deep
Attic windows: 9mm wide x 12mm deep
Bottom double doors: 20mm wide x 29mm deep
Bottom floor: 50mm
1st-2nd floors: 40mm each
Materials
The basics you will need are a cutting mat or board, a craft knife, PVA glue, pins or thumbtacks, a steel rule.
For the basic structure I used fairly thick art card (about 1.5-2mm) which is available from most stationary and art stores. I use this because it is cheap and I have lots of it. You may like to use foam card or plastic card instead.
For the detail work I use a variety of thinner card mostly recycled from cereal boxes. I have just recently got some preformed plastic card that can be use for brickwork, roof tiles and cobblestone pavements.
|
 |
 |
Step 1
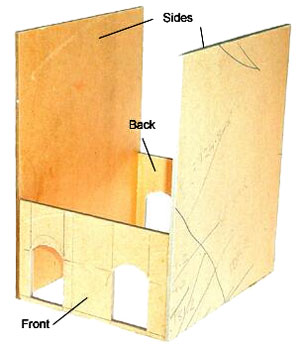
First I cut out the two sidewalls, unless you are making a corner building you don’t need to make windows in these. They measure 108mm x 131mm. Glued between these are the front and back walls of the ground floor.
I’ve made this level separate so I can pull the building apart for gaming and put troops in the different levels. They measure 51mm by 82mm. The front has two large double doors. Always cut the doors and windows out before you glue the walls together. The back has one double door and a window. The doors at the back and front line up as if they form a passage or alleyway.
|
|
Step 2
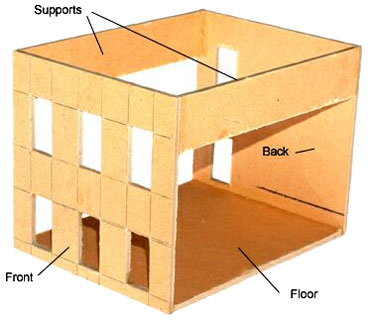
Next I made the 1st/2nd floor section. The front and back walls were made from the same strip of card as the ground floor to keep the 82mm width constant. Windows were then cut out.
The card I’m using is 2mm thick, so I made a floor section for the 1st floor the same width as the front and back walls (82mm) and 104mm deep (108mm - 4mm for the thickness of the walls). This was glued to the bottom inside backs of the facing walls. Two strips of card were glued at the top for strength.
|
 |
|
|
Step 3
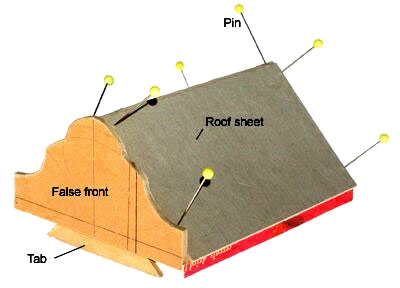
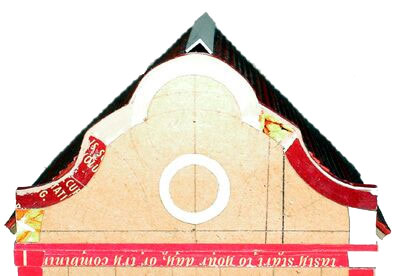
Next I made three sections for the roof structure. The first one was the false front of the front of the roof. This was made in an ornate shape to be further decorated later.
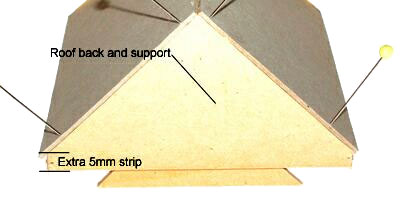
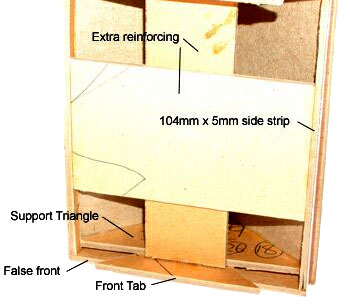
The next two are identical and conform to the shape of the roof, which it this case is a basic triangle. Both are triangles 82mm wide x 47mm high. One triangle had a 5mm high strip left on it to sit flush with the top of the 1st/2nd floor section. Two 5mm x 104mm strips were made and glued between the outer edges of the back wall triangle and the false front.
Glue some bits of scrap card to the inside of the roof front and back, with about 5mm sticking out the bottoms to act as tabs for fitting the roof.
Then glue the remaining triangle (the one without the extra 5mm strip) butted against the front tab resting on the side strips. Further reinforcing can be added.
|
|
Step 4
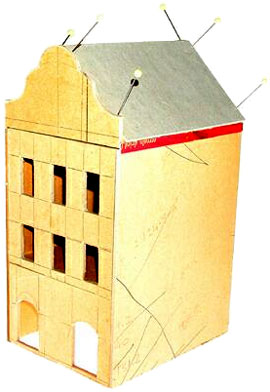
I then cut out two roof base sheets the same size 106mm x 62mm. These are then glued to the roof structure.
|
 |
 |
Step 5
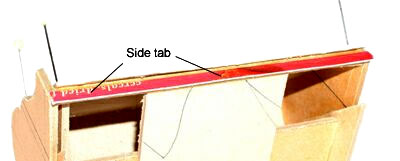
I then added thin card strips along the roof sides to align the roof when it is placed on top of the other two sections. These tabs over lap the bottom of the roof section by about 3mm. You could also use a peg and hole system for aligning the sections.
|
Step 6
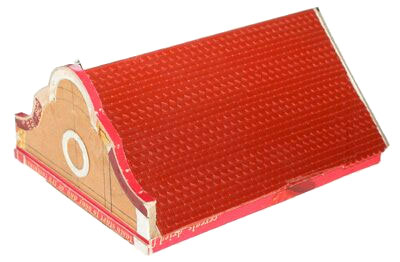
For the roof tiles I just used pre made tile sheets available from most hobby stores. I cut them to size then glued them to the roof base sheets.
|
 |
 |
Step 7
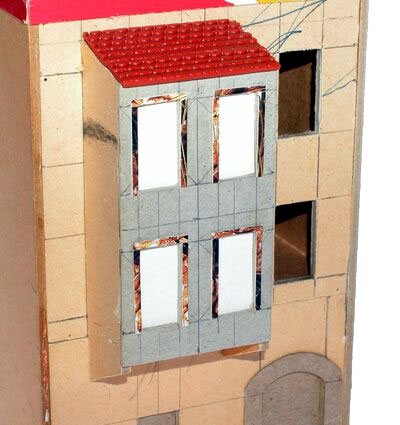
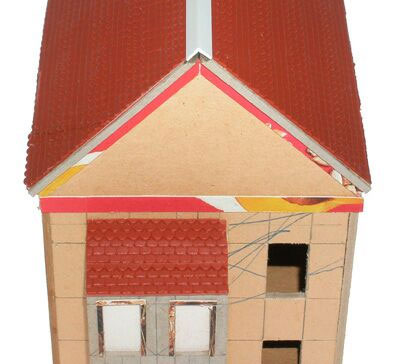
I decided to put an extra section on the back of the building. This was made out of the thick card and glued to the back of the middle section. I used tile off cuts from the roof for its roof.
|
|
Step 8
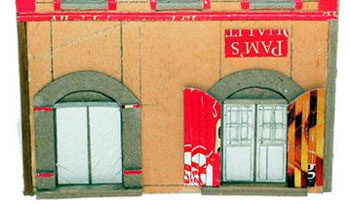
Detailing. For this I used thin card from an old cereal box. I framed the windows and doors. I also ran strips up the side of the 1st/2nd floor section to hide the join where it slides in. These bits were just glued to the 1st/2nd floor section to overlap the main sidewalls. Any gaps and joins can be filled in with a bit of modelling putty.
Right: Here I built the doors and frames from card and scored some of the door parts with a sharp knife to give a wood panel effect.
|
|
|
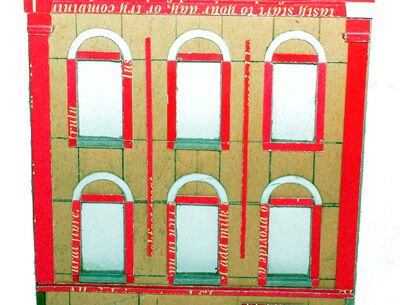
Above: I used thin strips of card to build up the frames and sills. Small gaps will be filled in latter with putty. I also ran ledges around the column tops.
|
Below: I cut out some circles to match the shapes of the roof false front and trimed them to fit.
|
|
|
|