
|
| |
|
|
|
|
|
|
Products mentioned in this Article
--None--
|
|
|
|
|
|
|
|
|
 |
|
|
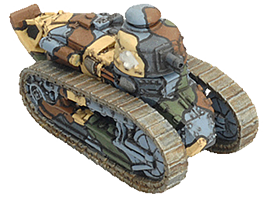
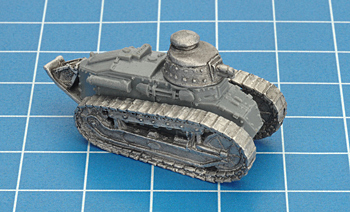
Renault FT-17 (GFBX03)
 |
Renault FT-17 (GFBX03)
Includes three Renault FT-17 (37mm) and two Renault FT-17 (MG) light tanks.
The most innovative tank design fielded by the French was the Renault FT-17. This light tank was small and relatively mobile, and was the first tank design to house its weapon in a fully rotating turret, which would heavily influence the design of later tanks.
Check out the Renault FT-17 in the online store here...
Designed by Evan Allen
Painted by Aaron Mathie
|
1918 saw great changes in the warfare of the Western Front. Russia pulled out of the war, freeing thousands more German troops to push the Allies back huge distances. The Allied counteroffensives, with the new tanks, evolving tactics, and the arrival of the Americans, forced the Germans back towards their own borders and defeat.
Learn more about Great War here... |
 |
| The Renault FT-17 in Great War |
| |
|
|
Armour
|
|
|
| Name |
Mobility |
Front |
Side |
Top |
Equipment and Notes |
| Weapon |
Range
|
ROF
|
Anti-tank
|
Firepower
|
|
|
Renault FT-17 (37mm)
|
6"/15cm
|
1
|
1
|
1
|
Overloaded. |
| 37mm SA-18 gun
|
16"/40cm
|
2
|
4
|
4+
|
One-man turret. |
|
| Renault FT-17 (MG) |
16"/15cm |
1 |
1 |
1 |
Overloaded, Turret MG. |
|
Contents & Assembly Guide for the Renault FT-17
Contact the customer service team at [email protected] if you have issues with any components. |
a. 2x FT-17 MG turrets.
b. 3x FT-17 37mm cannon turrets.
c. 5x Tail.
d. 5x Renault FT-17 hulls.
|
e. 10x Tracks.
f. 3x Turret hatch sprues.
g. 2x tank commander figures for FT-17 (MG)
h. 3x tank commanders figures for FT-17 (37mm)
|
Assembling the Renault FT-17
|
|
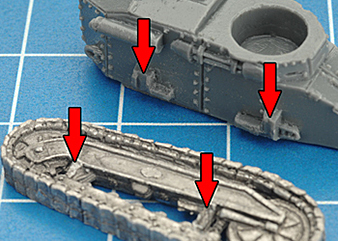
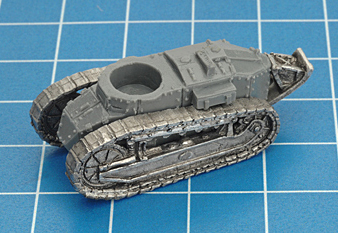
Step 1. Begin by attaching the tracks to the resin hull.
Note: The two track pieces are symmetrical, so you don't have to worry about putting them on the wrong side. Just make sure the large wheel is at the front.
|
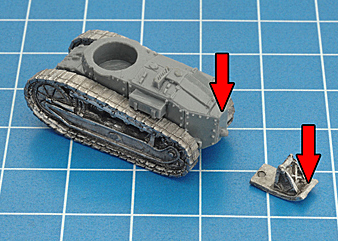
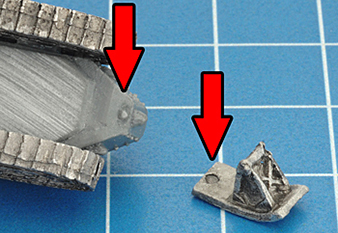
Step 2: Next attach the curved tail, which helped the FT-17 to cross trenches without getting stuck.
|
|
|
| Below: Note the small indentation in the tail piece and the corresponding on the resin which help with correct placement. |
Below: The correctly attached tail.
|
 |
 |
|
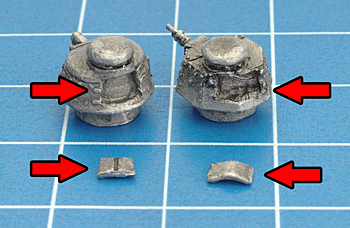
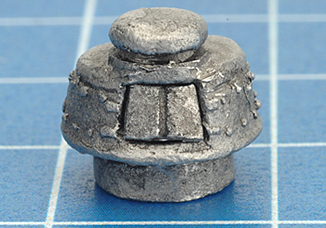
Step 3: Remove the turret hatches from the sprue using a pair of clippers, and trim any excess metal with a sharp hobby knife or a file. The two-piece hatch is for the rounded 37mm turret, while the other hatch piece fits the angled MG turret.
If you want any of the turrets to have a commander, simply use the appropriate commander figure (see above) in place of the hatch piece.
|
Below: Glue each hatch in place. |
 |
 |
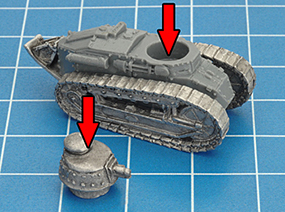
Below: Place the turret in the hull. Don't glue it in place, so it can rotate to face its target when shooting.
|
Below: A completed Renault FT-17 (37mm)
|
 |
 |
Last Updated On Wednesday, October 28, 2015 by James at Battlefront
|
|
|