
|
| |
|
|
|
|
|
|
Products mentioned in this Article
--None--
|
|
|
|
|
|
|
|
|
 |
|
|
Tirailleurs Heavy Artillery Battery (FRX08)
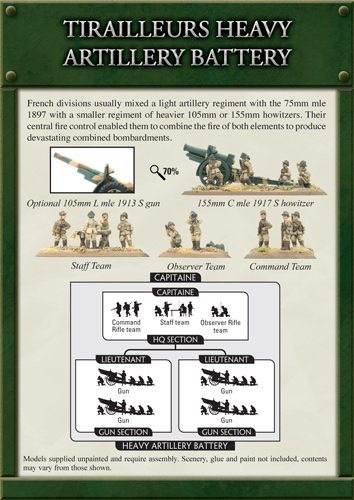 |
Of more advanced design, but fewer in number than the 75mm mle 1897, was the excellent little Bourges 105mm Court mle 1935. It too had a relatively high rate of fire and was designed with a split trail that splayed the guns’ wheels outwards to provide additional protection for its crew.
The majority of these modern howitzers went to the various forms of cavalry division, although enough remained for the motorised and several other active divisions to replace their old 155mm C mle 1917 S heavy howitzers with this more mobile piece.
Designed by Karl Cederman & Evan Allen
Painted by Mark Hazell |
| "French divisions usually mixed a light artillery regiment with the 75mm mle 1897 with a smaller regiment of heavier 105mm or 155mm howitzers. Their central fire control enabled them to combine the fire of both elements to produce devastating combined bombardments." |
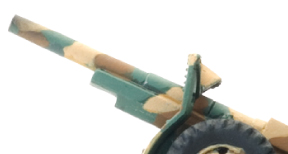
Barrel Options
The Tirailleurs Heavy Artillery Battery includes barrels for the 155mm C mle 1917 S gun and the 105mm L mle 1913 S gun.
Right: The optional 105mm L mle 1913 S gun. |
 |
| The 105mm L mle 1913 S Gun in Flames Of War |
Weapon
|
Mobility
|
Range
|
ROF
|
Anti-tank
|
Firepower
|
Notes
|
| 105mm L mle 1913 S gun |
Immobile |
24"/60cm |
1 |
9 |
2+ |
Gun shield. |
Firing bombardment
|
|
80"/200cm
|
-
|
4
|
4+
|
|
|
| "Heavy Artillery Batteries may not be deployed in Ambush." |
| The Staff Team |
| "An artillery platoon with a Staff team can repeat an artillery bombardment in subsequent turns once it has ranged in on an aiming point. You do not need to roll again to range in, nor is there any penalty to the score needed to hit if your artillery Ranged In on the second or third attempts." |
| "Observer teams need a good view of the battlefield in order to do their job correctly. Be sure to deploy them in a position where they have an excellent view of the battlefield such as on a hilltop or on the top floor of a multi-level building." |
| The 155mm C mle 1917 S Gun in Flames Of War |
Weapon
|
Mobility
|
Range
|
ROF
|
Anti-tank
|
Firepower
|
Notes
|
| 155mm C mle 1917 S howitzer |
Immobile |
16"/40cm |
1 |
10 |
1+ |
Bunker buster, Gun shield.. |
Firing bombardment
|
|
72"/180cm
|
-
|
5
|
2+ |
|
|
| The 155mm C mle 1917 S Guns |
| "The 105mm L mle 1913 S gun and 155mm C mle 1917 S howitzer has a Gun shield which means that even if you fail a Gun save, your opponent must make a Firepower test to destroy that team. But remember, Gun shields only provide Bulletproof cover from shots fired from in front of the gun; they do not provide protection if a team moved At The Double or from artillery bombardments." |
| “The 155mm C mle 1917 S howitzer is rated as Bunker Buster. When a weapon with this attribute scores a hit on a team in a building, it also hits every other team in the building. This can make your opponents think twice about using buildings for cover and concealment.” |
"The figures and guns in the Tirailleurs Heavy Artillery Battery can be used to represent French forces during the campaign in France (i.e. Blitzkrieg) or to represent a French force in Burning Empires. You can even mix and match in the Greatcoat figures to add a flavour to your infantry bases."
Learn more about Blitzkrieg here… |
| The 155mm C mle 1917 S Howitzers Ready For Action |
| The Contents Tirailleurs Heavy Artillery Battery Box Set |
| Contact the customer service team at [email protected] if you have any issues with any of the components. |
| Description of Components |
a. 2x Standing riflemen figures with rifle slung.
b. 2x Officier figures.
c. 1x Officier figure with map.
d. 1x Officier figure pointing. |
e. 1x Pointing riflemen figure.
f. 2x Table legs.
g. 1x Tabletop. |
| Description of Components |
a. 2x Kneeling gun crew figures with hand up.
b. 4x Kneeling gun crew figures.
c. 4x Standing gun crew figures with hand on face. |
d. 2x Standing gun crew figure with hand up.
e. 4x Gun crew figures holding shell.
f. 4x Standing gun crew figure with hand out. |
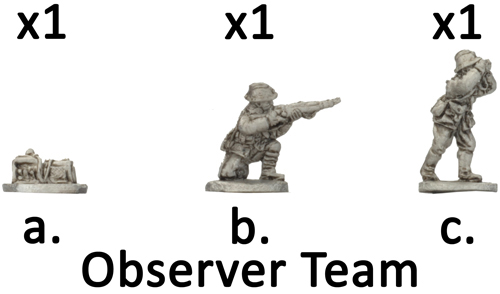 |
Description of Components
a. 1x Radio.
b. 1x Kneeling riflemen figure.
c. 1x Observer figure. |
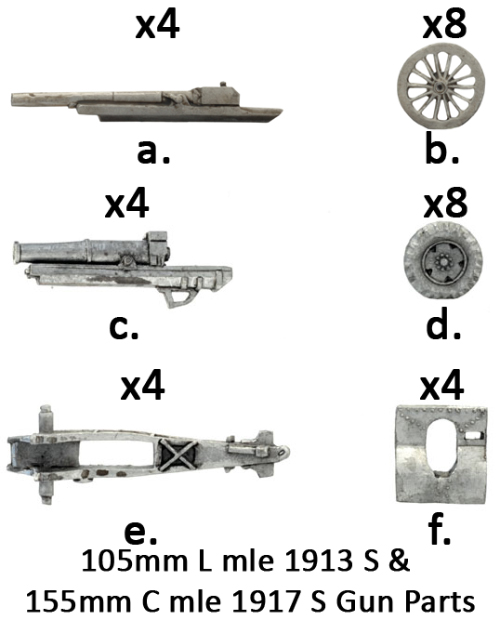
Description of Components
a. 4x 105mm L 1913 S gun barrels.
b. 8x Spoked wheels.
c. 4x 155mm C mle 1917 S gun barrels.
d. 8x Solid rubber wheels.
e. 4x Gun trails.
f. 4x Gun shields. |
 |
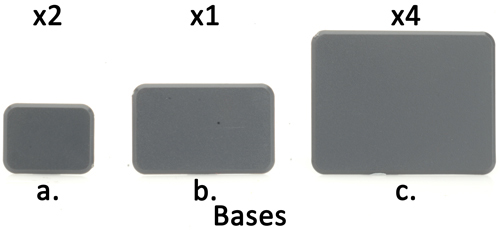 |
Description of Components
a. 2x Small bases.
b. 1x Medium bases.
c. 4x Large bases. |
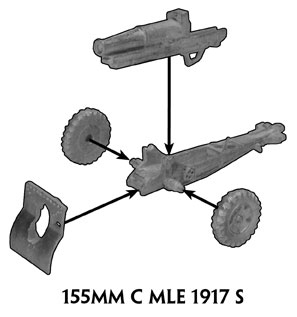
Assembling the 105mm L mle 1913 Gun and the 155mm C mle 1917 S Howitzer
Simply follow the instructions shown on the right to assemble the 155mm C mle 1917 S howitzer. To model the 105mm L mle 1913 replace the 155mm barrel with the 105mm barrel.
Note: If you are fielding either the 155mm or 105mm guns as horse-drawn artillery model the gun with the spoked wheels. If you decide to field them as motorised artillery model the guns with the solid rubber wheels.
Right: The assembly instructions for the 155mm C mle 1917 S howitzer. |
 |
 |
Modelling
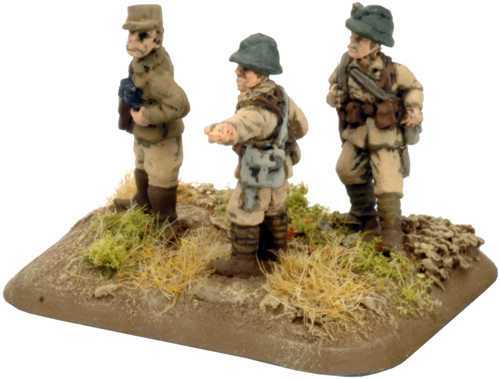
The Command Team
To model the Command team, add an Officer figure, the Pointing riflemen figure and one Rifleman figure to a small base.
Left: An example of a Command team. |
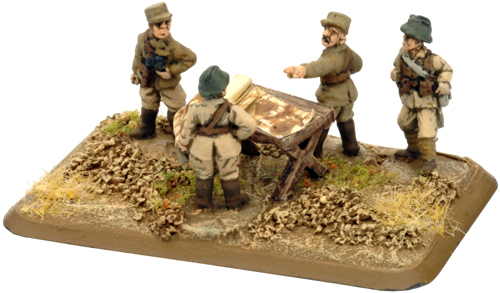
The Staff Team
On a Medium base, arrange three Officer figures and a Rifleman figure around the table.
Right: An example of a Staff team. |
 |
 |
The Observer Team
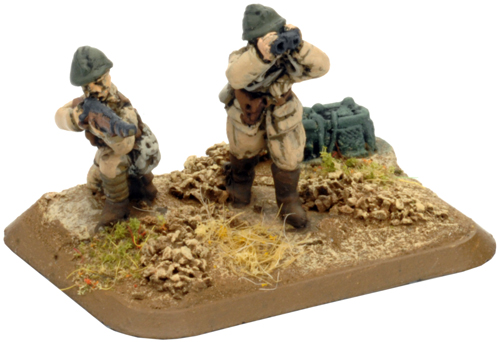
Add the spotter figure and the kneeling riflemen figure to a small base to model the Observer team.
Left: An example of an Observer team. |
The Guns / Howitzers
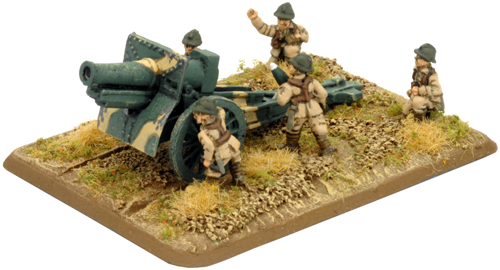
After assembling the guns, attach them to a large base. Next, surround the gun with five gun crew figures.
Right: A 155mm C mle 1917 S howitzer surrounded by its crew. |
 |
Last Updated On Tuesday, October 24, 2017
|
|
|