|
|
 |
|
|
The 12th Royal Lancers in France, 1940
 |
The 12th Royal Lancers in France, 1940
by Paul Goldstone
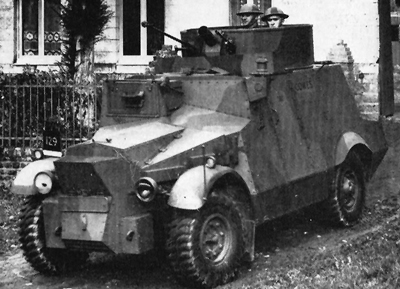
The 12th Royal Lancers was first formed as Bowles Dragoons in 1715. In 1928, the regiment gave up their beloved horses for armoured cars, becoming one of the first British cavalry regiments to become mechanised. The regiment was well trained, but the quality of the men was not matched by their equipment. When war came the regiment were equipped with Morris CS9 armoured cars, essentially a lightly armoured box on top of a Morris 15-cwt chassis. The 12th Lancers were under command of Lieutenant-Colonel Herbert Lumsden, an energetic and forceful officer.
Learn more about Blitzkrieg here... |
In October 1939 the 12th Lancers went to France with the British Expeditionary Force (BEF) to serve as the BEFs armoured car regiment. An important addition to the regiment was a contingent of Royal Engineers in lorries to facilitate the mobile role expected of the 12th Lancers – Engineers would give the armoured car squadrons’ considerable assistance in the forthcoming campaign. Lumsden trained the regiment hard, and when the long-expected German offensive against Belgium broke on 10 May the 12th Lancers were ready and quickly motored into Belgium to take up their allotted positions ahead of the River Dyle. Behind the 12th Lancers were the Divisional Cavalry regiments of the BEF. Ahead of the 12th Lancers was supposed to be the Belgian army, but instead the 12th Lancers met with confused columns of demoralised Belgian troops in full retreat.
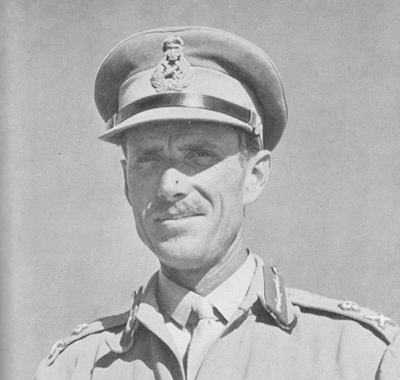
Right: Lieutenant-Colonel Herbert Lumsden. |
 |
On 12 May the armoured cars ran into German motorcyclists, the spearheads of the German offensive. The 12th Lancers sought to slow the German advance down, blowing up bridges as they fell back over the River Dyle in conjunction with the Divisional Cavalry regiments. Then on the 15 May disturbing news came from the south – the Germans had broken through the French front. The BEF was ordered to withdraw to a shorter line, and the 12th Lancers with some artillery support were sent to cover the retreat. Once again, the 12th Lancers were to buy time for the Allied retreat, blowing up bridges in the path of the Germans.
|
|
In a succession of rearguards it became apparent that the armoured cars,
while useful against enemy motorcyclists, were useless against enemy
tanks and at a disadvantage in built up areas against enemy infantry.
The strategic situation had become extremely confusing, and
how far the German tank columns had penetrated in the south was unknown, so the
12th Lancers were sent to locate the Germans. Pushing through
columns of frightened refugees and demoralised French troops, the 12th Lancers ran
into the German spearheads south of Arras
(the British General Headquarters and major supply dump).
Left: A Morris CS9 Armoured Car.
|
| As the armoured cars
sparred with the German advance guards (and occasionally running into less well
protected targets such as an inviting column of German heavy artillery on a
road) it became increasingly apparent that the scale of the disaster was far
beyond what the BEF HQ had imagined, and that the Germans were now nearing the
English Channel. In another series of rearguards, the regiment helped with the
retreat of Allied forces from Arras. |
Three days later, the 12th Lancers were once again called on because of an emergency. This time, the imminent collapse of the Belgian army meant the left (northern) flank of the BEF would become completely exposed. Immediately motoring north, the 12th Lancers, with support from the 4th Gordon Highlanders and a squadron of Divisional Cavalry, met German advance guards moving into the gap left by the disintegrating Belgian forces. The 12th Lancers held the historic town of Ypres long enough for the 3rd Division to arrive, beginning the long connection between the 12th Lancers and the 3rd Division’s commander, Bernard Montgomery. The 12th Lancers were sent out to slow the Germans down by blowing up the bridges across the Yser canal, as well as clashing with German advance guards. These rearguards caused a significant delay to the Germans, giving the BEF crucial time to retreat back to Dunkirk.
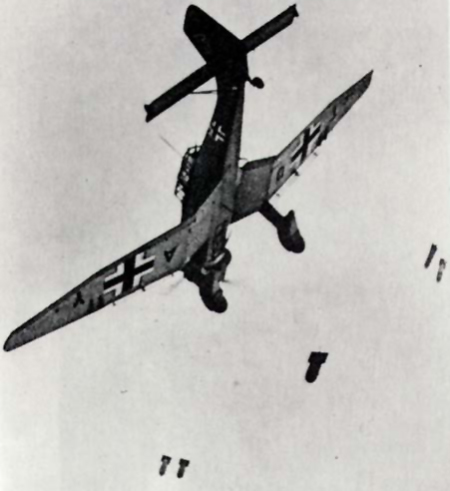
Right: German Stuka Dive Bombers caused havoc on the beaches of Dunkirk.
|
 |
A Typical Action in 1940...
"As the 12th Lancers and their attached band of sappers rushed to blow up bridges between the open flank of the BEF and the English Channel, 2nd Lt. Mann’s armoured cars were sent to demolish the canal bridge at Dixmunde. The bridge was already wired with explosives by Belgian troops, but Mann discovered that the Belgians were already in the process of surrendering and the explosives had been tampered with. As his small force worked to reconnect the explosives, a French officer arrived and announced that he was to take over the bridge and not to do anything. With the knowledge that German agents and “fifth columnists” were at work, Mann was suspicious, and went to check the claim. However, on Mann returning the French officer vanished, and Mann ordered the bridge to be blown up.
A few minutes later a column of German motorcyclists followed by lorried infantry arrived at the far bank, apparently surprised the bridge was no longer standing and by the volume of fire from Mann’s little force. For the next few hours, as German forces banked up behind the far bank, every attempt by the Germans to cross the canal was shot up by Mann’s armoured cars.
Mann would be awarded the DSO for his role in this little action which delayed the German advance by several critical hours."
|
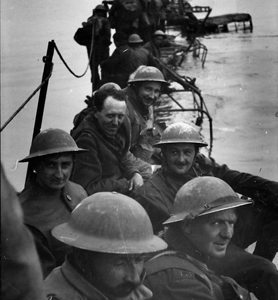 |
With the BEF defending the Dunkirk perimeter as it was evacuated, there was now little need for armoured cars, so the order was given for the cars to be destroyed, the crews taking out the machine-guns to keep on the fight. On 29 May the 12th Lancers were ordered to organise the embarkation of troops from the beach. Under a black canopy of smoke from the burning port and frequent air attack, the regiment constructed improvised jetties from lorries driven into the sea. Eventually, on 31 May, the 12th Lancers were embarked – as a point of honour the 12th Lancers did so with their rifles and machine-guns saved from their armoured cars.
The 12th Lancers would go on to serve in the North African desert (in much better armoured Humber armoured cars), and then in the Italian campaign. The tireless commander of the 12th Lancers, Herbert Lumsden, would go on to command an armoured corps at Alamein.
~ Paul.
Left: Evacuees from Dunkirk.
|
Want To Know More About Blitzkrieg?
Over the past few months we have added a massive range of articles
about Blitzkrieg to the website, to make it easier for people to find a
specific article we have put together this handy place.
Find out more about Blitzkrieg and Early-war here... |
Last Updated On Thursday, June 23, 2011 by Blake at Battlefront
|
|
|