
|
| |
|
|
|
|
 |
|
|
Epsom Linked Campaign
 |
 |
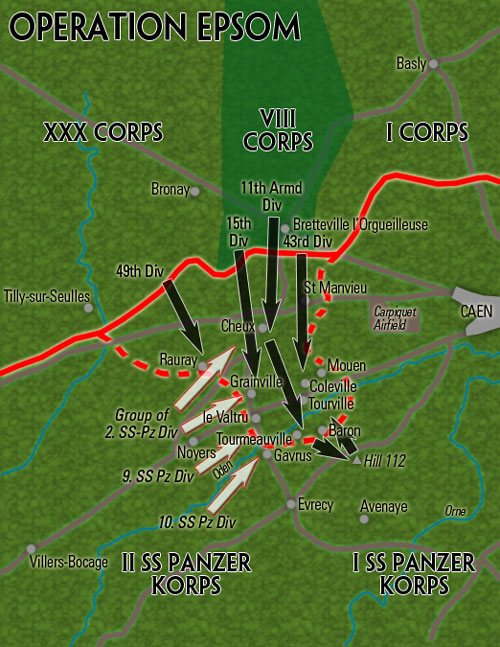
Linked Campaign for Operation Epsom
Operation Epsom…
By Gary Martin
Mission 1: The Scottish Attack
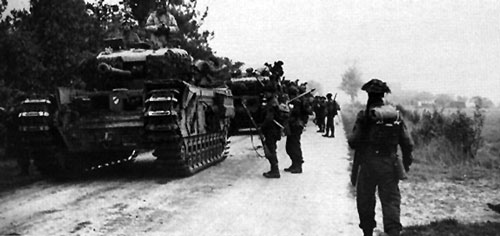
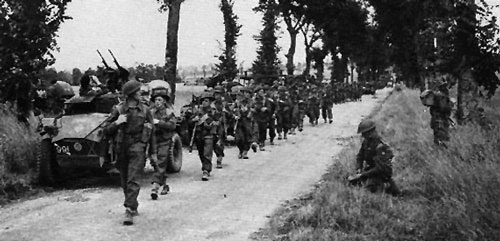
Dawn, 26 June – Operation Epsom begins with the fresh 15th Scottish Division’s first action of the war. As VIII Corps is advancing towards the rivers Odon and Odre, the 44th ‘Lowland’ Brigade must clear the way for the tanks.
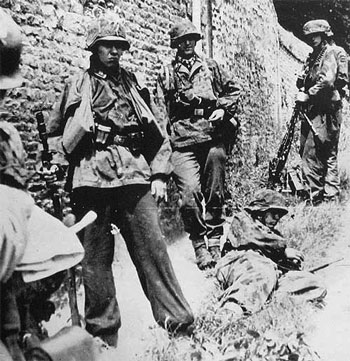
The 12. SS-Panzerdivision ‘Hitlerjugend’ is prepared for the attack and have fortified their positions.
|
|
This mission uses the Ambush special rule.
Your Orders
26. SS-Panzergrenadier Regiment
The Allies have been pushing their way inland for 10 days now. You have prepared your defences well with mine fields, barbed wire and MG-42s. They tried to break you down with artillery but you are strong and your devotion to the Fatherland is unwavering. The guns have stopped so the Tommies must be coming. Time to man the guns.
6th Royal Scot Fusiliers
This is it. After months of training you are about to face the Hun for the first time. You have to clear out all the outlying villages between here and the river Oden. Shouldn’t be too bad. The artillery has pounded the German lines for some time now, surly nothing could have survived that.
Your Forces
26. SS-Panzergrenadier Regiment
See the SS Panzergrenadier Company from D-Day Waffen-SS for full details.
Or use a Panzergrenadier Company from D-Day: German.
SS Panzergrenadier Company HQ
2x MP40 SMG team with Panzerfaust
|
 |
 |
SS Panzergrenadier Platoon
7x MG42 team with Panzerfaust
1x Panzerschreck Anti-tank team
SS Panzergrenadier Platoon
7x MG42 team with Panzerfaust
1x Panzerschreck Anti-tank team
8cm SS Mortar Platoon
4x 8cm mortar
7.5cm SS Tank-hunter Platoon
3x 7.5cm gun
15cm SS Nebelwerfer Battery
3x 15cm Nebelwerfer
|
|
Rifle Company HQ
2x Sten SMG team
Rifle Platoon
7x Bren Gun & SMLE rifle team
1x PIAT anti-tank team
1x 2-inch mortar team
Rifle Platoon
7x Bren Gun & SMLE rifle team
1x PIAT anti-tank team
1x 2-inch mortar team
Rifle Platoon
7x Bren Gun & SMLE rifle team
1x PIAT anti-tank team
1x 2-inch mortar team
Rifle Platoon
7x Bren Gun & SMLE rifle team
1x PIAT anti-tank team
1x 2-inch mortar team
|
 |
 |
Vickers Machine-gun Platoon
4x Vickers MMG
Universal Carrier Patrol
3x Universal Carrier (MG)
Crocodile Flame-tank Platoon
3x Crocodile
25 pdr Field Troop
4x 25 pdr gun
25 pdr Field Troop
4x 25 pdr gun
Universal Carrier OP
Ovservation Post
1x Universal Carrier OP
|
Preparing for battle
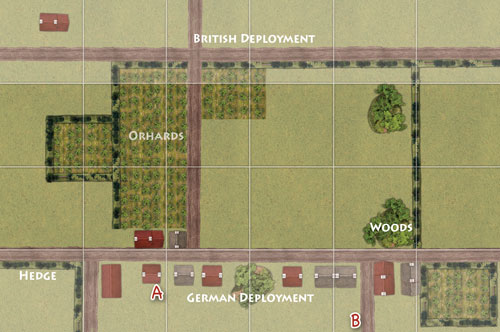
1. Each player can deploy up to 12”/30cm from the table centre line. They run the length of the long table edges.
2. Starting with the Germans both players place an objective in the German deployment zone. Each objective must be at least 16”/40cm from the table centre line and 8”/20cm from the side table edge and each other.
3. The German force deploys their full force except for 2 platoons which are held in ambush.
4. The British now deploy their entire force in their deployment zone. |
 |
Beginning the Battle
1. The Germans begin the game in Fox Holes and Gound to Ground.
2. The British get first turn.
Winning the Game
The British win the game is they end their turn Holding an Objective. The Germans win if they end their turn on or after the sixth turn with no Attacking British Tank, Infantry or Gun teams withing 8"/20cm of an Objective. |
|
Mission 2: Hill 112
Dawn - 28th of June. The 15th Scottish Division has forced a crossing on the river Odon, now its time for the 11th Armoured Division to strike for Hill 112. 12. SS-Panzerdivision ‘Hitlerjugend’ were concentrating their forces on the bridgehead and have only lightly defended the hill top. Will the 23rd Hussars beat the 12. SS-Panzerregiment to the summit.
This mission use the Reserves special rule.
Your Orders
12. SS-Panzerregiment
An attack has been mounted on Hill 112 you must move to re-enforce that vital position straight away.
23rd Hussars
At last you have reached the river Odon. Hill 112 must be secured before you advance to the Odre.
Your Forces
|
|
12. SS-Panzerregiment
See the Panzer IV SS Tank Company in D-Day: Waffen-SS for full details.
Alternatively you can use D-Day: German
Panzer IV SS Tank Company HQ
2x Panzer IV
Panzer IV SS Tank Platoon
4x Panzer IV
Panzer IV SS Tank Platoon
4x Panzer IV
Armoured SS Panzergrenadier Platoon
7x MG42 team with Panzerfaust
3x Sd Kfz 251 (MG) half-track
1x Sd Kfz 251 (3.7cm)
7.5cm SS Tank-hunter Platoon
3x 7.5cm gun
|
23rd Hussars
See the British Armoured Squadron Intelligence Briefing from D-Day: British for full details.
Defenders
Sherman Armoured Squadron HQ
2x Sherman
Sherman Armoured Troop
3x Sherman
1x Firefly
Sherman Armoured Troop
3x Sherman
1x Firefly
Sherman Armoured Troop
3x Sherman
1x Firefly
Sherman Armoured Troop
3x Sherman
1x Firefly
Motor Platoon
4x Bren Gun team
1x PIAT anti-tank team
1x 2-inch mortar team
M10 SP Anti-Tank Platoon
4x M10 (17pdr)
|
|
Campaign Play
If you are playing this as a follow on to the Mission 1: The Scottish Attack game then the following rules are used:
German Victory – The determined resistance to the initial Allied attacks have allowed you more time to re-enforce your position on Hill 112. You automatically pass your reserve roll in the first turn only.
British Victory – You have pressed hard into the German positions and advanced faster than expected so the enemy has not had time to prepare its position. The German infantry and gun teams will not be in foxholes.
|
 |
Preparing for battle
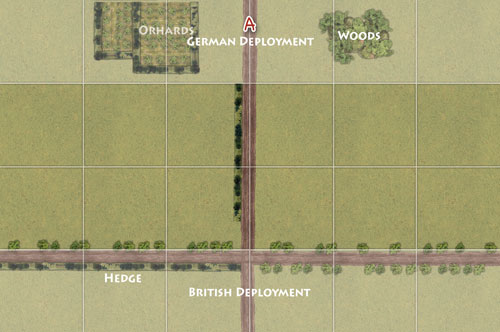
1. Each player can deploy up to 12”/30cm from the table centre line. They run the length of the long table edges.
2. Starting with the Germans both players place an objective in the German deployment zone. Each objective must be at least 8”/20cm from the side table edge and each other.
3. The German force deploys the 7.5cm Tank-hunter Platoon and Panzergernadiers on the table. The Panzer IVs are held in reserve (see Campaign rules).
4. The British Squadron deploys the HQ and 2 Sherman Armoured Platoons on the table. |
|
The other units are held in Reserve to represent the cautious advance of the British tanks.
Beginning the Battle
1. The Germans begin the game in Foxholes and Gone to Ground. If the British won the previous game they loose their Foxholes.
2. The British Get first turn.
Winning the Game
The British win the game is they end their turn Holding an Objective. The Germans win if they end their turn on or after the sixth turn with no Attacking British Tank, Infantry or Gun teams withing 8"/20cm of an Objective.
|
Mission 3: The German Counter attack
18:00 hours - 29 June. After several hard days fighting the German pressure continued to build against the Scottish Corridor. 9. SS-Panzerdivision ‘Hohenstaufen’ launched attacks against the entire west flank looking for any weaknesses in the British lines.
This mission uses Delayed Reserves, Reserves and Across the Off Table Artillery special rules. |
|
Your Orders
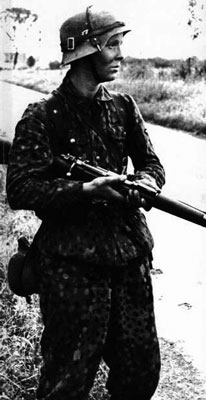
9. SS-Panzerdivision “Hohenstaufen”
Your reconnaissance units have found a weakness in the British lines. The company of Tommys holding the Belleval estate don’t have any armour support and only limited anti-tank guns. You must strike in true blitzkrieg fashion while their position is still weak.
8th Royal Scots
You have been pounded by enemy mortars and guns for days. Short of supplies and with only a few 6pdrs left operational, its time for you to be pulled from the line. Reinforcements are on the way from 6 RSF, 44 RTR and 91st Anti-tank brigade. All you need to do is hold the line until they arrive.
Your Forces
|
 |
|
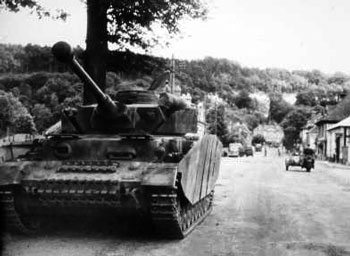
9. SS-Panzerdivision “Hohenstaufen”
Armoured SS Panzergrenadier Company from D-Day: Waffen-SS for full details.
Alternatively use D-Day: German.
Armoured SS Panzergrenadier Company HQ
2x MP40 SMH team with Panzerfaust
1x Sd Kfz 251 (MG) half-track
Armoured SS Panzergrenadier Platoon
7x MG42 team with Panzerfaust
3x Sd Kfz 251 (MG) half-track
1x Sd Kfz 251 (3.7cm)
Armoured SS Panzergrenadier Platoon
7x MG42 team with Panzerfaust
3x Sd Kfz 251 (MG) half-track
1x Sd Kfz 251 (3.7cm)
Armoured 8cm SS Mortar Platoon
4x Sd Kfz 251 (8cm)
Armoured SS Flame-Thrower Platoon
2x Sd Kfz 251 (Flame)
Panzer IV SS Tank Platoon
4x Panzer IV
|
8th Royal Scots
See D-Day: British and use the 15th Scottish Division Command Card. Your company is split into 3 groups, defenders, reserves and Corps support.
Defenders
Rifle Company HQ
2x Sten SMG team
Rifle Platoon
7x Bren Gun & SMLE rifle team
1x PIAT anti-tank team
1x 2-inch mortar team
Rifle Platoon
7x Bren Gun & SMLE rifle team
1x PIAT anti-tank team
1x 2-inch mortar team
Vickers Machine-gun Platoon
4x Vickers MMG
6 pdr Anti-tank Platoon
2x 6 pder gun
Observers for Corps Artillery
Universal Carrier OP
Reserves
Rifle Platoon
7x Bren Gun & SMLE rifle team
1x PIAT anti-tank team
1x 2-inch mortar team
Rifle Platoon
7x Bren Gun & SMLE rifle team
1x PIAT anti-tank team
1x 2-inch mortar team
Sherman Armoured Troop
3x Sherman
1x Firefly
M10 SP Anti-Tank Platoon
4x M10 (17pdr)
Corps support
25 pdr Field Troop
4x 25 pdr gun
Battery uses the Offboard Artillery special rule.
Priest Field Troop
4x Priest (105mm)
Battery uses the Offboard Artillery special rule.
|
|
Offboard Artillery rule
During Deployment Offboard Artillery Units are not placed on the table. The remain off table for the entire game. However, they can fire Artillery Bombardments using on table Spotting teams. Range is measured from their table edge.
Campaign Play
If you are playing this as a follow on to the Mission 2: Hill 112 game then the following rules are used.
German Victory – With you forces well established on Hill 112 you are in a stronger position to drive into the Allied lines. One of your units may make a free Spearhead move before the start of the game.
British Victory – From the summit of Hill 112 your forward observers can better direct the Corps artillery fire and break up the German attacks before they even start. The Panzer IV SS Tank Platoon has been delayed and starts the game in reserve.
|
|
Preparing for battle
1. This battle is fought a long the table as per the No Retreat mission.
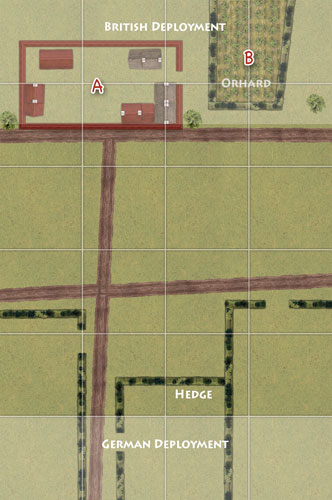
2. Starting with the British both players place an objective in the British end of the table. Both objectives should be with in 18”/45cm table centre line and at least 8”/20cm away from the table sides.
3. The British deploy the Defenders group up to 18”45cm from the table centre line.
4. The German forces are deployed up to 24”/60cm from the table centre line.
Beginning the Battle
1. The British begin the game in Foxholes and Gone to Ground.
2. Make any Spearhead moves if allowed by the Campaign rules
3. The Germans get first turn.
Winning the Game
The German attacker wins if they end their turn Holding an Objective. The Defending British win if they end their turn on or after the sixth turn with not Attacking German Tank, Infantry or Gun teams within 8:/20cm of an Objective.
If the Germans win they have broken into the Scottish Corridor and forced the enemy to fall back.
Otherwise if the British win their perimeter has been secured.
|
 |
|
Terrain
Throughout this campaign treat all hedges as Bocage (See D-Day British). The orchards provide concealment only and do not affect line of sight or movement.
The Farm Buildings at A on Mission 3 are surrounded by a wall which counts as Bullet Proof Cover. The wall is only one story high so windows at higher levels can be used to shoot out of. Each teams deployed behind it and in Foxholes at the start of the game have made one team width loophole in the wall to shoot through.
|
|
For another campaign based around Operation Epsom and Hill 112 see Craig Courtis's Axis Of Attack Campaign based on the actions of the 43rd Wessex Division.
Hill 112...
|
Last Updated On Tuesday, May 26, 2020 by Wayne at Battlefront
|
|
|