|
|
 |
|
|
Defence of 150th Brigade Box
 |
The Defence of 150th Brigade Box,
1 June 1942
A No Retreat Mission
By Paul Goldstone
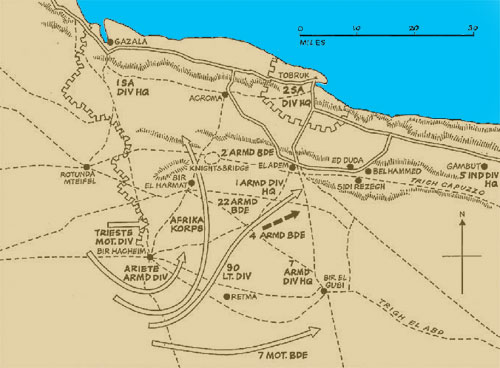
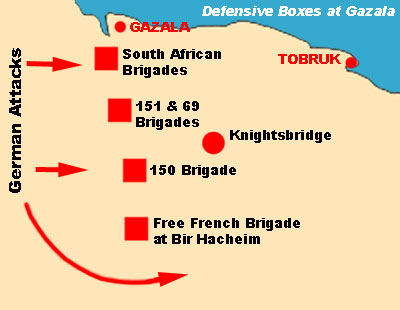
In May 1942 Afrika Korps outflanked the British Eighth Army at Gazala, but after fierce tank battles, were unable to break the resilient British. Afrika Korps now found themselves in a dire position - they were in effect behind British lines and their supply line, the Trigh Capuzzo road, was controlled by the British 150th Infantry Brigade who occupied a “Box” of strong all-round defences surrounded by minefields. If Afrika Korps was to survive they would have to destroy 150th Brigade and open their supply route.
The attack on the embattled 150th Brigade began on 29th May, with the British outlying posts being driven in. For the next two days probing attacks were made on the British positions, and the British were subjected to heavy artillery and Stuka bombardment.
|
|
The Battle of Gazala
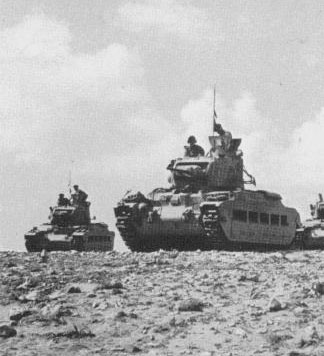
The most exposed British position was on a low ridge overlooking the Trigh Capuzzo, held by “B” Company of the 4th Green Howards Regiment. They had suffered heavy losses, the supporting 25-pounders were short of ammunition, and only a few of the supporting Matilda tanks were still operational. On the night of 31 May/1st June the Green Howards, under their company commander, Major D’Arcy Mander prepared for the next German attack.
Rommel was desperate. Without supplies his army would be finished. And after three days of attacks the stubborn British infantry showed no signs of weakness.
|
 |
| He decided to launch an all-out attack on the British defences with III Battalion, 104th Schutzen Regiment. 11th Company would lead the assault, under the command of Hauptmann Werner Reismann. The company would be supported by an artillery battery, and a powerful anti-tank force of 5cm guns, self-propelled 2cm FlaK guns and a couple of 8.8cm FlaK. |
 |
A pioneer detachment would clear the mines and barbed wire in front of the British positions. The operation was critical for the survival of Afrika Korps, and, typically, Rommel was present.
Before dawn the German infantry were given their orders for the battle, and they moved towards the silent British positions. At 6.10 a preliminary bombardment of the British defences began, and an hour later the German force began the advance.
About 300 meters from the British positions the 11th Company came under British machine-gun fire and took casualties. Running and firing, the Panzergrenadiers tried to keep the British pinned while pioneers cleared a lane through the minefield. A lane cleared, infantry, 2cm FlaK and anti-tank guns of the Panzerjager platoon moved through.
|
| Leutenant Miessgang’s platoon was pinned down by British fire, but Oberleutnant Koppe’s platoon broke into the enemy positions. Other German platoons pushed into where the rupture had occurred in the British line. The British responded, bombarding the gap in their line, and the German units were pinned down. However, the guns of the Panzerjager platoon of 11th Company were pushed forward with great determination to fire on British machine-gun positions with high explosive shells. 2cm FlaK guns also fired on British positions to keep them pinned down. A counter-attack by some Matildas was driven off by the Panzerjagers, with two Matildas knocked out. |
|
However, the British still clung on to their positions. At 8.30am a Stuka air attack brought some relief from the pounding of the British artillery, and Leutnant Czymoch, the artillery observer with 11th Company, directed extremely accurate artillery fire. Sensing the moment to attack, Generaloberst Rommel himself entered the battle, taking personal command of the right hand infantry platoon and leading it forward, yelling encouragement in the thick Swabian accent he lapsed into when excited. Fighting with grenades took place, and the German infantry stormed into the British positions, the British beginning to surrender.
The British had one last attempt to hold their positions, a section of three carriers under the command of Sergeant J.Leng launching a courageous but futile counter-attack (for which he would earn the Distinguished Conduct Medal). However, by mid-morning “B” Company had been overrun - the victorious Germans pushed forward into the middle of the defences, and the brave defenders of 150th Brigade were forced to surrender. Rommel’s gamble had paid off - Afrika Korps had opened its supply route. A few days later the British armour would attack Afrika Korps. Now fully replenished, Afrika Korps would inflict upon the British a catastrophic defeat.
|
 |
 |
Game Ideas:
This is a typical No Retreat mission scenario (page 110, Flames Of War). The British should be well dug-in along a low ridge, with minefields and barbed wire across the front of their position (see Bagration: German for Barbed Wire rules if you would like to add them to your game, add one for every Minefield).
The Germans should have none other than Generaloberst Erwin Rommel! His rules can be found in the Afrika Korps command card pack.
Hauptmann Werner Reismann would be awarded the Iron Cross for his determined leadership in this battle. Players feeling like really penalising the British player may also try giving Werner Reissmann the Ferocious Valour command card.
|
|
British Force
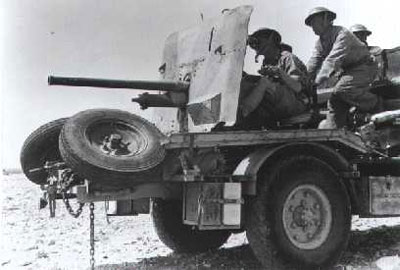
“B” Company, 4th Green Howards
Rifle Company, Page 175-179 North Africa
Rifle Company HQ
2x SMLE rifle team
- (Major D’Arcy Mander) |
2 points |
Rifle Platoon
7x Bren Gun & SMLE rifle team
1x 2-inch mortar team
1x Boys anti-tank rifle team |
11 points
|
Rifle Platoon
7x Bren Gun & SMLE rifle team
1x 2-inch mortar team
1x Boys anti-tank rifle team |
11 points |
Rifle Platoon
7x Bren Gun & SMLE rifle team
1x 2-inch mortar team
1x Boys anti-tank rifle team |
11 points |
6 pdr Anti-tank Platoon
4x 6 pdr guns
Portees command card |
12 points
1 point |
Universal Carrier Patrol
3x Universal Carriers |
2 points |
Universal Carrier Patrol
3x Universal Carriers |
2 points |
| Support Platoons |
|
25 pdr Field Troop
4x 25pdr guns |
14 points |
25 pdr Field Troop
4x 25pdr guns |
14 points |
Valentine II Armoured Troop (44th RTR)
3x Valentine II (2 pdr) |
11 points |
Total
|
91 points
|
|
German Force
11/104th Schutzen Regiment
Africa Rifle Company, Page 37 North Africa
Africa Rifle Company HQ
2x MP40 SMG teams
(Hauptmann Werner Reissmann)
Generalfeldmarschall Erwin Rommel
Command Card
Pioneer Company command card
(to represent the Pioneer attachment) |
2 points
6 points
1 point |
Africa Rifle Platoon
4x MG34 team
1x 2.8cm anti-tank team
1x sMG34 HMG team
1x 8cm mortar team |
7 points
1 point
2 points |
Africa Rifle Platoon
4x MG34 team
1x 2.8cm anti-tank team
1x sMG34 HMG team
1x 8cm mortar team
|
7 points
1 point
2 points |
Africa Rifle Platoon
4x MG34 team
1x 2.8cm anti-tank team
1x sMG34 HMG team
1x 8cm mortar team |
7 points
1 point
2 points |
5cm Tank-hunter Platoon
3x 5cm gun |
12 points |
Sd Kfz 10/4 Light AA Platoon
3x Sd Kfz 10/4 (2cm) |
6 points |
| Support Platoons |
|
8.8cm Heavy AA Platoon
3x 8.8cm AA gun |
18 points |
10.5cm Artillery Battery
4x 10.5cm howitzer |
14 points |
| Total |
89 points
|
|
Last Updated On Wednesday, December 14, 2022 by Wayne at Battlefront
|
|
|