|
|
 |
|
|
The Clearing of Monte Pezza
 |
The Clearing of Monte Pezza, 17 October 1944
By J.C von Winterbach, Mike Bersiks and Rex Barrett
After the fierce fighting at Monte Stanco the 12th South African Motorized Infantry Brigade with both RNC & FC/CTH pushed forward again. Then on 16 October 1944, thus getting out of range of support from the “Priests” of 4/22 Field Regiment with the Armoured Brigade they came up against a strong enemy line running from Monte Pezza westward to Pt. 660. One RNC Platoon was soon on Pt. 640, supported by a troop of “B” Squadron, PAG Tanks which sliced up enemy machine-gun posts at two points and setting alight another enemy vehicle in the Carviano area.
|
|
At 11:45 “A” Company, RNC secured Pt. 707 on the ridge almost directly south of Monte Pezza, to which they pushed out patrols which found the Germans strongly entrenched on the reverse slopes. Simultaneously “A” Company, FC/CTH, also gained Pt. 640 and sent a patrol north-westward on to Pt. 660, where it had a sharp engagement at close quarters with the enemy holding Casa della Sete.
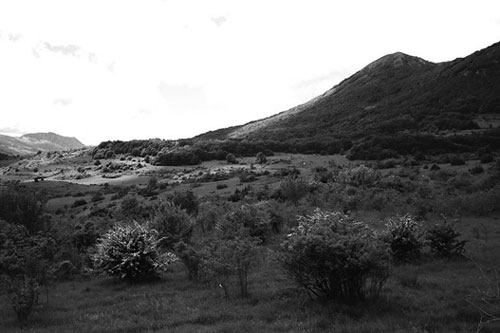
“B” Squadron, PAG, which had got Tank right up to Grizzana by way of Route 6620 and the newly opened lateral road, had put one Troop well forward as Casa della di Veggio near Pt. 640 by dint of miraculous climbing up the steep tracks from Piandisetta and two Troops just off the Grizzana-Vergato road at Mo’ di Lilame, from which positions the Sherman’s engaged Monte Pezza while the RNC firmed up on Pt. 707 and another Platoon moved to fill the gap between the two Battalions.
|
 |
|
By 16:45 an RNC patrol was near the summit of Monte Pezza, but was driven back by machine-gun fire and hand grenades. During the night of 16 October 1944 another RNC patrol, again almost reached the top of Monte Pezza.
Early on 17 October 1944, with Lt. Col. A.S. Duncan, DSO Tactical Headquarters now in the Carbinieri Barracks in Grizzano, around which much work was done on roads during the next five days, patrols sent out at first light confirmed that the enemy was in fair strength on the reverse slopes of both Monte Pezza and Pt. 660 at the western end of the shoulder to the left of it.
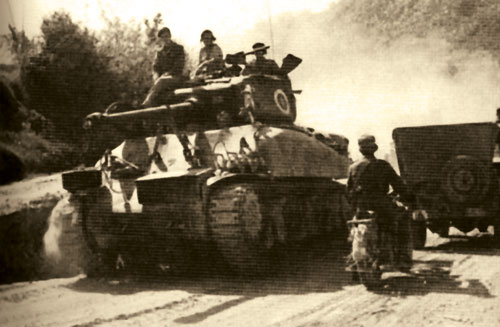
At 08:00, Brig. R.J. Palmer, DSO, held an order group and the time for a further attack was fixed for 14:00 that afternoon. Though the area was out of range of the 4/22 Field Regiment, the rest of the Divisional Artillery organized a big fire plan in support of the attack, and at the appointed hour RNC on the right and FC/CTH on the left launched a two-Battalion assault on the enemy line of high ground. As “A” & “D” Companies, FC/CTH went in to attack at 14:16 on 17 October 1944 they ran into heavy enemy mortar and artillery fire, which was directed particularly on “A” Company, FC/CTH causing a number of casualties and holding up the Battalions advance. With the Divisional artillery, “B” Squadron, PAG Tanks (two Troops of Sherman’s demonstrating down the Grizzana-Vergato road) & RDLI’s heavy support weapons all adding their weight to the assault.
|
 |
Rain was falling steadily, and a blanket of fog made visibility very poor. Clearing up of enemy pockets, machine-gun posts and snipers led to some brisk exchanges of fire, but between 16:00 – 18:00 the RNC established three Companies astride Pt. 748 on Monte Pezza & FC/CTH got “A” & “D” Companies on the saddle running westward from there, after clearing the northern slopes and routing a German counter-attack at Casa la Fame beyond the crest. Both Battalions took prisoners from III/SS-Panzergrenadier-Regiment 35 (16. SS-Panzergrenadier-Division), as well as from Grenadier-Regiment 274 (94. Infanterie-Division). |
| Late on the afternoon of 17 October 1944, a patrol from RNC linked up with FC/CTH while hostile shelling continued heavily. Both Battalions consolidated their positions during the night and during 18 October 1944 the rest of WR/DLR came forward, preparing to pass through the RNC. |
|
The Clearing of Monte Pezza Scenario
The Clearing of Monte Pezza scenario uses the Reserves (page 104 of the rulebook) special rules.
|
 |
|
YOUR ORDERS
GERMAN
Your orders are to stop the Allied advance towards Bologna by holding Monte Pezza.
SOUTH AFRICAN
Your orders are to advance towards Bologna by breaking through the German lines at Monte Pezza.
PREPARING FOR BATTLE
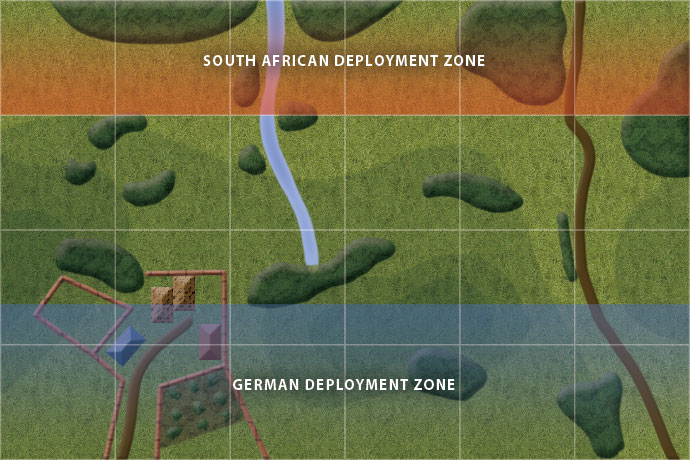
1. For Table Deployment and Objective Areas please use the Contact Mission (page 108 of the rulebook) & for Terrain setup, please use the Scenario map as your guide.
2. The German player places one Objective and then the South African player places two Objectives in the German players Deployment Area at least 12”/30cm from the centre line and not within 8”/20cm of any table edge.
3. Starting with the German player, the players place Ranged In markers for all of their deployed (including in Ambush) Artillery Units.
4. The German player then Deploys all their Units, save the two Units held in Reserve.
5. The South African player then Deploys all their Units.
BEGINNING THE BATTLE
1. The South African player has the first turn.
2. As both sides begin the game in Foxholes and Gone to Ground.
3. The German reserve Units may arrive anywhere along their table edge.
|
 |
- Stream
- Small = Scrub
- Large = Wood
- Road
- Orchard
- Wall
- Houses
|
|
ENDING THE GAME
The battle ends when:
• The South Africans have Taken all of the Objectives at the end of their turn, or 10 turns have been played, or
• If the German player starts any of their turns from turn six with no attacking teams within 8"/20cm of an Objective in the Germans table half.
DECIDING WHO WON
• The South African player wins if the game ended because they ended one of their turns holding one or more objectives. The degree of victory is determined by the number of objectives held.
- 1 Objective for Minor Victory,
- 2 Objectives for Major Victory,
- 3 Objectives for Stunning Victory
• Otherwise the German player wins, having successfully held their positions and driven off all attacks.
|
|
SCENARIO MAP SPECIAL RULES
• The Entire Table is Difficult Terrain, requires a Cross Test and is Terrain Dash. High gound is indicated by darker shades of the table colour.
• Roads are reduced to Cross Country Dash speed.
• The Stream/Creek follows the Creek or Shallow River rules on page 43 if the rulebook..
• Scrubs follow the rules on page 43 if the rulebook.
• Woods follow the rules on page 43 if the rulebook.
|
 |
Elements of the 16. SS-Panzergrenadierdivision 'Reichsführer-SS', I. Fallschirm-Korps, 14. Armee
Using SS Panzergrenadier Company on page 42 of D-Day: Waffen-SS.
|
SS Panzergrenadierkompanie HQ (Stab./III./SS-Pz.Gren.Rgt. 35)
• 2x MP40 SMG team |
2 points
|
SS Panzergrenadier Platoon (III./SS-Pz.Gren.Rgt. 35)
• 7x MG42 team |
7 points
|
SS Panzergrenadier Platoon (III./SS-Pz.Gren.Rgt. 35)
• 7x MG42 team |
7 points
|
SS Panzergrenadier Platoon (III./SS-Pz.Gren.Rgt. 35)
• 7x MG42 team |
7 points
|
sMG42 SS Machine-gun Platoon (III./SS-Pz.Gren.Rgt. 35)
• 4x sMG42 HMG team |
4 points
|
8cm SS Mortar Platoon (III./SS-Pz.Gren.Rgt. 35)
• 4x 8cm mortar |
5 points
|
10.5cm SS Artillery Battery (I./SS-Art.-Rgt. 16)
• 4x 10.5cm howitzer |
11 points
|
| Reserves |
|
Grenadier Platoon (I/Gren.Rgt. 274) (Page 51 Fortress Europe)
• 7x MG34 & K98 rifle team |
7 points
|
10.5cm SS Artillery Battery (I./SS-Art.-Rgt. 16)
• 4x 10.5cm howitzer |
11 points
|
| Total |
61 points |
|
 |
Elements of the 12th South African Motorized Infantry Brigade, 6th South African Armoured Division, 5th US Army
(see page 30, D-Day: British) |
Rifle Company HQ (RHQ, RNC)
• 2x Sten SMG team |
2 points
|
Rifle Platoon (“A” Company, RNC)
• 7x Bren Gun & SMLE rifle team, 1x PIAT anti-tank team, 1x 2-inch mortar team |
9 points
|
Rifle Platoon (“B” Company, RNC)
• 7x Bren Gun & SMLE rifle team, 1x PIAT anti-tank team, 1x 2-inch mortar team |
9 points
|
Rifle Platoon (“C” Company, RNC)
• 7x Bren Gun & SMLE rifle team, 1x PIAT anti-tank team, 1x 2-inch mortar team |
9 points
|
Vickers Machine-gun Platoon (“S” Company, RDLI)
• 4x Vickers MMG team |
4 points
|
3-inch Mortar Platoon (“S” Company, RDLI)
• 4x 3-inch mortar |
6 points
|
Rifle Company HQ (RHQ, FC/CTH)
• 2x Sten SMG team |
2 points
|
Rifle Platoon (“A” Company, FC/CTH)
• 7x Bren Gun & SMLE rifle team, 1x PIAT anti-tank team, 1x 2-inch mortar team |
9 points
|
Rifle Platoon (“D” Company, FC/CTH)
• 7x Bren Gun & SMLE rifle team, 1x PIAT anti-tank team, 1x 2-inch mortar team |
9 points
|
| Support Units |
|
25 pdr Field Troop (1/6 Field Regiment, SAA)
• 4x 25 pdr gun |
14 points
|
| Total |
73 points |
|
Last Updated On Friday, December 16, 2022 by Wayne at Battlefront
|
|
|