|
|
 |
|
|
The Battle of Hell-House
 |
The Battle of “Hell-House”,
25 July 1944
By J.C von Winterbach, Mike Bersiks, and Rex Barrett
On 24 July 1944, the WR/DLR after days of bitter fighting, had cleared the hilly country round Radda-in-Chianti and captured Point 555, opening the way to the latter country beyond. The SSB and ILH/KimR was to go up the Divisional Green Route, through Radda, past Point 555, take the town of Mercatale, cross the River Greve and cut Route 2, and then on to Florence.
|
|
While the 6th South African Armoured Division was advancing to the River Greve, the 11th Armoured Brigade met stern opposition to the west of Greve in the Monte Macerate area, after passing through WR/DLR up Green Route in an attempt to punch a hole in the enemy line. Tanks of the NMR & SSB, with ILH/KimR, had begun passing through at 05:30 on 24 July 1944, with “A” Squadron, SSB leading the Armoured Regiment. Just after midday they struck the German anti-tank screen, strongly supported by infantry from 4. Fallschirmjägerdivision, in the Monte Macerata area. The narrow road, 3 to 4 metres wide, winding along a ridge, came repeatedly into view of the enemy, who were ideally situated for defence.
“A” Squadron, NMR, reconnoitred along a secondary road and ran into heavy artillery, mortar and machine-gun fire. At 19:45 on the evening of 24 July 1944, “B” and “C” Company’s, ILH/KimR, covered by “A” Squadron, SSB and preceded by a brief barrage from the 7/64 Field Battery (THA), launched a two-Company attack on Belvedere, with mortar and Vickers machine-gun in support. In spite of stiff resistance from both German infantry and artillery blocking the road to Mercatale, the ILH/KimR captured the objective. They had secured the high ground with observation over the next objective, Point 426, and by driving in along an enemy Divisional boundary line, the attack caused disorganisation among the defenders. All Companies and Battalion HQ’s were under enemy shelling for almost all day.
|
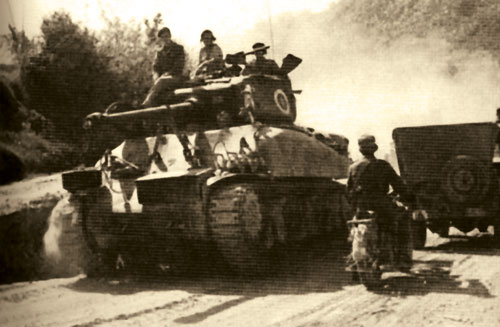
| At 05:30 on the morning of 25 July 1944, “B” Squadron, SSB passed through “A” Squadron, SSB, but heavy mist caused a late start and for some time made movement and observation difficult, but the column was soon under way to Point 504 with one Company of RNC together with “B” Squadron, PAG. Teller mines were found along one part of the road which occasioned the loss of one of “D” Squadron Sherman’s and one Recce “Honey” Stuart until the Sappers had cleared the obstacles away, the advance could not continue. |
 |
|
Meanwhile “B” Squadron held the high ground East of the road and from there engaged enemy targets and assisted the forward Infantry. Enemy destruction of bridges and culverts and blows in the road combined with heavy shelling held up the South African Armour 1000 yards from the River Greve.
By 11:00 hours the Sapper had made a deviation round the mined area and the advance continued. “A” Squadron, SSB was on the road axis with “C” Squadron, SSB on the left and “B” Squadron, SSB in support. By 17:30 smoke was being put down to cover further advance by “B” Squadron, SSB. All three SSB armoured Squadrons were now in action, with “C” Squadron, SSB, being ordered up to cover “B” Squadron as a sharp engagement between the South Africans and 6 Tiger I E heavy tanks had begun. The SSB lost one Sherman and “B” Squadron knocked out 2 Tiger I E tanks. “A” Company, ILH/KimR had moved forward with the SSB and consolidated astride the road slightly beyond Belvedere before one Platoon was forced to take cover from enemy shelling and mortaring before pressing on to secure Point 426 and a hilltop farmhouse nearby nicknamed “The Hell-House”, which commanded the countryside northward to Impruneta and west ward S. Casciano, with Florence clearly in view.
|
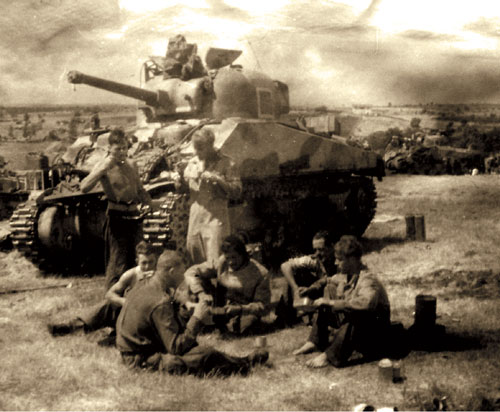 |
The ILH/KimR continued along the road with the armour to another house nearer Villa Mercellani and only about 1000m from Mercatale. There they were heavy shelled & mortared. Enemy attempts to retake the Hell-House failed, and thereafter shelled it and the approach road so badly that supplies could only be sent up in “Honey” Stuarts and scout cars. The guns from the 7/64 Field Battery (THA), were kept busy all afternoon on 25 July 1944 in support of the South African armour and infantry. During the combat an OP Sherman Tank’s crew narrowly escaped when they were directly hit from a HE shell from an 8.8cm gun.
Tanks of “A” Squadron, NMR on recon to the right of Point 504 and south-west of Poggio Mandorli ran up against 3 Tiger I E tanks appearing on the ridge 800 yards away.
|
|
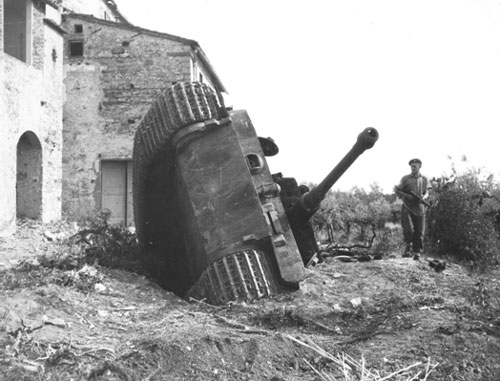
Leading elements of “A” Squadron, NMR were heavily engaged by the Tiger I E tanks just short of Mercatale as they probed positions held by 4. Fallschirmjägerdivision. The Tiger I E tanks damaged some of the Sherman tanks but were so heavily and successfully engaged that they pulled out from the houses against which they were sheltering. It was later found that one Tiger I E in its withdrawal had fallen into a cess-pit and was there destroyed by its crew. Another had been so damaged that it was “brewed up” by its crew in Mercatale, and the other one was successfully recovered by the enemy. Extremely heavy enemy artillery and mortar fire struck the reconnaissance tanks and three Sherman’s were destroyed and the rest pulled back for the night.
|
South African Units
RDLI - Royal Durban Light Infantry
NMR - Natal Mounted Rifles
DROR - Duke of Edinburgh’s Own Rifles
RLI - Rand Light Infantry
RB/RPS - Regiment Botha/Regiment President Steyn
PR - Pretoria Regiment
PAG - Prince Alfred’s Guard
SSB - Special Service Battalion
ILH/KimR - Imperial Light Horse/Kimberley Regiment
RNC - Royal Natal Carbineers
FC/CTH - First City/Cape Town Highlanders Regiment
WR/DLR - Witwatersrand/De La Rey Regiment
|
|
The Battle of "Hell-House" Scenario
The Battle of “Hell House” scenario uses the Ambush (page 103 of the rulebook),and Strategic Withdrawal (page 104 of the rulebook) special rules.
YOUR ORDERS
GERMAN
Your orders are to stop the Allied advance towards Florence by holding Point 426.
SOUTH AFRICAN
Your orders are to advance towards Florence by breaking through the German lines at Point 426.
PREPARING FOR BATTLE
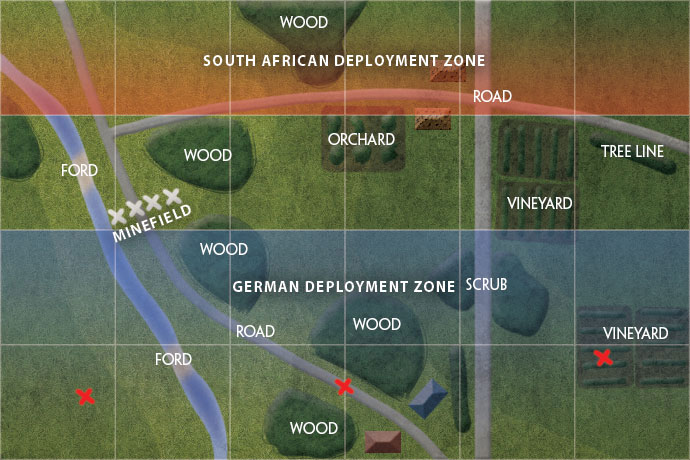
1. For Table Setup please use the Rearguard Mission (page 109 of the rulebook) and for Terrain setup, please use the Scenario map as your guide.
2. The German player places an Objective on their side of the table at least 8”/20cm away from all table edges and at least 8”/20cm back from the centre line.
3. The South African player then places two Objectives in the same area so that no two Objectives are more than 48”/120cm apart and all are more than 8”/20cm from any other Objective.
4. Starting with the German player, the players place Ranged In markers for all of their deployed (including in Ambush) Artillery Units.
5. The German player then Deploys all their Units. The German player may hold one Unit in ambush.
5. The South African player then Deploys all their Units..
BEGINNING THE BATTLE
1. The South African player has the first turn.
2. Both sides start the game in Foxholes and are Gone to Ground.
ENDING THE GAME
The battle ends when:
• The South Africans have Taken any of the Objectives at the end of their turn, or
• The Germans start their turn 9.
DECIDING WHO WON
• The South Africans win if the game ended because they ended one of their turns holding an Objective.
• Otherwise the Germans win.
• Calculate your Victory Points using the Victory Points Table on Page 101 of the rulebook.
|
 |
|
SCENARIO MAP SPECIAL RULES
• The River Ford (see Ford on page 43 of the rulebook)
• The River (see page 43 of the rulebook).
• Scrubs (see page 43 of the rulebook).
• Woods (see page 43 of the rulebook).
• Tree Lines (see page 43 of the rulebook).
• Vineyards and Orchards (see page 43 of the rulebook).
|
| |
Turn |
Event |
| > |
2 |
Withdraw a Unit and remove all counters if 6+ Unitss or counters, otherwise gain a delay counter. |
| > |
3 |
Repeat withdrawal. |
| > |
4 |
Repeat withdrawal. |
| > |
5 |
Repeat withdrawal. |
| > |
6 |
Repeat withdrawal. |
| > |
7 |
Repeat withdrawal. |
| > |
8 |
Repeat withdrawal. |
| > |
9 |
Check Formation Last Stan if necessary. Game over. |
|
 |
Elements of the 4. Fallschirmjägerdivision, I. Fallschirm-Korps, 14. Armee (Page 26, D-Day: German)
|
Fallschirmjäger Company HQ
• 2x MP40 SMG team with Panzerfaust |
5 points
|
Fallschirmjäger Platoon
• 10x MG42 & K98 rifle eam with Panzerfaust, 1x Panzerschreck anti-tank team |
16 points
|
Fallschirmjäger Platoon
• 10x MG42 & K98 rifle eam with Panzerfaust, 1x Panzerschreck anti-tank team |
16 points
|
Fallschirmjäger Platoon
• 10x MG42 & K98 rifle eam with Panzerfaust |
15 points
|
Fallschirmjäger sMG42 Machine-Gun Platoon
• 4x sMG42 HMG team |
6 points
|
Fallschirmjäger 8cm Mortar Platoon
• 4x 8cm mortars |
8 points
|
Fallschirmjäger Tank-hunter Platoon
• 4x 7.5cm guns |
18 points
|
| Support Units |
|
10.5cm Artillery Battery
• 4x 10.5cm howitzers |
14 points
|
|
Tiger Tank Platoon
• 3x Tiger (8.8cm)
Tiger Ace Command Card
|
36 points
|
| Total (9 Platoons) |
134 points |
|
 |
Elements of the 11th South African Armoured Brigade, 6th South African Armoured Division, XIII Corps
(Page 46, Bulge: British)
|
Guards Sherman Armoured Squadron HQ (RHQ, SSB)
• 2x Sherman (75mm) with .50 cal AA MG command card |
9 points
|
Guards Sherman Armoured Troop (“A” Squadron, SSB)
• 3x Sherman (75mm) & 1x Sherman (76mm) with .50 cal AA MG command card
(Shernan (76mm): 76mm gun Range 36"/90cm, ROF 2/1, AT 12, FP 3+
with No HE, Front Armour 7, with Protected Ammo Remount 3+) |
18 points
|
Guards Sherman Armoured Troop (“B” Squadron, SSB)
• 3x Sherman (75mm) & 1x Sherman (76mm)with .50 cal AA MG command card
(Shernan (76mm): 76mm gun Range 36"/90cm, ROF 2/1, AT 12, FP 3+
with No HE, Front Armour 7, with Protected Ammo Remount 3+) |
18 points
|
Guards Sherman Armoured Troop (CV) (“C” Squadron, SSB) (Rhodesians)
• 3x Sherman (75mm) & 1x Sherman (76mm)with .50 cal AA MG command card
(Shernan (76mm): 76mm gun Range 36"/90cm, ROF 2/1, AT 12, FP 3+
with No HE, Front Armour 7, with Protected Ammo Remount 3+) |
18 points
|
Armoured Recce Troop (CV) (“C” Squadron, NMR) (use Guards Armoured Troop with)
• 2x Sherman (75mm) & 2x Stuart Jalopy (Jalopies command card) |
12 points
|
South African Motor Platoon (Kangaroo Rifle Platoon) (“A” Company, ILH/KimR)
• 7x Bren Gun & SMLE rifle team, 1x PIAT anti-tank team, 1x 2-inch mortar
& 2x M5 half-tracks & 2 M5 half-tracks with .50 cal MG instead of Kangaroos |
11 points
|
South African Motor Platoon (Kangaroo Rifle Platoon) (“B” Company, ILH/KimR)
• 7x Bren Gun & SMLE rifle team, 1x PIAT anti-tank team, 1x 2-inch mortar
& 2x M5 half-tracks & 2 M5 half-tracks with .50 cal MG instead of Kangaroos |
11 points
|
South African Motor Platoon (Kangaroo Rifle Platoon) (“C” Company, ILH/KimR)
• 7x Bren Gun & SMLE rifle team, 1x PIAT anti-tank team, 1x 2-inch mortar
& 2x M5 half-tracks & 2 M5 half-tracks with .50 cal MG (instead of Kangaroos) |
11 points
|
3-inch Mortar Platoon (“S” Company, ILH/KimR)
• 4x 3-inch mortars |
6 points
|
Vickers Machine-Gun Platoon (“S” Company, ILH/KimR)
• 4x Vickers MMG team |
4 points
|
|
25 pdr Field Troop (4/22 Field Regiment, SAA)
• 4x 25 pdr guns
Sherman OP Observation Post
|
14 points
1 point
|
| Total |
133 points |
|
Last Updated On Friday, December 16, 2022 by Wayne at Battlefront
|
|
|