|
|
Unlocking the Enchantment of Highlights: Creating Contrast in 15mm Vehicles
 |
Unlocking the Enchantment of Highlights: Creating Contrast in 15mm Vehicles
by Rubén Torregrosa
In previous tutorials, we have explored quick painting methods for 1/100 scale tanks, employing straightforward techniques such as “blocking” (using a single color, with no lights) or basic highlighting with the drybrush technique that was further polished using oils.
|
|
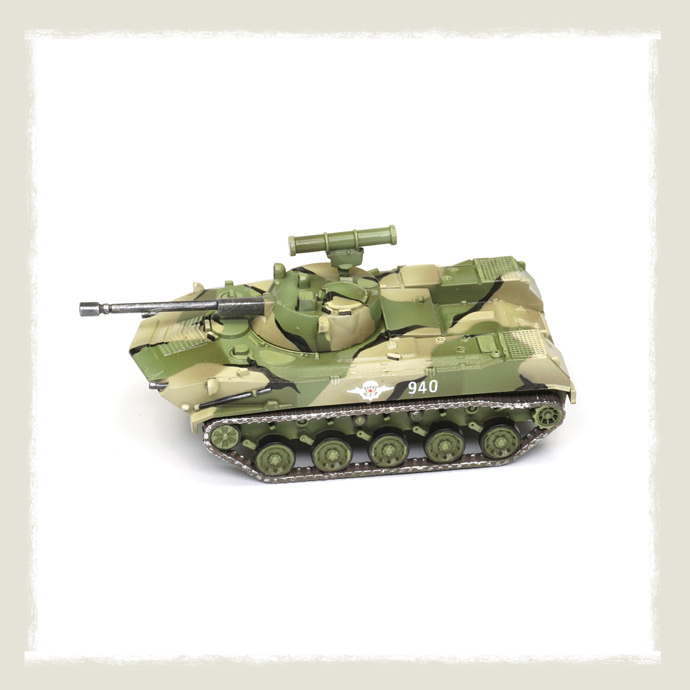
In this tutorial, we will delve into a more complex highlighting approach utilizing the airbrush, aiming to amplify the contrast. By doing so, we aim to offset the diminutive size of these tanks. It is worth noting that the smaller the surface area, the darker the color appears to our eyes. Thus, while we may use the authentic color of real tanks on our miniature models, it will appear considerably darker due to their tiny scale.
|
|
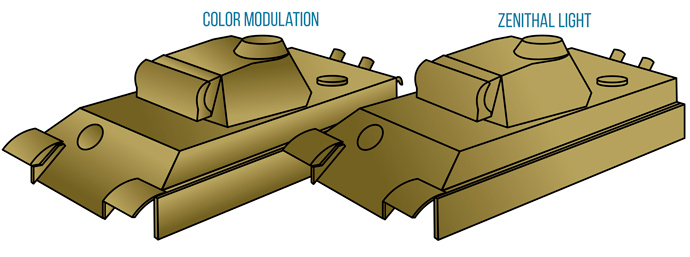
The highlighting technique we are about to employ is known as "color modulation," which involves painting each panel of the vehicle separately, with its own distinct shadows and highlights. Typically, when using an airbrush, we follow to the "zenithal" method, where we imagine a single light source (such as the sun), and thus direct the highlights consistently toward a specific point across the tank. This is achieved by spraying the airbrush directly above the tank at a 90-degree angle, for instance. However, in color modulation, we invent a unique light source for each individual panel. This means we create highlights in different areas of each panel based on our desired effect. Frequently, we place the maximum highlight of one panel adjacent to the maximum shadow of an adjacent panel. The outcome is highly artificial and reminiscent of 3D-rendering, but this approach allows us to produce captivating and visually striking contrasts.
|
|
|
|
In this tutorial, we will continue to embrace a straightforward approach, focusing on creating color modulation using only three colors: shade, base, and highlight (we often incorporate additional layers to enhance contrast further). Additionally, we will integrate this method with the masking technique we have previously discussed to craft a bitonal camouflage. This camouflage will be augmented with a third color applied using a brush for added depth and detail.
|
|
Step 1: Preparation
|
|
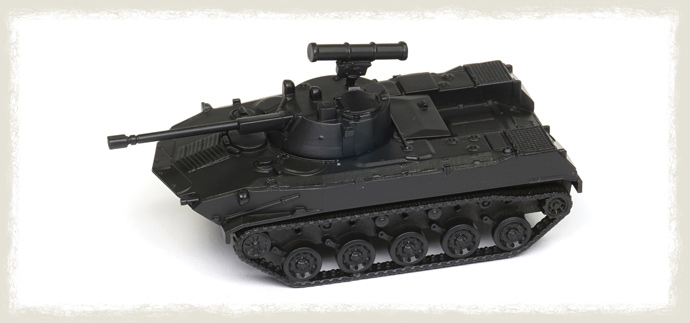
As usual, we begin by meticulously cleaning each plastic piece of the tank using a modeling knife. Subsequently, we assemble all the pieces together, including the tracks, utilizing plastic cement (avoiding the use of "super glue" for assembling plastic parts). Once assembled, we proceed to apply an appropriate undercoat layer or primer. This serves a dual purpose: it facilitates the adherence of the paint and enhances its durability. I typically prefer black primer because it offers the option to leave this color in the recesses if needed, which can save some time during the painting process. To streamline the process and save time, we can apply the primer using a spray such as TITANS HOBBY Black Matt Primer TTH100. It is advisable to apply a couple of thin layers, maintaining a distance of approximately 30 cm between the spray nozzle and the surface of the model.
|
|
|
|
Step 2: Green Camouflage Shadow
|
|
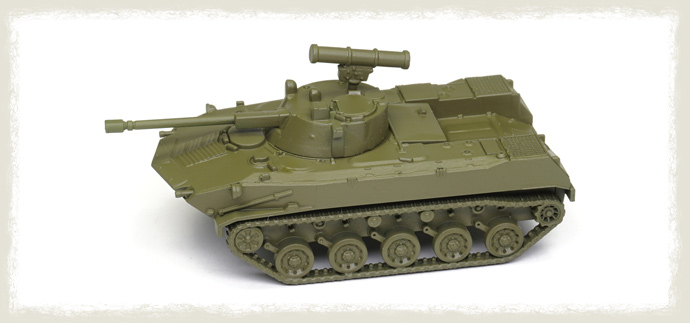
Once we have determined the camouflage pattern we intend to paint, we begin by applying the dominant color, which is either the base color of the tank from the factory or the hue that covers the largest area of the tank. In this instance, it is Russian green. To achieve depth and contrast, we initiate the painting process with the darkest color or shadow, gradually layering on lighter tones (base and highlight). For the shadow, we mix Dark Olive Green ATOM-20072 and Chipping ATOM-20064 in equal proportions, thinning it with 20% acrylic thinner. Using the airbrush, we evenly coat the entire tank with a couple of thin layers.
|
|
|
|
Step 3a: Green Camouflage Base I
|
|
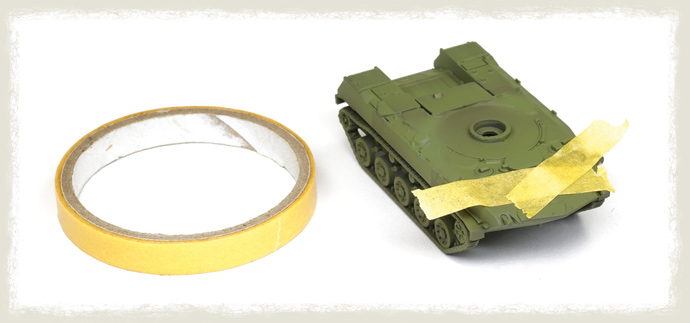
Moving to the first lighter color, the base, we apply Dark Olive Green ATOM-20072 directly after thinning it down with 20% of thinner. Using the airbrush and masks, we progressively highlight each panel of the tank. For masking, we can use a piece of paper or masking tape for straight or angled panels, while we can employ masking putty or liquid mask for irregular edges or surfaces. For this tank, we will utilize the former option. The goal is to utilize the mask to shield the adjacent panel, enabling us to freely apply the highlight on one panel without mistakenly painting the neighboring one. Consequently, we can align the maximal highlight and shadow of two adjacent panels.
|
|
|
|
Step 3b: Green Camouflage Base II
|
|
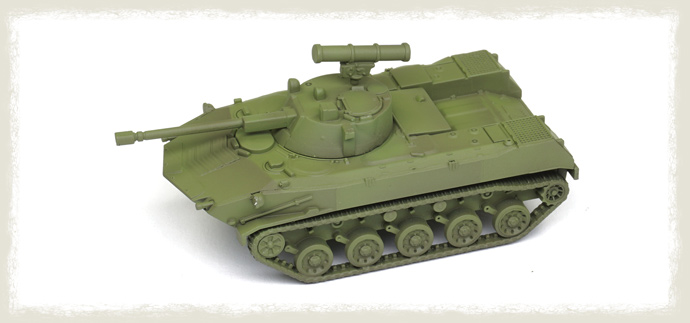
For this fast painting approach, perfection is not crucial, and our attention is primarily directed towards the larger panels rather than every tiny detail. If you find yourself unsure about where to position the lights and shadows, a straightforward guideline is to consistently highlight the upper portion of vertical panels and the frontal part of horizontal ones. Additionally, whenever feasible, we can tilt the tank to access and paint specific areas of the panel without affecting the neighboring ones, thereby avoiding the need for masks. For instance, we can incline the tank to apply the frontal highlight on the frontal panel or to paint the upper portion of the side panels.
|
|
|
|
Step 4: Green Camouflage Highlight
|
|
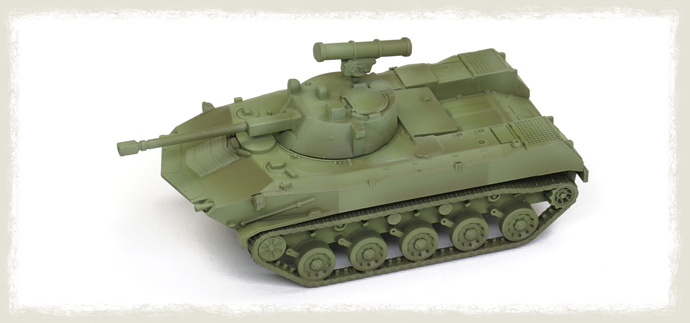
To achieve the green highlight, we mix 75% of Dark Olive Green ATOM-20072 with 25% of a cream or light brown color such as Dunkelgelb DG III ATOM-20005. After thinning the mixture with 20% acrylic thinner, we apply the final highlight, adhering to the highlighting pattern established in the previous step, and once more utilizing masks. It is crucial to note that with each layer, we gradually reduce the painted area to ensure that all the colors remain visible in the final result. After completing this step, the distinct volumes of the various panels become clearly visible. For a more intricate painting job, additional highlight layers could be incorporated to further enhance the overall appearance and depth of the model.
|
|
|
|
Step 5: Masking The Camo Spots
|
|
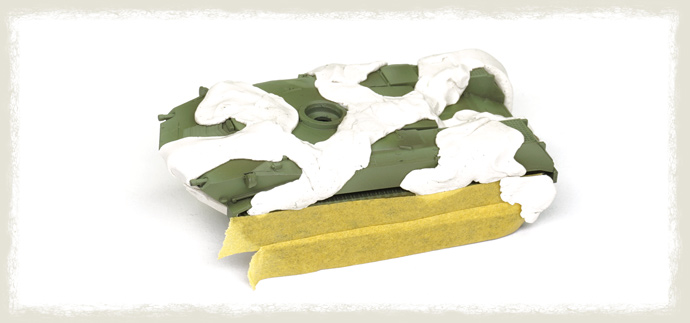
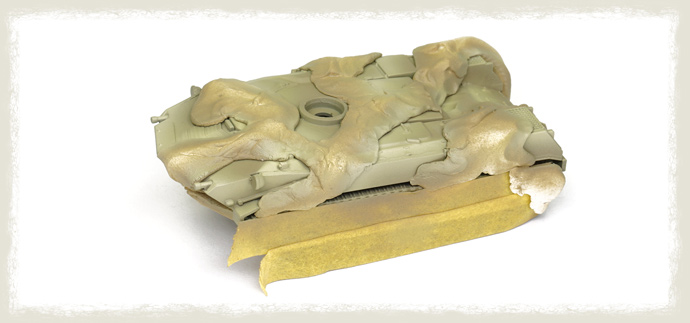
To create the typical hard camouflage pattern of green and dark yellow seen on these tanks, we can utilize masking putty, as demonstrated in another tutorial. Using masking putty or self-adhesive putty, we cover half of the tank. It is crucial to ensure that the edges of the masks are properly adhered to the surface to prevent paint from seeping beneath them. This ensures clean and precise lines for the camouflage pattern.
|
|
|
|
Step 6: Dark Yellow Camouflage
|
|
Next, we proceed to paint the second color of the camouflage using the same highlighting system, the “color modulation”. For this, we once again employ three colors: shade (a mix of 50% Chipping ATOM-20064 and 50% Dunkelgelb ATOM-20012), base (Dunkelgelb ATOM-20012), and highlight (50% Dunkelgelb ATOM-20012 and 50% Dunkelgelb DG III ATOM-20005). It is important to note that we are using the same colors to mix the base for creating the shadow and highlight, just as we did with the green. This ensures a more harmonious contrast between both colors of the camouflage. After thinning down each mixture with 20% acrylic thinner, we use the airbrush to apply the color modulation in the same manner as we did with the green color. This entails creating shadows and highlights in the exact same spots as before.
|
|
|
|
Step 7a: Removing The Mask I
|
|
Carefully, we begin removing the masking putty little by little. If we have applied a proper primer layer and used high-quality masking putty (avoiding cheap options), this process should be relatively safe, and we should not risk damaging the paint beneath the putty. In any case, it is essential to exercise caution and take our time during this step to ensure clean and precise results.
|
|
Step 7b: Removing The Mask II
|
|
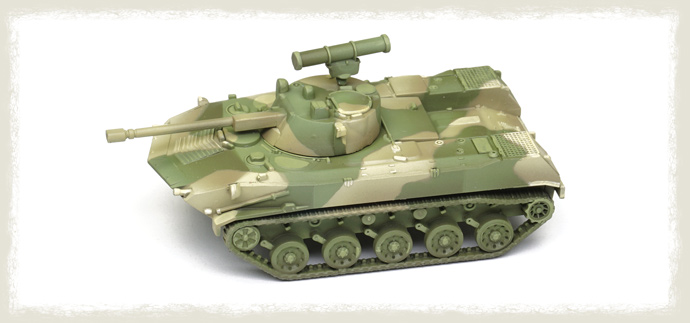
Once we have completely removed the mask, we can notice how the camo spots nicely follow the same highlighting pattern, resulting in a cohesive and uniform appearance. Technically, we could consider stopping here. However, the color modulation is not yet complete. We still need to add one final highlight, but this time we will use a brush instead of the airbrush.
|
|
Step 8: Final Highlight of The Colour Modulation
|
|
Frequently overlooked, this step is crucial for achieving the full effect of color modulation. Using a lighter color than the previous highlights (we can add a bit more of Dunkelgelb DG III ATOM-20005 to each of the previous mixes), and employing a thin brush, we meticulously paint all the small details such as rivets, mesh, visors, etc. This not only enhances the sense of volume but also brings to life all the intricate details of the tank, resulting in a more visually appealing finish.
|
|
|
|
Step 9: Black Camouflage
|
|
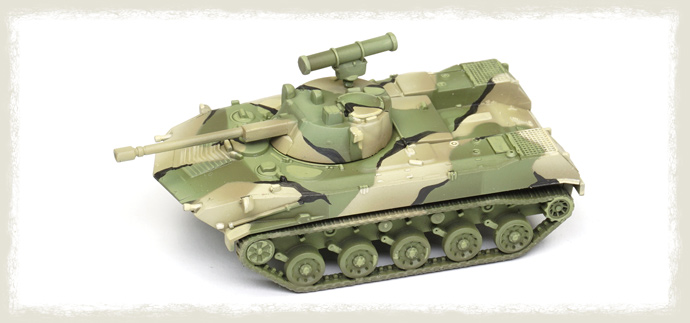
To add the third camouflage layer in the form of black spots, we could have opted for the masking technique once again. However, to save time, we can apply this color using a brush. We simply paint small black lines or spots on the intersections of the green and dark yellow areas. We can refer to real pictures for guidance and inspiration, as this camo pattern may have various versions. Since the black spots are very small, it is not necessary to incorporate shadows or highlights; a flat color will suffice. For bigger spots, we should consider using the masking and color modulation techniques.
|
|
|
|
Step 10: Details
|
|
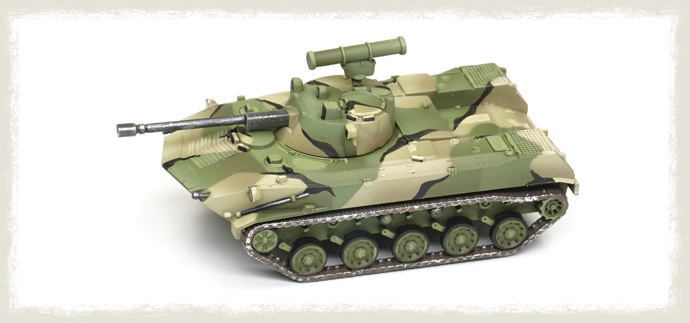
With the camouflage now complete, we proceed to paint the remaining details of the tank using their appropriate colors. To paint the tracks, we use a 1:1 mix of Zimmerit ATOM-20144 and Chipping ATOM-20064. Once dry, we can create metallic reflections by applying a dry brush technique with Dio Drybrush Light Metal A.MIG-0621. For the gun barrel and tools, we start by blocking in black and then highlighting with Light Metal using also the drybrush technique. The rubber parts of the tracks are painted with black. All these steps are done using a thin brush, with the paint diluted with 20% water to ensure smooth application.
|
|
|
|
Step 11: Decals and Sealing With Gloss Varnish
|
|
With this the basic paintjob of the tank is complete. Now is the moment to apply decals as we discussed in a previous tutorial. Before proceeding with the weathering effects and enamel/oil paints, we should apply a thin layer of acrylic glossy varnish. This can be done using an airbrush and A-STAND Aqua Gloss Clear A.MIG-2503. The glossy varnish helps create a smooth and polished surface, ensuring optimal application and distribution of the wash.
|
|
Next Time
|
|
In the next part of the tutorial, we will explore various weathering techniques and tools that we have used in previous tutorials to further enhance the realism of the tank. Additionally, we will introduce new effects that will elevate our models to the next level, adding depth and character to the finished piece.
|
|
~ Rubén
|
|
|