|
|
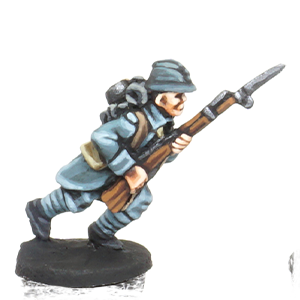
Painting WWI French Fusiliers: Combining Quick Washes and Advanced Layering
 |
Painting WWI French Fusiliers: Combining Quick Washes and Advanced Layering
With Ruben Torregrosa
Wargamers frequently find themselves seeking a balance between painting and gaming, which often leads them to prefer fast painting techniques. These methods are typically straightforward and swift, and, importantly, highly effective. However, it is worth noting that the trade-off is often between speed and quality, with quality being inversely proportional to the time invested.
|
|
In this tutorial, we will explore the fusion of a fast-painting technique that involves washes with a more sophisticated method by incorporating successive layers of highlights. To clarify, we will begin with the conventional 'base + wash + highlight' technique and progressively enhance our results by transitioning to the 'layering technique'. One of the significant advantages of this approach is its scalability, allowing us to halt at various stages depending on our available time and goals. Additionally, these concepts can be employed to enhance an older fast painting project.
|
|
Step 1: Preparation
|
|
It is of utmost importance to eliminate all traces from the casting process, particularly the mould lines, as these can significantly affect the final results. To accomplish this, we use a modelling knife and a set of files. To ease the painting process, we can attach the miniatures onto old paint caps or small pieces of cork using self-adhesive putty.
|
|
Equally vital is the application of an undercoat or primer. This layer not only eases the subsequent application of paint but also enhances its long-term durability. When painting 15mm miniatures, it is advisable to use a black primer. This choice allows you to leave this colour in the deepest recesses, which can save you valuable time during the painting process. Ideally, we apply the primer using an airbrush or spray, as these methods produce a very thin and even layer of paint that does not mask the miniature details.
|
|
Step 2: Blocking
|
|
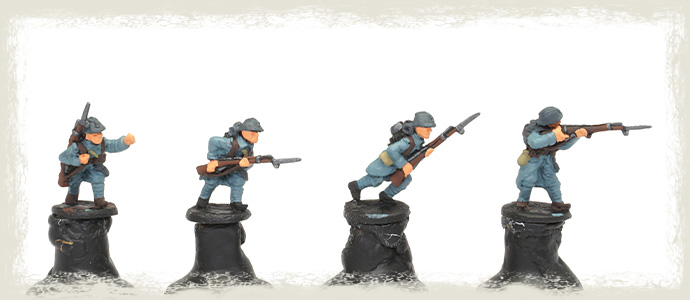
We block out each part of the miniature with an intermediate colour that is neither too bright nor too dark. Frequently, this colour represents the desired shade for the element being painted. Later on, we will proceed to create shadows and highlights.
|
|
Using a fine brush and acrylic paint thinned with approximately 20% water and applied in two layers for even coverage, we begin painting from the inside out. We start with the face and hands painted in Basic Skin Tone (AMMO F-549), followed by the uniform in a mixture of Bluish Grey (AMMO F-530) with 10% Marine Blue (AMMO F-518). To darken specific areas, such as the helmet and anti-gas mask canister, we incorporate 20% black into the previous mix. The leather webbing is coated in Dark Brown (AMMO F-533), the bags in Khaki Green (AMMO F-533) and the blankets in Slate Grey (AMMO F-522). Lastly, the wooden parts of the rifle are painted with Brown Base (AMMO F-508), while the metallic components are covered in a mixture of Steel A.MIG-0191 and black.
|
|
|
|
Step 3: Wash
|
|
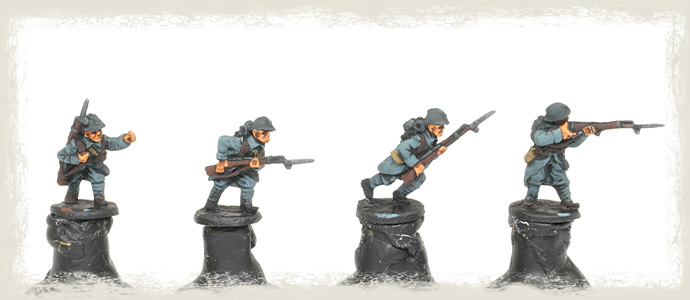
To accentuate all the recesses quickly and effectively, a general dark wash can be applied covering the entire miniature. Thanks to gravity, the pigment will primarily accumulate in the recesses, emphasizing the deeper areas. For a more natural appearance, it is advisable to use at least two different washes: a dark brown wash for lighter and mid-tone colours, such as the skin and khaki bags in this case; and a black wash for the remaining elements, especially the darker ones. To create a wash, any available paint on your workspace can be used, mixed with 50% acrylic thinner (preferably over water because it contains detergent, enhancing paint flow). Alternatively, ready-to-use acrylic washes can be employed. However, these typically have a satin or glossy finish, which is recommended to be killed by applying a layer of matt varnish.
|
|
In this example, we mix Dark Brown (AMMO F-533) or Black (AMMO F-501) with 50% Transparator Matt (A.MIG-2042) to create the dark brown and black wash, respectively. The Transparator product is a special acrylic thinner designed to thin the paint while better preserving pigment intensity and improving fluidity, and it provides a matte finish. When applying two or more washes, it is essential to apply them one at a time. Wait until the previous one is entirely dry before applying the next layer.
|
|
|
|
Step 4: Recovering
|
|
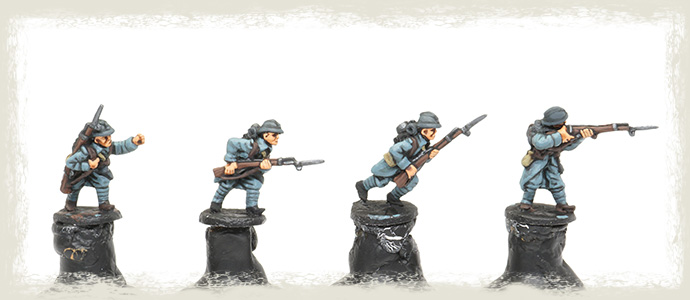
A potential issue with applying a dark wash is that it often causes the entire miniature to become darker, resulting in a loss of definition. As a solution, we should employ the same colours we used in Step 2 to accentuate the more prominent features. In other words, we should repaint the most exposed areas, while allowing the wash to remain primarily in the deeper crevices.
|
|
Typically, this recovery step serves as a "highlight," and we could conclude the painting process at this point for a quick and simple technique. The miniatures now feature clearly defined elements, and we have successfully created some depth and volume. Alternatively, we can start adding subsequent layers of highlights. We can apply just one if we prefer not to spend too much time. Nevertheless, the more layers we apply, the more visually interesting the miniatures will become, as we enhance the two fundamental aspects of painting 15mm miniatures: definition and contrast.
|
|
|
|
Step 5: First highlight
|
|
One great advantage of the wash and the subsequent recovery step is that it provides us with a clear map, indicating where we should continue applying lighter colours or highlights to give the miniature depth and dimension (volume). This lighting technique is entirely unreal, as we paint from the inside out, as opposed to the more realistic bottom-to-top approach often associated with zenithal lighting, where the sun is imagined to be directly above the miniature. However, it proves to be remarkably effective and straightforward to follow.
|
|
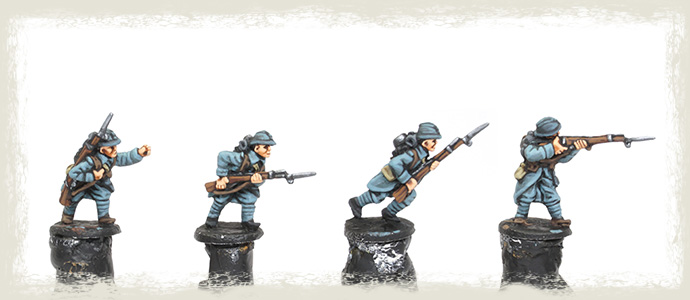
In line with this approach, we begin by creating the initial highlight using lighter colours. Typically, this involves using a lighter shade or mixing the base colour we used in Step 2 with a very pale yellow, such as Light Sand (AMMO F-511). While wargamers frequently opt for pure white, it is worth noting that this can yield somewhat muted or "greyish" highlights. Light yellow, on the other hand, produces more natural and vivid highlights. We blend the base colour with about 20% of Light Sand and apply these highlights to the most exposed or upper areas, reducing the painted area. For highlighting the wooden parts, we mix the base colour with 50% Red Leather (A.MIG-0133), while the metallic components are highlighted with pure Silver. The former is applied as horizontal lines simulating the wood veins, whereas the latter is applied mainly on the edges of each metallic part.
|
|
The miniatures now appear more interesting, featuring well-defined elements and a striking contrast. We have the option to conclude at this point or continue to add additional layers of highlights.
|
|
|
|
Step 6: Second highlight
|
|
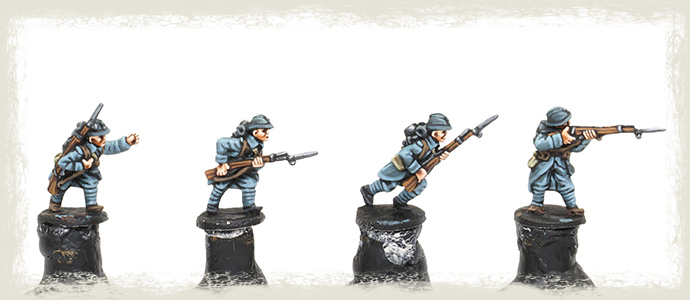
To apply a second layer of highlights, we add an additional 20% of Light Sand to the previous mixes. For the wooden parts, use pure Red Leather. We do not touch the metallic parts anymore. We apply the second highlight to the same raised parts we worked on previously but reduce the painted area. It is crucial to ensure that all the layers remain visible by the end. When applying these extra highlight layers, consider further diluting the paint (to around 30-40%) to create semi-transparent layers that facilitate smoother transitions between colours. To highlight small details, such as straps, pouches and bags, we focus on the edges.
|
|
|
|
Step 7: Third highlight
|
|
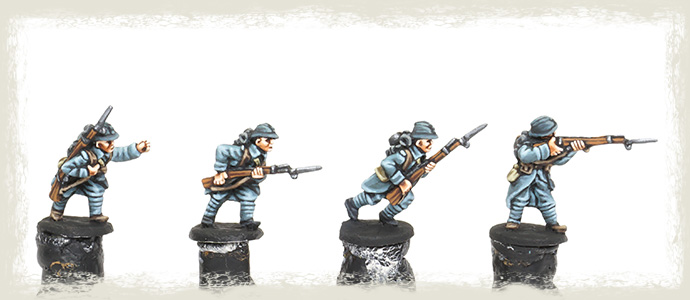
Optionally, a third and final highlight can be applied to intensify the contrast. To achieve this, we increase the amount of Light Sand by an additional 20%, or in specific instances, such as with the skin, you can add a touch of pure white to create more pronounced highlights. We do not touch the wooden parts at this stage. This ultimate highlight is only applied to a very limited area, such as a small dot or line on the most exposed parts. If necessary, you can rework certain shadows or even use pure black to outline specific details, like painting a thin line between the coat and the trousers, for example.
|
|
By incorporating three additional layers of highlights, which approximately doubles the time spent, we have elevated a simple and quick painting job into a more intricate one, making the most of the groundwork laid initially. As previously mentioned, one of the most appealing aspects of this approach is that we can halt at various stages if the need for a quick finish arises, particularly for gaming purposes. However, in the following month or at a later time, we can return to enhance the painting job with a bit more time and refinement.
|
|
|
|
In a future tutorial, we will delve into the process of creating realistic mud effects and splashes using enamel products. Stay tuned!
~ Ruben
|
|
|