|
|
 |
|
|
Lumpy's Guide to Windscreens
 |
Lumpy's Guide to Painting Windscreens
By Andrew 'Lumpy' Salisbury
Apparently there’s more than one way to skin a cat, but as I’ve never done that, fortunately, I can’t elaborate any further. But I have done a few windows in my time, and in the next 5 minutes I hope to have filled your heads with information that shouldn’t be too complicated, gods willing.
|
|
First up, the so-called ‘easy’ method…
The Easy Method
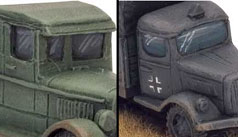
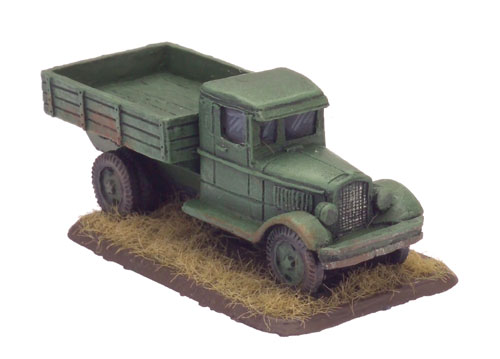
To the right you can see two examples of some trucks. The first one is a Russian truck painted by resident Mac monkey, Casey. The second is a German truck by chief Mac monkey, Dion.
|
 |
 |
Here’s a break down of how they achieve this effect:
First off, you paint the windows black, followed by a layer of Infantry Blue. Adding a touch of white to Field Blue, and about an equal part of water, you carefully paint in the diagonal lines. These lines give you the idea that light is reflecting from them from some mysterious, unknown light source.
|
After painting the windows black, Dion added a layer of what he calls “blue-black”, not too unlike Casey’s Infantry Blue. After that he added a touch of white to his paint and highlighted towards the top of the screen to give an illusion of clouds. Finishing off he used another, higher, highlight to give the reflection of this imaginary light source we hear so much about.
If you’re doing a lot of trucks and really are not worried about how magnificent they are, then this is the way to go. Otherwise, if you’re a loony like myself, then read below!
|
 |
 |
The Not-So-Easy Method
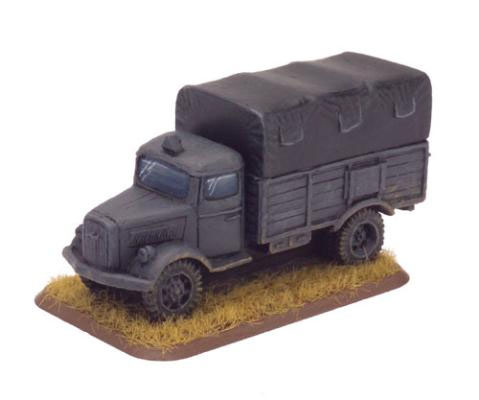
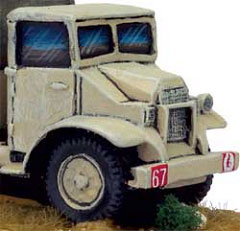
The truck to the left would’ve seen time in an 8th Army force, if it were real. This, of course, is not a real truck, but made entirely from resin, so stop asking me for the keys.
What I’ve done here is modified the method otherwise known as Sky-Earth Non Metallic Metal, or SENMM for short.
When you look at a shiny object on your television, it’s not actually shiny, it’s just tricking you into thinking that it is. Cartoonists often do the same thing in their line of work when they have to make you think a glass is see-through or that a gun is actually metallic. There are two major aspects to this technique, and they are Contrast and Light Reflection.
|
Contrast
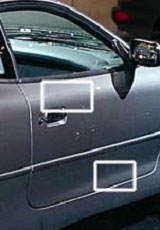
Looking at this photo of the door of an Aston-Martin, we see that while we know it is in fact only one colour, we also know that it is shiny. Just above the handle you’ll see a lighter colour, and we can all tell that this is where light is diffusing along the form of the door.
At the bottom of the door you’ll see the same effect. But in each case you’ll notice that there is also a very dark colour right next to it. In practice, if this colour change is too gradual, then the effect is lost. This direct contrast tricks us into thinking “Oooh, shiny!”
|
 |
 |
Light Reflection
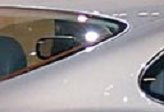
Looking at this photo of the very same Aston-Martin we can see where light bounces off it generating sharp points of white that are quite obvious to the eye. These speak for themselves, and add that much class to your own work if you can decide where to put them!
|
| (Editor ~ As far as I’m aware Lumpy does not own
a Aston-Martin or is associated in any way to the Aston-Martin company,
I think he’s merely hoping they might give him one free!) |
Breaking It Down
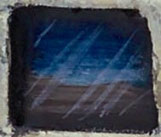
Here’s a close-up of one of the windows of my British truck. Lets break down how I used the principles of ‘light reflection’ and ‘contrast’.
Firstly, I started by painting the sky over a black background. I used Luftwaffe Blue that was quite thin, about 50/50 paint to water.
Next I added a little bit of white and lightened the sky towards the horizon line, which is set slightly below half way down the window. I continued this process until it was only slightly off white.
|
 |
Once the sky was done I followed it up with the
ground. I started with Dark Leather to get the ground started, highlighting towards the horizon. I added a little
white to get the final colour at the horizon line, and most of the work
is now done. This finished the ‘contrast’ principle of the sky-earth
technique.
Once the base work is complete, I gave it a very thin wash of black to
darken the areas around the frame of the window. If it’s not thin
enough, you’ll cry when you paint over all your work in black!
To finish off, I applied some very thin white lines to provide the
‘light reflection’ side of the sky-earth theory. These lines were
pretty thin, so thin that when they dried you could still sort of see
the colours that were behind them. This is important, because if you
don’t apply them thin enough then it looks like someone painted white
lines on your windows. While essentially this is true, it’s not what
you want people to think!
And that’s it! Simply unsimple!
This procedure took me about 5-7 minutes for all the windows on the
truck, so you can see that when you’ve got a method down you can get
through them without too many problems and I think the result is worth
the effort.
Get yourself a practice vehicle first and give it a go, you’ll probably
be surprised about how easy it is to do, it just sounds tricky. Best of
luck, thin your paints, and have fun!
Lumpy |
|
|
|