
|
| |
|
|
|
|
 |
|
|
Evan’s Churchill Project Part 2
 |
Evan’s Churchill Project Part 2
The Hessians are coming!
Once the spare tracks were installed the next step was to add the Hessian strips to the turrets. The British used cut up strips of hessian sacking material as a camouflage technique on both soldier’s helmets and tanks. I originally considered using Green/Grey stuff putty but realised it would take quite a while and would be hard to keep to a scale size. I tried a few things, but eventually settled on common garden-variety printer paper.
First, with a steel ruler and sharp knife I cut long strips around 4-5mm in width, then I added cuts not quite all the way through, it is a slow-ish task, but you get enough to do plenty of tanks from a just few strips, so not too onerous a task at all compared to the alternatives.
|
|
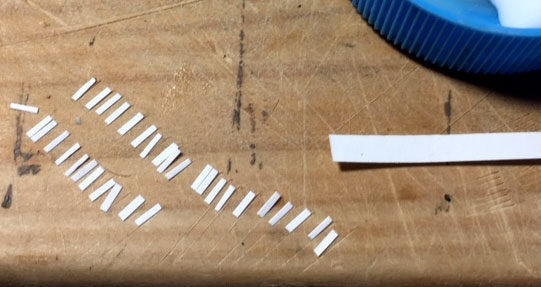
Then the strips were cut into approximately 1- 1.2cm lengths, various lengths are your friend here so don’t try to be precise.
|
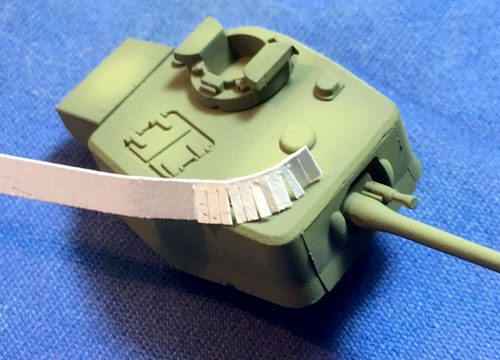 |
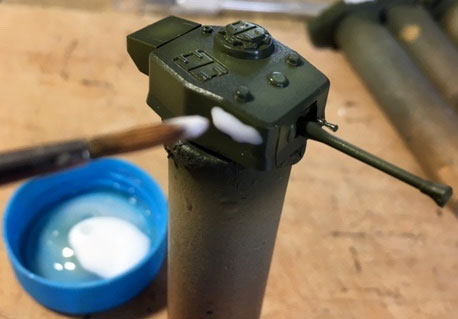 |
Then I added white glue to the turret ready for the first layer.
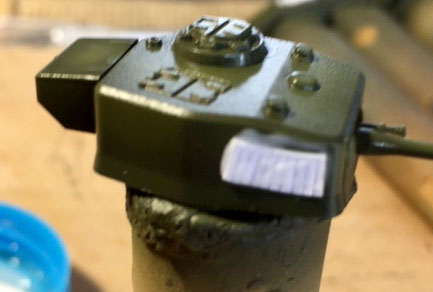
The hessian has a layered effect so start down low and add extra layers over the top, I left about 1/2 of the previous layer as I added more layers. You can add a layer then wait for the glue to dry before adding the next but I did them one after the other while still wet.
|
| Tip – I used a paintbrush to apply the glue and I also used the same brush to pick up the strips & stripes of paper to put them in place. |
 |
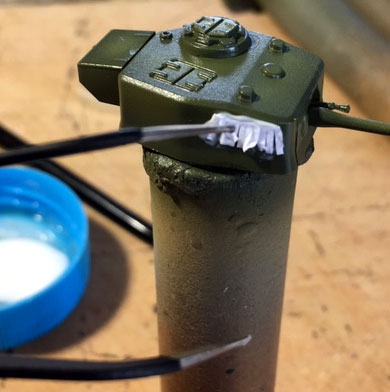 |
Once the strip is in place I coated the paper with more glue – don’t use too much! Wait a minute and the paper will soften and you can move the strips about to give it a bit more of a haphazard effect. I used a pair of pointed tweezers, but a simple piece of wire or toothpick would do the same thing.
Gently move the strips about, the glue takes a while to set so you don’t need to rush it. Keep the tip of your choice of pointy tool clear of any glue build up.
|
|
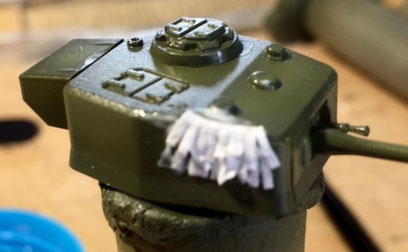
Once you’re happy with the first layer you can add a second overlapping the first, it doesn’t have to be directly above and feel free to stagger them a bit horizontally. Repeat the same process if you’ve waited for the glue to dry first otherwise slap it on and cover with more glue and repeat the poking about thing.
I did this on several turrets around the sides and front making sure not to cover sights, periscopes, hatches or gun mantlet openings.
The same technique was used on plain turrets and also the turrets I’d added track links to. I attempted to make them all look a bit different, like the individual crews had their own way of doing things.
|
 |
 |
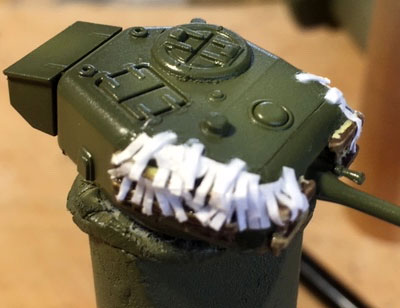
The straight edges along the top bothered me a little so I cut some of the left over strips all the way through and added individual strips to break up that top edge.
|
| It didn’t take many, only about 2-3 each side, to give it a less hard-edged look. |
 |
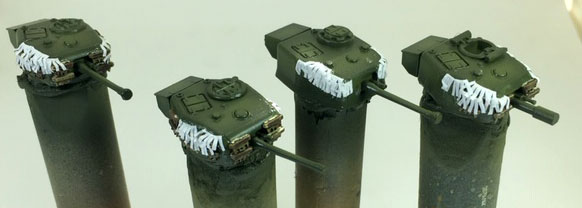 |
Then the painting began once the glue had dried completely, the glue makes the paper strips quite robust BTW.
My usual technique is to do this kind of work before I start painting but it was an after thought so I’d already started.
|
|
I prime, base coat, add modulation and do the basic detail like track primer, tools and any stowage. Then I gloss coat followed by a dark wash. Once that’s cleaned up I add decals and any highlighting and weathering.
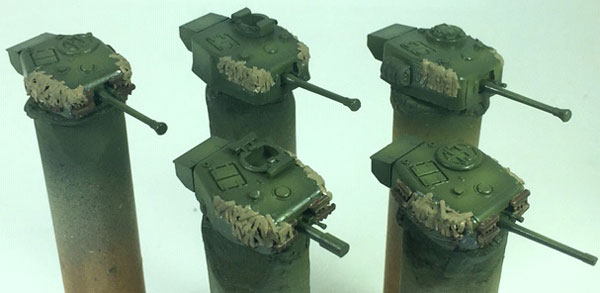
In this case I’d already done the gloss coat so I simply added a base colour to my hessian strips and then re-glossed before continuing on as normal.
|
 |
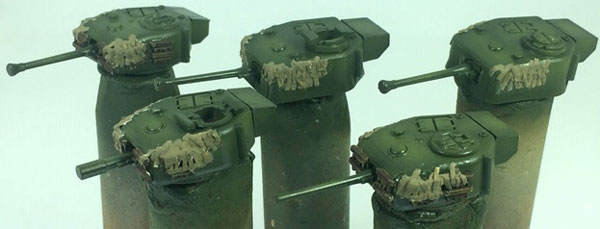 |
I will add highlight colours to the strips of hessian with two different colours after the dark wash though to break it up some more. |
|
This simple (ish) technique can be used on any British AFV, like Cromwells and Shermans, which employed Hessian strip camouflage. Give it a crack, once you’ve done a couple it will seem simple and an effective way to give that “British” feel to your Armour (with a u.. ☺ )
Evan
|
|
|
|