|
| |
|
|
|
|
 |
|
|
Enhancing Rural Roads
 |
Enhancing Rural Roads
with Jason Buyaki.
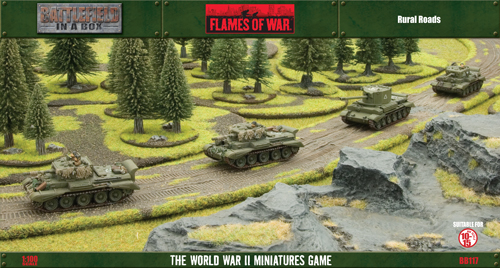
Our Battlefield in a Box Rural Roads are ready to use right out of the box without an additional work but with a little extra effort, anyone can make their roads more in theater to a more specific area of operations. In this article, we’ll look at enhancing our Rural Roads to fit North Africa, Italy, Pripyet Marshes and the Battle of the Bulge. |
North Africa
The common feature of North African roads is dusty, barren desert driving and it is a simple matter to repaint the road to fit inline with our desert range. |
Step One
Paint the entire road with Battledress Brown (FWP325). It is best to paint on two thin coats for better coverage without obscuring the details on the roads. |
Step Two
Next, dry brush the road with Sicily Yellow (FWP362). |
Step Three
Finally, dry brush the road with Dry Dust (FWP364). |
Italy
Italy has a wide variety of earth colours that could used as a base colour for roads. I chose to make a road with tan as it would look great with the static grass and flock blends that I had in mind based on a few reference photos that I looked at. This colour palette would also work well for the long dusty roads in the Soviet Union. |
Step One
Paint the entire road with Battlefield brown (FWP324). It is best to paint on two thin coats for better coverage without obscuring the details on the roads. |
Step Two
Next, dry brush the road with Dry Dust (FWP364). |
Step Three
Then dry brush the road with Worn Canvas (FWP306). |
Step Four
Apply white glue along the edges and some of the ridges along the road taking care not to obscure footprints and vehicle tracks, then apply GF9 Meadow Blend (FGS017) in random spots and cover the remaining glue with GF9 Static Grass: Green (GFS001). At this point, your road is complete but you could add water to some of the ruts in the road (see Pripyet Marshes steps for more details).
Check out the GF9 range in the online store here... |
Pripyet Marshes
The Pripyet Marsh is a vast swamp area that presented serious strategic challenges to the German war machine. Many of the roads were difficult for travel in the best conditions and my focus on this tutorial was to make them appear to be wet and muddy. I chose the piece with the large mud hole to be a feature to drive home the effect (which in North Africa could be a Salt Marsh!) |
Step One
I’m able to use the piece straight out the box without any painting, but if it suits you, now is the time to do any painting on the piece as you see fit. |
Step Two
Apply white glue along the edges and some of the ridges along the road taking care not to obscure footprints and vehicle tracks, then apply GF9 Meadow Blend (FGS017) in random spots and cover the remaining glue with GF9 Flock Blend: Dark Conifer (GFS011) and let dry. |
Step Three
In this step, I am adding in my water features. I’m using a two-part resin found in the United States called Enviro-tex Lite that can be easily tinted. I poured a small batch, added a few small drops of Battlefield brown (FWP324) and mixed it thoroughly according to the manufacturer’s directions. It is always best to add a little paint at a time and mix than to mistakenly add more because it is nearly impossible to remove the extra paint. Then I used a disposable brush to apply my water to the large mudhole area. The resin was applied to the wheel ruts using a toothpick to drag along the selected areas. |
 |
 |
Battle of the Bulge (or winter time in the Soviet Union and Finland)
One defining feature of a road covered in snow is the pristine condition of no tracks or markings which I could have made but would have been quite boring. Instead, I opted to work on the edges as if there had been a number of vehicles and soldiers moving along the roadway after the snow had fallen and some sunshine to melt those traffic areas. |
Step One
I used the road straight out of the box without any additional work but if it suits you, now is the time to do any painting on the piece as you see fit. |
Step Two
Using a mixture of 2 parts white glue, 1 part water, 4 parts GF9 Snow (GFS027), I carefully painted the snow mixture onto edges and less traveled areas and gave the snow mixture a dusting of GF9 Snow. |
Step Three
I added water to the bottom of the craters by using a two-part resin found in the USA called Enviro-tex Lite following the manufacturer’s directions. |
Step Four
I wanted the water in the craters to be frozen, so I stippled on some white paint onto the tops of the hardened resin. |
|
I hope you found this guide useful.
~ Jason.
|
|
|
|