|
|
 |
Painting Typhoons
With James Brown
Preparation
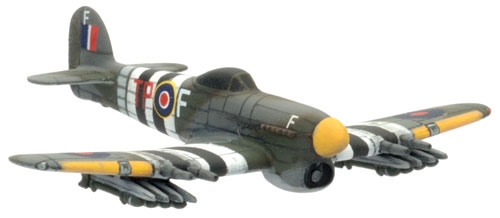
It is always important to properly prepare any model prior to painting. A bit of extra effort at the start can save you plenty of headaches later on. This is especially true in the case of Battlefront’s aircraft, because the process of casting them requires a different resin to that used in our normal vehicles.
|
|
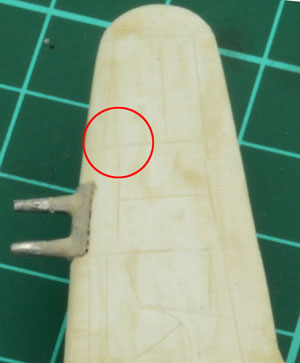
It is lighter and less brittle, making it perfect for thin, delicate parts such as wings. But it does have a slightly slick surface, which doesn’t bond with paint as readily as metal or grey resin parts. Therefore, it is more important than usual to wash the models with detergent prior to undercoating. I also recommend giving the surface a quick buff with fine-grain sandpaper, to rough it up slightly and create a ‘tooth’ for the paint to adhere to. Take care not to miss out-of-the-way areas such as the curves where the wings and tailplane meet the fuselage.
Assembly
Putting the Typhoons together is really fairly self-explanatory. The
cannon pieces are slightly thicker at one end; make sure you position
this end closest to the fuselage, where the wing is correspondingly
thicker. If you have a pin vice, I recommend pinning the rocket pods.
The wings are only thick enough to accommodate a very short pin, but
that is plenty to ensure that the rockets will withstand the rigors of
transport and gaming. I also recommend you attach the rockets after
painting, particularly if you are going to paint invasion stripes.
Whenever you do attach them, they should be positioned so that their
front, outside corner lines up with the front, outer corner of the
double panel immediately behind the cannon.
|
 |
 |
 |
 |
Undercoating
As long as you take care to prepare the models, whatever method of
undercoating you prefer should be fine. However, enamel paints seem to
bond to the resin better than acrylic, and give a somewhat more durable
result; if you happen to have any enamel paints sitting around,
consider priming the Typhoons with a thin coat of these. If you prefer
not to use oil-based paints, and if you have access to Milliput,
something else you might like to try is a Milliput wash.
Model-makers have been using Milliput for all sorts of purposes since
the ‘70s. Unlike most epoxy putties, it is somewhat water-soluble, and
some modelers and sculptors like to use it as a wash, to fill tiny
imperfections and leave a smooth, even surface. I have found that this
technique also creates a rock-hard, slightly porous surface to which
paint will adhere very well.
|
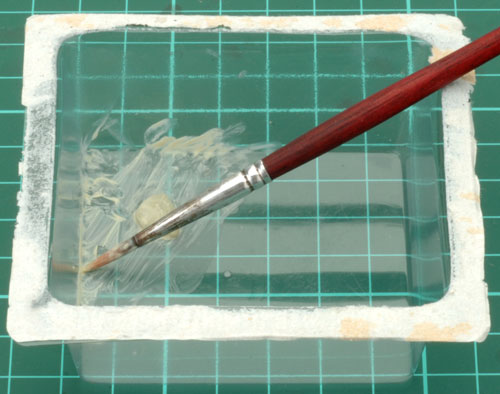
The process is very simple. Blend a small blob of putty in equal amounts, as usual, and press it on to a suitable mixing surface – preferably a disposable one, as hardened Milliput is almost impossible to remove. I have used the yellow-grey type, but it will work with any colour of Milliput. Using a fairly large brush, firmly scrub a few large drops of water over the surface of the putty for about 20-30 seconds, until a coloured, translucent wash is produced. Brush the wash liberally on to your model in much the same way as you would apply a normal undercoat. It will be touch-dry fairly quickly, and rock-hard within a few hours. A very thin film of Milliput is sufficient, but you may want to apply two thin coats, to ensure you have not missed any areas.
|
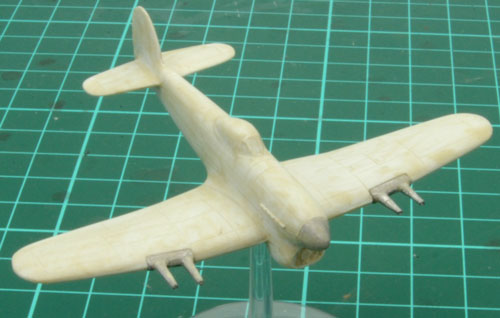 |
| Try not to go overboard, though, as too thick an application may risk obscuring some of the fine details such as panel lines. |
 |
Colours
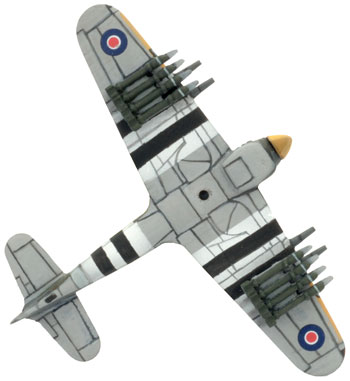
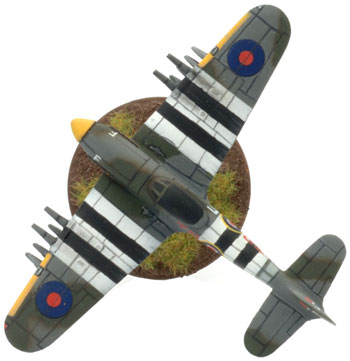
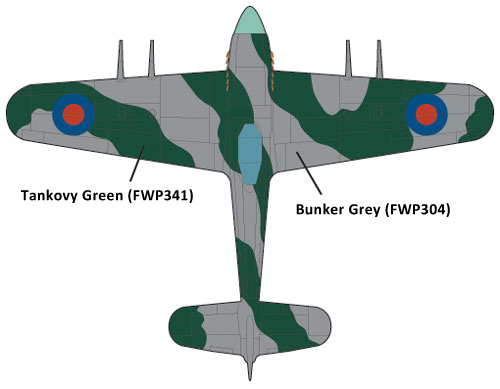
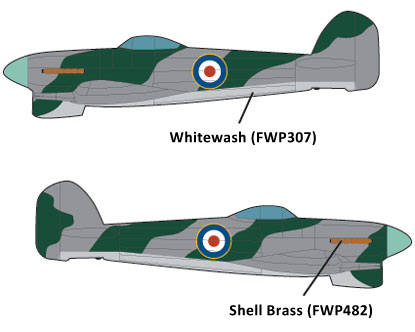
RAF Typhoons were painted in a camouflage scheme of Dark Green and Ocean Grey, with the underside in Medium Sea Grey. The colours I recommend are Tankovy Green (FWP341) and Bunker Grey (FWP304) and Whitewash (FWP307). The camouflage pattern was applied in the factory, using rubber masks made to a standard pattern. Although photographs show a small amount of variation in the placement of the masks, you should try to stay fairly close to the pattern in the diagrams, unless you intend to show an aircraft which has been repaired and repainted in the field.
|
|
Hard or soft-edged camouflage?
The short answer is, there is no short answer. Spraying over a mask often gives a slightly feathered edge, and this is visible in many historical photographs. At 1:144 scale, though, it is probably rather more accurate to ignore this soft edge and either apply the camouflage with a brush or airbrush it using a hard mask, such as masking fluid. However, the most important consideration is your own aesthetic preference, if you like the look of freehand airbrushed camouflage, then by all means go ahead.
Invasion stripes
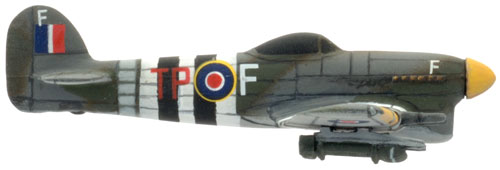
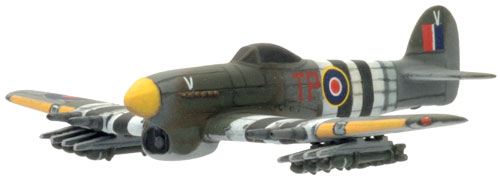
On the wings, these extend from the first panel line on the wing to about 1mm outside the second cannon – a width of 15mm. So each stripe should be 3mm wide. The fuselage stripes should be 2.5mm each, and begin approximately 1mm behind the rear curve of the canopy.
|
 |
 |
If you have a reasonably steady hand, the
simplest way of applying the stripes is freehand. But if you want a
nice straight, crisp line, you will have to mask them off with tape.
When used carelessly, tape can sometimes pull paint off models. If the
planes are well prepared and undercoated, this is unlikely;
nevertheless, I recommend using a low-tack tape, preferably proper
modeling tape. I also like to press the tape against my trousers a few
times, to reduce its stickiness. It is better to be safe than sorry.
I airbrushed the white bands – 15mm wide for the wings and 12.5mm for the fuselage – as hand-painting white can be very laborious. If you use a white undercoat, you could instead mask the area prior to painting the camouflage colours. Either way, remove the tape carefully, to ensure it does not take any paint with it. Painting black over white, though, is easy.
|
|
So, rather than painstakingly mask off each
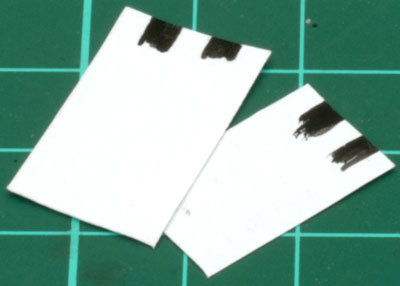
individual stripe, I painted the black stripes freehand. I measured and
painted the stripes on a small piece of paper the appropriate width, as
a guide for positioning the stripes. Move the paper guide down the
length of the white band, marking the width of the stripes with a small
black dot as you go.
|
 |
 |
Then simply join the black dots with a straight
line and fill in the space between them.
Happy painting, and fly carefully!
James
The Spotlight...
|
Last Updated On Tuesday, June 23, 2015
|
|