|
|
|
|
Products mentioned in this Article
--None--
|
|
|
|
|
|
|
|
|
 |
|
|
 |
Canada Attacks!
Operation Totalize: 7-9 August 1944
By Van Norton
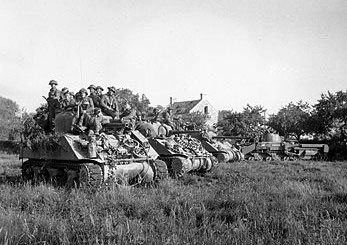
The American Operation Cobra had broken through the German lines south of the Commonwealth positions in Normandy. While the British had finally captured the ruins of Caen, their advance was not keeping pace with their American allies. 21st Army Group Commander Bernard Montgomery ordered the Canadian II Corps under Lt. General Guy Simonds to break through the German lines in their sector and drive on.
|
The area of attack, along the Caen to Falaise road, was open country dotted with villages and farms. The terrain gently rolls gaining elevation to the east. The Germans had fortified the villages and many of the farms. Their guns and mortars were farther back on the higher elevations granting excellent long range fields of fire. Artillery as well as tank and assault gun reserves were held to the rear out of range of allied artillery. This defence in depth made a traditional attack impractical.
The front line immediately opposite of the Canadians had just been taken over by the 89. Infanteriedivision. The division was recently formed in February 1944 and consisted of the 1055. and 1056. Grenadier Regiments, the 89. Fusilier Battalion and the 189. Artillery Regiment. Officially called the Horseshoe Division, the troops had nicknamed it the ‘Wheelbarrow’ division for its almost complete lack of motor transport. They were supported by at least one company of the 217. Sturmpanzer Battalion with 11 operational assault guns (Brummbärs), one regiment of the 7. Werfer Brigade as well as an independent heavy artillery battalion. Anti-tank guns, mortars and machineguns were dug into carefully concealed positions, which the Germans changed nightly to avoid air strikes.
|
 |
 |
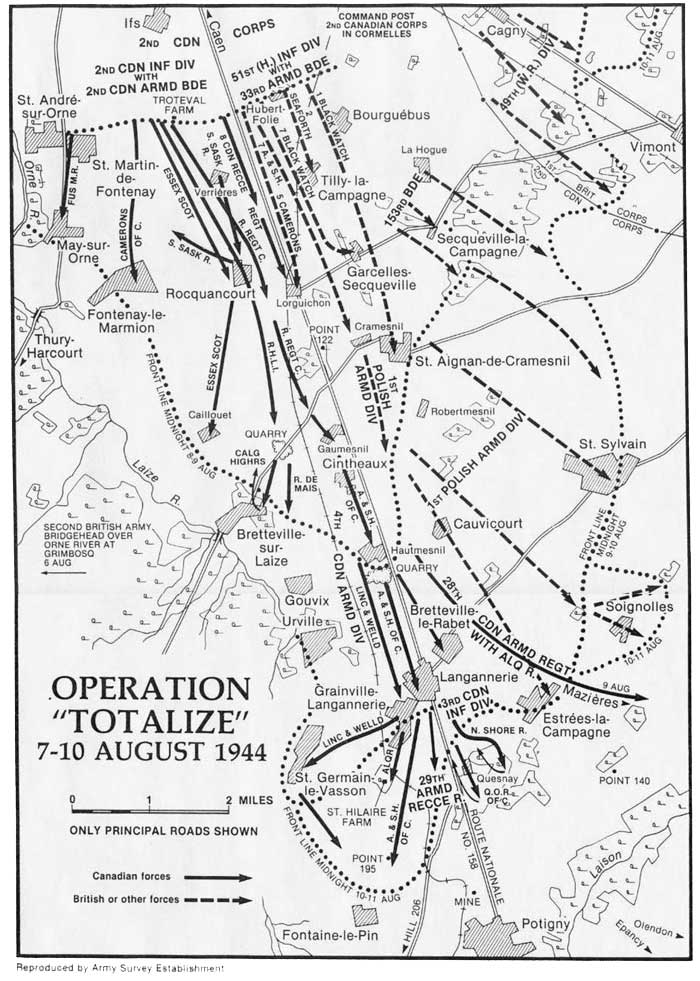
Lt General Simonds’ plan was organized into three phases:
- Phase 1: Armoured columns to drive by night from the start line at Ifs, Bras and Cormelles through the enemy front lines to a distance of about 5 miles. The armour would establish armed camps and walking infantry behind would clear the fortified areas bypassed by the armour.
-
Phase 2: About mid-day on the 8th, two further armoured groups, the 4th Canadian and 1st Polish Armoured Divisions, would pass through the armed camps and engage the last lines of the German prepared positions softened by daylight bombing.
- Phase 3: Upon completion of Phase 2, Canadian and Polish troops would exploit the gap created to drive on Falaise.
|
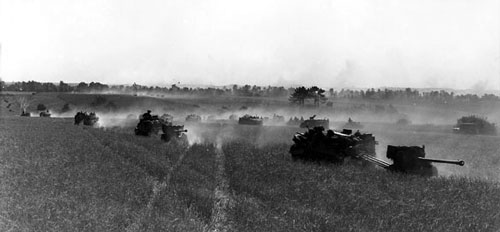
In previous operations, Allied armour had suffered from a lack of infantry support on their attacks. Simonds devised a plan to allow supporting infantry to accompany his tanks on their night march. Commonwealth units had been removing the 105mm armed American Priest self-propelled gun from units due to ammunition shortages and had rearmed the artillery units with the towed 25 pdr guns. This left approximately 100 Priests in the vehicle park.
|
 |
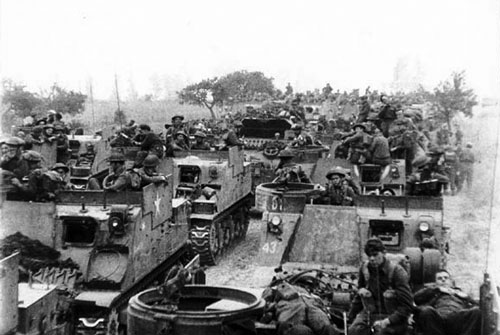 |
The guns were removed and Simonds ordered
salvaged armour plates to be wielded to the Priests existing armour to
create a fully tracked armoured personal carrier capable to stopping
bullets and splinters and keeping up with the Shermans and Fireflies of
the armoured divisions. These new vehicles were called Kangaroos since
they carried infantry safely in their “pouch.” However, the PBI often
referred to these improvised carriers as Defrocked Priests. A Kangaroo
typically carried ten men and all their kit plus a crew of two,
however, twenty men could be crammed in. |
|
For Operation Totalize, Lt General Simonds commanded the specially reinforced II Canadian Corps consisting of:
2nd Canadian Infantry Division under Foulkes
3rd Canadian Infantry Division under Keller
4th Canadian Armoured Division under Kitching
1st Polish Armoured Division under Maczek
51st (Highland) Highland Division under Rennie
33rd Armoured Brigade under Scott
Units of 79th Armoured Division under Hobart
The 79th was the specialist division with mine-flail tanks, flame-thrower tanks, assault bulldozers, etc.
|
 |
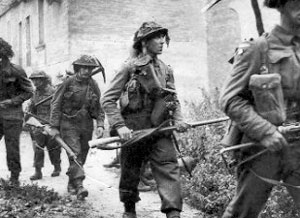 |
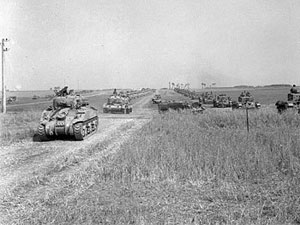
Phase 1 was a great success. Allied artillery fired marker shells at German positions. Over 1000 RAF bombers targeted the marked positions. Six columns of Sherman and Firefly tanks four abreast moved out into the night. Each column was supported by one or more mine flail tanks and followed by Kangaroos bearing the supporting infantry. There were mishaps such as tanks falling into bomb craters as well as combat casualties, but by dawn, the majority of the Phase 1 units were sitting on their objectives with minimal losses.
Phase 2 was to kick off at 12.26 when American heavy bombers would conduct a daylight raid on targets about 1 mile forward of the Phase 1 objectives. Two twelve plane groups dropped they bombs 3 to 4 miles short of the target area.
|
The casualties in the Allied rear area where probably greater than the
damage done to the entrenched German defenders. During the morning, the
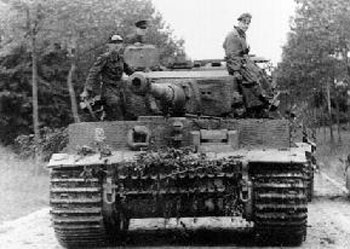
Germans had not been idle. SS-Oberführer Kurt Meyer of the 12.
SS-Panzerdivision rallied the troops of the 89. Infanteriedivision and
began a counter-attack with his own 12. SS-Panzerdivision’s as well as
101. Schwere SS-Panzerabteilung with three Tigers commanded by
SS-Hauptsturmführer Michael Wittman. This was to be Wittman’s last ride
as the Tigers drove by the concealed tanks of the 1st Northamptonshire
Yeomanry. At around 12.40 the Firefly of A troop with the support of
the other tanks engaged and destroyed all three Tigers from the flank
and rear near Saint-Aignan.
See Ken Natt’s Scenario…
|
 |
 |
The phase 2 troops had been held up by massive traffic jams in the rear area, heavy German shelling, and ‘friendly’ bombs for the B-17s. The two leading Polish regiments moved forward around 13.35. The first was the 24th Lancers with 43 Shermans, 9 Fireflies, and 11 Honeys. The other was the 2nd Polish Armoured with a similar strength. This was their first combat since arriving at Normandy and they advanced in lines similar to a cavalry formation. The Germans took a toll on these tankers speeding across open ground. By the end of the day the 24th had lost 20 tanks and the 2nd had lost around 15.
On the north flank, the 4th Canadian Armoured pushed forward, but only tentatively. The 4th was also delayed by problems in the rear area.
|
|
The disorder of the Allied daylight bombing had passed by the time the
4th arrived and any holes in the German lines quickly disappeared.
Simonds ordered both the 4th Canadian and the 1st Polish to continue attacking into the night, however, both units failed to respond. Worthington Force consisting of the British Columbia Regiment (28 CAR) and three companies of the Algonquin Infantry were ordered to advance to Point 195 by first light. The force became lost in the night and ended up 4 miles east of their objective, surrounded on 3 sides by the Panthers of the 12. SS-Panzerdivision. When dawn broke, the force was encircled and destroyed as Allied troops could not locate them. 47 tanks and about 240 men were lost or taken prisoner.
|
 |
 |
While fighting continued, the momentum for Operation Totalize had been lost. The attack succeeded in tying up German resources in the Commonwealth sector and prevented units from being moved against Patton’s Operation Cobra. This was important, but the failure of the Canadians to score a break-through resulted in Totalize being viewed as a missed opportunity.
|
Last Updated On Monday, March 10, 2008 by Wayne at Battlefront
|
|
|