|
|
|
|
Products mentioned in this Article
--None--
|
|
|
|
|
|
|
|
|
 |
|
|
 |
A Tale of Two Tigers: Part One
Failing To Plan - Then Plan To Fail
with Blake Coster
When I first starting working for Battlefront in 2007, the Design Studio was well entrenched in Normandy with the pending book release at the time being Villers-Bocage. I look back on this time fondly, as my Flames Of War baptism of fire came shortly after its release, at that year's Grand Tournament. Phil was gracious enough to rope me into the event to make up the odd numbers, borrowing his 7th Armoured Divison army. |
| Below: The Tigers of 2nd Kompanie of the 101. SS-Schwere Panzerabteilung circa 2007. |
 |
Ironically, my only victory over those two days came against Michael Wittmann and the Tigers of the 101. SS-Schwere Panzerabteilung. But I was impressed with how the army performed and since I was still brand new to Flames Of War it seemed like the perfect first army: all tanks and not many of them to paint.
Right: Tiger 223 for my first Flames Of War army. |
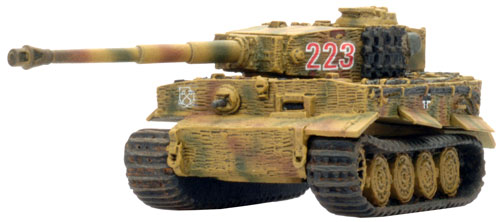 |
Growing up I had done my share of scale modelling with varied results. I recently re-discovered some of my early attempts at my parent's place that were, how do you say it, cringe-worthy at best. But many years have passed since those early struggles. Even my 2007-era Tigers (seen above), which weren't too bad despite being the first Flames Of War miniatures I had painted at the time, are now getting a bit long in the tooth compared to my current techniques and painting abilities.
|
My Plan
A wise man once said, "A goal without a plan is a wish." So here is my attempt at explaining how I intend to model my Tiger I E. |
Chipped Zimmerit
The plastic Tiger I E is an excellent model and one of the details that really makes it stand out is the Zimmerit. This feature alone offers a nearly endless amount of modelling opportunities.
Since the formula for Zimmerit included an Ochre coloured pigment (the exact formula for Zimmerit was 40% Barium sulphate; 25% polyvinyl acetate or PVA (similar to the glue); 15% pigment (Ochre in colour); 10% Zinc sulphide and 10% sawdust), I'm only going to model just small chips in the ridged surface in the to help break-up to factory fresh look of the plastic model.
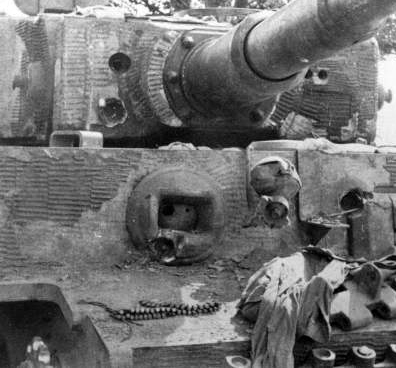
Right: A battle-weary Tiger I E featuring several patches of damaged Zimmerit. |
 |
 |
 |
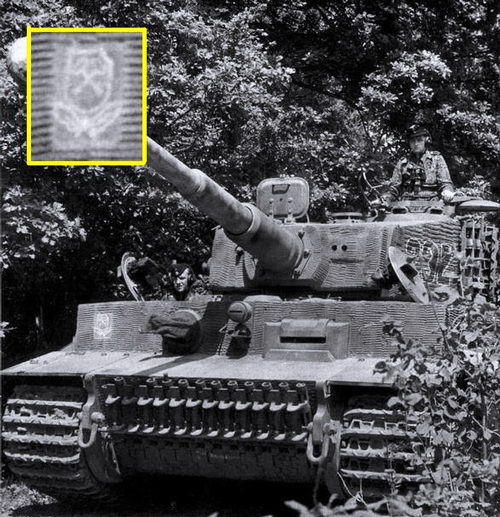
I will also attempt to create a Zimmerit-free square on the left-hand of both the glacis plate and the rear hull plate in which to hand-paint (yes, that's right, hand-paint) the unit's insignia.
Left: A stylised version of the insignia of the 101. SS-Schwere Panzerabteilung.
Far left: An example of the insignia on an actual Tiger I E of the 101. SS-Schwere Panzerabteilung. |
|
What is Zimmerit?
When Germany developed the Hafthohlladung (a cone-like, magnetic shaped charge) in 1942, they were quick to realise that a similar weapon could be used against them and a countermeasure was quickly sort. The answer, Zimmerit, was developed by a company called Zimmer AG as a non-magnetic substance that could be applied to German tanks during manufacture to prevent the adherence of any such devices.
Zimmerit resembled a thick paste and was applied in two coats; a 5mm thick base coat and a second lighter coat that was shaped into distinctive patterns to increase the level of thickness without adding to weight (the Tiger I E required 200kg of Zimmerit) of the vehicle and created an irregular surface for mines to adhere.
Zimmerit was applied to tanks, self-propelled guns and tank destroyers from December 1943 until September 1944.
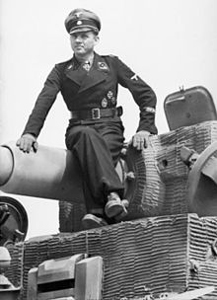
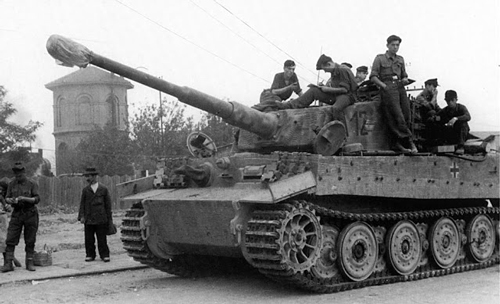
Right: Michael Wittman sits aboard a Tiger I E that has been finished with a coat of Zimmerit non-magnetic paste.
|
 |
 |
Drilling Out The Muzzle Brake
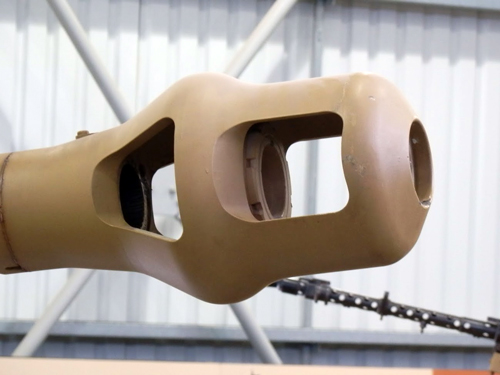
Another feature that the plastic Tiger has over the older resin and metal version is the muzzle brake. I've always been a fan of drilling out the muzzle brake on guns when possible, and with the plastic Tiger I E, two-thirds of the job is already done for you (both baffles are already hollowed out). All you need to do is complete the job by drilling out the muzzle brake along its centre axis and thus create an exit point for those 8.8cm rounds.
Left: A close-up of the muzzle brake affixed to the 8.8cm KwK 36 L/56 gun of the Tiger I E. |
Adding Foilage
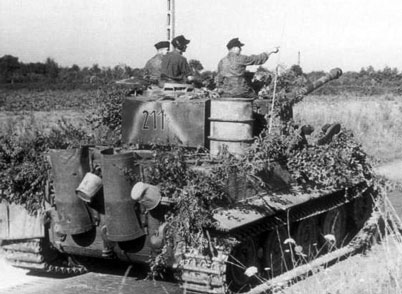
Since Allied fighter-bombers made movement during the day near impossible for the Germans, no tank during the Normandy campaign would be caught dead without a decent amount of foliage covering the vehicle in an attempt to conceal them from those pesky Jabos.
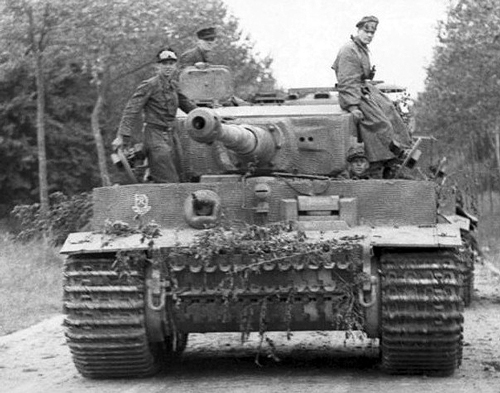
I will also be adding a modest level of foliage camouflage to my Tiger I E. I won't go too overboard, just enough to add some character (see the image on the right).
Right: A Tiger I E with a modest level of foliage camouflage. |
 |
 |
 |
Using the Stowage and the Extra Bits
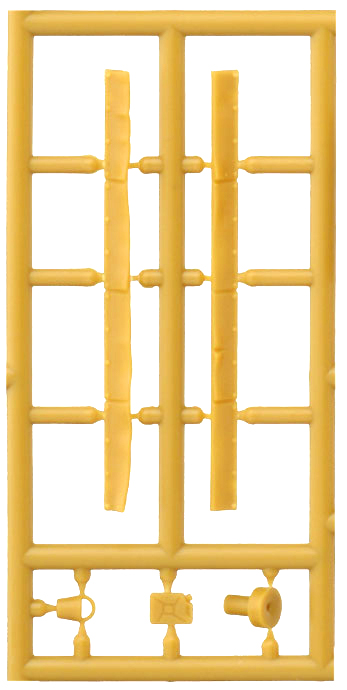
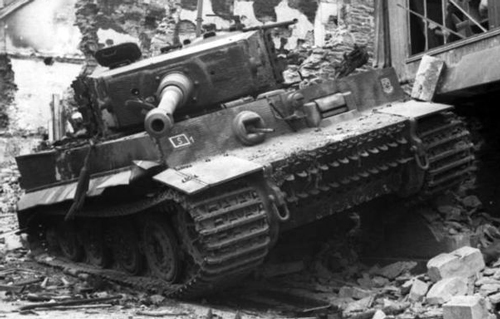
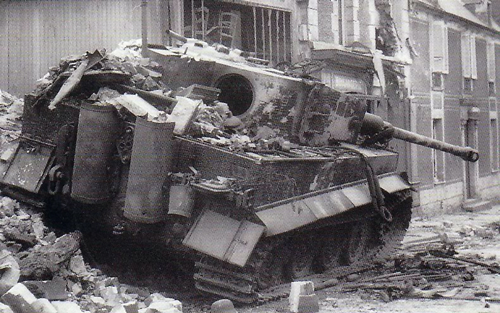
I plan to the use most, if not all of the stowage and extra bits found on the plastic Tiger I E sprue. The damaged side skirts are a fantastic addition.
Far Left: The stowage and extra bits found on the plastic Tiger I E sprue. These include damaged side skirts, a jerry can and a bucket.
Left: Buckets were surprisingly common on German tanks.
|
| Below: A knocked out Tiger I E at Villers-Bocage. Note the damage to the side skirts. |
Below: The same knocked out Tiger I E from a different angle. Note the bucket hanging from the jack. |
 |
 |
Improvised Armour
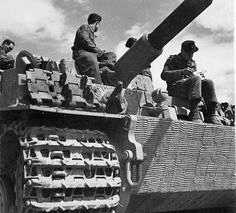
Using the spare track links, I'll model some improvised armour to the glacis plate.
Right & far right: Examples of spare track links used as improved armour on the Tiger I E. |
 |
 |
 |
Minor Bumps and Bruises
Finally, using James' excellent article on detailing the plastic T-34 as a guide I'll add a few minor bumps and bruises to my Tiger as I see fit.
Read James' article Adding Detail To Your Plastic T-34s here...
Other things I'd like to try is adding an AA machine-gun mount to the ring of the cupola, a radio antenna and possibly another way of representing the Tank Commander
Join me in part two next week to see if I've bitten off way more than I can chew.
~ Blake. |
Last Updated On Wednesday, February 15, 2017 by Blake at Battlefront
|
|
|