|
|
|
|
Products mentioned in this Article
--None--
|
|
|
|
|
|
|
|
|
 |
|
|
 |
Battle Report III Villers-Bocage
Our third Villers-Bocage battle report features our newest writer Mike Haught against our new painter James. Mike used a the 50th Division Rifle Company with 7th Armoured support, while James selected a Panzer Lehr Panzerkompanie armed with Panzer IV H tanks.
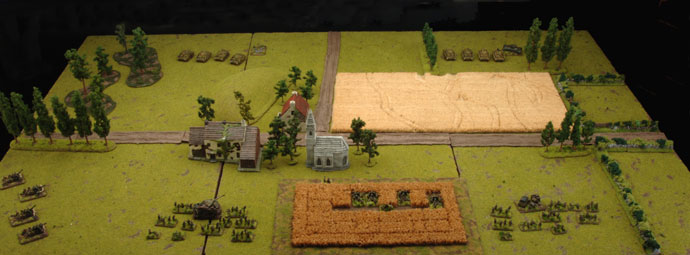
We decided to fight an Encounter Mission battle using more open terrain, representing the forces as they broke out the Bocage country into the wheat and cornfields around Caen. |
|
James’s Panzer Lehr Panzerkompanie consisted of:
Panzerkompanie Headquarters (Confident Veteran)
|
|
2 Panzer IV H
|
190 points
|
Combat Platoons
|
|
Panzer Platoon
3 Panzer IV H
|
285 points |
Panzer Platoon
3 Panzer IV H
|
285 points
|
Panzer Platoon
3 Panzer IV H
|
285 points |
Support Platoons
|
|
Gepanzerte Panzergrenadier Platoon
3 Squads
Upgrade command to Command Panzerfaust SMG team +10 points
|
335 points
10 points
|
Armoured Car Patrol
2 Sd Kfz 234/2 Puma |
110 points |
Total
|
1500 points
|
|
|
Mike took the Confident Veteran 50th Division option from Villers-Bocage and supported them with the 7th Armoured Division.
It consisted of:
50th Division Rifle Company Headquarters (Confident Veteran)
|
|
Company Command Rifle team and 2iC Command Rifle team
|
30 points |
Combat Platoons
|
|
Rifle Platoon
3 Squads
|
175 points
|
Rifle Platoon
3 Squads
|
175 points
|
Rifle Platoon
3 Squads
|
175 points
|
Weapons Platoons
|
|
Anti-tank Platoon
Two Anti-tank Sections (4x 6 pdr guns)
|
150 points
|
Carrier Patrol
3 Universal carriers
Add extra hull mounted MG to all carriers
|
90 points
15 points
|
Support Platoon
|
|
Machine-gun Platoons
2 sections
|
185 points
|
7th AD Armoured Platoon (Reluctant Veteran)
3 Cromwell IV and 1 Firefly VC
|
325 points
|
Field Battery, Royal Artillery (Reluctant Veteran)
2 Gun Sections
|
170 points
|
Total
|
1490 points
|
|
|
Mike’s Plan
I was pretty stoked to play a British Rifle Company. It’s been a loyal force for me since my early days with the game. I’ve always been a huge fan of the 50th since way back and given the chance to play them as a late war force was too great a temptation!
My plan was pretty blah. As an infantry force, I wasn’t initially too excited about playing an Encounter mission against tanks. The mission demanded my ‘plan’ to be: dig in, get small and hope that’s enough! With veteran infantry and support, I should be able to hold on, but everything depended on deployment.
Fortunately, having eight platoons meant that I could sport four platoons straight away. Recon indicated that I’d be facing “tanks” but I had no idea what else. So, I chose my 6 pdrs and artillery to lend anti-tank support and some infantry to hold down the objectives. I can only hope that the 7th Armoured Division doesn’t leave me hanging!
That’s the plan, but as von Moltke once said, “No plan survives contact with the enemy.”
|
James’s Plan
The safest place for a commander with zero tactical ability is obviously a big metal box with a huge gun attached, so I naturally chose a Panzerkompanie. Having only ever played an infantry army before, this was an exciting change for me. So I wanted tanks, and plenty of them. Surely nothing could stand up to the combined fury of 11 mighty Panzer VIs, I thought. I added a Panzergrenadier Platoon, banking on them to either defend an objective with ferocious tenacity or, if circumstances allowed, attempt a mounted assault, which sounded exciting. Finally, I hoped a pair of Pumas might be able to swoop in at the last possible moment and claim an objective (or perhaps arrive last and drive around in the rear looking cool.)
My initial strategy was to push forward as early as possible and attempt to shoot something off an objective – not the most subtle approach, but Mike had a more platoons in reserve than I did, and I hoped to make some quick progress before they started to arrive.
|
|
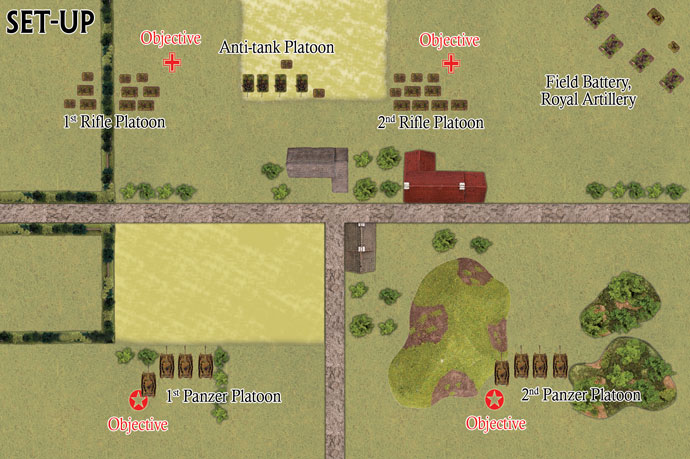
James won the dice off to see who is to attack, though this has minimal impact as he just selects the tableside he deploys in. He also wins the dice off to see who has the first turn.
Because the Encounter Mission has reserves James has only two Panzer Platoons and the HQ to deploy. Mike with a Rifle Company has a few more platoons to play with. He deploys his artillery, two Rifle Platoons and the Anti-tank Platoon on the table.
|
German Turn 1
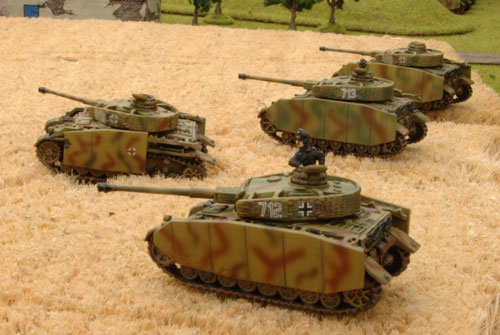
On the left flank James advanced his 1st Panzer Platoon through the wheat fields where they could sight the British 6 pdr guns in a smaller wheat field on the other side of the road. The platoon was accompanied by the Company commander in his Panzer IV.
On the other flank the 2nd Panzer Platoon and the 2iC remained stationary covering the objective.
The 1st Panzer Platoon then opened fire on the 6 pdr guns of the British Anti-tank Platoon and destroy a gun.
|
 |
|
British Turn 1
The British 1st Rifle Platoon advanced along the bocage line on the left flank towards the objective on that flank, using the Bocage and tree line to conceal themselves from the Panzer IV H tanks in the wheat field. The 2iC Command team accompanied them.
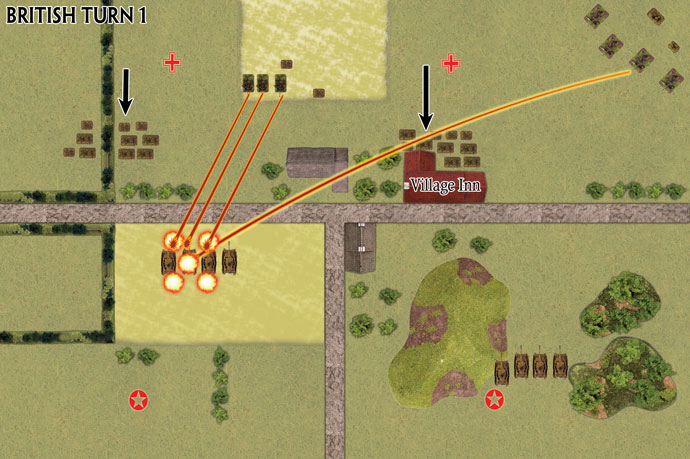
The other (2nd) Rifle Platoon and the Company Command team advanced up to the village inn, positioned in front of one objective, and prepared to take the building in the following turn.
|
The 6 pdr guns of the Anti-tank Platoon opened fire on the 1st Panzer Platoon in the wheat field. They hit one of the Panzer IV H tanks, but its armour deflected the round.
The Field Battery, Royal Artillery was called down on the same platoon by the observer positioned with the 6 pdr guns. The bombardment was successfully ranged in and artillery rounds fall amongst the Panzer IV H tanks. Two were eventually bailed out, one of which was the Company Command tank.
|
German Turn 2
Both Panzer IV tanks bailed out by the British artillery were able to gather their wits and ready for action. The 1st Panzer Platoon and Company Command tank moved forward to the right so they could fire on the 6 pdr guns.
The 2nd Panzer Platoon and 2iC tank moved forward towards the road with the intention of threatening the objective covered by the British 2nd Rifle Platoon.
|
 |
|
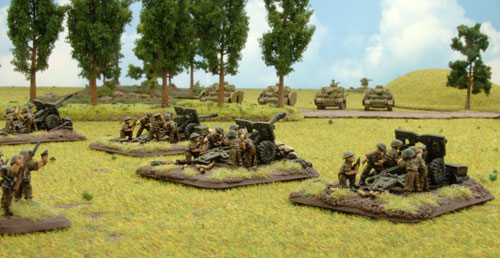
They may also get an opportunity to shoot at the artillery battery.
The
1st Panzer Platoon’s fire on the anti-tank guns was not as successful
as the last turn and they only get the one hit, which the gun saved.
Both Panzer Platoons and the accompanying commanders make successful
Storm Trooper moves. The 1st Panzer Platoon retreated back into the
wheat to get concealment while the 2nd Panzer Platoon continued to
advance. |
 |
British Turn 2
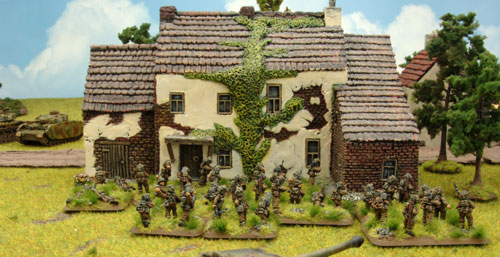
The 1st Rifle Platoon continued to move forward, creeping past the flank of the 1st Panzer Platoon. The 2nd Rifle Platoon occupied the village inn.
The Anti-tank Platoon shot at the 1st Panzer Platoon again. They only got the one hit on the enemy armoured platoon and bailed out one tank. However, the observer called in the 25 pdr guns on the new positions of the panzers and ranged them on target again.
|
| This time the bombardment bailed out three of
the four Panzer IV H tanks in the position. The Company Commander was
one of the tanks bailed out, and one hit was on the tank already bailed
out by the 6 pdr guns. The double bailed tank crew, however, makes a
motivation test to remain with the vehicle. Despite the fact that the
platoon has only one running tank a platoon motivation test is not
required, as no tank has been destroyed yet. |
German Turn 3
It’s the third turn so the Delayed Reserves can start arriving. They don’t and the Germans will have to fight for another turn with what they have.
Two of the three bailed out tanks recover and ready for action (Company Command tank and Platoon Command tank).
|
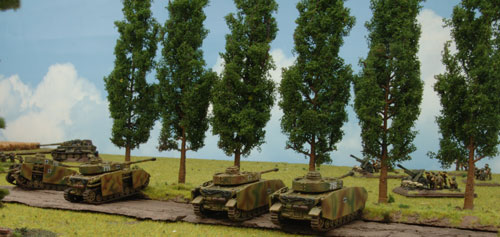 |
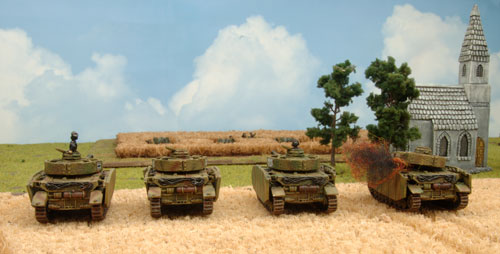
The 1st Panzer Platoon and the Company Command tank remained stationary, hoping to overwhelm the British Anti-tank Platoon with shear weight of fire. The 2nd Panzer Platoon moved up to the tree line shielding the British artillery from direct fire. The 2iC tank moved around the flank of the trees, but the platoon noses into the tree line to gain concealment.
The 2nd Panzer Platoon, except one tank still to enter the tree line, and the 2iC tank then fired on the artillery battery and destroyed two 25 pdr guns.
The 1st Panzer Platoon and Commander fired the three functioning tanks at the Anti-tank Platoon. Despite the increased volume of fire on two shots hit. One gun makes the save, and one fails. The one hit on the German gun fails to make a firepower test and the gun proved adequately protected by its gun shield. The net result was zero destroyed guns.
In the Assault Step the 2nd Panzer Platoon made a Storm Trooper move to get the last Panzer IV H tank into the tree line.
|
 |
 |
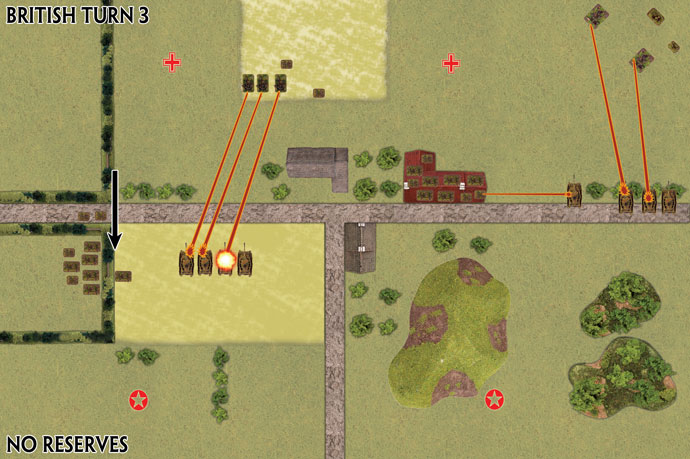
British Turn 3
The British also received no reserves this turn. The 1st Rifle Platoon moved further into the wheat field and across the bocage toward the German objective on the left.
The Anti-tank Platoon fired on the 1st Panzer Platoon and the Company Command tank. They hit all the tanks, destroying one, and bailing out the two others and Company Command tank.
|
The Field Battery, Royal Artillery then fired on the 2nd Panzer Platoon in the tree line facing them. Both remaining guns hit their targets, but the front armour of the Panzer IV H was enough to withstand the 25 pdr rounds.
A PIAT from the 2nd Rifle Platoon took a shot out a window at the side armour of the 2iC Panzer IV H tank sitting to the left of the tree line in the open. The shot missed.
|
|
German Turn 4
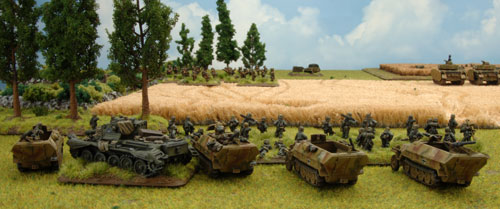
The first German reserves arrive and Hauptmann Von Braun brought on his Panzergrenadier Platoon. He rolled a die to see where they arrive according to the scattered reserves rules and they arrived in the central sector of the table edge.
The Company Command tank, the Command Panzer IV H tank and a Panzer IV H tank all recovered from being bailed out.
|
|
The newly arrived Panzergrenadiers drove their half-tracks up to the objective threatened by the advancing British 1st Rifle Platoon.
The Panzergrenadiers shot their half-track machine-guns at the British infantry and knocked out one team, but didn’t pin them.
The 2iC tank turned to face the direction of the PIAT fire from the building.
|
 |
The 2nd Panzer Platoon fired on the 25 pdr guns of the artillery battery again, this time with their full rate of fire. The British platoon became pinned and two more guns were destroyed.
The 2iC tank fires on the building occupied by the 2nd Rifle Platoon who had exposed themselves with PIAT fire. All the tank managed to do was spray the brickwork and add a few more chips to the ancient building.
The 1st Panzer Platoon on the other flank fired on the anti-tank guns again. They got two more hits, but once more one gun saved and the other proved well protected (failed firepower test against gun shield).
The Field Battery, Royal Artillery was forced below half strength and had to make a motivation test at the end of the Shooting Step. The Reluctant 7th Armoured Division troops failed and the Staff and Command teams were forced to leave the table.
During the Assault Step the Germans made a number of Storm Trooper moves. The Panzergrenadiers dismounted in front of the objective and the 2nd Panzer Platoon moved out of the trees to move along the road toward the village inn and the British 2nd Rifle Platoon.
|
 |
British Turn 4
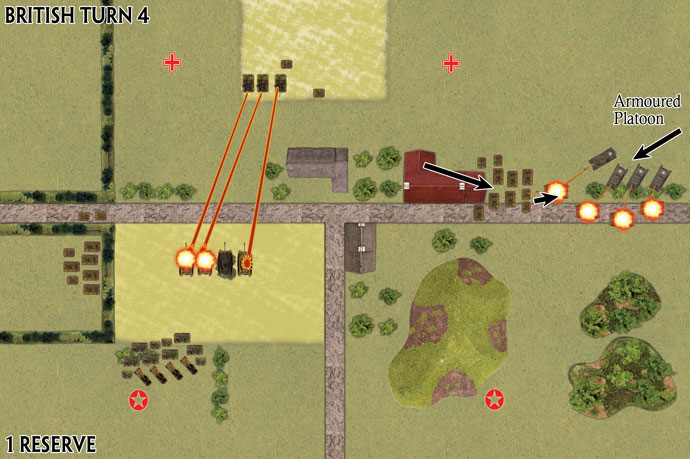
In their second attempt to get reserves (this time rolling two dice) the British managed to call up the Armoured Platoon. Major Haught got his to arrive on the right flank with his Scattered Reserves die roll. He brought them on the British side of the tree line previously occupied by the 2nd Panzer Platoon. The Germans Storm Trooper move was starting to look a little unwise.
|
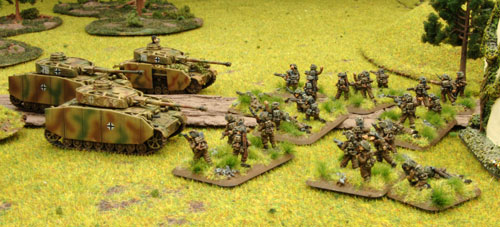 |
Buoyed by the arrival of his Armoured Platoon the British commander ordered his 2nd Rifle Platoon out of the inn to threaten the front of the 2nd Panzer Platoon and the 2iC.
The 1st Rifle Platoon went to ground in the wheat field to reconsider its options now that the Panzergrenadiers have arrived on the battlefield.
|
|
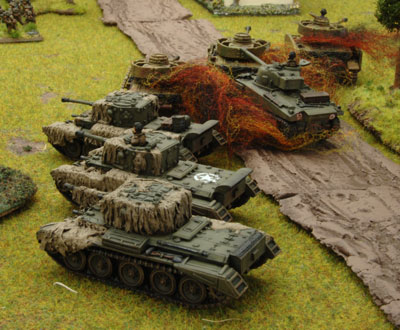
The Armoured Platoon moved up to the tree line to take shots at the 2nd Panzer Platoons side and rear armour.
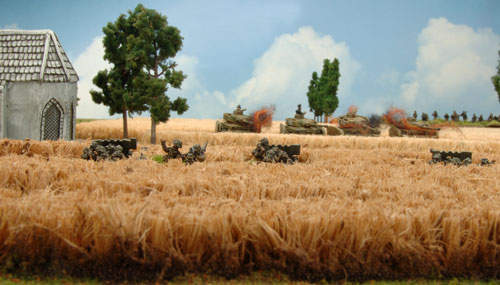
The anti-tank guns fired another volley at the 1st Panzer Platoon and Company Command tank. They got four hits and destroyed two Panzer IV H tanks, one of which was the tank of the Company Commander. Another tank was bailed out, leaving just two tanks, both of which were bailed out. The Commander uses his extraordinary powers as a Warrior team to take command of one of the bailed out tanks. He could then continued to command the battle. Von Braun rides again! The platoon also made its motivation test and remains in the battle.
|
The 2nd Rifle Platoon fired a PIAT at the German 2iC tank. The round hit and bailed out the tank.
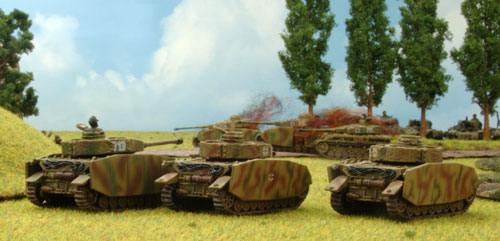
The Armoured Platoon fired on the 2nd Panzer Platoon, or sitting duck platoon might have been more appropriate, and they got three hits with the British tanks. Two Panzers were destroyed and the third was bailed out. The platoon promptly failed its motivation test for being below half strength and the crew of the bailed tank abandon it and flee to the rear.
|
 |
| The 2nd Rifle Platoon then assaulted the bailed
out 2iC Panzer IV H. The tank couldn’t fight back and was automatically
destroyed. |
 |
German Turn 5
Due to the loss of 2nd Panzer Platoon the German force was below half-strength on table (platoons still in reserve don’t count towards the force total until they arrive on table) and have to take a company morale test. They pass and fight on for another turn.
The Germans got two reserves with their three
dice, and it couldn’t have been timelier.
|
|
His last two platoons to
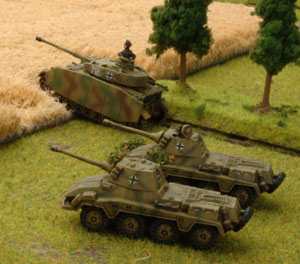
arrive were the 3rd Panzer Platoon and the Armoured Car Patrol. Both
platoons arrived in the centre. Von Braun places them so the Puma
armoured cars headed left to cover the Panzergrenadiers and the Panzers
headed right to shore up the right.
The Company Command Panzer IV H tank retired through the wheat to support the Panzergrenadiers.
|
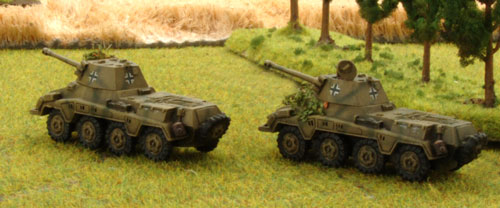 |
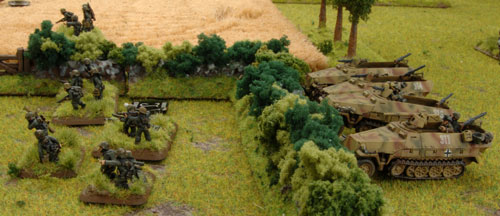
The Pumas advanced to the objective behind the Panzergrenadiers and the Panzergrenadiers moved towards the 1st Rifle Platoon behind the bocage. The 3rd Panzer Platoon advanced on the British Armoured Platoon cemented in the tree line.
The Panzergrenadier half-tracks shot on the 1st Rifle Platoon through the bocage. They got five hits and the British were pinned down. The Rifle Platoon made 4 saves and the one failed saw a PIAT team knocked out.
The dismounted teams of the Panzergrenadier Platoon also shot at the 1st Rifle Platoon for another fours hit, but caused no further damage.
|
The 3rd Panzer Platoon shot at the 2nd Rifle Platoon who were in the open after their assault on the 2iC Panzer IV H tank. They scored five hits and pinned the riflemen down, but didn’t knock out any teams.
The Pumas and 3rd Panzer Platoon successfully made a Storm Trooper move forward.
|
 |
British Turn 5
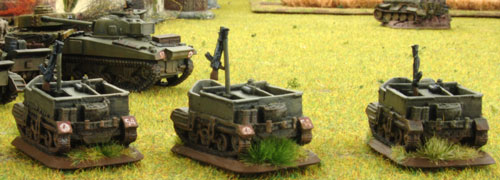
More British reserves arrived in the form of the Carrier Patrol. The Carriers arrived behind the Armoured Platoons.
The 1st and 2nd Rifle Platoons unpinned. The 2nd Rifle Platoon retires back towards the village inn.
|
The Carrier Patrol raced around the tree line towards the 3rd Panzer Platoon.
The 1st Rifle Platoon fired on the Panzergrenadiers and take out a Panzerschreck team. However their fire was light and sporadic and didn’t cause the Panzergrenadier any further trouble. |
The Armoured Platoon, with the Firefly in the tree line, fired on the advancing 3rd Panzer Platoon. With just the Cromwell fire the British tanks took out all three Panzers.
The anti-tank guns could still see the German Company Commander’s tank turret in the wheat field and the Panzergrenadiers. They fired on both targets. They hit and killed another Panzerschreck team, but missed the command tank.
|
 |
German Turn 6
Once more the German company forced was below half-strength and was forced to take a Company Morale check. They pass again and continue to fight.
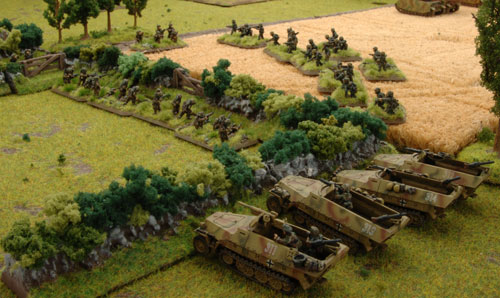
The Panzergrenadiers advanced up to the bocage edge and prepared to assault the British 1st Rifle Platoon. The Pumas advanced into the wheat field to support the Commander who also moved his Panzer IV H forward.
The Panzergrenadier half-tracks and Panzergrenadier teams fired on the 1st Rifle Platoon and knocked out three teams and pinned down the entire platoon.
|
|
The Pumas and command tank shot at the Anti-tank Platoon, but the 6 pdr guns once move proved hard to kill.
The Panzergrenadier assaulted the 1st Rifle Platoon with all their infantry teams. Defensive fire from the British was ineffective and the Germans press home. After two rounds of combat the Panzergrenadiers failed a motivation test and are forced to retreat. They lost three teams during the assault while the riflemen lost four teams.
|
 |
British Turn 6
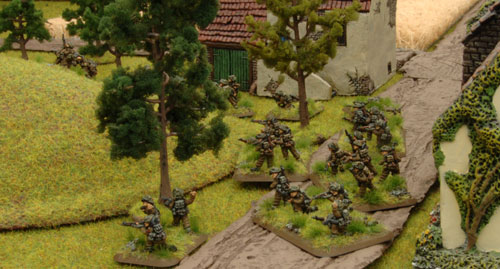
The final two reserve platoons of Major Haught’s company arrived on the field. They consisted of the 3rd Rifle Platoon and the Machine-gun Platoon who arrived on the left flank behind the 1st Rifle Platoon.
The 1st Rifle Platoon consists of only the command team, so Major Haught removed the team from play and sent it to the rear.
|
 |
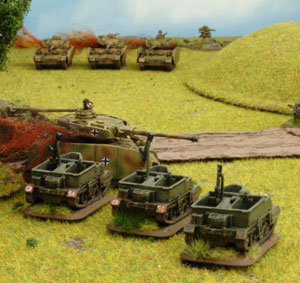 |
This saved the company from losing another platoon, but reduces the company total strength by a platoon.
The new platoons advanced towards the Panzergrenadier Platoon to fill the gap left by the 1st Rifle Platoon. The 2nd Rifle Platoon advanced around the hill by the village towards the objective on the right. They were joined by the Carrier Patrol who speeds past the burning wrecks of the 3rd Panzer Platoon towards the objective on the right.
The Anti-tank Platoon shoot at the German command tank and the Pumas. One Puma gets bailed out and the German Commander’s tank was bailed out twice and was forced to take a motivation test. Hauptmann von Braun passed the motivation test and remained on the field to command his troops.
|
|
Turn 7
The German company was still below half strength and was forced to take a Company Morale check before continuing the turn. The German company’s morale failed and Hauptmann von Braun withdrew the remains of his force from the field.
Mike’s Closing Thoughts
The moment the game began I decided that digging in was for people who are into being unimaginative. That’s right, I said it! The idea was to see if I could throw the German tanks on the defensive long enough to pull in my reserves, a plan which only half worked.
I thought that I was done when the Royal Artillery packed its bags and headed for the rear.
|
 |
 |
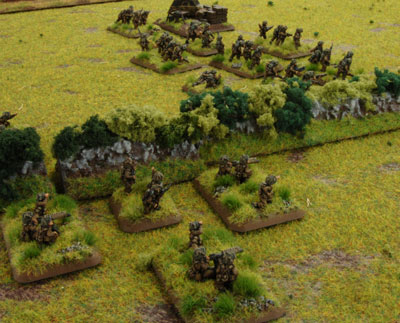
The nearest infantry was inside the inn, too far to contest the objective, which was now wide open for the taking! Having the Cromwells turn up when they did saved me from my bad planning.
On my right flank, the 1st Rifle Platoon’s mission shifted from capturing the objective to stalling the Panzergrenadiers for as long as possible. |
|
The tenacious German company commander was another problem. He wouldn’t retreat, even having had a mount shot from under him!
The stubborn 6 pdrs in the centre and the success on the right flank allowed me some latitude to press on an objective. However, by this point my remaining reserves hit the table and showed up to take 1st Rifle Platoon’s position, locking down the right flank.
The game was tense from the beginning, and a considerable amount of firepower tests were failed on both sides, effectively pushing the turn count up. Several lucky rolls saved me from a strategic plan fit only for a retarded monkey. Nevertheless, it was a close and exciting game!
James’s closing thoughts
Lacking even so much as a retarded-monkey plan, I made a bee-line for Mike’s 6 pdrs, hoping to knock them out quickly and leave the left-hand objective relatively unprotected.
|
 |
Unfortunately, I managed to destroy one gun with my first round of shooting, which deluded me into thinking I could finish the rest off in a similar fashion. Had they all survived my first hasty salvo, I would probably have been encouraged to try something more imaginative like outflanking or assaulting the guns. But instead I sat like a lemon in my wheat field, bouncing shots off their impenetrable gun shields while Mike gave me an expert demonstration of Panzer IVs’ fragility.
Knocking out the 25 pdr battery was the high point of the game for me. What a shame it was immediately followed by a steady succession of lows. Forgetting that Mike’s reserves were bound to start appearing up at any moment – possibly even directly behind my Panzers’ exposed flank – was the sort of mistake which makes inept commanders like me look even more inept.
All in all, this was the most exciting game I have played in a long time. Congratulations to Mike, who was very gracious in victory.
|
Last Updated On Wednesday, December 19, 2007 by Wayne at Battlefront
|
|
|