|
|
|
|
Products mentioned in this Article
|
|
|
|
|
|
|
|
|
 |
|
|
|
Late-war British Decal Recognition Guide
with Casey Davies
The Late-war British decal set covers a lot of ground. For
the uninitiated, it can prove quite daunting to determine which decals go
where. But never fear, in this article I will provide a quick recognition guide
to help show you what the decals are for.
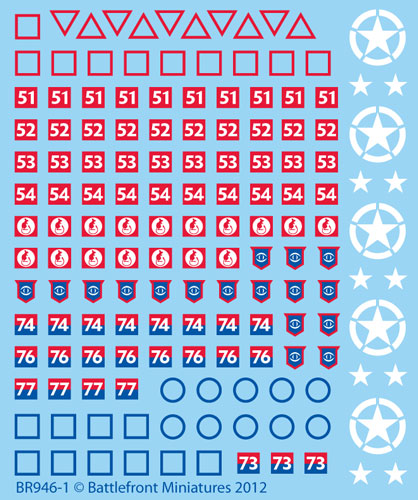
Left: An example of sheet one from the British Late-war decal set. |
The Armour Divisions
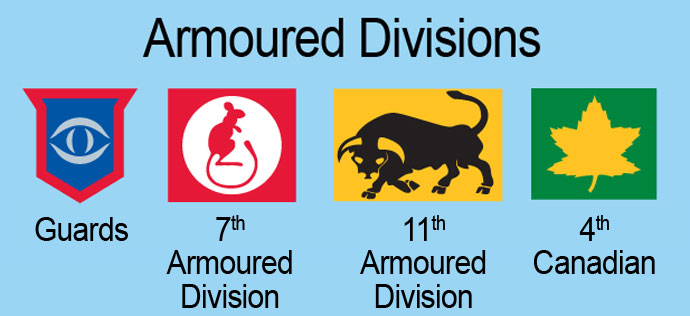
The decal set gives you options for four armoured divisions:
|
■ Guards Armoured Division.
■ 7th Armoured Division.
|
■ 11th Armoured Division.
■ 4th Canadian Armoured Division.
|
| Below: The Armoured Divisions represented in the British Late-war decal set. |
|
 |
The Senior Regiment
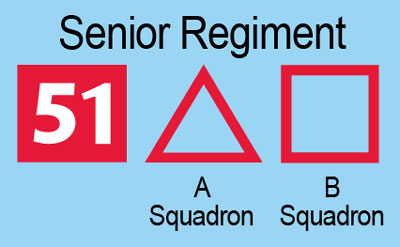
Each Armoured Division contains three Armoured Regiments, each
containing three Armoured Squadrons. Using this decal set you can field A
or B Squadron from the Senior Regiment (which used the 51 on a red
square) with the red squadron markings.
Right: The markings for the Senior Regiment. |
The Second Regiment
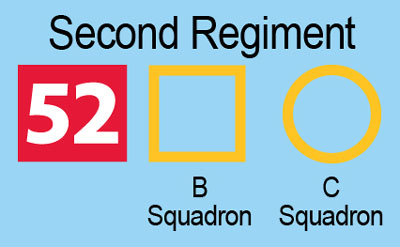
The Second Regiment used the 52 on a red square marking and the yellow squadron markings. The decal set includes markings for B and C squadrons.
|
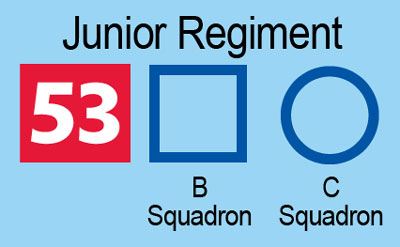
The Junior Regiment
The Junior Regiment used the 53 on a red square marking with the blue squadron markings. The set includes markings for B and C squadrons.
|
| Below: The markings for the Second Regiment. |
Below: The markings for the Junior Regiment. |
 |
 |
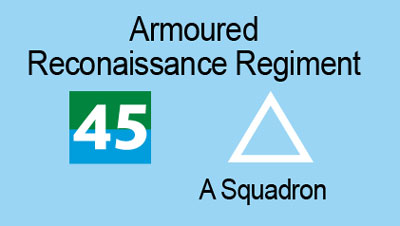
Armoured Reconnaissance Regiment
The
Armoured Reconnaissance Regiment is an unbrigaded regiment so it uses
white squadron markings. Its tanks are marked with a white 45 on a green
and blue square. |
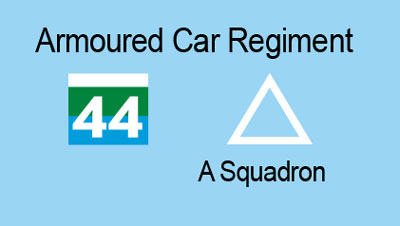
Armoured Car Regiment
The Armoured Car Regiment is also unbrigaded, using white squadron markings. It
pairs them with a white 44 on a green and blue square with a white line
over the top, indicating they are corps troops. |
| Below: The markings for the Armoured Reconnaissance Regiment. |
Below: The markings for the Armoured Car Regiment. |
 |
|
Other Numbers within an Armoured Division
An armoured division contains more than just tanks. Each division contains a motor battalion, two artillery regiments, an anti-tank regiment, and a light anti-aircraft regiment. Each of these regiments pairs the divisional symbol with one of the numbers shown here.
|
Below: The numbers for the Field Artillery Regiments.
|
Below: The number for the Motor Battalion.
|
Below: The number for the Light AA Regiment.
|
Below: The number for the Anti-tank Regiment.
|
 |
 |
 |

|
Churchills and Crocodiles
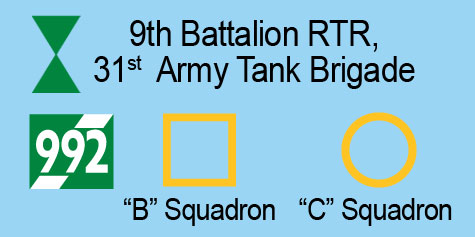
In addition to the Armoured Divisions, this decal set provides decals for Churchill and Churchill Crocodiles tanks from the either the B or C squadron of the 9th Battalion Royal Tank Regiment, 31 Army Tank Brigade. The 31 Army Tank Brigade only contains tanks as it supports an infantry division when it attacks.
Right: The markings for the 9th Battalion RTR, 31st Army Tank Brigade.
|
|
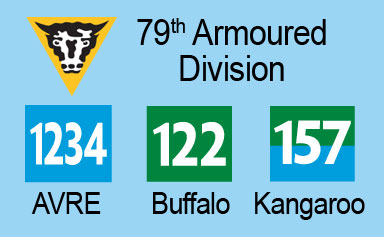 |
79th Armoured Division
The 79th Armoured Division contains all of the funnies or specialist tanks such as the bunker busting AVREs, the Buffalo amphibious landing craft, and the Ram Kangaroo armoured personnel carrier.
Left: The marking for the 79th Armoured Division.
|
Serial Numbers
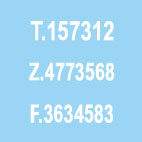
Each vehicle has a white serial number. The ‘T’ series of numbers belongs to tanks, the ‘Z’ series belongs to half-tacks and the ‘F’ series belongs to armoured cars and carriers.
Right: Examples of 'T', 'Z' and 'F' numbers.
|
|
 |
Allied Stars
Most British vehicles have a small star on each side and often the rear. Most vehicles also have a large star as an air recognition symbol on the cab or the top of the turret.
Left: Examples of Allied stars.
|
Bridge Classification Numbers
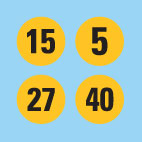
Bridge classification numbers identified whether a vehicle was able to cross a bridge or not. Most vehicles only have one bridge weight on the front of the vehicle. Use the 5 on small vehicles like armoured cars, trucks or half-tracks. Use the 15 on Stuart tanks. Use the 27 on medium tanks like Cromwells and Shermans and the 40 on heavy tanks like Churchills and Crocodiles.
Right: Examples of bridge classification numbers.
|
 |
I hope that you found this article informative and it allows you to add that little bit of extra realise to your models.
~ Casey.
|
Last Updated On Wednesday, February 20, 2013 by Blake at Battlefront
|
|
|