|
|
|
|
Products mentioned in this Article
--None--
|
|
|
|
|
|
|
|
|
 |
|
|
 |
Commandos vs. Engineers: Part Three
Painting Forces for Shifting Sands
with Mark Francis & Mike Haught
Mark’s Zany Kampfgruppe
When I'm painting an army for Flames Of War, I usually pick a unit that I really want to paint first rather than hitting the project in order by doing the HQ, then the Combat Platoons, etc. This sets the stage for me as to how I want the overall army to look. Luckily in this case, the platoons happen to be the same (well, the combat platoons anyway).
I painted up the Ersatz StuGs and Panthers using an OD Green approach rather than the Reflective Green colour used by the Battlefront painters, but the end result just wasn't enough for me. Although the Battle of the Bulge began in fair conditions (as fair as can be in the Ardennes in December), the iconic vision of the Battle of the Bulge is that it was fought in deep snow, so I wanted to do a little more to the tanks to give them that winterized look. In so doing, I realised that the rest of the army would have to follow suit. Sometimes this is a tough decision to make because it can sometimes pigeon-holes the force for one specific battle or theater of operations rather than being a generic force that can be used on multiple battlefields. However, this is Shifting Sands and I wanted to do something special for it.
|
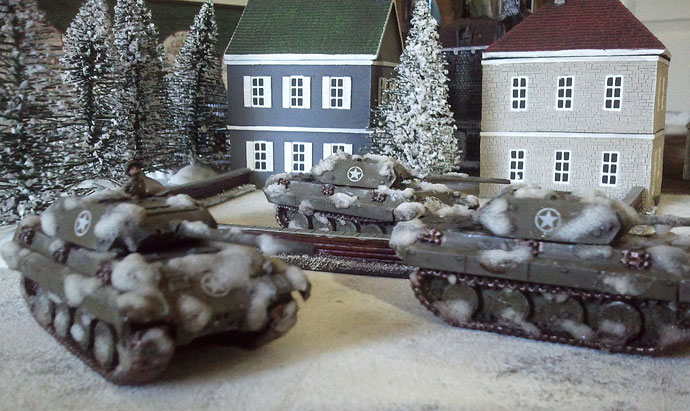
After looking through some images, I found some that had the Ersatz vehicles covered in patches of snow rather than being totally covered. This is the look I wanted to emulate. I ended up using a combination of crushed glass mixed with water effects (be sure to wear a mask if you are working with crushed glass!). This result left an icy appearance on the tanks rather than fresh snow, so I finished with a light drybrush of pure white to show some snow that had yet to melt. The end result was a little troubling simply because there was no turning back!
|
 |
Luckily I was happy with the result and I finished my Panthers and StuGs at the same time, knocking out the armoured element of my Shifting Sands force. At this point I have to decide what to paint up next. I really should have a crack at one of the infantry platoons, but it's hard to ignore the four Skorzeny teams I have sitting on my desk. Although not directly in my force (Skorzeny Commandos are Firestorm units only at Shifting Sands), I really want to paint a few of these guys and it will give me a test bed for how I want to do the snow bases.
~ Mark.
|
Mike’s Damned Engineers
Like Mark I like to start with what is really exciting in my list. These are easily the Engineer platoons, as I’ve got some ideas on how to make them stand out from normal infantry. However, they will take a bit more planning, so I’m going to focus on the peripheral units first. I’ve got a lot already painted for my army, so this week I’ll post up some photos of the completed platoons and talk basing.
|
|
Mud, Mud, and more Mud
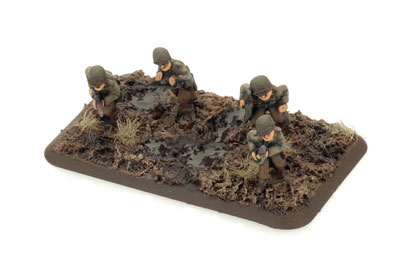
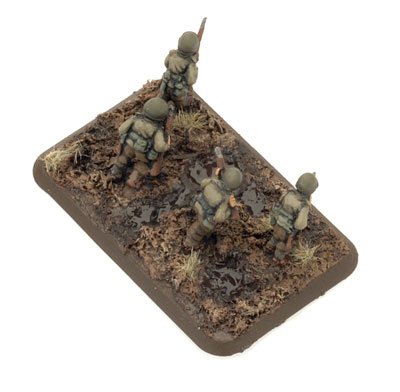
As you can tell, I’ve gone for mud as my basing theme. This is an attempt to have my American army playable at any point in the year. I figure, in wartime, there’s mud everywhere, even in the winter after artillery had its way with the landscape. In this way I can use my greatcoated Americans alongside my Mid/Late US troops and they won’t look too out of place!
As usual, before I committed to the basing scheme, I did a trial piece and recorded my colors. Here’s my sample:
|

|
Paints
- Basecoat: Boot Brown (FWP323)
- Highlight 1: Wool Brown (FWP328)
- Highlight 2: Dry Dust (FWP364)
- Shade: Grease Brown (FWP320)
|
Accents
- GF9 Static Grass: Winter/Dead (GFS003)
- PVA glue (or suitable water effects)
|
|
Before painting the bases I carved holes into the spackle filler to represent mortar shells or hollows in the ground. I also applied some loose-leaf tea and sand to the base to add some texture.
After basecoating, I applied a healthy dry brush of US Field Drab. Once that was dry I hit it with a very light drybrush of Iraqi Sand in selected areas, making sure that it highlighted the edges of craters and broken ground.
Next week I'll have a tip for you about making small grass clumps and using water effects. Until then, here's a few photos of my finished platoons so far. Thanks for reading!
~ Mike.
|

|
Last Updated On Tuesday, July 7, 2015
|
|
|