|
|
|
|
Products mentioned in this Article
--None--
|
|
|
|
|
|
|
|
|
 |
|
|
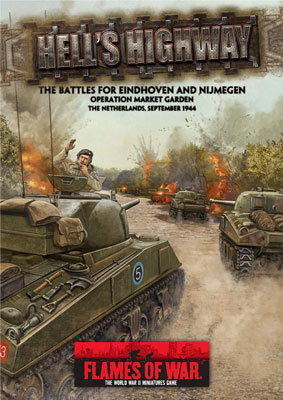 |
Hell’s Highway Battle Report
Driver, advance!
For our first Hell’s Highway battle report we thought we’d fight a battle based on the very start of Operation Garden. The 30th Corps’ plan was to advance from Joe’s Bridge up the highway to be in Eindhoven by the end of the first day (17 September 1944). However, everything didn’t go to plan.
An Improvised Scenario
Our idea for the game was to recreate the first part of the advance towards Valkenswaard. During the historical advance the Irish Guards, leading the Guards Armoured Division, were ambushed by Fallschirmjäger. Subordinated to Kampfgruppe Walther was the first battalion of 18. Fallschirmjäger Regiment under Major Hellmut Kerutt. Kerutt organised a series of ambush points along the road manned by two-man Panzerfaust teams.
|
|
These teams waited for the oncoming British
tanks to pass by before launching their ambush. The ambush brought the
Guards advance to a halt with the destruction of nine tanks, which
delayed the 30th Corps who did not reach Eindhoven until 18 September.
We decided to recreate the battle using the Trench Fight Mission from page 219 of the main rulebook. However, we did make a few modifications to better suit the historical events. We selected trench fight because of the limited fortifications and the attackers’ preliminary bombardment, which opened the start of the real Operation Garden. We changed the amount of fortifications to only
include the one minefield.
|
 |
|
This was added, not because there were any
minefields on the 30th Corps route, but because the British thought
there would be. To make up for the lost of the fortifications we
allowed the Fallschirmjäger defenders to remove one platoon from
reserve (Blake took six platoons and had to hold three in Reserve) and
have it start on the table.
Forces
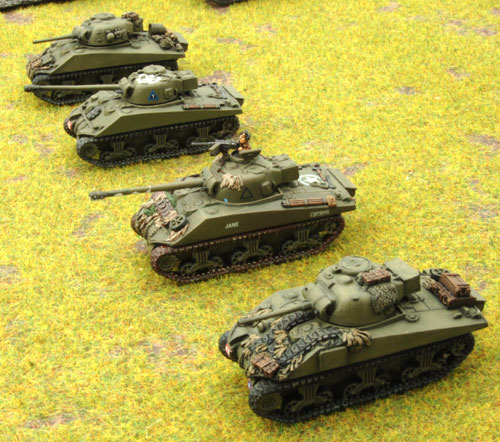
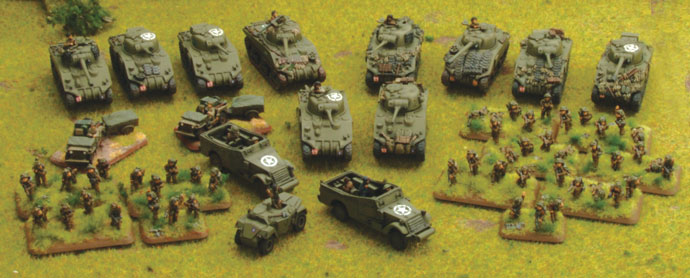
Guards Armoured Squadron
|
|
|
Guards Armoured Squadron
|
|
Lieutanant Colonel
J. O. E. Vandeleur, DSO & Bar
RAF Forward Air Controller
Limited Air Support (Typhoons) |
50 points
10 points
170 points
|
Headquarters
|
|
2 Sherman V
1 Sherman ARV |
185 points
10 points |
Combat Platoons
|
|
Guards Armoured Platoon
2 Sherman V & 2 Firefly V |
390 points |
Guards Armoured Platoon
2 Sherman V & 2 Firefly VC |
390 points |
Brigade Support Platoons
|
|
Guards Pioneer Platoon
2 Assault Squads |
105 points |
Guards Rifle Platoon
3 Rifle Squads |
185 points |
| Total |
1505 points |
|
Fallschirmjägerkompanie
(6. Fallschirmjäger Regiment, Fearless Veteran)
|
|
Oberstleutnant Freiherr von der Heydte
Panzerfaust Trap teams x4 |
70 points
100 points |
Headquarters
|
|
Company HQ
|
55 points |
Combat Platoons
|
|
Fallschirmjäger Platoon
3 Fallschirmjäger Squads
Command Panzerfaust SMG team
All Rifle/MG Panzerfaust teams |
250 points
10 points
90 points |
Fallschirmjäger Platoon
3 Fallschirmjäger Squads
Command Panzerfaust SMG team |
250 points
10 points |
Weapons Platoons
|
|
Fallschirmjäger Anti-tank Gun Platoon
4 7.5cm PaK40 guns |
230 points
|
6. Fallschirmjäger Regiment
Support Platoons
|
|
SS-Tank Hunter Platoon
(Fearless Veteran)
3 Jagdpanzer IV
|
325 points |
Heavy Anti-aircraft Gun Platoon
(Reluctant Trained)
1 8.8cm FlaK36
ROF 3 |
55 points
10 points |
Heavy Anti-aircraft Gun Platoon
(Reluctant Trained)
1 8.8cm FlaK36
ROF 3
|
55 points
10 points |
| Total |
1520 points |
|
Fallschirmjägerkompanie (6. Fallschirmjäger Regiment)
|

|
 |
Setup
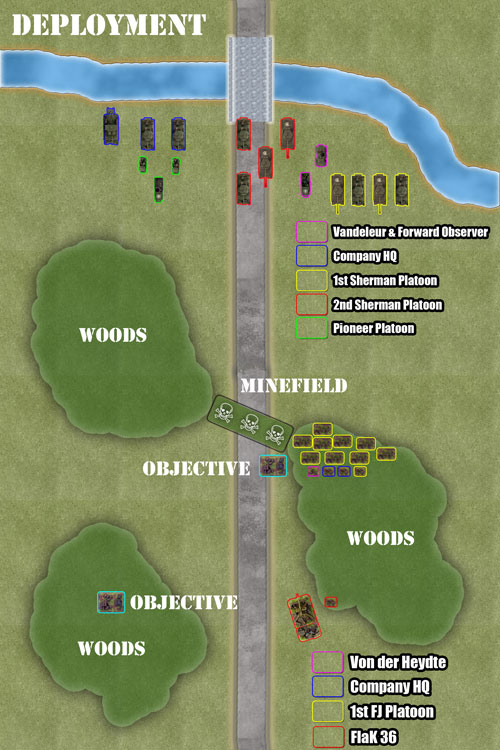
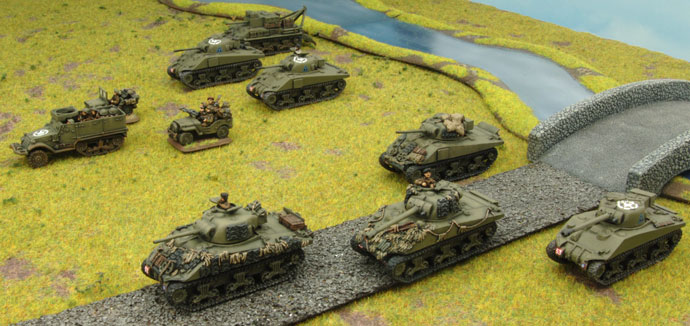
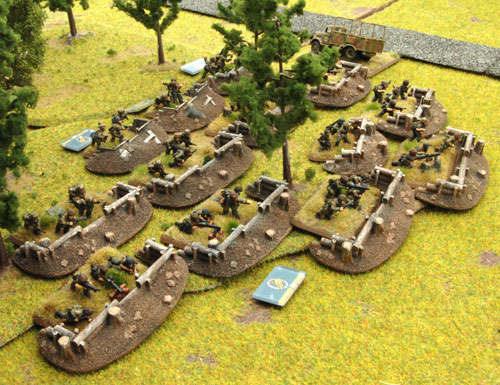
Mike was kind enough to design terrain table to represent the jump off point for 30th Corps from Joe’s Bridge at 1435 hours on 17 September 1944. Using the modified Trench Fight scenario as described above, Wayne deployed his entire force on the opposite side of the bridge as far forward as possible in accordance to the mission outline. The Guards Rifle Platoon rode on the back of the tanks of the first Armoured Platoon. To counter, Blake deployed his FlaK36 on the far end of the road in an attempt to stick with history. By this period in the war the German Army was severely lacking transports for their guns after the losses suffered in Normandy. The German practice was to deploy the FlaK36 in this way to take advance of the extreme range of the gun and the straight roads in the Dutch county side. Freiherr von der Heydte, along with the Company HQ and platoon of Fallschirm-jäger, were deployed in the woods with the minefield cutting the road between the two woods. The PaK40 and remaining FlaK36 were in ambush with the Panzerfaust Trap Teams hidden in ambush. The second platoon of Fallschirmjäger and the Jagdpanzer IV platoon were held in reserve.
|
 |
|
Game On
Turn One
British
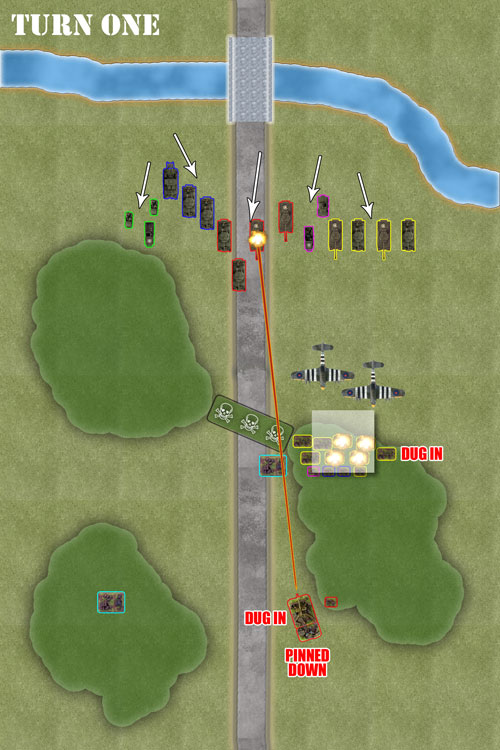
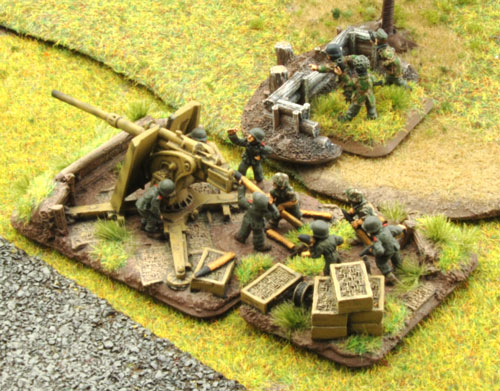
Before the begun, a Preliminary Bombardment was conducted as outlined on page 218 of the main rulebook. As a result the Germans suffered the loss of one Fallschirmjäger team and two PaK40s.
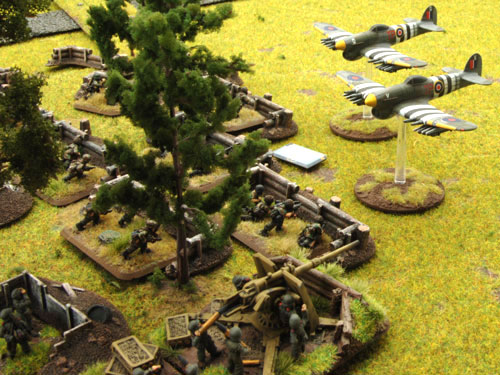
With the game now properly underway, Wayne was successful in calling for Air Support that targeted the Fallschirmjäger in the woods. The entire spearhead of 30th Corps then advanced forward in an attempt to begin rooting out the Fallschirmjäger. Vandeleur was unable to press any of the platoons on towards the objective and as a result they remained at long range and unable to shot at the infantry in the woods due to concealment and being gone to ground. Despite being able to re-roll the first ranging in attempt due to the RAF Forward Air Controller, the Typhoons were successful on the third attempt and successfully scored hits on four Fallschirmjäger teams, all of which passed their infantry saves.
|
 |
 |
 |
German
All of the platoons with the exception of the FlaK36 at the end of the road were able to rally from pinned after the preliminary bombardment. With no reserves in this turn, there was little else to do for the Germans but wait. However, the pinned down FlaK36 was able to destroy a Firefly with a single shot.
|
 |
Turn Two
British
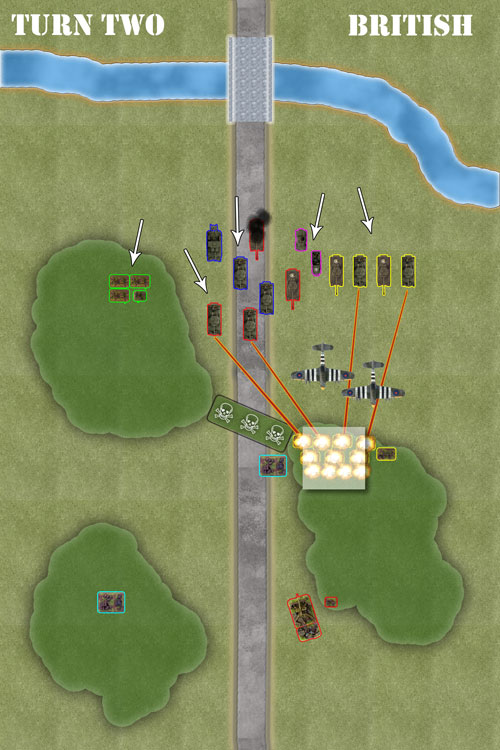
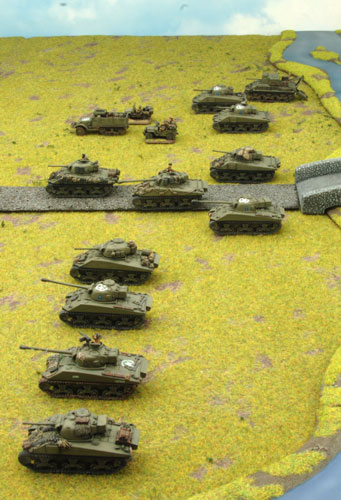
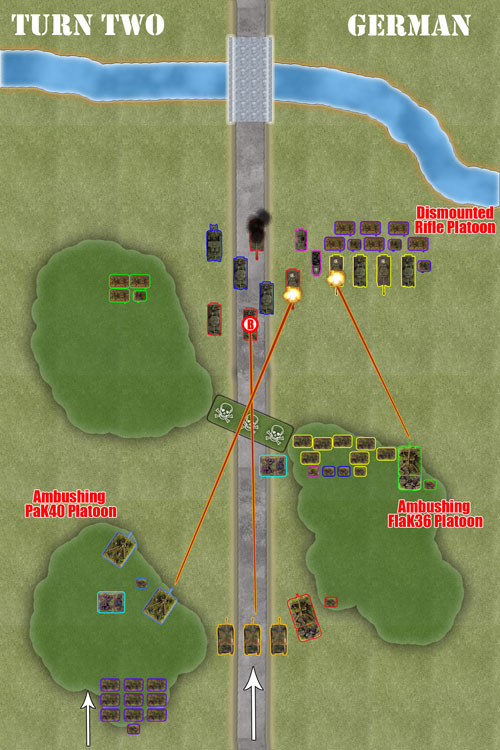
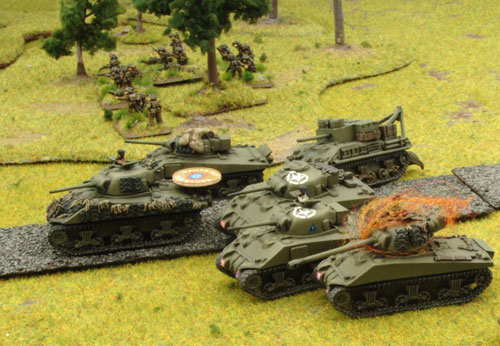
The R.A.F. was quick to again answer Vandeleur’s call, repeating their strike on the Fallschirmjäger in the woods. The pioneer platoon dismounted their transports and moved towards the minefield cutting the road via the woods. With the benefit of the RAF Forward Air Controller, both the Sherman platoons moved to short range versus the Fallschirmjäger and remained at a safe distance from the incoming air strike. Shooting from the Sherman’s scored four hits due to Guns, Left special rule (click here to see all the Vandeleur’s special rules). With the resultant causality was unable to be saved by Von der Heydte’s Rally Once More rule. This states once per turn any team destroyed within 6”/15cm of Von der Heydte is rallied and can continue to fight on a roll of 5+, otherwise the team is too badly wounded and destroyed as normal. The Typhoons successfully ranged in on the first attempt and notched up seven hits spread over the HQ section and Fallschirmjäger platoon, but all the Fallschirmjäger teams escaped unscathed.
|
 |
 |
|
German
The Fallschirmjäger platoon was able to unpin with Von der Heydte’s
assistance (passing motivation tests on a roll of 2+), as did the
FlaK36 at the end of the road. The Germans were then able to call up
both platoons held in reserve, the second Fallschirmjäger platoon
advanced towards the uncontested objective in the woods as the
Jagdpanzer IVs advanced up the road. Shooting from the FlaK36 missed,
as did the Jagdepanzer IV platoon.
However, the ambushing PaK40s were
able to knock out a Firefly and bail a Sherman from the second Sherman
platoon.
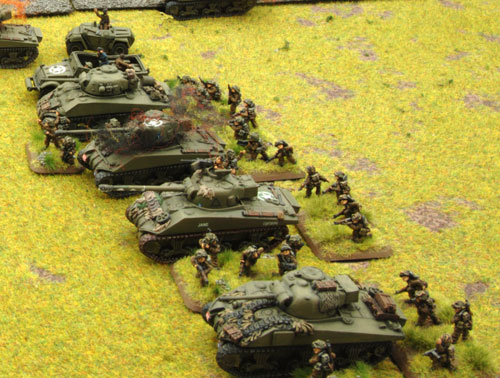
The second FlaK36 ambushed from the woods next
to the Fallschirmjäger destroying another Firefly, but the tank riding
Guards Rifle Platoon were able to successfully dismount the tanks being
shot at. A successful Stormtrooper move saw one of the Jagdpanzer’s
gain concealment in the woods.
|
 |
 |
 |
 |
Turn Three
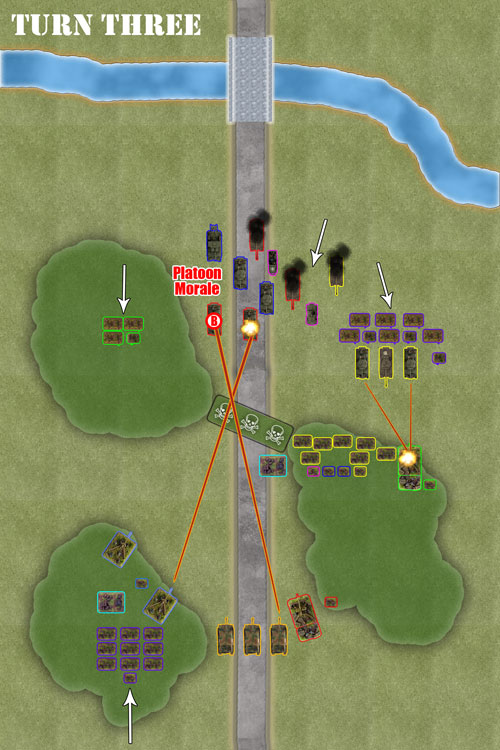
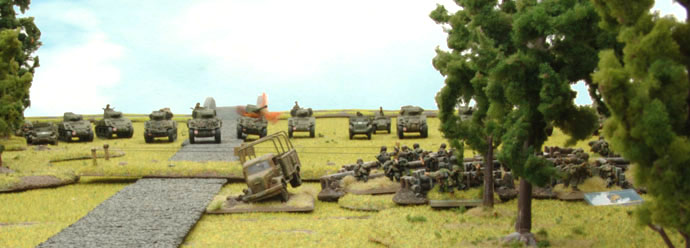
British
With the R.A.F. momentarily deserting the cause, the first platoon of
Shermans advanced towards the woods with the infantry in close support.
This was further aided by a successful Press On roll inspired
by Vandeleur. The bailed out Sherman succeeded in re-joining his
platoon mates and the second Guards Armoured Platoon remained
stationary along with the HQ section to maximise their rate of fire.
Still
concealed in the woods, the Pioneer platoon advanced towards the
objective contested by the PaK40 platoon. The shooting at the PaK40
platoon from the both the second platoon of Sherman’s and HQ section
scored a single hit, but was unable to inflict any causalities.
However, the FlaK36 in the woods was destroyed by the fire from the
first platoon’s 75mm guns while all other shots from the remainder of
the first platoon of Sherman’s and the infantry are unable
to cause any damage to the stubborn German Fallschirmjäger defenders.
|
 |
German
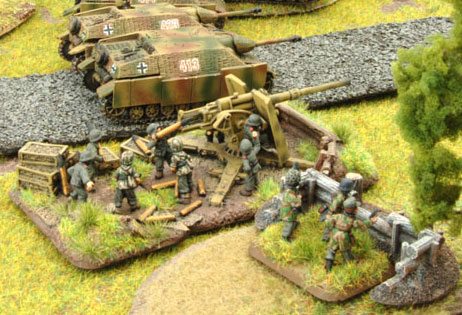
Now presented with the threat of the Pioneers, the second platoon of
Fallschirmjäger moved up to support the PaK40 platoon. The PaK40s split
their fire in an attempt to also return fire at the Shermans,
destroying a Sherman from the second platoon. The remaining FlaK36
missed the HQ section, but the Jagdpanzer IVs were able to bailout a
tank from the second platoon and forced a platoon morale test, which
Wayne promptly fails even with the Unflappable re-roll and the 2iC Sherman flees the battlefield along with what was left of the second platoon. |
 |
 |
Turn Four
British
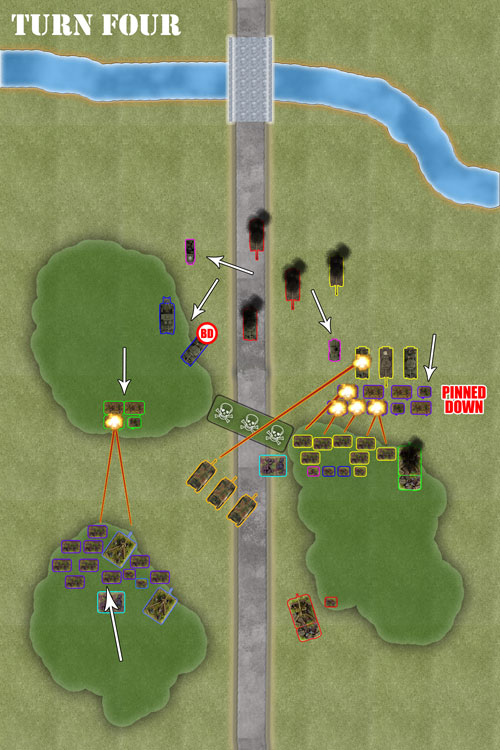
With no air support again this turn for the British, the HQ Sherman
sort cover in the woods, but became bogged down. The Pioneers moved up
to the edge of the woods adjacent to the PaK40s and second
Fallschirmjäger platoon.
Intending to launch the long awaited assault,
the infantry platoon moved towards the waiting Fallschirmjäger closely
supported by the armour. The combined efforts of the tanks and infantry
platoon couldn’t pin-down the Fallschirmjäger who threw back the
attempted assault with an effective round of defensive fire, pinning
the infantry and killing a single team.
With all this action taking
place, the Sherman ARV was able to successful tow the HQ Sherman out of
its bogged down position.
German
With the second Fallschirmjäger platoon consolidating there position
around the PaK40s, they begin to try and neutralise the threat posed by
the Pioneers. |
|
Fire from both the Fallschirmjäger and PaK40
platoons was able to pick off a single team.
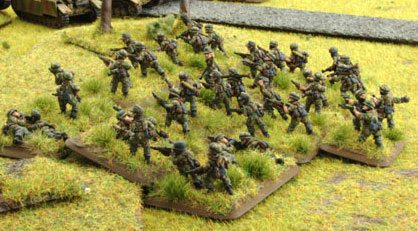
Meanwhile, the Jagdpanzer
IV platoon was able to knock out another Sherman V from the first
Guards Armoured Platoon. The Fallschirmjäger were able to destroy three
more infantry teams from the Guards Rifle Platoons, pinning them in the
process.
|
 |
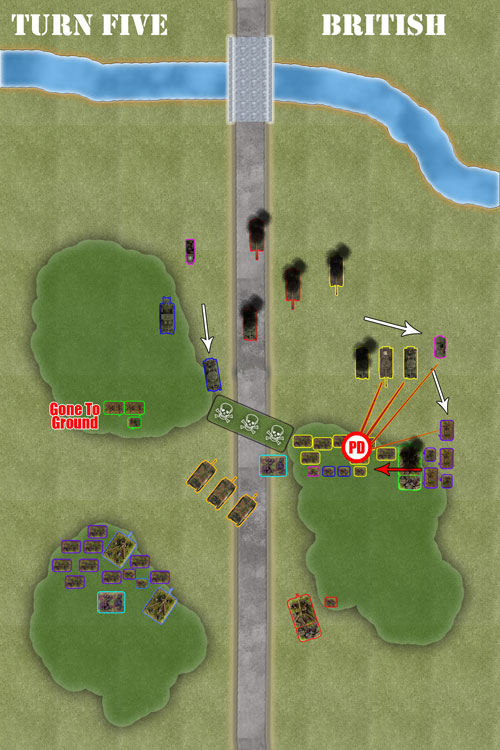 |
Turn Five
British
The Guards Rifle Platoon was able to unpin and moved to the flank of the Fallschirmjäger platoon. The tanks remained stationary to provide cover for the upcoming assault. The riflemen were further aided by Vandeleur who moved over in support.
Now free from being bogged down, the HQ Sherman was able to continue advancing into the woods, attaining concealment from both the FlaK36 and Jagdpanzer IVs’ guns.
Currently concealed at the edge of the woods, the pioneer team remained stationary and went to ground.
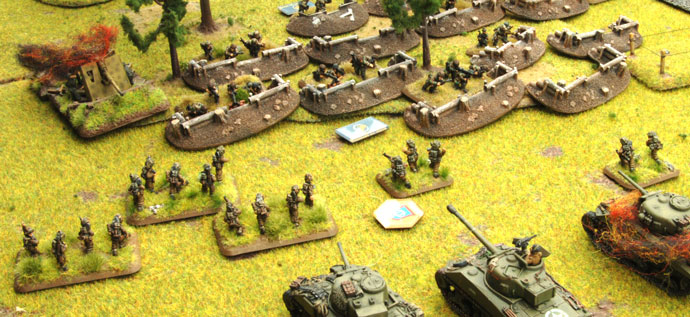
The countless shots from the both the armour, infantry and Vandeleur was able to pin-down the Fallschirmjäger, which in turn was unable to stop the assault with defensive fire. However, the British infantry lost another stand before getting into contact. But once in assault, the remaining teams kill two stands before the Fallschirmjäger platoon promptly failed motivation to counter-attack (on a 2+ with Von der Heydte) and were forced to break off, retreating back into the woods.
|
 |
|
At the end of the Asault step the British Guards
Rifle Platoon must then a Platoon Morale Check to continue in the
battle. They then fail, despite having Unflappable!
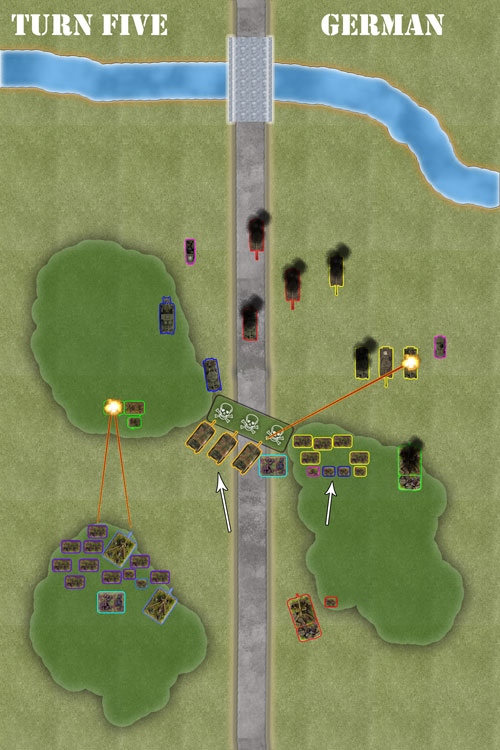
German
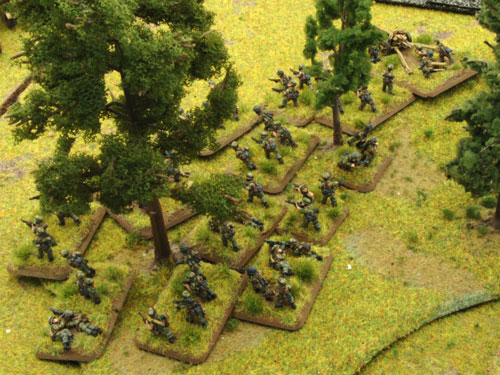
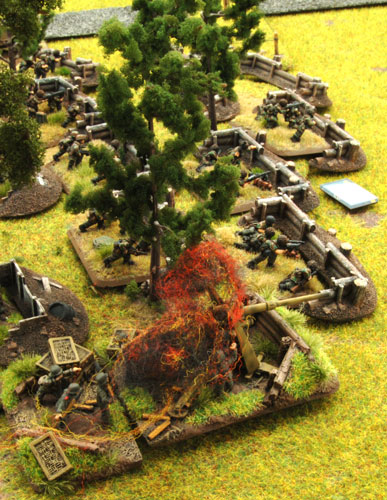
The routed Fallschirmjäger platoon regained its composure and unpinned before they moved up to retake their positions freshly abandoned by the British.
Continuing their duel with both the HQ Sherman and the tanks of the first Sherman platoon, the Jagdpanzer IVs are able to knock out the command tank of the first platoon while the HQ Sherman escaped unharmed. However, this time a Guards platoon was able to pass platoon morale and stick around on the battlefield, but only after Vandeleur assumed command of the platoon.
The continuing shootout between with the British Pioneers and the Fallschirmjäger and PaK40 claimed a single causality.
|
 |
 |
 |
 |
Turn Six
British
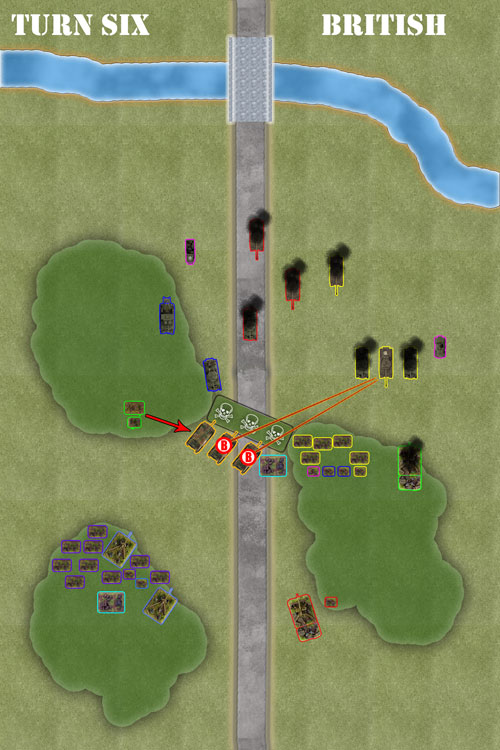
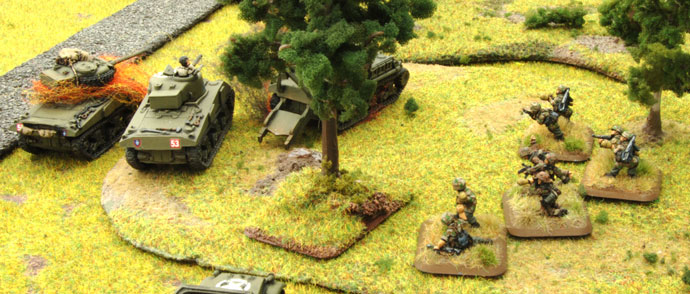
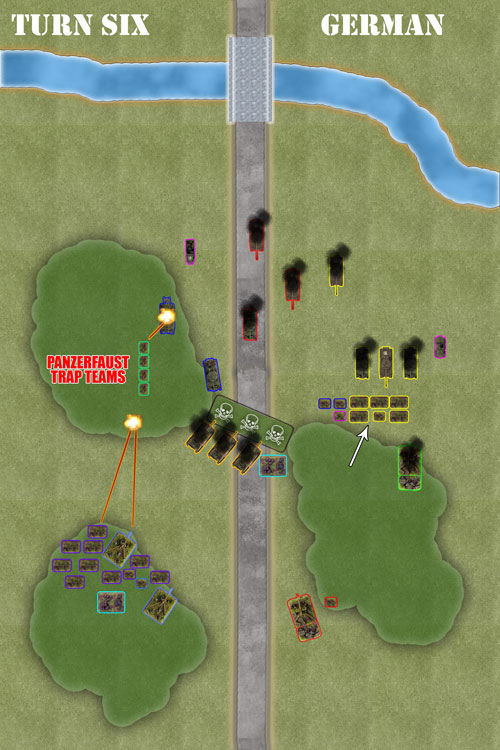
The R.A.F. was unable to take advantage of the now target rich environment by failing to answer Vandeleur’s call. Everything remained stationary and it was left to the Sherman’s to do the business.
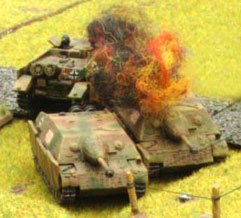
Shooting by the Firefly from the first platoon bailed two Jagdpanzer IV. With Vandeleur unable to touch the Fallschirmjäger in the woods, the pioneers launch a successful assault against the Jagdpanzer IV platoon from the woods. Scoring two hits after passing Motivations to assault tanks on the only active tank hunter. After two successful saves the lone Jadgpanzer IV fought back destroying a pioneer team, only to be destroyed themselves when the Pioneers counterattack and capture the bailed Jagdpanzer IV before consolidating back into the woods and passing platoon morale.
|
 |
|
German
Lead by Von der Heydte, the Fallschirmjäger platoon charges towards the
last of the British armour lead by Vandeleur with the intention of
assaulting them.
The Panzerfaust Trap Teams now spring their ambush against the HQ Sherman and Sherman ARV.
The combination of the second Fallschirmjäger platoon and PaK40 were able to finish off the Pioneer teams.
The Trap Teams were able to destroy the Sherman ARV.
The assault failed to go ahead, for the second time in the game Von der Heydte failed to motivate his troops on a 2+.
|
 |
 |
Turn Seven
British
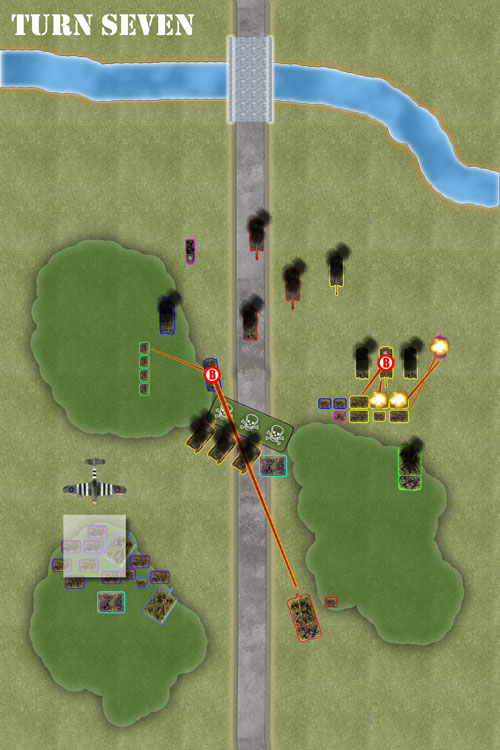
Now below half strength, the Guards stood steadfast passing Company Morale.
The R.A.F. finally returned to the battlefield after a long absence and targeted the Fallschirmjäger platoon and PaK40 in the woods.
With the Fallschirmjäger platoon now exposed in the open both the Firefly and Vandeleur machine gun them, killing two teams, but the survivors pass platoon morale.
The HQ Sherman tried to avenge the loss of the destroyed Sherman ARV with no avail versus the Panzerfaust Trap teams.
The turn ends with the single Typhoon unable to range in on its target.
|
|
German
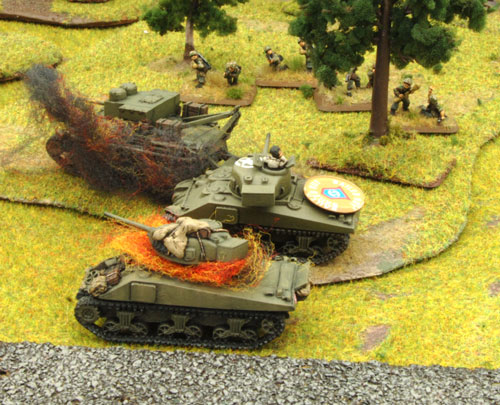
No movement from the Germans this turn. The Trap teams administered a double bail the HQ Sherman who survived a motivation test and the subsequence shooting of the FlaK36 at the end of the road.
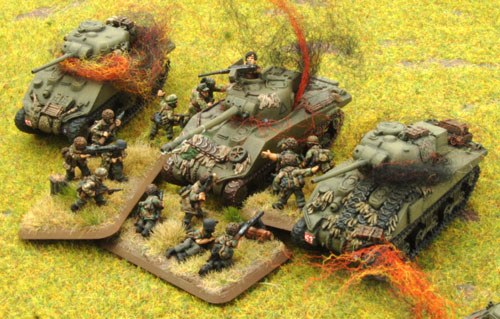
The Panzerfaust teams from the Fallschirmjäger platoon led by Van der Heydte bail out the Firefly and killed Vandeleur (after a successful 4+ dice roll, as he is a Warrior team).
|
 |
 |
 |
 |
Turn Eight
British
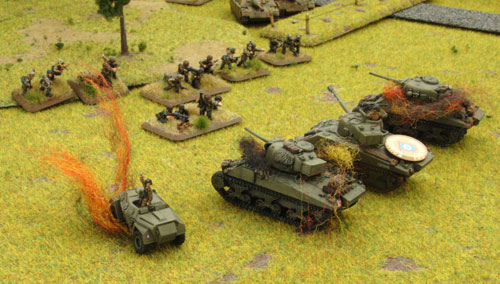
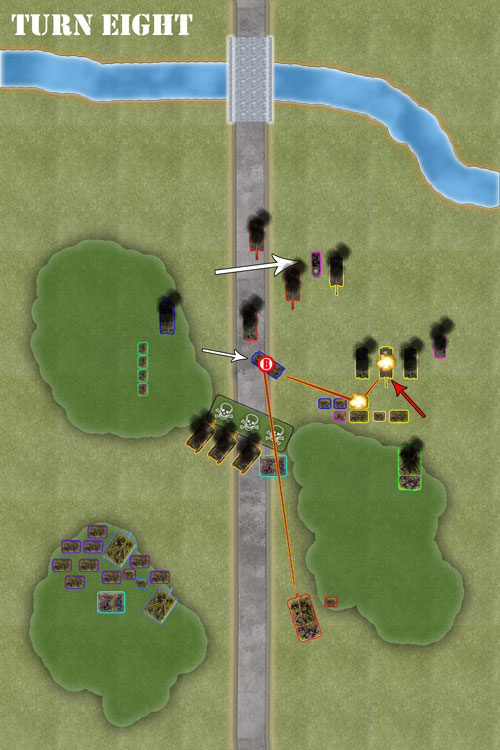
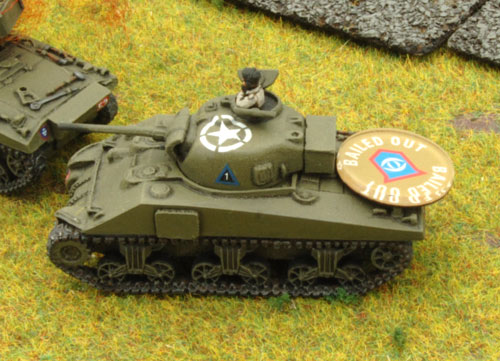
Once again the company morale was no problem for the remnants of the Irish Guards, nor is re-mounting the vehicles as both the HQ Sherman and Firefly crews were able to get back in the fight.
Escaping the Panzerfaust Trap teams, the Company Command Sherman V moved to support the Firefly with the RAF Forward Air Controller following behind. Both tanks machine-gun the infantry and kill yet another Fallschirmjäger team. The Fallschirmjäger proved just a stubborn as the Guards and the severely depleted platoon was able to pass platoon morale with the aid of Von der Heydte.
German
Sensing the end is near for the British, the Fallschirmjäger charged towards to the Firefly with the intention to assault. As shooting from the FlaK36 double bails the HQ Sherman, who passes morale, the defensive fire from the Firefly can’t stop the assault from the Fallschirmjäger. They make easy work of the Firefly before consolidating back towards the woods.
|
|
Turn Nine
British
Realising that this might not be their day, the Irish Guards call it quits failing company morale, once again even after the Unflappable re-roll. The hard-pressed Fallschirmjäger managed to win the day with a 4-3 victory.
Blake’s Thoughts
As I expected the Guards were tough, but Wayne did fail a number of morale tests in the early to middle stages of the game which gave me a sniff. In saying that, I also managed to fail a couple of morale test with Von der Hyde on a 2+ at important times.
|
 |
| However, I was able to get all of my reserves on
the table very early, which helped no end. If there are two people who
can fail morale no matter how many special rules are in place it’s
probably Wayne and I. This was my first game using any form of
Fallschirmjäger and I enjoyed it and the different challenges it posed.
The Panzerfaust Trap teams were a bit of fun and I probably could have
used them better, but the rules restricted what I could do, so I’ll
notch this one up as experience. All-in-all a most enjoyable game. |
|
Wayne’s Thoughts
Another good victory Blake. My plan did go as well as I’d hoped, but I did identify a few things I could of done better. For one, I should have backed up the main thrust of my attack, against the Fallschirmjäger in the wood on my left, with the HQ and second Guards Armoured Platoon, and just left the Pioneer to distract the other flank. Taking on the wood with more tanks would of provided more firepower and saved them from the sniping fire of the FlaK36, Pak40 and Jagdpanzer IVs. Though, they would of still be vulnerable to the Panzerfaust Trap teams. However, I enjoyed the game and would consider building a British Guards Armoured Squadron.
|
Last Updated On Thursday, October 1, 2009 by Blake at Battlefront
|
|
|