|
|
|
|
Products mentioned in this Article
|
|
|
|
|
|
|
|
|
 |
|
|
 |
Blake’s Battlefield Breakdown: Volume Three
Fate Of A Nation: Arab-Israeli Wars, Six-Day, 1967.
with Blake Coster
Last time on Blake’s Battlefield Breakdown I talked about the pros and cons of each Israeli vehicle in an attempt to explain the rationale behind my choices when creating my 1500 point army list from Fate Of A Nation. Now it’s time to talk tactics and how I plan to actually use the force on the tabletop. But before I get started this article comes with a disclaimer; since I’m hardly a master tactician when it comes to Flames Of War this is by no means the be-all and end-all tactical guide to everything Flames Of War. So you’ve been warned!
Read Blake’s Battlefield Breakdown: Volume One here…
Read Blake’s Battlefield Breakdown: Volume Two here…
|
Fate Of A Nation
The fate of a nation hangs in the balance. Israel cannot lose even a
single battle. One defeat would mean the destruction of the tiny Jewish
state. Not waiting to be attacked by the Arab forces massing on its
borders, Israel strikes first.
Learn more about Fate Of A Nation here... |
 |
The Tip Of The Spear
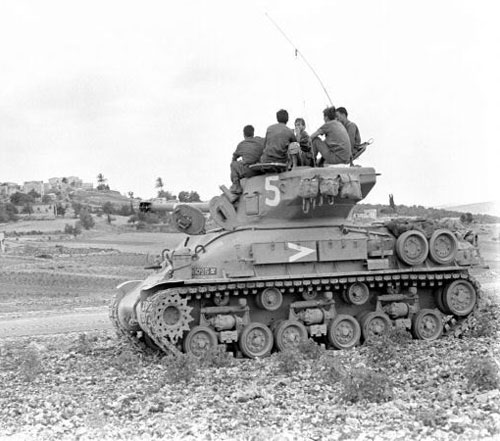
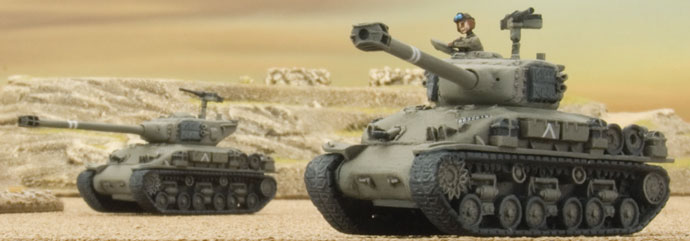
Since a majority of my force consists of the M50 Sherman (three platoon each containing three M50 Shermans for a total of nine tanks) these platoons will form the Tip of the Spear as the saying goes, advancing towards the most suitable objective i.e. an objective with concealment that can be used to your advantage when advancing across No Man’s Land.
As one of the M50’s attributes is Wide Tracks
crossing any Rough Terrain is less of a factor as if you were unlucky to
Bog Down I have an immediate 50 / 50 chances of freeing the vehicle
in question with the Wide Tracks attribute.
|
|
In case you’re unfamiliar with the Wide Tracks rule I’ve outlined it below:
Wide Tracks
Some excellent tank
designs have successfully utilised wider tracks, allowing them to cross almost
any terrain.
If a vehicle with Wide
Tracks becomes Bogged Down while attempting to cross Rough Terrain, roll again.
On a roll of 4+ the vehicle immediately frees itself and continues moving.
Right: The Tip Of The Spear; the M50 Sherman.
|
Another handy attribute the M50 has is Protected Ammo; this allows a player to re-roll any failed attempts to remount any Bailed Out vehicles. Once again below is an outline of the Protected Ammo rule:
Protected Ammo
Many tanks are destroyed not by the enemy shell but by their own ammunition being hit by white-hot fragments of armour and exploding. The chances of this were minimised by providing a safe place for stowing ammunition within the vehicle such as an armoured compartment or inside a water-filled jacket.
If forced to bail out, crews of tanks with protected ammunition are far more confident when it comes to remounting their vehicle quickly.
Tanks with Protected Ammo re-roll all failed Motivation Tests to Remount Bailed Out vehicles in the Starting Step (see page 102 of the main rulebook).
|
 |
The Veteran rating of the Israelis and the proper use of terrain
i.e. not wandering out into the open means I'm only hit on 5+ at
short range (distances of less than 16"/40cm) and only on a 6 at long range ( distances of greater than 16"/40cm). So any hits that result in a
vehicle becoming Bailed Out means I've got two die rolls at 50 / 50 (based on the Confident rating of 4+) to remount and keep pressing the attack.
Speaking of pressing the attack, one of the Israeli National Special Rules is Few Against Many which in essence is the German special rule Stormtroopers; allowing a platoon an additional 4”/10cm of movement in its Assault Step as longs as they can pass a Skill Test (3+ for the Veteran rated Israelis).
This extra movement can be very handy and can potentially help me avoid disaster by moving up to the next lot of concealment. The Few Against Many rule basically gives the M50 a pseudo Light tank rating which it comes to mobility and a potential movement range of 16”/40cm if the conditions are right. For example, you’re not moving through Rough Terrain and you actually pass the Skill Test to make your Few Against Many move. You can read up on the Few Against Many special rule on page 9 of Fate Of A Nation.
Another rule inherited from the Germans in Flames Of War is the Every Soldier Is A Leader or as you might know it Mission Tactics.
There’s nothing worse than having your attack stopped dead in its
tracks due to losing your Platoon Commander. If I’m unlucky enough to
lose my Platoon Commander, you can simply nominate a new one as long as I
have another Tank team within Command Distance. Like the Few Against Many special rule you can read more about the Every Soldier Is A Leader on page 9 of Fate Of A Nation.
|
Leadership Reflects Attitude
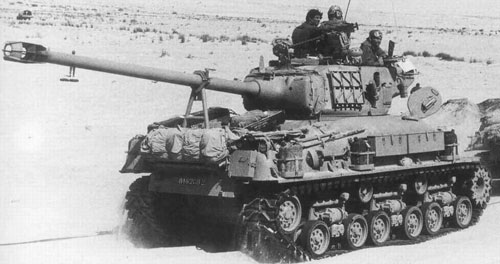
I’m a big believer in attitude reflects leadership and Flames Of War in not different. So I’d never ask my troops to do anything that the Company Commander wouldn’t do. So accompanying the three platoons of M50 Shermans advancing towards the objective with is the Company Commander in his M51 Isherman!
Right: The mighty M51 Isherman. |
|
This is mainly due for motivation purposes
especially for any looming assaults. The Company Commander can join the
Assaulting Platoon and provide a re-roll for any failed Motivation Tests
when it comes to counterattacking. The added benefit of that Anti-tank
16 gun is really just a bonus!
If
the Company Commander should meet a stick end then not to worry! The Israeli national
special rule A War Of Survival not only lets platoons re-roll any failed
Platoon Morale Checks but also allows any Platoon Commander still on the table
to take the Company Morale Check in his place. So I can be a little more
reckless than I'd usually be with my Company Commander.
In summary, it’s basically Hey Diddle Diddle, M50s Up The Middle with the
Company Commander in support. Pretty basic really!
|
 |
The Fingers Of Death
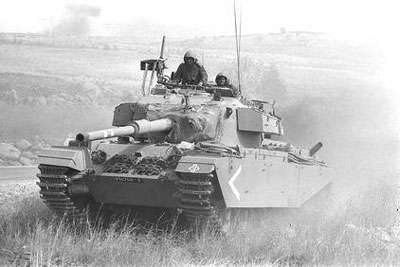
Covering the advancing M50s will be the M51 Isherman platoon containing three tanks. Their role will be to take up a firing position behind some linear terrain (preferably) such as a hill, go hull-down position and engage any targets of opportunity that pose a threat to the M50s. Since all Israeli tanks benefit from the Gunnery First special rule (think Semi-Indirect Fire; this time inherited from their British cousins) if the M51 (in this example but this rule also applies to every Israeli tank expect the AMX) remain stationary during the Movement Step, they may re-roll failed rolls To Hit as long as the intended target is more than 16”/40cm away.
Anything shooting back will need a 6 to hit and the opposition who are only Trained
at best will be at a disadvantage and the odds will are in our favour.
Rated as Anti-tank 16 and Firepower 2+ the 105mm D1504 gun of the M51 is
the literal Finger Of Death; whatever it points at it has a good
chance of destroying. Their secondary role will be as a reserve platoon
for the main thrust; I can throw them into the fray if needed to as
reinforcements.
Finally, the M51 has the ability to fire smoke
directly. This is often overlooked in favour of destroying the enemy
rather blinding them (read more about Smoke Ammunition on page
107 of the rulebook). This maybe a tactic worth considering especially
if the enemy is fielding a few heavy tanks since these would be tougher
to kill at long range.
|
|
Hold Your Ground
The last of my platoons of course consists of two the much vaunted Sho’t tanks. Since I rate the Sho’t is so effective on the battlefield, their job is to simply hold the objective opposite to the main advance. There have more than enough firepower to take out anything the enemy throws up against it and enough armour to survive most guns on the battlefield. If suddenly everything on their flank were to turn pear-shaped then I can call up the M51 to support them instead of the main advance.
Right: The much vaunted Sho't.
|
| If forced to move for whatever reason the Sho’t’s main gun is equipped
with Stabilsers. This special rule allows it to move and shot at full
ROF (or Rate of Fire) with at a +1 penalty to the score to hit. This is
great for flank shoot on enemy tanks and doesn’t put you at that much of
a disadvantage as your opponent are only rated Trained at best. More
dice and better than better dice as Phil once told me. |
Fire In The Sky
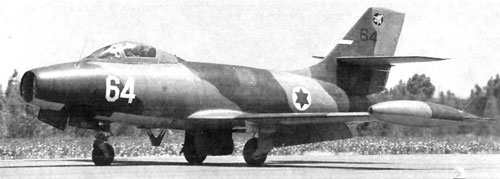
Let’s not forget about the Air Support option from my 1750 point list. Since the safety distance for friendly teams is 16”/40cm, there is only a very small window to assist in the softening up the enemy for the main advance.
|
Therefore, I plan to use my Priority Air Support is to assist
the Sho’t platoon in defending their objective; harassing enemy units as
their approach with Napalm to take out infantry and cannons and bombs
for the tanks!
Left: An Israeli Dassault Ouragan.
|
|
| So there it is my basic plan now I plan to use my Israelis on the
tabletop. As is often the case with me, everything usually goes out the
window once the dice start rolling but it at least give you a basic idea
of how I plan to use my force. |
Next Time On Blake’s Battlefield Breakdown
Join
me for the next instalment of Blake’s Battlefield Breakdown as I
actually start assembling some miniatures and offer a few ideas on how
to make your models stand out on the tabletop.
Till then, let the odds ever be in your favour.
~ Blake. |
Last Updated On Wednesday, December 3, 2014 by Blake at Battlefront
|
|
|