|
|
|
|
Products mentioned in this Article
|
|
|
|
|
|
|
|
|
 |
|
|
|

|
Enhance Your Bunker
Part I: Basic Modelling & Painting
by Mike Haught
Having had a hand in designing this line of bunkers, I was extremely excited to have a crack at enhancing one out with all the bells and whistles that were too difficult to include in the model. I have a passion for both bunkers and terrain modelling, so the chance to combine the two was one I couldn’t resist. I gathered several of my favorite bunker books and set to work.
Check out the Anti-tank Pillboxes box set here...
|
| Obviously, with your own bunkers feel free to put in as much or as little work as you like. Some players may be perfectly happy with them straight from the box while others will have fun adding some or a lot of extra detail. |
|
Research
Step one of any project is research. This can be as basic or as deep as you like. As a historian, I tend to go a little nuts with gathering information and quickly found myself buried under a pile of photos, plans, and documents. I took elements from all the various photos I had and made a short list of the types of things I’d like to see on my bunker.
These included:
- Camo netting
- Rebar hooks
- Rubble and debris
- Rebar lattice exposed by damage
- Rust weathering
- Defilade wall for the backdoor
- Concrete ‘apron’ in front of the embrasure
- Earthen build-up against one wall
- Period patriotic graffiti
|
 |
|
With all these modifications, I quickly realised this would be a major project and weighed the pros and cons before proceeding. I decided to tackle it all because these bunkers are the centerpiece of my fortification armies and as such demanded my full effort!
|
|
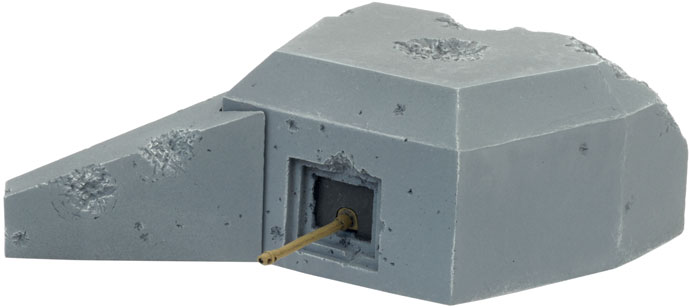
Above: The bunker straight out of the box.
|
Phase 1: Modelling & Painting
For this article series I’ve broken up the process into several phases. The first phase, featured here, was construction and basic painting. Then I look at basing, followed by the final phase with a little super-detailing.
Supplies:
1x Bunker & Defilade Wall (BB121)
22 Gauge (0.643mm) Wire
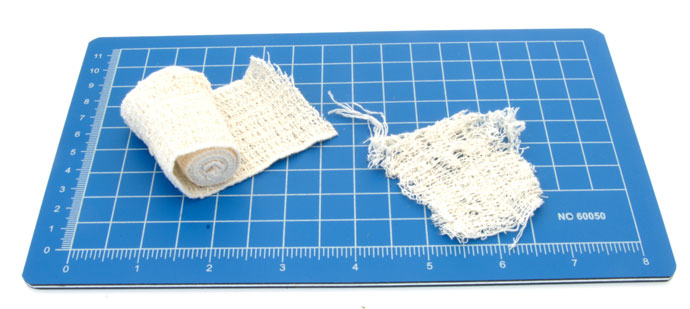
Cotton Bandage
Fine Basing Grit (GFS019)
Medium Basing Grit (GFS021)
Vinyl Spackle (Rapidfilla)
GF9 Hobby Glue (GFM110M)
|
Notes on Supplies:
The bunkers, basing grit, and superglue can be found at your local hobby store or on our web store. I found the bandage at the local $2 shop after a fruitless attempt to score some loose gauze at the pharmacy shop. The vinyl spackling (or rapidfilla) and wire can be found at any hardware store. |
 |
 |
Step 1: Exposed Rebar
The first thing I tackled was the most difficult and time-consuming bit: the rebar. This involved drilling out some holes in the bunker where ever I wanted the rebar to be exposed.
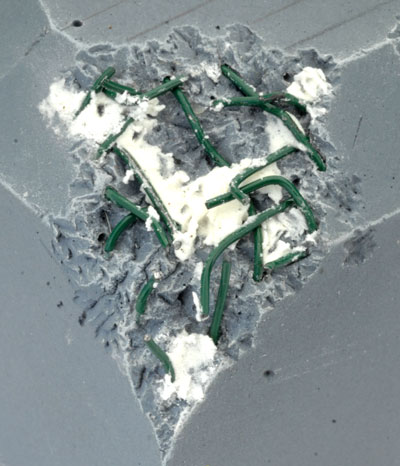
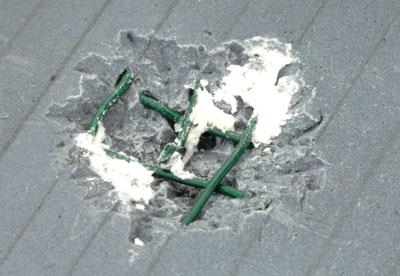
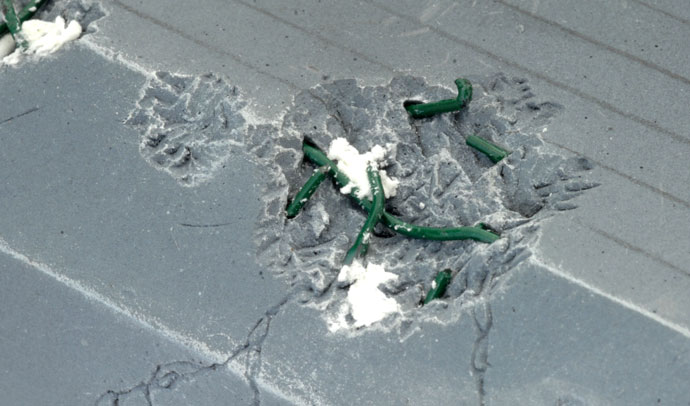
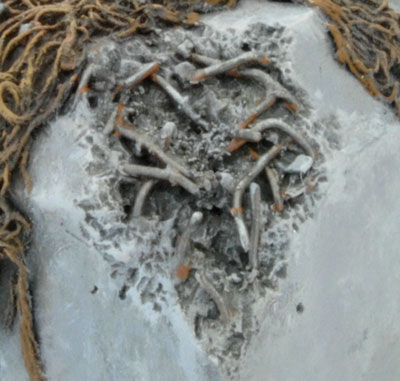
Bunkers were constructed with lattice of rebar, or steel bars, and filled in and over with concrete. There are essentially two reasons why rebar would be exposed on a bunker. The first is damage. These bunkers are presculpted with battle damage, and there are several large chunks of concrete missing. These are perfect places for adding some mangled rebar. I drilled out some holes at regular intervals and glued some short pieces of .22 gauge wire to simulate the shattered rebar lattice. I added a little spackling around the rebar to simulate dust and debris buildup.
|
 |
 |
|
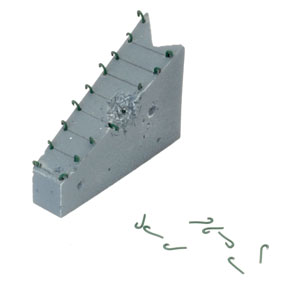
The second reason for the exposed rebar was intentional by the builders. The vertical bits of rebar were left a bit taller than the final structure and bent over to shape hooks. These were used to fasten netting and other camouflage to the bunker. I added these all along the defilade walls on both sides as well as along the edge of the bunker itself. I didn’t want to completely cover the bunker in netting, so I left a portion at the back free of holes.
I then bent small bits of wire into fish-hooks and glued them into the holes.
|
 |
|
Step 2: Camo Netting
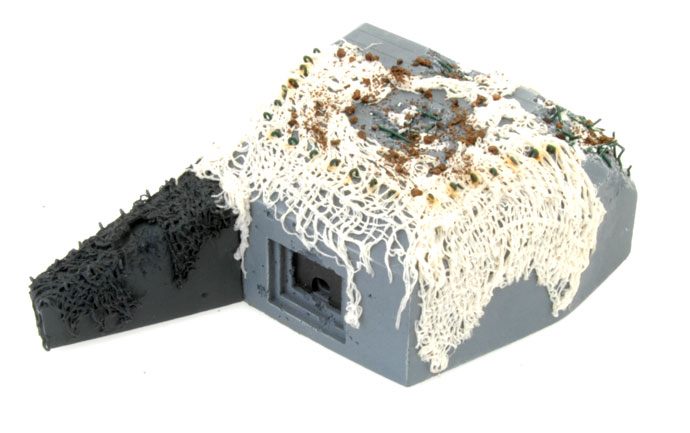
The next step was to add netting to the bunker. The purpose of netting focused less on hiding the bunker from ground troops and more on concealing it from aerial photography. Therefore netting is more prevalent on the tops of bunkers, as evidenced by many historical photos. However, this bunker has some damage on the top and I wanted to make sure that the netting didn’t cover it up. So I applied netting to the sides first, then put some on the roof.
|
 |
|
The bandage I used was quite elastic and dense, so I had to cut the edges off and pull it apart slightly to achieve some transparency and gaps in the netting. After working with it until I was satisfied with its look (this took me a couple of tries) I soaked the bit of fabric in a 50/50 mix of PVA glue and water. I let absorb the glue for a few minutes and then carefully applied it to the bunker. Once it was on the model I could play with it a bit to open up some gaps and tease out a ‘draping’ look. I added small piece after small piece of the bandage fabric until I was happy with the look and then tackled the top. I tried to tease the netting on the roof to look like it had been blown back from the damaged parts of the top.
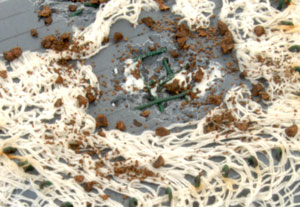
Then I added a very small amount of basing grit to the roof and around the damaged rebar areas to simulate debris from the bomb blasts. I then let all of this dry overnight.
|
 |
|
Step 3: Painting
Next we begin painting the bunker. All the paints used are from the Vallejo range of paints with the exception of a couple, which have been converted in the list below.
Paint List - Vallejo
- London Grey (836)
- Buff (976)
- German Camo Medium Brown (826)
- US Field Drab (873)
- Khaki Grey (880)
- Black Grey (862)
- Gunmetal Grey (863)
|
 |
The Bunker
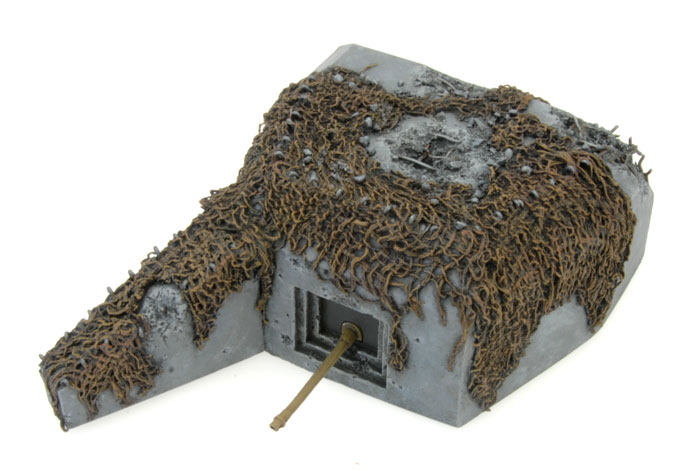
The next step was to paint the bunker. I began with giving the whole thing a basecoat using grey spray paint. I then applied a heavy drybrush of London Grey followed by a 50/50 mix of London Grey and Buff, and then finally a very light drybrush of 25/75 London Grey and Buff, making sure to hit all of the edges including the bullet and shell holes.
|
|
The Netting & Details
Next I basecoated the netting with a heavy drybrush of German Camo Medium Brown, followed by highlights of US Field Drab and Khaki Grey.
Once the netting was finished I went back and touched up the debris bits on the netting with London Grey and a 50/50 London Grey/Buff highlight. I then painted all of the rebar bits first with German Camo Medium Brown then with Gunmetal Grey.
I finished up by painting the embrasure Black Grey and the back door Gunmetal Grey.
|
 |
|
Washing & Finishing
Once all the paint had dried, I applied a thin black ink wash to the whole bunker followed immediately by a thin brown wash. Once this had dried I went back over the model and added another 25/75 London Grey and Buff highlight, but only at the extreme edges to bring out the corners and fractured concrete.
With the washed dried I sealed the bunker with a matte varnish and step one was done.
|
Last Updated On Thursday, May 30, 2024 by Kevin
|
|
|