
|
| |
|
|
|
|
|
|
|
 |
 |
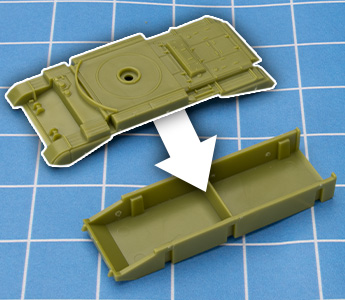
| Step 1. First, glue the hull top to the hull bottom. |
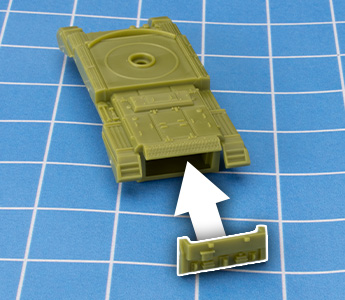
Step 2. Attach the rear plate to close up the hull. |
 |
 |
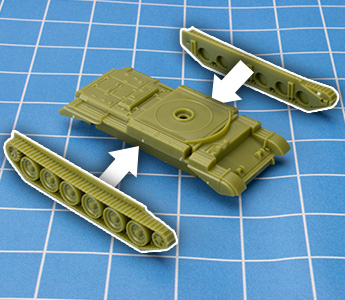
| Step 3. Attach the tracks to the lower hull. These are keyed to help you with the orientation. |
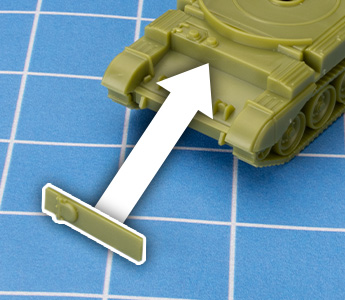
Step 4. Glue the front plate onto the hull top to complete the Challenger hull. |
 |
| The completed Challenger hull! We'll set this aside for now, and move on to the turret. |
 |
 |
 |
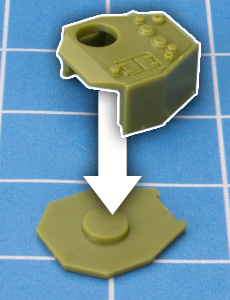
| Step 5. Start the turret assembly by glueing the turret top to the turret bottom. |
Step 6. Next, the turret front and mantlet can be glued into place. |
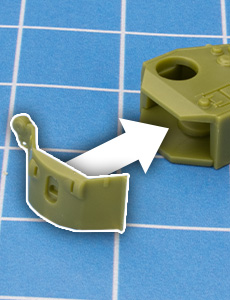
Step 7. Spin the turret around, and attach the ammunition hatch to the turret's rear. |
 |
 |
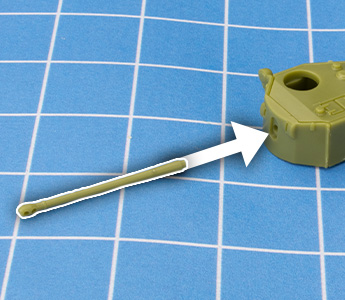
| Step 8. Now we can insert the gun into the mantlet. This is keyed to help get the orientation of the muzzle brake correct. |
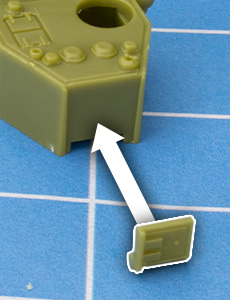
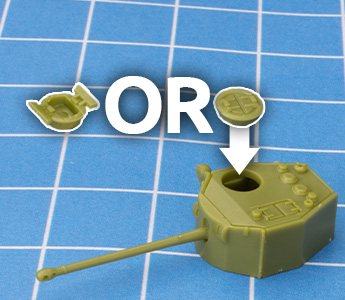
Step 9. Insert your choice of commander hatch to complete the turret. Note the direction that the hatches open. |
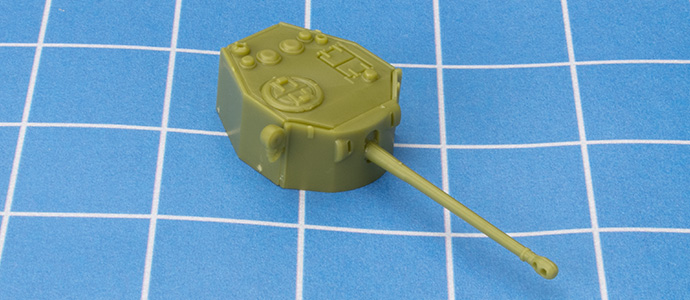 |
| The completed Challenger turret! |
 |
|
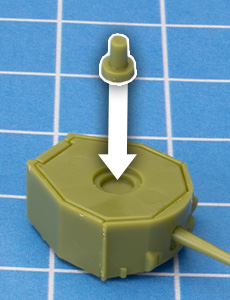
Alternatively, you may prefer to glue rare earth magnets into the recess in the hull and to the bottom of the turret. Magnets are a quick and secure way of fixing your turrets to the hulls, but they are a small added expense, which is why the turret peg is provided, leaving the choice up to you.
Rare Earth Magnets (XX105) are available through the online store here...
These 1mm x 5mm magnets fit perfectly into the round spaces in the hull and turret.
|
|
|
| You can attach the turret to the hull using the included turret peg, attaching the turret peg into the recess in the bottom of the turret. |
|
|
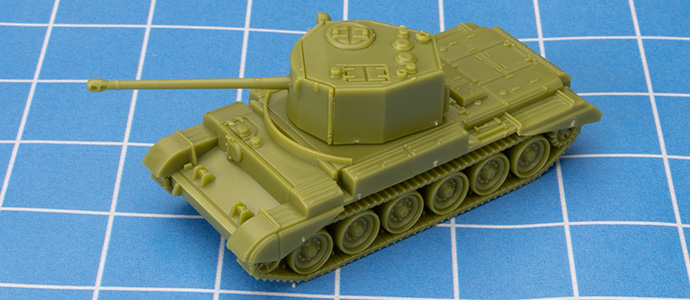 |
| The completed Challenger, now ready to hit the painting booth! |
Last Updated On Wednesday, October 19, 2022
|
|
|