|
|
 |
|
|
Korsun Pocket 1944
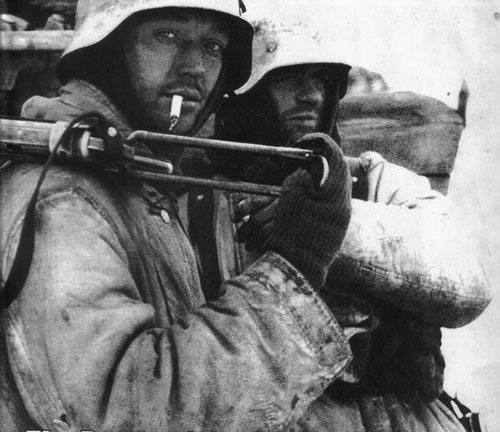 |
Korsun Pocket: January-February 1944
Axis of Attack Campaigns
By Scott Elaurant
Ukraine, Winter 1944
German forces in the Ukraine have been stuck in place by Hitler’s “no retreat” order. Now the Soviets are attacking from the flanks. Will they be cut off? If so, can German reserves break them out again?
Download Axis of Attack Campaign rules...
Campaign Setting
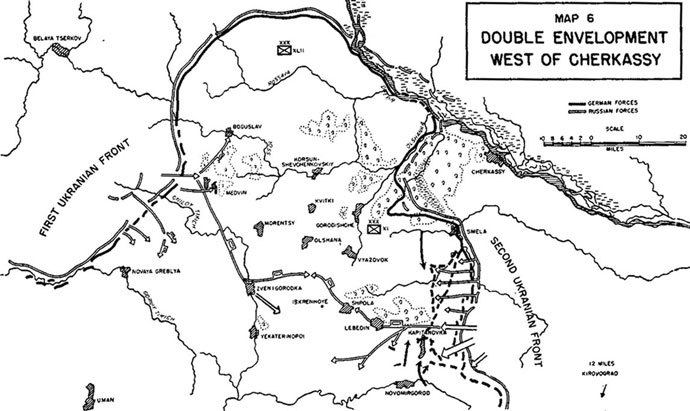
Historically Korsun was a huge complex battle involving 400,000 men fighting over an area 100 square kilometres for three weeks.
|
| To reduce it to manageable proportions, the Korsun Campaign consists of two linked mini-campaigns – first the Soviets try to cut off the German pocket with an east-west assault – then a north-south German counter-attack tries to free them. Players may play either mini-campaign, or both as a combined game. Time is a constraint in both mini-campaigns. |
Soviet Briefing:
Comrades, I bring you glorious news from our beloved Stalin. Once more we are ready to strike a hammer blow deep into the heart of the fascist beast. We will cut off the viper’s head at Korsun and turn the town into a second Stalingrad! We have far more tanks than our foes, and the cowardly Huns grow weary after their fourth winter. Now lead the way for your fellow soldiers. On to victory! |
German Briefing:
The Fuhrer has ordered every man to stand firm in his position. Rest assured that in the unlikely event of an enemy breakthrough, strong reserves will smash them and soon come to our relief. Remember that you are German Soldiers, and conduct yourselves accordingly. I do not have to remind you that captivity under the Soviets is an unpleasant prospect. The winter will soon be over and this summer we will finally crush the Bolshevik forces. |
|
The First (East-West) Mini-Campaign
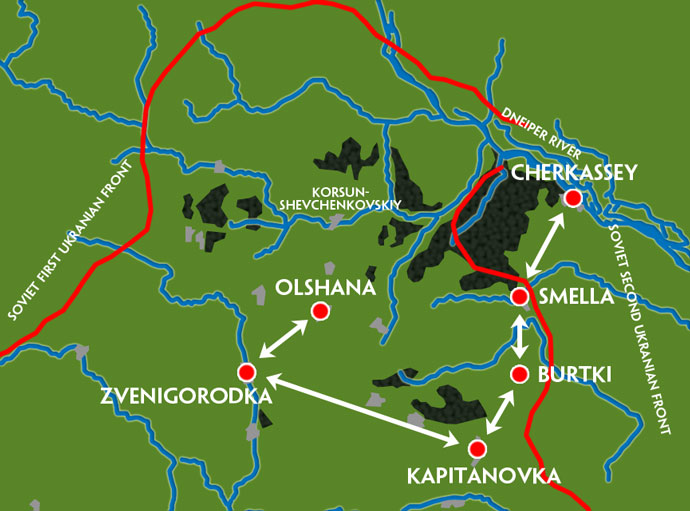
In the first mini-campaign the Soviets have only four games to cut off the pocket before German reserves intervene. If they win all four games and reach Korsun, they have sealed off and eliminated the pocket, winning the entire campaign! If they lose all four games they have been pushed back to the Dnieper, and the Germans win the entire campaign. Provided the Soviets advance two spaces on the campaign map (to Zvenigorodka) they have sealed off the German forces in the Korsun Pocket, and win the first mini-campaign. Otherwise the Germans win the first Mini-Campaign.
|
Campaign One Axis
(East /West) |
Notes |
| Cherkasy/Dnieper River (German Win) |
Objective for German Decisive Victory, Campaign over |
| Smella |
|
| Burtki (Start) |
Starting location for Soviet Offensive |
| Kapitanovka |
|
| Zvenigorodka |
German troops cut off! Objective for Soviet Minor Victory |
| Olshana |
|
Korsun
(Soviet Win) |
Objective for Soviet Decisive Victory, German pocket liquidated! Campaign over |
|
| Campaign Two Axis (North-South) |
Notes |
| Steblev |
Objective for Soviet Pocket Major Victory |
Shanderovka
(German Pocket Start) |
Starting location for German Pocket Force |
| Burtki (Start) |
Starting location for Soviet Offensive |
| Komarovka |
Objective for German Relief Major Victory |
| Hill 239 |
Objective for German Minor Victory |
| Lysyanka |
Objective for German Pocket Major Victory |
Tinovka
(German Relief Start) |
Starting location for German Relief Force |
| Gornyy Tikich Bridge |
Objective for Soviet Relief Major Victory |
|
The Second (North-South) Mini-Campaign
In the second mini-campaign the time pressure is on the Germans. They have four games to either relieve the pocket or escape from it, before the forces in it run out of supplies and must surrender. German forces in the pocket attempted to break-out, while forces outside the pocket simultaneously attempted to relieve them.
Depending on the type of force they have chosen, the Germans must play either a “pocket” or “relief” force. This determines their starting position and objectives. A German “Minor Victory” represents the troops escaping but without equipment (the historical outcome). A German “Major Victory” represents a successful breakout. Otherwise the Soviets win the second Mini-Campaign. If they push the Germans back past their starting position it is a Major Victory. |
|
The Combined Campaign
Players are encouraged to play the Combined Campaign. The result of the Combined Campaign will depend on the results of the two mini-campaigns.
Combined Campaign Victory Chart
| First Campaign Result |
Second Campaign Result
German Major
|
German Minor
|
Soviet Minor
|
Soviet Major
|
|
Soviet Decisive
|
Campaign Over, Soviet Victory |
Soviet Minor
|
| German |
Draw |
Soviet |
Soviet |
|
German Minor
|
| German |
German |
Draw |
Soviet |
|
German Decisive
|
Campaign Over, German Victory |
|
|
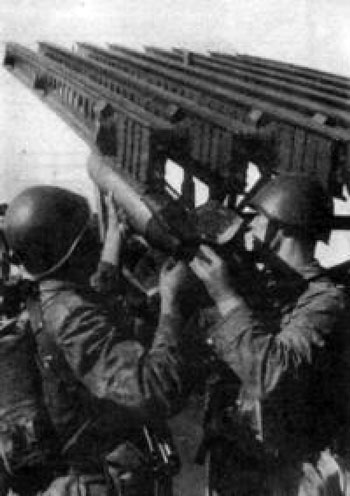
Soviet Forces:
Vatutin’s First Ukrainian Front (the Soviet West Pincer)
• 27th Army = 180th, 206th, 337th Rifle Divisions
• 40th Army
50th Rifle Corps = 38th, 240th, 340th Rifle, 4th Guards Airborne
51st Rifle Corps = 163rd, 232nd Rifle, 42nd Guards Rifle
104th Rifle Corps = 58th, 74th, 133rd Rifle
• 6th Tank Army
5th Mech Corps, 5th Guards Tank Corps
Konev’s Second Ukrainian Front (the Soviet East Pincer)
• 4th Guards Army
20th Guards Rifle Corps = 62nd Guards Rifle, 5th, 7th Guards Airborne
21st Guards Rifle Corps = 69th, 94th Guards Rifle,
252nd, 375th Rifle
• 52nd Army
73rd Rifle Corps = 254th, 294th Rifle
78th Rifle Corps = 373rd Rifle
• 53nd Army
26th Guards Rifle Corps = 25th Guards Rifle,
1st Guards Airborne, 6th Rifle
48th Guards Rifle Corps
= 14th, 66th, 89th Guards Rifle
75th Rifle Corps = 138th, 213rd, 233rd Rifle
• 5th Guards Tank Army = 18th, 20th, 29th Tank Corps
• 5th Guards Cavalry Cossack Corps
63rd Cavalry, 11th, 12th Guards Cavalry Divisions
|
 |
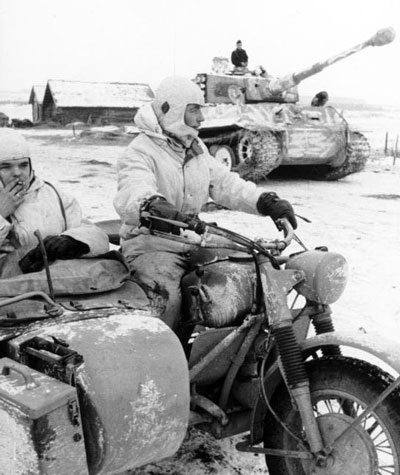 |
German Forces:
Defending in the pocket were:
XI Korps (Gen. Stemmermann)
• 57., 72., 389. Infanterie Divisions
• 239. StuG Abteilung
XLII Korps (Gen. Leib)
• 88., KAbt B Divisions
• 5. SS-Panzerdivision "Wiking"
• SS Walloon Brigade
German relief forces were:
III Panzer Korps (Gen. Breith)
• 1st, 16th, 17th Pz Divisions
• Schwere Panzer Regt Bake
XLVII Panzer Korps(von Vormann)
• 3., 11., 13., 14. Panzerdivision
• 1. SS-Panzerdivison "Leibstandard"
Soviet Forces (1500 or 2000 point Company)
Suggested forces could therefore include Soviet Strelkovy, Motostrelkovy, Udany Strelkovy, Rota Razvedki, Kazachya Sotnya, Tankovy and Heavy Tank forces. Regular or Guards forces may be used. Shtraf forces were not used.
|
|
German Forces (1500 or 2000 point kompanie)
The following forces may be used as “pocket” forces: Heer Grenadier, Pioneer, or Panzer (Stug) Kompanies or SS (Viking) Geparte Panzer Grenadier, Panzer, Motorized Panzer Grenadier, Aufklarung, or Panzer Pioneer Kompanies.
The following forces may be used as relief forces: Heer Panzer, Schwere Panzer, Geparte Panzer Grenadier, Motorized Panzer Grenadier, or Panzer Pioneer forces would all be appropriate for this campaign.
Weapons
Soviet forces used all of the support weapons typical of the time: T-34 obr 1942, Sherman and IS-II tanks, SU-76, SU-85, SU-122 and SU-152 assault guns, 76mm, 122mm and 152mm artillery, and Katyushas. T-34/85 obr 1943, KV85s, ISU-122, ISU-152 and flame-tanks were not used.
|
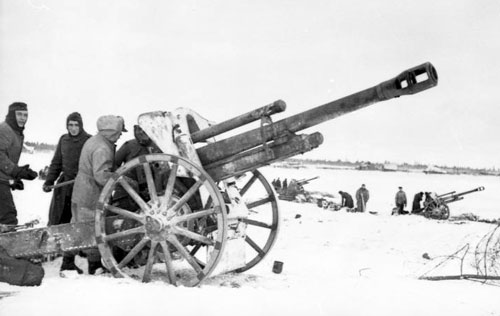
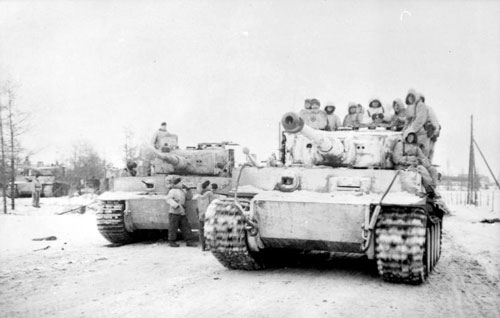
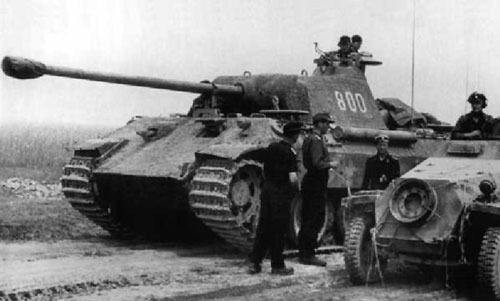
| The range of support weapons for German forces depended on whether they were within or outside the pocket. Both had PZII, PZIII, PZIVH, StugIIIG, Marder, Nashorn, Nebelwerfers, 10.5cm howitzers, and Wespe artillery. Panthers, Tiger Is, and Hummels were only used by relief forces from outside the pocket. No Elephants, Flame tanks or Pumas were used in the campaign.
Players could replay the campaign with alternative forces. The tactical situation is similar to the defence and relief of Bastogne.
|
 |
Terrain
Terrain in the Korsun area was typical of the more settled parts of the Ukraine with farmland, rolling hills, forests, balkas (gullies), a series of parallel rivers, towns and villages. Guidance is given in each battle description for the terrain on that battlefield. Where noted, players should use the Eastern Europe Terrain Chart (Campaigns & Terrain PDF ). |
Die Roll
|
Result
|
Effect
|
| 1 |
Blizzard |
As Snow, plus night visibility rules |
| 2 |
Snow |
Dirt Road as cross-country; cross-country as requires a Cross test, a ford requires a re-roll of successful Cross test |
| 3 |
Snow |
Dirt Road as cross-country; cross-country as requires a Cross test, a ford requires a re-roll of successful Cross test |
| 4 |
Mud |
Dirt Road as cross-country; cross-country as requires a Cross test, a ford requires a re-roll of successful Cross test, stream impassable |
| 5 |
Fog |
Night visibility; clears on 5+ from turn 3 |
| 6 |
Clear |
No effect |
|
Weather: January - February
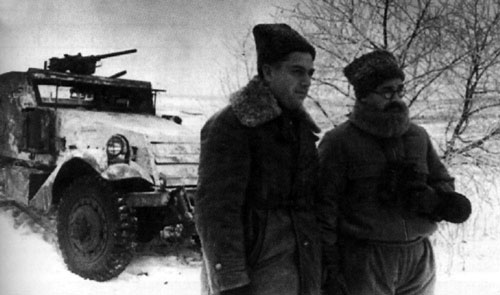
Weather and its effects played a crucial role in several of the Korsun battles. Winter in the Ukraine is cold, but unpredictable. The Korsun battles saw snow and also some unseasonal early thaws that turned roads into quagmires. Either use the historical weather for each game or roll on the following table before deployment (left): |
|
Air Support
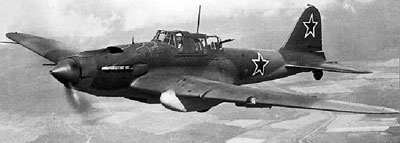
The Soviets had achieved Air Superiority by Korsun, although bad weather limited its use.
• Soviet aircraft arrive on a 3+ unless otherwise stated by mission rule.
Aircraft cannot arrive in games with Blizzard or until Fog clears.
|
 |
|
Starting Positions: January 1944
|
 |
The Battlefields – First Mini-Campaign
1. Cherkassy/Dneiper River (German Objective)
Cherkassy is a city on the Dnieper River that the Germans had attempted to hold before the Soviet army forced a crossing downstream at Kirovgrad. Its recapture would secure this area of the front line for Army Group South. The Soviets will defend the crossing vigorously.
|
|
Terrain: The Dnieper River (uncrossable, six inches wide) runs along the Soviet rear/entry edge of the table, with a ferry crossing point to allow reserves to enter the board from. The opposite (German entry) table edge has a twelve inch wide strip of fields adjacent to it. In between the table should be dominated by a large town/city with mostly wooden single level buildings and a central quarter of large concrete multi-level buildings. A wide paved road runs from the German entry edge, through the centre square to the river landing. There is a network of unpaved roads in the town.
Mission Suggestions: No Retreat. (or use the Mission Selector)
Artillery Support: All Soviet artillery may be located “Across the Dnieper” (using “Across the Volga” rules from Iron Cross or Enemy at the Gates City Fighting rules).
Reserves: Add one three platoon Strelkovy Company to the Soviets.
Victory: If the Germans successfully capture Cherkassy they cut the Soviet supply train and stop the offensive. They have won the campaign.
|
 |
|
2. Smella
If the Germans are able to force the soviets back from Burkri, they will next fight at Smella, on the road to Cherkassy. Historically, this area was defensively screened by the Soviets.
Terrain: Smella is a medium sized town in the middle of the board. A road runs through it between the short table edges. The Sukhoy Tasklyk is a narrow (2 inch wide) stream at this point, running across the centre between long table edges. Smella is on the eastern (Soviet) side of the stream. There are several swamps next to the stream, with the rest of the table containing woods and fields.
Mission Suggestions: Rearguard. (or Mission Selector)
Reserves: Add one three platoon Strelkovy Company to the Soviets.
3. Burtki (Start of First Mini-Campaign)
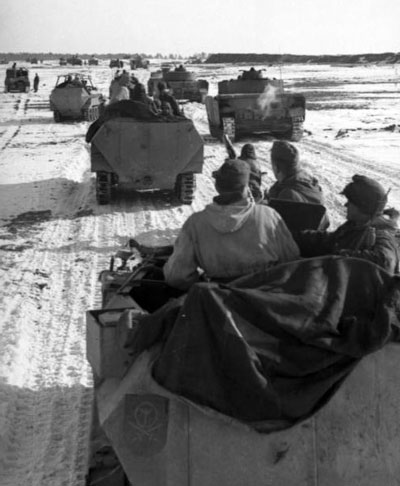
The Campaign starts with the Soviet force attacking at Burkri. The Soviet offensive began on 23 January as forward units seized jumping off points for the main attack on 24 January. Historically the Soviets won this battle after some initial reverses.
Terrain: Burtki is a small village in the centre of the table. Small streams run across the board twelve inches from the German entry edge and the Soviet entry edge (the Sukhoy Tasklyk).
|
 |
There is a ford across each stream opposite the village. The rest of the table is fairly open, with scattered fields.
Mission Suggestions: No Retreat (or use the Mission Selector)
Artillery Preparation: Soviet artillery add 1 to first turn ranging in.
Infiltration: All Soviet units may make a reconnaissance move forward after deployment, including crossing the stream. |
 |
4. Kapitanovka
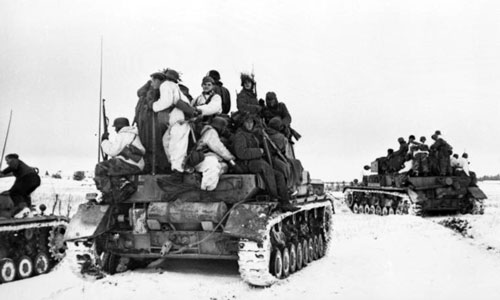
After the Soviets pushed through Burtki the next key point was at Kapitanovka. This town controlled the key road junction across the German salient. Historically, the Soviets gained a breakthrough at Kapitanovka, when their armoured reserves were released.
Terrain: Kapitanovka is a larger town located in the middle third of the table. Roads run between the long table edges and the short table edges, and meet in the middle of Kapitanovka.
|
|
The western quarter of the table (German deployment zone) is high ground that overlooks the town and road.
Mission Suggestions: Breakthrough (or use the Mission Selector)
Tank Reserves: Add a Company of 6 T34/76 tanks to the Soviets.
|
5. Zvenigorodka
This small town was the focus of the Soviet tanks, where Konev and Vatutin would meet to close the noose around the German forces in the Korsun pocket. If the Soviets reach this far and hold it, they have won the first mini-campaign. Historically, they did it in 3 days.
Terrain: The Gniloy Tikich River runs diagonally across the centre of the table. It is 4 inches wide but fast flowing and very difficult to cross requiring teams to re-roll successful Cross tests. Zvenigorodka is a modest town in the centre of the table straddling the river. |
 |
|
A road runs lengthwise across the table through the centre of the town, where there is a road bridge. The rest of the table is flat with mixed forest and fields.
Mission Suggestions: Contact (or Mission Selector)
6. Olshana
After the Soviets consolidated at Zvenigorodka they turned north to push back the German pocket towards Korps headquarters at Korsun. If they are not stoped the pocket will collapse.
Terrain: Olshana is a spread out village in the centre of a valley, surrounded by rolling hills on all sides. Place a half dozen wooden buildings in the table centre 2’ squares, with a larger concrete sugar factory in the middle. The village is at the centre of a T crossroads, with the major road connecting the short table edges and the side road extending to one long table edge. Place a large gentle hill in each corner of the table, and woods, fields or balka in each 2’ square. The Soviets enter from the side road long table edge.
Mission Suggestions: Bridgehead (or use the Mission Selector)
Training Centre: Add a platoon of replacement (Confident Trained) Grenadiers (3 squads with Panzerfaust) to the Germans.
Victory: If the Soviets reach Olshana and win, the road is open to Korsun. They have liquidated the pocket and the campaign is over!
|
Starting the Second Mini-Campaign:
The second mini-campaign starts with the Germans about to launch their counterattack. If the Germans are playing a pocket force, start with the attack on Shanderovka. If playing a relief force, start with the attack on Tinovka.
Unless otherwise noted use the mission selector (Campaigns & Terrain PDF ) to determine the battles thereafter. |
 |
The Battlefields – Second Mini-Campaign
1. Steblev
Steblev was the last town before Korsun on the Korsun – Lysanka road. If the Soviets force the Germans back from Steblev, they win.
Terrain: Steblev is a medium sized town (a dozen buildings) in the centre of the table. There is a large hill in the northern (German deployment zone) quarter of the table, overlooking the town. |
A road runs across the table connecting the short table edges and going through the town centre and over the hill. Roll for balka, forest or fields in the remaining table 2” squares.
Mission Suggestions: Rearguard. (or use the Mission Selector)
Garrison Area: Add a platoon of Confident Trained replacement Grenadiers (3 squads with Panzerfaust) to the Germans.
Victory: If the Soviets force the Germans back from Steblev the road to Korsun is open and the pocket will collapse. Victory comrade! |
2. Shanderovka (Start Second Mini-Campaign for Pocket Force)
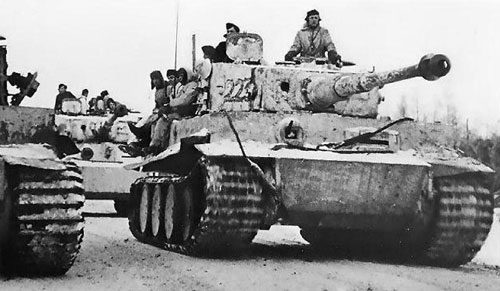
The Campaign starts with the German pocket forces attempting to break-out with an attack at Shanderovka. Historically the German attack was successful, thanks to a Night Attack by SS Wiking, and Grenadier Regiment 105, led by Major Robert Kastner.
Terrain: Shanderovka is a much larger town occupying the central third of the table. A paved road runs through it connecting the short table edges. A large balka leads from the German deployment area to the edge of the town. |
 |
|
Roll for balkas, forests and fields to fill remaining 2” squares of the table.
Mission Suggestions: No Retreat (or use the Mission Selector)
Ammo Shortage: German supplies are limited. All indirect fire weapons may only make one reroll to try to range in. (Mortars still get their reroll of the initial ranging in attempt.)
Night attack: The German player may opt for a night attack. This may only be done on the first attack at Shanderovka.
|
 |
3. Komarovka
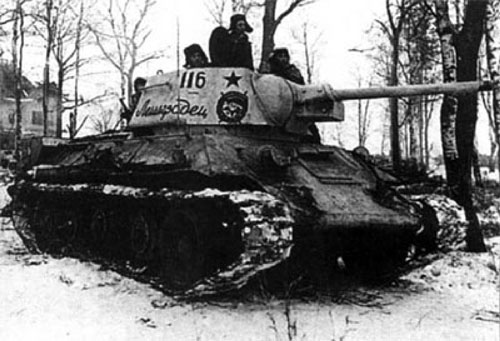
Komarovka (and nearby Khilki) was the last major town before the Gniloy Tikich River. The breakout was launched after it was captured. Major Kastner again led the successful night assault.
Terrain: Komarovka and Khilki are twin nearby towns, one in the middle of each half of the table. Komarovka is larger and located just forward of the Soviet deployment zone. Khilki is smaller, just a few houses and is located in the centre of the table. The south (Soviet) deployment zone rises to a large hill. There is a forest on the flank of Komarovka with scattered fields and balkas elsewhere. |
Mission Suggestions: Free For All (or use the Mission Selector)
Ammo Shortage: German supplies are limited. All indirect fire weapons may only make one reroll to try to range in. (Mortars still get their reroll of the initial ranging in attempt.)
Night attack: The German player may opt for a night attack. This may only be done on the first attack at Shanderovka. |
4. Hill 239
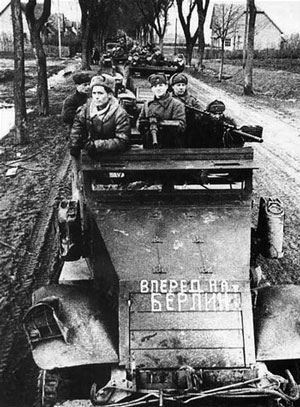
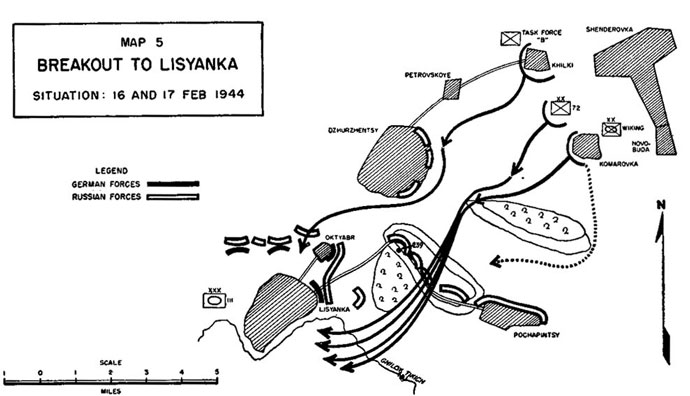
The climax of the campaign occurred on this small feature north of Lysyanka. Historically the relief force reached the hill, but was first halted and then forced back. The break-out force then had to force their way past, and disintegrated while doing so taking heavy losses.
Terrain: The long table edge is orientated east-west, and the short table edges run north/south. German pocket forces deploy from the east edge of the table; German relief forces deploy from the west edge of the table. The central third of the table is dominated by a large north/south hill with the crest running along the table centre line, giving a wide (16 inch plus) field of view. The village of Pochapintsy is near the sough (long table edge) on the centre line i.e. on the hill crest. A road runs along the crest from the village to the other long table edge, with a T crossroads in the centre. The side road runs back to the western edge, where there is another village, Oktyabre. There is a wood west of the crest on the south side of the side road. The rest of the table is covered with fields, forests and balkas. Balkas on the east side of the table extend onto the hill.
Mission Suggestion: Always No Retreat
Ammo Shortage: German supplies are limited. All indirect fire weapons may only make one reroll to try to range in. (Mortars still get their reroll of the initial ranging in attempt.)
Konev Reacts: Soviets receive a company of six T34/76s. |
 |
|
5. Lysyanka
It was crucial for III Panzer Korps to seize a bridge over the Gniloy Tikich River if they were to relieve the pocket. Historically 16th Panzer quickly captured such a crossing, but the bridge was blown up by the Soviets. A crossing had to be forced at Lysyanka.
Terrain: The Gniloy Tikich River runs across the middle of the table between the two deployment zones. It is 4 inches wide, fast flowing and very difficult to cross, requiring teams to re-roll successfull Cross tests. Lysanka is a sprawling town in the centre of the table on both sides of the river. A road runs lengthwise across the table through the centre of the town, where there is a road bridge. A hill rises in the Soviet deployment zone. The rest of the table is flat with mixed forest and fields.
Mission Suggestions: Rearguard (or use the Mission Selector)
Stalin’s Surprise: Soviets receive a company of three IS-IIs.
Rudel to the Rescue: For this mission German aircraft arive on a 3+, and Soviet air support arrives on a 5+. German air support is flown by Ju 87 Stuka (3.7cm).
|
 |
 |
6. Tinovka (Start Second Mini-Campaign for Relief Force)
Bad weather and muddy roads delayed the German relief attempt for a week. When it began on 4 February 1944, it soon became apparent that von Vormann’s XLVII Panzer Korps could not reach Korsun and the job fell to III Panzer Korps. Their drive started from Tinovka, with their line of advance along the road to Korsun.
Terrain: A road runs lengthwise across the table connecting the long table edges. Tinovka is a small village of a half dozen wooden buildings along the road in the centre of the table. There are hills in two opposite corners of the table. The rest of the table is flat with mixed forest and fields.
Mission Suggestions: No Retreat (or use the Mission Selector)
Special Rules:
Dawn Assault: The game starts at Night, and players roll for daylight from the Attackers Turn 3 onwards (5+ for daylight).
|
| Tactical Surprise: The German relief force surprised the Soviets with a pre-dawn start to the battle. All Soviet units on the table start pinned and/or bailed out if vehicles. This rule applies for the first game at this battlefield only.
Weather: Snow (or roll on table)
|
7. Gornyy Tikich Bridge
The German relief forces had travelled from Uman via the few roads in the area and in particular over the Gornyy Tikich River at the road bridge near Novoya Greblya. Loss of the bridge would be fatal.
Terrain: The Gornyy Tikich River runs across the table just in front of the German deployment zone. It is 4 inches wide but fast flowing and very difficult to cross, requiring teams to re-roll successfull Cross tests. Novoya Greblya is a small town in the centre of the table next to the river. A road runs lengthwise across the table through the centre of the town, and across the road bridge. The rest of the table is flat with mixed forest and fields.
Mission Suggestions: Free For All (or use the Mission Selector)
Victory: If the Soviets force the German relief force back from the bridge, they have broken III PzCorps and won a Major Victory! |
|
Historical Campaign Outcome
The Korsun Pocket was a Soviet victory, though it came at a high price. Also the Germans could claim that, Dunkirk like, most of their men escaped the trap. The pincers of Konev and Vatutin did indeed cut off the German XI and XLII Army Corps. (The Soviets clearly won the first mini-campaign.) The relief effort of Brieth and von Vormann came close but fell just short. The infantry trying to escape mostly succeeded. (The Germans had a marginal victory in the second mini-campaign.)
The intensity of the battles was born out in the casualty figures. In two months the Soviets starting with 240,000 men and 500 tanks, lost 25000 killed, 56000 wounded and half their tanks. The Germans had started with 55000 men and 70 tanks and assault guns in the pocket. Another 80,000 men and 300 tanks (4 weak panzer divisions) tried to break them out in the second half of the battle. Claims vary, but as a minimum 20,000 Germans in the pocket were killed or captured with all of their equipment lost. Of the 40,000 survivors, 11,000 were wounded. In addition a similar number of killed and wounded were lost from the relieving forces, which also lost over 100 tanks.
|
Last Updated On Tuesday, January 11, 2022 by Wayne at Battlefront
|
|
|