|
|
The Staghound and AEC
 |
The Staghound and AEC
By Adam Brooker
The British Bulge book finally gives me what I really want in my late-war British Force - lovely wheeled armoured cars and a plethora of them as well. You have the Daimler and Dingo, as well as the Sawn-off Daimler, and now I get to add the excellent Staghound and AEC III Matador to my forces.
|
|
I don’t intend to spam these as some players enjoy doing. I really like building themed lists and weird lists with unusual vehicles not often seen. I also seem to like lists that are very fun to play but are often not as competitive as they could be. One of the new Command Card Formations drew me straight away, the Armoured Car Squadron.
|
|
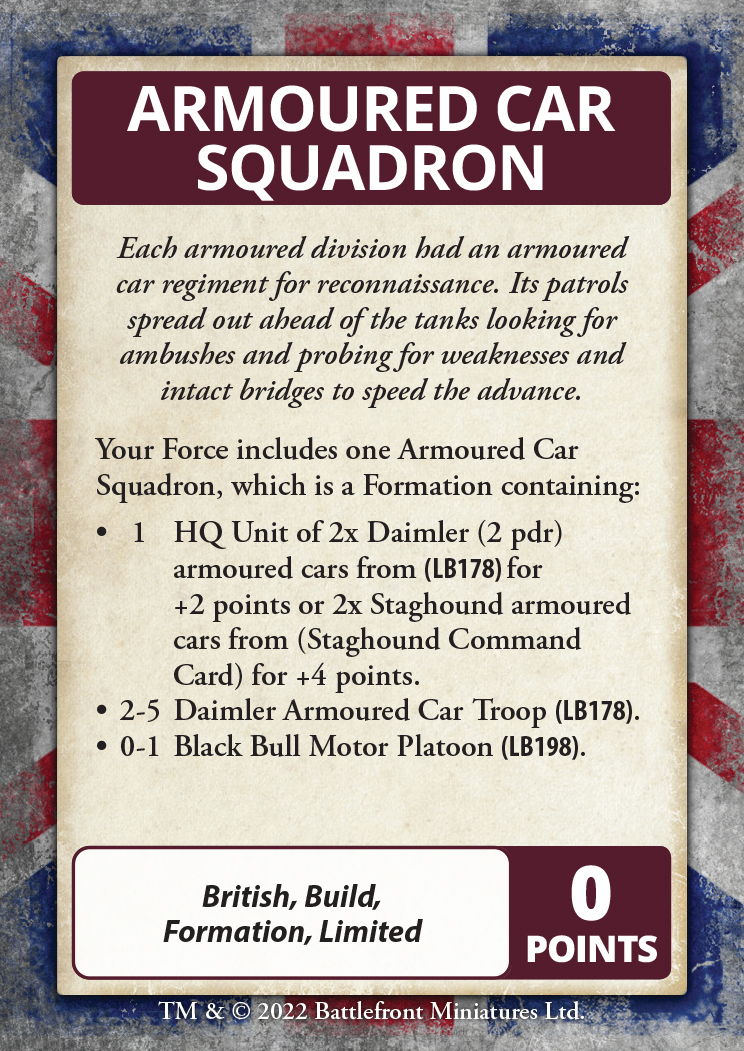
The new Armoured Car Squadron allows me to play with all of these options if I wish, and I started to flesh out a force that would use a lot of the new vehicles and some of the new command card units. First of all, you will need access to the British Bulge Command Card deck. I really see these Command Cards as almost mandatory if you want to get the most out of the new army books, with so many great new options. Another good thing (in my view) is that this card is Limited, so you can only ever take one of these, lessening the issue of armoured car SPAM that was prevalent in some early V4 lists.
|
|
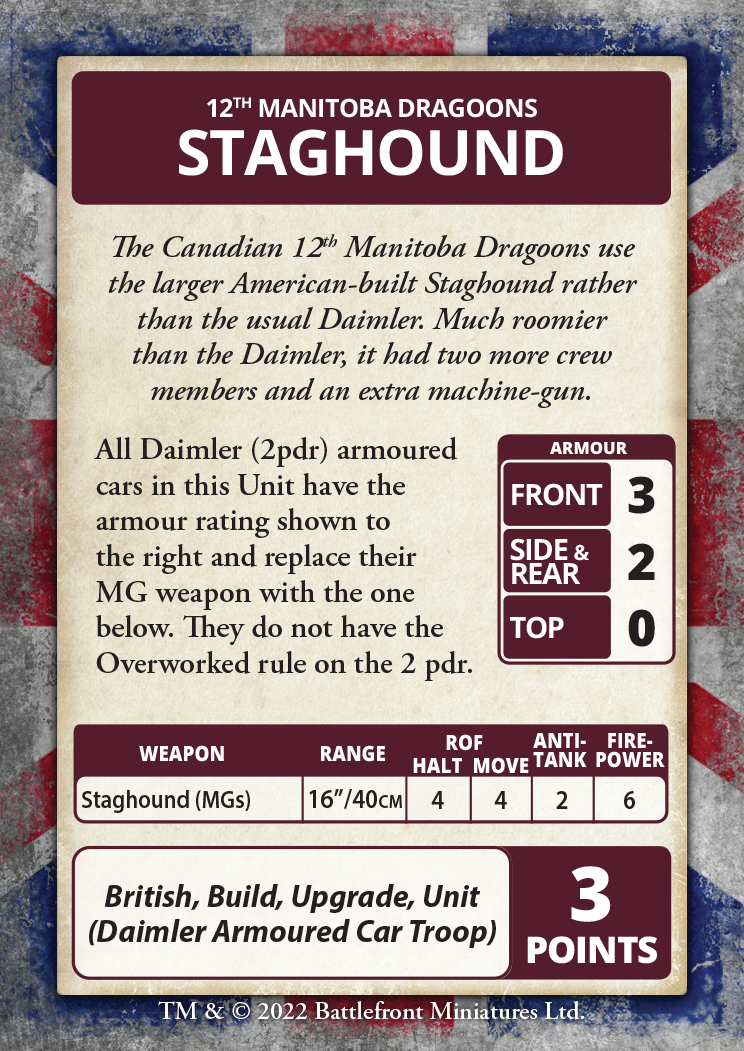
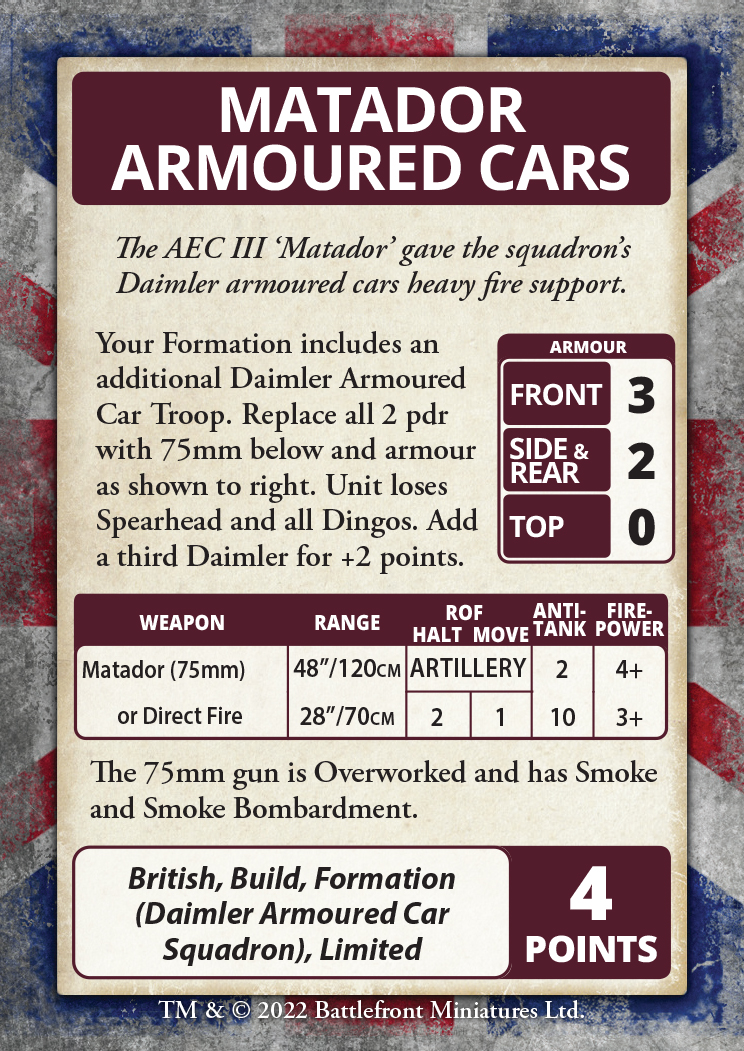
It has the option of either 2 Daimlers or 2 Staghounds as the HQ, then 2-5 Daimler Armoured Car Troops, and up to 1 Black Bull Motor Platoon, which is not a bad Formation as it sits, but I can enhance it with the 12th Manitoba Dragoons Staghound and Matador Armoured Cars Command Cards. See below:
|
 |
 |
 |
|
Firstly, let's look at the Staghound. It’s a 3pt upgrade on the 2pt Daimler Armoured Car Troop, so you end up getting 2 Staghounds and a Dingo for 5 points, with increased armour, an extra MG, and you lose the Overworked rule on the main gun. A fairly good trade in my view means you have a fair chance of bouncing AT 5 or 6 shots and more armour than most other armoured cars, but for me losing overworked is the best part.
|
|
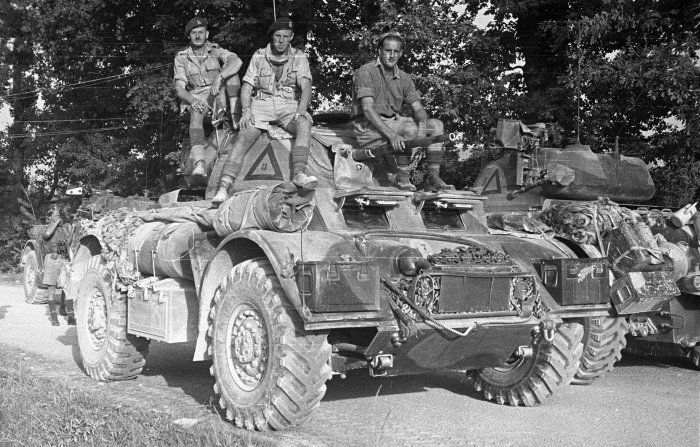
The Staghound has always been one of my favourite allied armoured cars. It was a US-designed and produced vehicle that the US initially started designing but decided against using, but the British, looking for a better armoured car based on their experiences in the deserts of North Africa, thought it could be produced as a lend-lease vehicle. Eventually, around 3,800 vehicles of different variants were built for the British and Commonwealth forces.
|
|
|
|
New Zealander Divisional Cavalry – Staghounds, Italy 1944
|
|
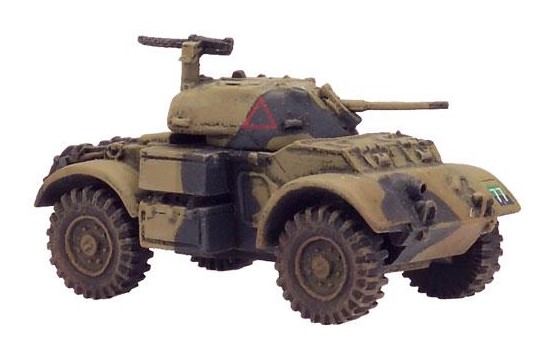
The most common variant was the Staghound Mk I (T17E1), 5 crew, with the same 37mm gun on the Stuart light tank and gyroscopically stabilised, but with a roomier 3-man turret bigger than the British Daimler or Humber, hence the loss of the Overworked rule. It also had a co-axial MG, a hull-mounted MG and often another AA 0.30cal MG on a pintle mount. So a lot more firepower compared to the Daimler.
|
|
Two other common variants were the Staghound AA (T17E2) with twin 0.5cal MGs, and the Staghound Mk II, which replaced the 37mm with a 3” Mk I howitzer for close support. The Mk II was mostly fielded in Italy and was often attached to the Armoured Car HQ Section, or in the case of the NZ Staghound Div Cav, one was often put directly in a troop to provide immediate close fire support.
|
|
|
| Staghound Mk I – T17E1 – NZ Div Cav markings |
|
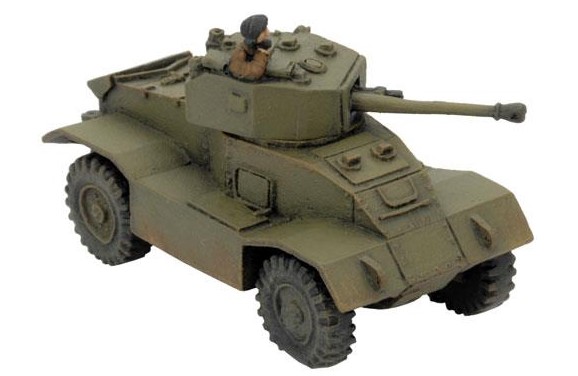
Next is the Matador Armoured Cars Command Card. These have the same armour profile as the Staghound and work out at 2 points each as well. But this card is Limited, so you can only get one unit of these in your Armoured Car Squadron, which is fair enough as they pack a mean punch with their dual-purpose 75mm gun. It has a RoF 2 AT 10, 3+ firepower direct fire mode, as well as the option of performing an artillery bombardment AT2, 4+ firepower, as well as smoke. These are the dedicated Heavy Troop of the Sabre Squadrons, with 2 to 3 of them in a Troop. They can be used to dig out enemy infantry or gun teams, as effective Anti-tank units, or use smoke to neutralize any targets they can’t destroy.
|
 |
|
An AEC III Matador – Heavy Armoured Car with 75mm gun
|
|
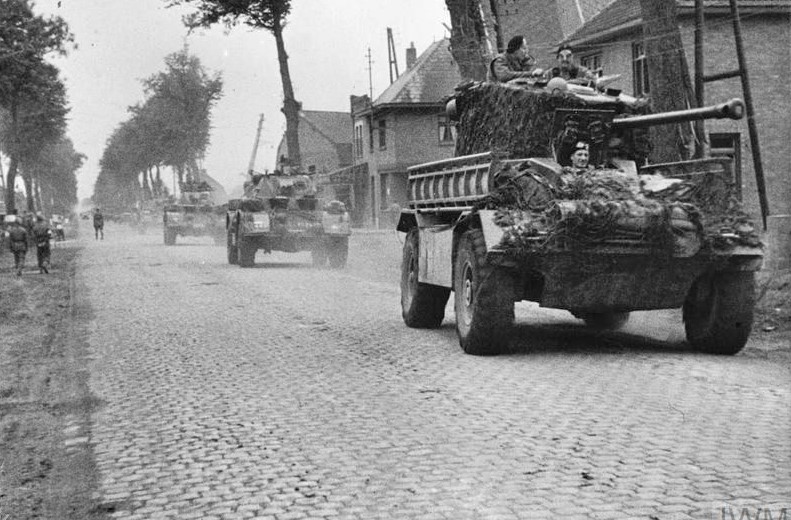
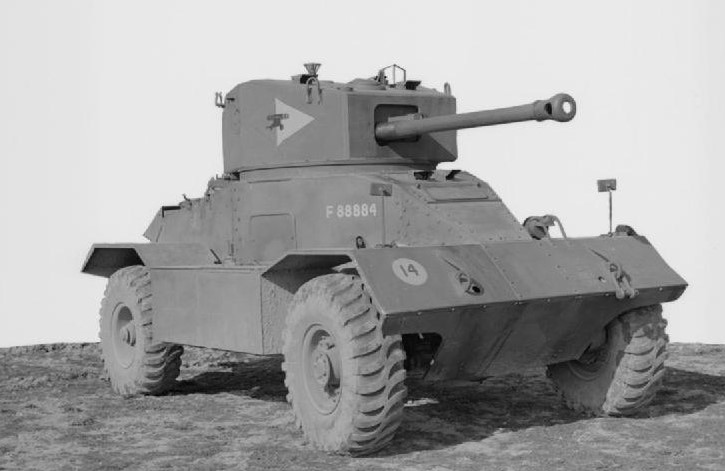
The AEC was a heavy modification of the AEC Matador artillery tractor, 4x4 rear engine (158 Hp) and the only diesel-powered armoured car fielded by the British Army in WW2. It really only had the Matador wheel and tyres of the Matador, and apart from that was essentially a totally different vehicle. Its transmission was such that it was normally 4x2, but it only engaged the 4x4 when it needed it cross country. It was very high for an armoured car, which did give it a good field of view but also made its profile stand out, which is why the turrets were often camouflaged. See the image at the start.
|
|
The AEC had 3 variants. The first, the AEC I, was armed with the modified Matador chassis, but with the turret of the Valentine Mk II tank with a 2pdr gun. It came too late to North Africa to see much service. There have been records of an up-gunned AEC I with a Crusader 6pdr turret as the 2pdr was seen as obsolete, but no images exist. The next version, the AEC II, had a new larger 3-man turret and fitted a 6pdr and co-axial Besa MG, fielded in the Italy Theatre. The only issue with the 6pdr was its HE shell at the time was not powerful enough, nor in large supply, so was seen as sub-optimal for the support role.
|
|
The final variant we see in British Bulge is the AEC III (Matador) using the same turret as the AEC II, but with a 75mm gun with better HE shells than the 6pdr.
|
 |
|
The Matador in game, as a part of the Heavy Troop in the Sabre Squadron, should be used in a support role, not as a front-line fighter - it does not have the armour for it. You should try to keep at range, and ideally in cover, firing at enemy guns or tanks but also trying to use your shoot and scoot or blitz movement orders to get you in the right position. Also, don’t forget you have the ability to bombard, so you can be useful while not making yourself vulnerable. You just need someone to spot for you (HQ), while your Staghounds stalk forwards and annoy/distract the enemy.
|
|
Here is a list I put together, using a lot of the new options that British Bulge brings:
|
|
An Armoured Car Squadron Formation with an HQ of 2 Staghound, 3 Troops of Staghounds, and 2 Troops of Daimlers, as well as 3 Matador (75mm) and a Black Bull Motor Platoon in half-tracks. I have also taken 4 Sextons, 4 Archers, 3 Chaffee, a full Ram Kangaroo Rifle Platoon (3 RAM Kangaroos), and 4 Ram Badgers.
|
|
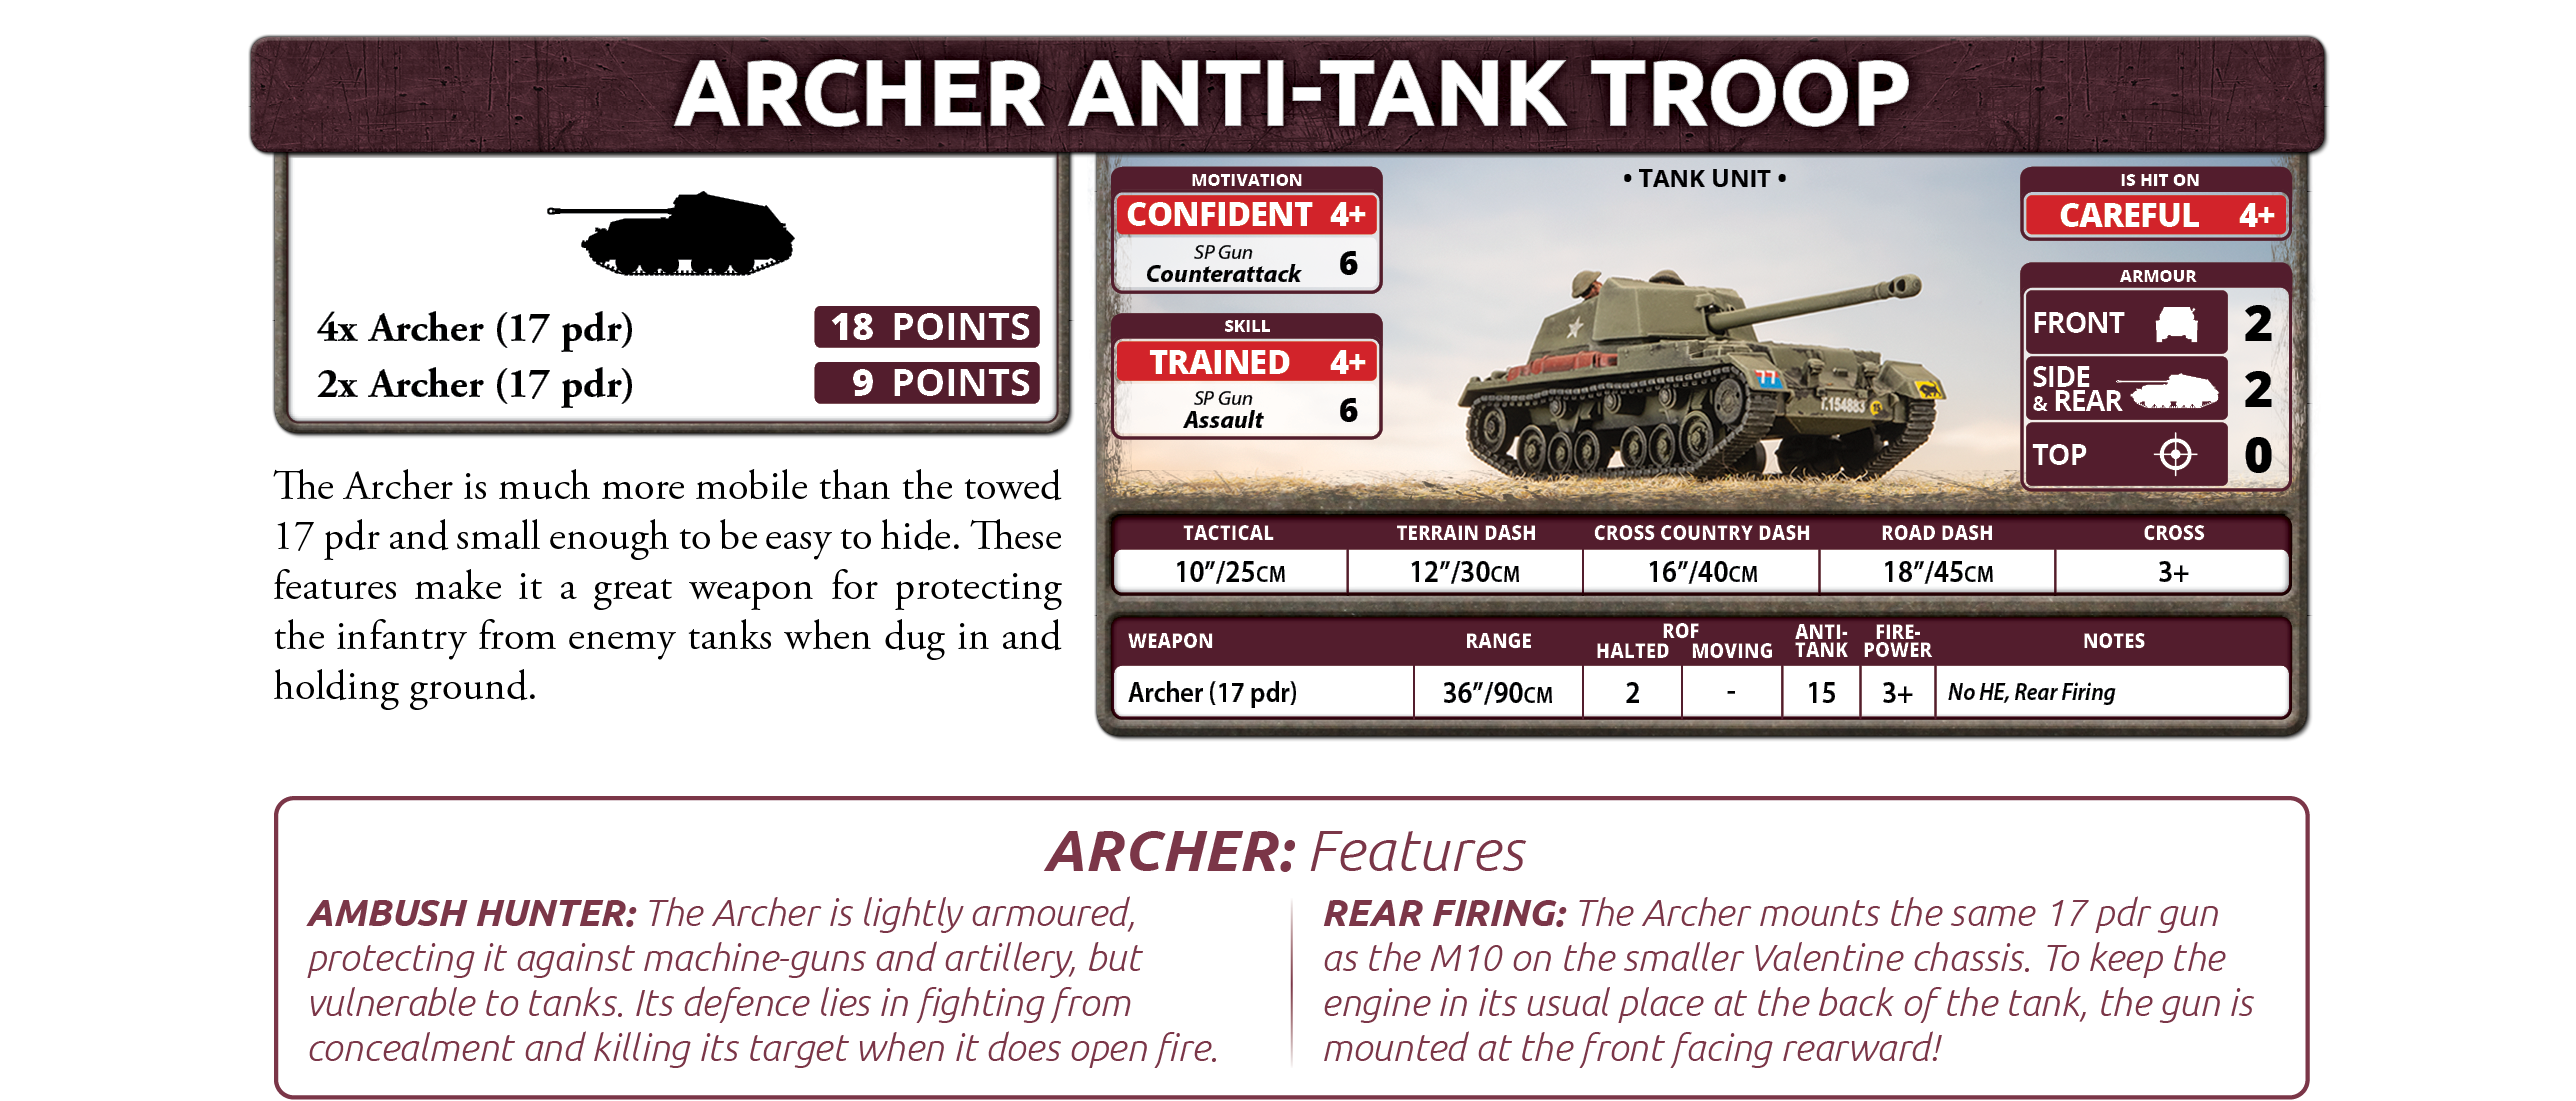
The Sextons will be my main artillery, and anti-tank in a pinch, while the Archers are my main Anti-tank unit. They are the cheapest 17pdr vehicles you can get, they have almost no armour, and no MG, but they can pump out 8 AT15 shots a round, and are in a lovely new plastic kit!
|
 |
|
Archer Anti-tank Troop – cut-price 17pdrs
|
|
The Chaffee will help the Staghounds to annoy things, snipe at the flanks of heavier tanks, and generally be a pain. I like them as they just go so fast, a 12” Tactical move and a 20” Cross Country Dash, they will zoom about! The Kangaroo Rifle platoon will be part of my assault section using the Close Assault rule of the Ram Kangaroo, which allows my infantry to assault out of the Kangaroo as long as it has not dashed in the movement phase.
|
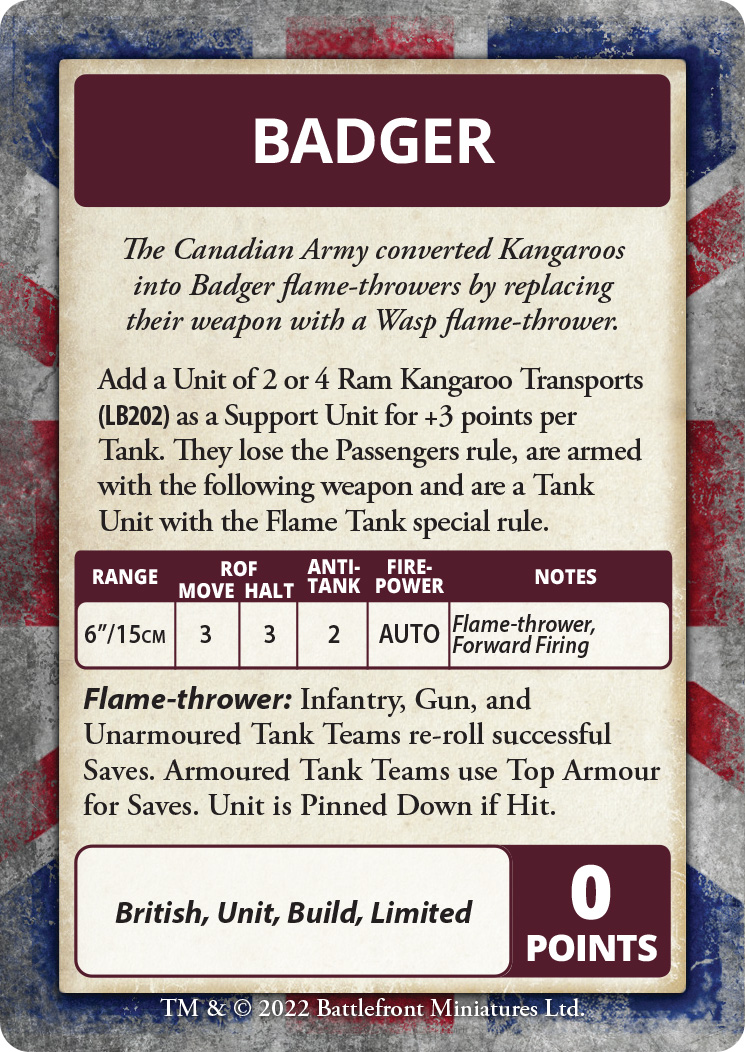 |
But I think the most fun unit will be the Ram Badger. Now I had no idea about this vehicle before this book came out. What was a Ram Badger? Some sort of Canadian Lumberjack Commando?? Nope, it was a Flamer variant of the Ram tank, something weird and wonderful. I had to have one, well, four.
|
|
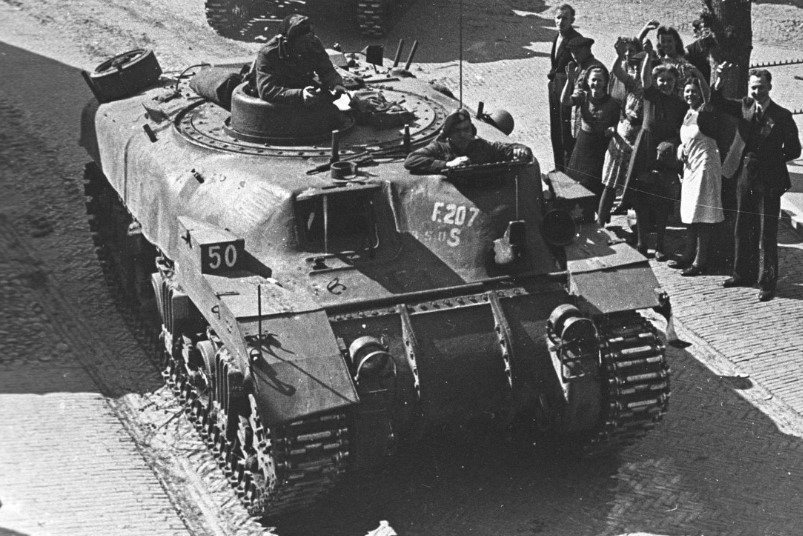
The Ram Badger was a Ram Kangaroo that moved the auxiliary 0.30cal MG turret from the hull onto the roof and added the WASP flame thrower upside-down into the hull mount, adding the WASP fuel tanks inside the vehicle. The Allies were finding the flamer vehicles like the WASP and Sherman/Churchill Crocodiles invaluable in assaulting strong German fortifications and they needed more of them. The speedy RAMs allowed them to close quickly with the enemy while having decent protection and no vulnerable trailers.
|
|
It first saw action with the Lake Superior Regiment (4th Arm Brigade, 4th Arm Division) in Jan 1945 in Operation Elephant near Capelle, Netherlands against German paratroopers, causing them considerable casualties, but taking a position that they had failed multiple times before to take. 24 were produced in total with 6 to the Lake Superior Regiment (Motor) Battalion, 6 to Westminster Regiment 5th Armoured Division, and 6 each to 1st Hussars, Fort Garry Horse & Sherbrooke Fusiliers (2nd Armoured Brigade).
|
 |
|
Ram Badger MKII – 5th Arm Brigade – Putten Netherlands, 1945
|
|
I’ve grabbed four of these hellfires to help crispy up my enemy before the riflemen in the Rams give the bosh a damn good thrashing! Lucky last is my Lucky Card, which gives me a re-roll in game. I tend to use it to re-roll one of my terrible reserve rolls, as my troops are never turning up when I think they should!
|
|
I think it will be a pretty fun list to play and will get me to use a lot of the new plastic toys coming out, like the plastic Sexton/RAM, the new plastic Archer and the new Chaffee that I haven’t picked up yet. Hopefully, I can use the new RAM kit to convert up 4 Badgers as well!
Hope you find something useful here, and it gives you ideas for your own force.
Happy Gaming,
Adam
|
|
|