|
|
|
|
Products mentioned in this Article
--None--
|
|
|
|
|
|
|
|
|
 |
|
|
 |
Road to the GT: Fallout
Phil's Tournament Report
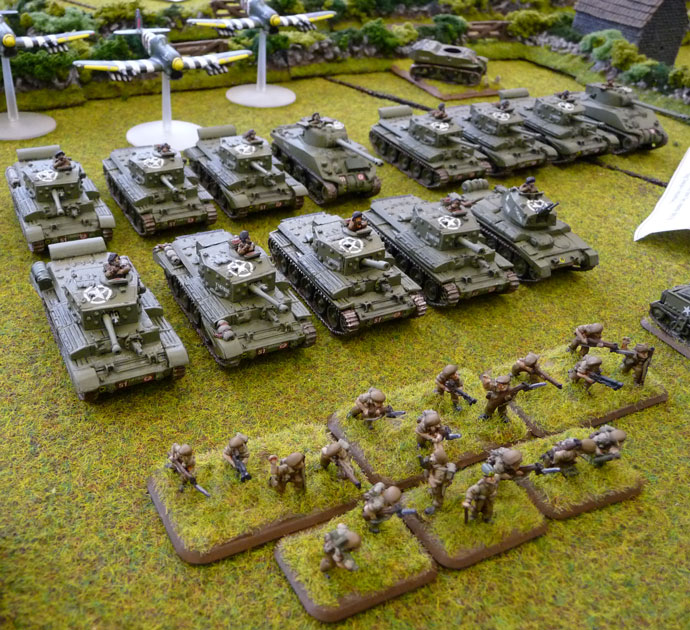
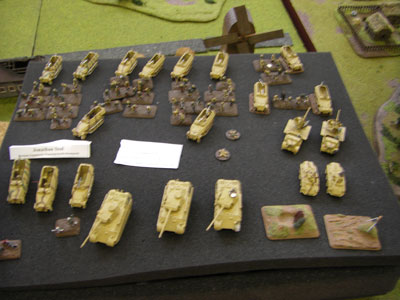
My force dates back to last year’s Panzerschreck tournament. The core 1500 points were painted up in the two weeks leading up to that tournament and have not changed since!
It represents A Squadron, 1 Royal Tanks, the senior company of the senior tank battalion in the British Army. 1 R Tanks were also the senior battalion in the Desert Rats’ 22nd Armoured Brigade in Normandy.
I’ve always loved the Cromwell tank and the 7th Armoured Division in Normandy (despite their manifold faults!), so when we wrote Villers Bocage, I had to make this force.
It has served me well, getting third place at Panzerschreck and fifth place in this tournament.
|
 |

|
A SQUADRON, 1 R TANKS
(ARMOURED SQUADRON)
COMPANY HQ
|
|
Company Command Cromwell IV tank and
|
|
| 2iC Command Cromwell IV tank |
160 points |
| Two Cromwell VI CS tanks |
140 points |
| One Crusader A/A tank |
45 points |
| ARMOURED PLATOONS |
|
Three Cromwell IV tanks and one Firefly VC tank
|
325 points |
| Three Cromwell IV tanks and one Firefly VC tank |
325 points |
| Three Cromwell IV tanks and one Firefly VC tank |
325 points |
SUPPORT PLATOONS
|
|
6 PLATOON, B COMPANY, 1 RIFLE BRIGADE
(MOTOR PLATOON) |
|
| Three Motor Sections |
125 points |
| SCOUT PATROL, B COMPANY, 1 RIFLE BRIGADE |
|
Three Universal Carriers,
one with additional MG, one with PIAT |
85 points |
| AIR SUPPORT |
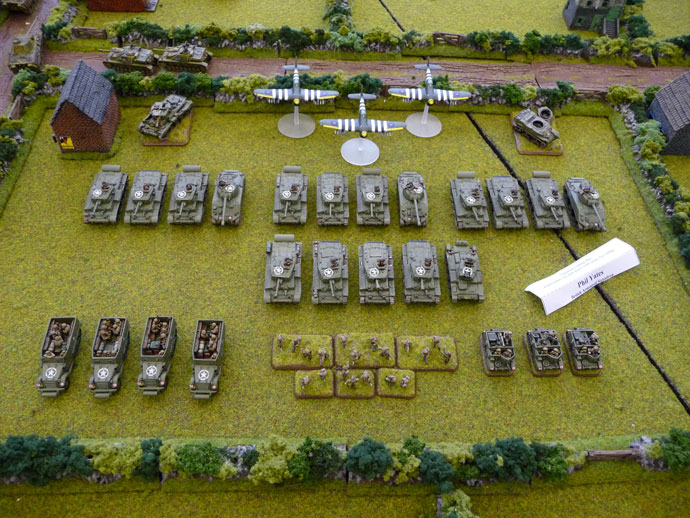
|
| Priority Air Support |
220 points |
Total
|
1750 points
|
|
|
Getting Ready
To take my force up to 1750 points, I added a second Cromwell VI CS tank and took out one of the two Crusader A/A tanks, and then painted up the new Typhoon box for a bit of air support.
I was hoping to bring a Romanian tank company, but time constraints meant that painting one tank, three aircraft and two objectives was my limit!
|
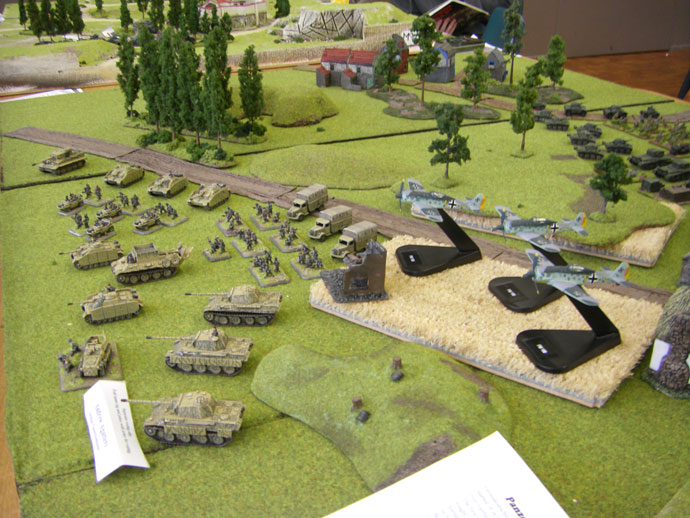 |
Game 1: Encounter
against Andrew Agutter’s Panzerkompanie
This was a really interesting game. I started the game with two Armoured Platoons hiding in or behind woods and a hill facing off against three Panthers, a small Kampfgruppe of two StuG assault guns and the commander in another StuG.
Andrew held one flank with just the company commander while pressing down the other with both platoons. I responded by staying out of sight until the Panthers came close enough, relying on the RAF who picked off one Panther. Then I dashed out with the Cromwells and shot with the Firefly. The result was one dead Panther platoon! This was helped by the StuG platoon getting well and truly hung up in a wood while trying to avoid the fire of my HQ tanks!
|
|
Unfortunately, that’s when things started to go
wrong. With that flank apparently under control, my reserves joined the
other platoon in hunting the company commander. Unfortunately the scout
platoon was ensconced in a village and the rest of the assault guns
arrived to join him at an inopportune moment!
Meanwhile the survivors of the
fighting against the Panthers were surprised by the sudden arrival of a
Tiger tank on the objective they were planning on occupying, and the
StuG assault guns recovering just in time to pick the all off! This
left my objective unprotected.
Time for the Rifle Brigade! They
arrived on schedule and dug in on the objective, fighting of an assault
by the assault guns before finally being pushed off on the second
attempt. This left things in the balance with just a turn left to win
the game.
On the other flank things were grim.
After several hit-and-run raids by German Focke Wulf 190’s, not a
single officer remained. The good news was that the German Assault Gun
Platoon and their company commander were gone too. The last chance was
to knock out the Tiger and break the whole army. Two good hits for the
second turn in a row were shrugged off by the Tiger, and it was game
over. A hard-fought and well-earned victory to Andrew.
Hey, I just realised that I
forgot about British Bulldog all tournament! That reroll could have
kept the Rifle Brigade on the objective and won me the game! Oh well.
I’ll have to remember that next time!
|
|
Game 2: Fighting Withdrawal
against Tony Davys’ Panzerkompanie
Having been defeated in our first encounter with the German Panzers, we were ordered to delay the enemy while the infantry formed a box. Having delayed the enemy we would fall back into the box and prepare to counterattack.
Leaving a platoon on the left flank with the attached Rifle Brigade troops, the bulk of my force deployed on the right. Tony decided to bull his way through before the platoon from my left could join in.
My troops performed well, picking off Panzer after Panzer, while successfully avoiding return fire for most of the game. Even his Königstiger heavy tank couldn’t do much.
|
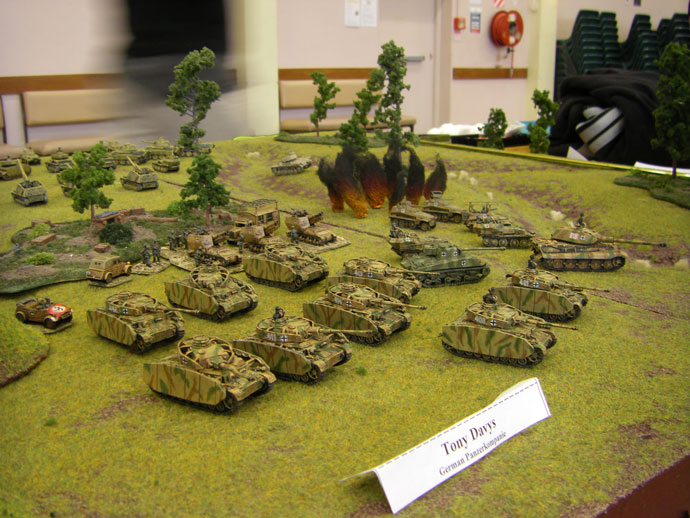 |
It wasn’t until the final few turns that Tony’s tanks finally identified where all the fire was coming from and knocked out a few tanks, far too late to make a difference. Tony reckoned it was par for the course. Apparently his bad luck continued through the rest of the tournament. Fortunately his good humour did too!
The most disappointing thing was the continued poor performance of the RAF. Although they turned up repeatedly, they were singularly ineffective. Even with five Panzers under the template, they still only managed to kill one! Their ineffectiveness was to continue until the last turn of the last game!
|
 |
 |
Game 3: Free-for-all
against Andrew Haught’s British Rifle Company
With a successful withdrawal under our belt, it was off for some training exercises before the next battle.
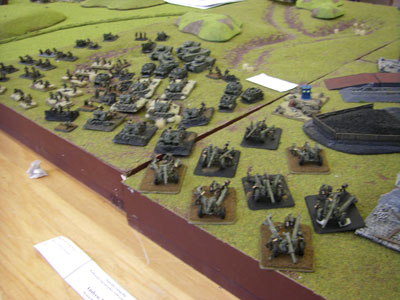
Andrew had been visiting his brother Mike (the author of Stalin’s Onslaught), and stayed on for the tournament, so it was good to get a farewell game with him. Not so good was facing up to sixteen artillery pieces on a board that gave them a lovely cornfield to deploy in! With them being in concealment with an excellent field of fire, I wasn’t keen on charging his 5.5” guns!
Unfortunately, the covered approach through the town on the right flank was blocked by three Churchill tanks. Not too much of a problem I thought. My Fireflies and the RAF should deal with them. How wrong I was!
|
The game consisted of my vain attempts to do more than bounce shells off the Churchill tanks while hiding from his artillery observers. By the end of the game, the RAF had managed to get one Churchill tank, a 17 pdr got another, and all of his 6 pdrs on the flank were dead. The cost though was high. I had four tanks left to assault his infantry. Not a realistic prospect with Reluctant tanks. With the Rifle Brigade staying pinned down half-way across the table, that was pretty much game over.
|
|
Game 4: Breakthrough
against Gavin Van Rossum’s Panzerkompanie
Sunday morning and we were back in the front lines attempting to break
through the German positions and restore some mobility to the front.
The battle took place in dense
Bocage, fortunate considering that the enemy had three Tiger and three
Panther tanks, plus some StuG assault guns.
I put two Armoured Platoons on table,
leaving an Armoured Platoon, the Motor Platoon and the Scout Patrol to
outflank the enemy. This turned out to be an effective strategy.
|
|
| The
Tigers skirmished with my tanks, knocking out a Firefly and a Cromwell
for no losses, but the Panthers hesitated to get too close, having
little effect. When the StuG assault guns turned up, they started for
my main force, before diverting towards the objectives just as the
flanking force arrived.
This left the company commander and
his number two on their own against the flanking force. The two StuG
assault guns didn’t last long, and everything else was too far away, so
the game ended with a British victory.
The game was quite quick, and as it
was Gavin’s first game in a Bocage, we decided to play again–this time
a Free-for-all. That was an interesting game. For the first time the
RAF turned out in force knocking out two Tiger tanks and a Panther
tank. A pity that it wasn’t in a tournament game! After hard fighting
in which I lost all of my Firefly tanks knocking out the last of the
Tigers and bailing a Panther, I sounded the general advance and the
Cromwells flanked the surviving Panthers to end the game just as I
reached the objective.
Two fun games against another great opponent!
|
|
Game 5: No Retreat
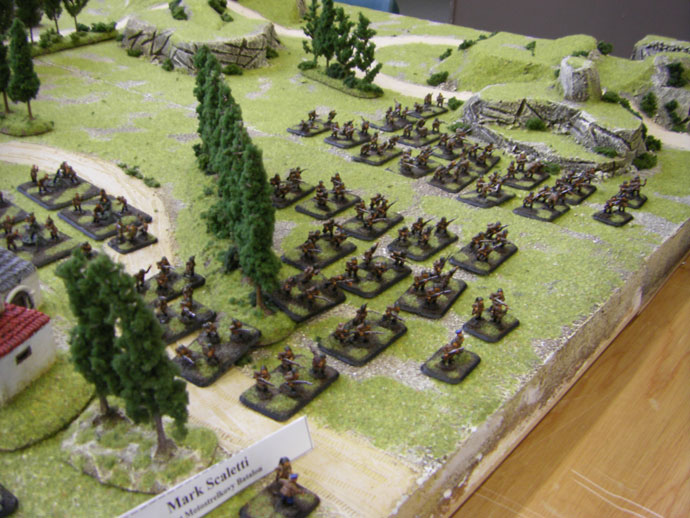
against Mark Scaletti’s Motostrelkovy Batalon
Having dealt to that Panzer force, we advanced a considerable way into Germany before running into another equipped with a new type of tank we had not seen before. Undaunted, we attacked again!
Attacking a force with more tanks than I have, and three times as many well-armed tanks, was a little daunting. None-the-less, I devised a plan that would have done the Blackadder family proud (it was so cunning that it actually was a weasel!).
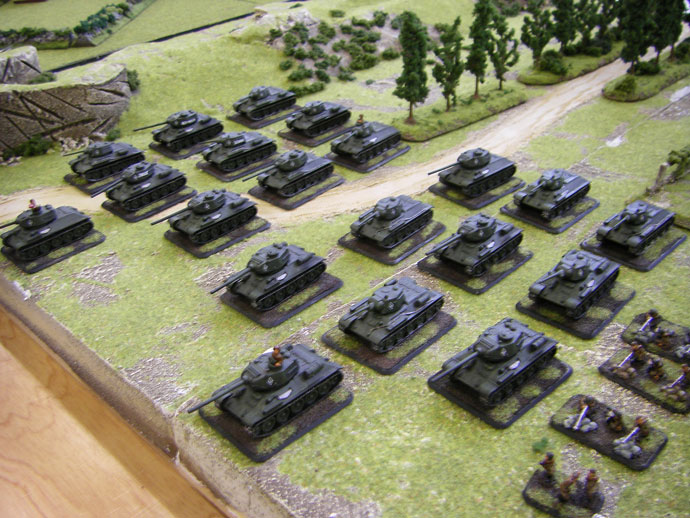
Mark placed a T-34 tank company on my right flank and an infantry company on the left. A walled hilltop village separated them. Leaving my scout platoon alone on the right flank to threaten the rear objective, the entire rest of my force massed on the left. There was little room for him to deploy the rest of his tanks on this flank, and only a narrow defile for his reinforcements to move up through, so I figured the resulting massed targets would help the RAF. Meanwhile there was a disjointed line of trees between me and the tank company on the right. If I could deal with the tanks I expected to appear from ambush on the left, then I’d swing up to the tree line and deal with the right flank in turn.
So much for the plan!
The reality turned out a bit different. I lost one Firefly and had another bailed out before I fired a shot. The RAF was disappointing as always and my return fire got a single tank!
The right flank tanks manoeuvred to bring the bailed-out Firefly under fire, keeping it out of the fight for several turns until they finally got it. Fortunately, the left flank tank company was fairly ineffective, knocking out another Cromwell and the last Firefly. At this point things looked grim, especially as the RAF failed to turn up!
Then things changed dramatically. All twelve shots from the surviving Cromwells hit (thanks to Semi-indirect Fire) and blew away the left flank tank company! Even the battalion commander couldn’t stop the ensuing rout and was carried off with them.
Unfortunately that was the highlight of the game. The RAF continued to be ineffective, despite massed targets, and six Cromwell tanks are just not a match for ten T-34 tanks.
In the end, we were forced to call off the attack and fall back on the infantry brigade once more—another great game!
|
 |
 |
|
Game 6: Free-for-All
against Jonathon Seal’s Gepanzerte Panzergrenadierkompanie
The last game of the tournament was against my traditional last-game-of-tournament opponent, Jonathon.
This was another tough game. The table was a mix of open space and a devastated industrial landscape. Facing off against a Panzer Lehr Panzergrenadierkompanie with heaps of infantry anti-tank and three Panther tanks, it wasn’t an easy game.
Most of the game was spent with the Panthers and my tanks sniping at each other through the ruins with the RAF making sorties with single aircraft who died to the anti-aircraft guns defending the Panthers.
|
 |
| My attempt to outflank the Panthers ran into
trouble when the Firefly bogged down trying to hide in a gully. The
Cromwell following it got stuck, as did the third one! Fortunately the
fourth tank remained behind the hill covering them as the infantry were
uncomfortably close!
The game ended with the eventual
destruction of the Panthers from lucky shots and the destruction of
both infantry platoons as they bravely attacked. The one attacking my
flanking force died to massed machine-gun fire when the bogged-down
tanks sorted themselves out and were reinforced by more Cromwells, and
the other flank’s attack was finished off by a spectacular air strike
by the RAF who finished the game in fine style.
At the end of the game, we were both tired, but happy gamers!
|
Last Updated On Wednesday, November 5, 2008
|
|
|