|
|
|
|
Products mentioned in this Article
--None--
|
|
|
|
|
|
|
|
|
 |
|
|
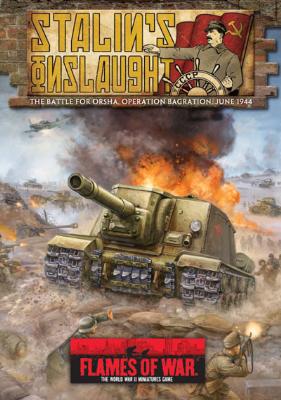 |
Stalin's Onslaught Battle Report:
Reconnaissance in Force Scenario
It’s the eve of the Operation Bagration and the Soviet forces are making their last few adjustments to their deployment. The time has come to learn what they will be facing. The Germans have had some time to prepare for the assault and it has become necessary to test the strength of their defences—a perfect job for a Shtraf battalion!
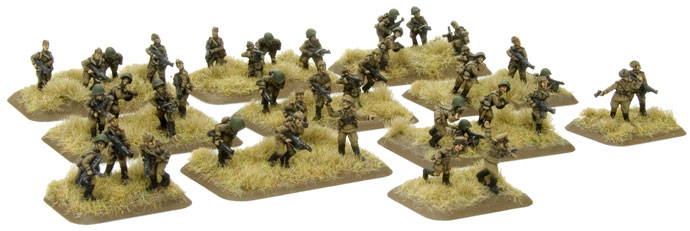
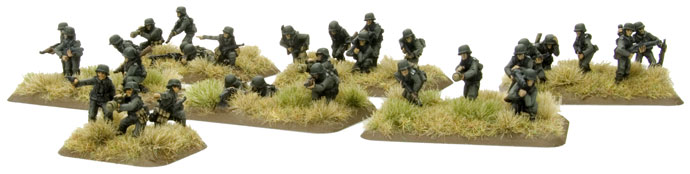
Last week Phil and my brother Andrew jumped at the chance to play the first scenario out of the new Stalin’s Onslaught book featuring the new Shtraf Batalon and the Sturmkompanie. Andrew is visiting on holiday from in Phoenix, Arizona way back in the good ol’ USA. He’s been playing the game for several years. He obviously got all the “strategy genes” in the family, given my propensity to play like a monkey!
Andrew was particularly interested in trying out the Shtraf battalion as he has never played Soviets before and thought it would be a fun force to take for a spin. Phil took on the Sturmkompanie in an attempt to vindicate my last poor outing with the new German force!
Both Phil and Andrew took a moment to share their thoughts before the battle…
|
|
Andrew's Opening Thoughts
I’m sceptical of the thought of fighting through mines and barbed wire, but no matter what I do, I will have to gap the obstacles. My plan is to take one Shtraf company and combat attach the sappers and flame-throwers to one platoon to lead the attack. The sappers will lead the pack of troops in order to get started clearing mines and wire for the second company.
I’m not sure if it will help, but I’m going to
separate my heavy machine-guns so I can use them to support the advance
by pinning both sides of the front, keeping the Germans spread out.
If nothing else, my men will bravely charge into the German defensive line and find their redemption in the glory of combat! |
 |
|
Phil's Opening Thoughts
It
doesn’t look good! I have maybe half of the troops I need to hold this
frontage, if I’m lucky.Plenty of anti-tank if they throw tanks at us,
but more men on the ground and more machine-guns would be better.
I’m
not sure whether to risk defending the first trench or not? I think I
have to, as once they are in my trenches, they’ll be immune to my
firepower, and I simply can’t throw them out with the troops I have. In
that case, I have to put the infantry in a screen across the front line
with the machine-guns backing them up from the second line. This will
also free up the second trench for my reserves to move quickly to where
they are needed.
I think I’ll combat attach all
of my machine-guns to get them involved in the fight for the first
trench.With this in mind, I’ll break the Sturm platoon into two with a
small Kampfgruppe under the company 2iC. I’ll also give the
Oberfeldwebel the two machine-guns from the heavy platoon. The rest of
the platoon will have the machine-guns from the MG platoon attached.
The remaining guns and mortars will be deployed forward to get plenty
of shots in as early as possible and cause as many casualties on
Andrew’s Shtrafniki as I can before he hits my line.
Gott mit Uns! We’ll need it.
|
 |
 |
Manoeuvring into Position
Phil deployed his infantry in the trenches with the infantry guns and mortars in the support trench. He attached his HMG teams along the back trench to support the infantry in the forward positions. The 8.8cm FlaK36 and 7.5cm PaK40 guns were deployed a little further back and in concealment to offer long-range support. The heavy mortars deployed behind the small copse of trees and readied themselves for the fight.
Beyond the marshes Andrew moved his Shtraf into position. The two blocks of Shtrafniki began together in the forested area. His HMG teams deployed on the flanks to help support the troops. The Shtrafnik mortars found a little patch of solid ground behind the marshes and set up their tubes. The Katyusha trucks prepared to deliver the opening salvo from just behind the forested area.
Battle Commences: Turn 1
The
flares go up and signal Andrew’s Shtraf to lurch forward and begin its
assault. Andrew moved his prisoners up through the middle of the forest
toward the German lines. The HMG teams open up, pinning down the troops
in front of the Shtrafniki.
The Soviet mortars
delivered a deadly barrage on the rear trench; knocking out an HMG and
pinning down the infantry guns the 8.8cm guns and a Sturm platoon in a
single barrage
|
|
The Katyusha rockets ranged in and hit the forward trench with a doublewide template covering the Sturm platoon and the Kampfgruppe.
Phil attempted to rally his troops from the Soviet barrages. The 8.8cm guns shrugged off the barrage and unpinned, but the others hit by the mortars failed to do so! The troops on the other flank bounced back, ready to retaliate with their own mortars. A platoon of Sturm grenadiers arrived from reserve and shuffled at-the-double down the trenches toward the action. (Phil’s Tip: Moving at the double along a trench line will help get your troops into position faster. They’re concealed and Gone-to-Ground while in the trench, and still remain in bullet-proof cover!)
Phil’s observers sent a desperate message back to HQ that they have
spotted a massive block of enemy troops emerge from the forests. He
ordered all weapons to fire at the threat. Phil was elated that the
heavy mortars managed to grab 17 Shtrafnik teams under the template! He
rolled and got nine hits, but Andrew managed to save all but three
teams. The medium mortars had a try at the same target and got four
hits, destroying three teams—that’s more like it! The HMG teams and the
8.8cm and PaK40 guns fired long-range shots, destroying several more
teams.
Andrew’s casualties numbered 13 destroyed stands, but
with passing platoon Morale Tests on 2+, he easily kept the company
around!
|
 |
 |
Turn Two
Andrew’s Shtrafniki rallied from being Pinned Down and continued to rush forward relentlessly. They made it to the minefields and immediately began to cross the deadly defences. Four Shtrafniki teams dashed across the mines without incident and came to a stop at the wire. The rest of the company legged-it to the minefield and prepared to cross.
Soviet mortars and Katyushas support the upcoming assault by pinning down enemy HMG teams and mortars. The Shtrafniki machine-guns fired into the front trench pinning the defenders.
Andrew then moved Pyl’cyn and his Shtrafniki and assaulted the first trench. The wire proved to be no obstacle for the four teams that had made it through the minefield, however a few teams weren’t so lucky crossing the minefield! Rita Makarievskaya, the company’s medic, managed to save the Kommisar who had trod on a Teller mine. Defensive fire from the Sturmgrenadiers cut down another three teams, but the Shtrafniki were not pinned down by Defensive Fire (though it was technically Pinned Down by the minefield). Andrew’s troops piled into the trench and managed to kill a single German team before Phil pulled his men back.
As the Soviets paused to collect themselves, the
Germans rallied themselves. The medium mortars failed to unpin, but
everything else was ready to punish the Soviet aggressors.
|
| Phil fired
every weapon he could at the forward Shtraf unit. Heavy mortars,
machine-guns, infantry guns, 8.8cm and PaK40 guns all opened up. When
the firing stopped a mere five Shtrafnik teams remained—but they were
still determined to fight on!
Turn Three
The battered first Shtraf company rallied from being Pinned Down and
immediately set to work clearing the minefield for the following
company which was just now coming into position. A sapper team
successfully cleared a way and the remaining troops of the first
company jumped into the German trenches.
|

|
|
Soviet artillery and heavy
machine-guns continued to Pin Down the enemy troops on the flanks,
covering the clumsy block of troops as it moved forward.
For the first time, Phil managed to rally all his platoons from being Pinned Down. He then turned his attention to the second company of Soviet troops, raining mortar, 8.8cm and machine-gun fire onto the new threat. The PaK40 anti-tank guns opened up on the remaining Shtrafniki in the first company, hitting the Kommisar team. Rita went to work again and saved the political officer once again from certain death. Needless to say, Pyl’cyn now had his eye on the Kommisar and Rita!
While Pyl’cyn was distracted, Phil launched a limited assault against the Soviets with a Sturm platoon. He managed to jump Pyl’cyn. Rita failed to save the company commander, but the Shtrafniki fought on under the watchful eye of the 2iC, killing a German team. Phil decided to press his luck and carry on with the assault but failed to hit anything. Andrew fought back but also failed to hit! Finally the Germans managed to hit two teams, which ended the assault. Both sides settled into their trenches and prepared for the next turn.
|
 |
 |
Turn Four
The Soviet horde continued to press forward, threatening Phil’s left flank. Andrew rolled his machine-guns forward to support the advance. Most of the second Shtraf company reached the trenches. The Katyusha and mortar batteries continued to pin Phil’s troops as the Shtrafniki assaulted into the trenches, clearing out the last of the German defenders.
The beaten Sturm platoon failed it’s platoon morale—a problem even the company commander failed to stop! So, Phil’s force now had to fight on without a platoon and a company commander! He shelled the second Shtraf company with his artillery and eliminated six teams. He then opened up with his machine-guns, scoring ten hits out of twelve shots! Andrew calmly picked up his dice, allocated the hits and then promptly rolled 10 saves!
Turn Five
Andrew’s troops bounced back into action after their remarkable saves
last turn. He gathered more troops into the trenches and then fired
bombardments to help keep Phil’s Germans pinned in position. However,
with only eight remaining teams, Andrew needed to clear the defenders,
but they were all a little out of the assault range. So he decided wait
to launch the assault until he had a few more team
|
|
Phil didn’t want to wait for Andrew to gather reinforcements, so he launched an attack of his own. He moved his reserve Grenadiers into assault position and fired his support weapons. The heavy mortars failed to range in, but the Pak40, machine-gun and medium mortar teams managed to reduce the soviet numbers by three stands.
Then the Sturm Grenadiers assaulted, eliminating two more teams. Andrew retaliated with three hits. But the German troops were determined and destroyed a further three teams. At this point, the assault came to a close since the fighting teams were too far apart. The Shtraf company, though badly mauled, still remained. The Sturm platoon retired from the battle, having done its damage.
Turn Six
At this point
the battle has degenerated into a battle of maybe a half-dozen Shtraf
teams versus a collection of German independent teams and a few gun
teams—truly a bloody fight! It was still anyone’s game!
Andrew decided to try and hold onto the patch of
ground he had and try and break the German morale under the fury of
Katyusha rockets. The barrage knocked out the Kampfgruppe’s commander,
forcing a platoon morale check.
|
 |
 |
Phil passed
the check and used his gun teams to shoot up the remaining Shtraf
company. The 8.8cm and PaK40 guns managed to clear the trenches and the
Shtraf company 2iC was hit and destroyed by machine-gun fire.
Victory
went to the Germans, as there were no remaining Shtraf companies. But
the cost was high! Both players bled their forces dry and had a great
time in the process!
Phil's Closing Thoughts
Mein Gott, that was close! My infantry has been totally destroyed. I
stopped the Soviet reconnaissance in force, but tomorrow the real
attack begins. My guns are immobile and my counterattack force is gone.
I’ll take plenty with me, but I’m not going to stop another attack
after that!
My plan worked great. The initial
assault drew a hail of defensive fire and then my frontline fled for
the rear trench. The other platoon counterattacked along the trench and
cleared the penetration, but got carried away and died to the second
Shtraf company’s assault.
My reserve platoon doubled along the rear trench line in safety, being
gone-to-ground, despite having moved! This put them in the perfect spot
to counterattack the second penetration, which they did well, but the
cost was too high for them and they retired from the field before
completely securing the trench. Only my superior firepower allowed me
to win the game.
|
|
What I did right was manned the front trench lightly and backed them
with fire. What I did wrong was that I got carried away in the first
counterattack and lost a platoon and my CO unnecessarily.
Wonderful game against a great opponent!
Andrew's Closing Thoughts
So, last thoughts… I was close.... sooooo close. But it came down to
the fact I ran out of troops. But, my troops pretty much did what I
expected them to do, and then some. I wish that I had the other
Katyushas, but my arty rolls were not that grand to begin with, so
adding
|

|
 |
extra launchers probably wouldn’t have added much.
The thing that I would definitely
have done differently was attach two flame-throwers to each platoon and
deployed the companies in a little more narrowly. Then I could use the
troops in a more focused attack by moving them together, attacking at
the same time instead of staggering them one at a time. I perhaps could
have tried attacking on a wider front, but I still think focusing them
into columns and not blobs is the key to success. I still would have
put the sappers in the front to clear those pesky mines!
|
|
I was close to making the Phil’s company break. I
killed the CiC and two platoons and if the game went longer, I would
have used my arty to try to kill the last two German platoons with two
teams remaining in them. This would have been my only hope in the last
phase of the battle. The Germans had a lot of artillery and I didn’t
have any line of sight on his heavy mortars to counter them. But I used
my artillery to reduce the other things in Phil’s army and pinned once
and a while.
The Shtraf troops got as far
as I thought my men could go. I was insanely lucky with my saves at
times and just as unlucky with my arty, so everything balanced out! If
the dice gods where on my side, I think I would have had the game in
the bag but as it was the game was fun. There is something to be said
about having a mob that will never give up on the fight no matter how
many die. On a side note, the hero is very awesome. The ability to save
a team from certain doom is a powerful ability. Sadly, I didn’t
anticipate him getting assaulted and killed, but at least Pyl’cyn’s
troops fought on and destroyed the enemy platoon—a moral victory!
|
Last Updated On Thursday, October 9, 2008
|
|
|