|
|
|
|
Products mentioned in this Article
--None--
|
|
|
|
|
|
|
|
|
 |
|
|
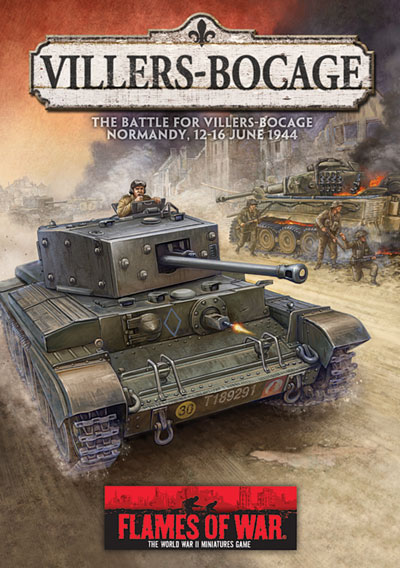 |
Villers-Bocage Battle Report
The Battle for Point 213.
For our first Villers-Bocage battle report we thought we’d try out one of the scenarios: Point 213. This recreates the ambush by four Tigers of the 101. Schwere SS-Panzerabteilung against A Squadron, 4th County of London Yeomanry as they stop east of Villers-Bocage to plan their next move. The scenario can also be played as part of the Villers-Bocage campaign with the out comes of the early battles having a bearing on the following scenarios. We decided to play Point 213 (the second battle in the campaign) as a stand-alone battle.
Our gaming volunteers are Jeremy, resident miniature painter, and Kyran, head of Australasian sales. Jeremy took command of the Tigers and Kyran the British.
|
|
Forces
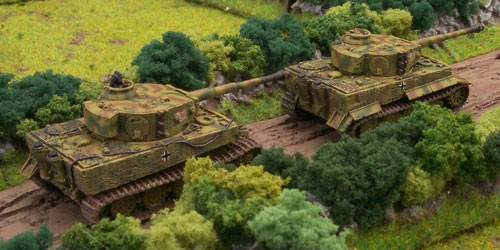
German
101. Schwere SS-Panzerabteilung
1st Schwere SS-Panzer Platoon
Tiger 211 and Tiger 234
2nd Schwere SS-Panzer Platoon
Tiger 221 and Tiger 223
|
 |
| The force doesn’t have a Company HQ (that’s
Michael Wittmann who’s busy in Villers-Bocage holding off any British
reserves that may come). |
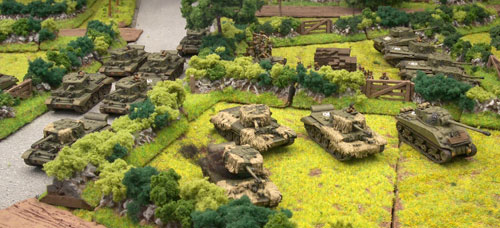 |
British
A Squadron, 4th County of London Yeomanry
Lieutenant Colonel Lord Cranley
Higher Command Daimler Dingo scout car
HQ Troop, Major Peter Scott
Company HQ
Two Cromwell IV and two Cromwell CS tanks
|
1 Troop, A Squadron
Armoured Platoon
Three Cromwell IV and one Firefly VC tank
2 Troop, A Squadron
Armoured Platoon
Three Cromwell IV and one Firefly VC tank
3 Troop, A Squadron
Armoured Platoon
Three Cromwell IV and one Firefly VC tank
4 Troop, A Squadron
Armoured Platoon
One Independent Command Cromwell IV tank
‘O’ group, A Company, 1st Battalion, The Rifle Brigade
Four independent Command MG teams with an M5 half-track each
|
|
Set-up
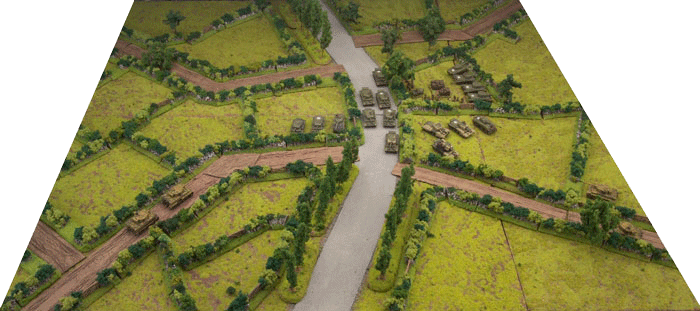
The set-up is dictated by the Scenario, the British defenders must place an objective within 12”/30cm of the table centre. The British player (Kyran) then places his entire force within 16”/40cm of the table centre, with the additional problem of having to place all the command and independent teams within 4”/10cm of Lord Cranley (as they gather for their meeting). Kyran chose to place Lord Cranley near the objective in a field near the centre of the table. The result of this means that his force is concentrated around the objective in three fields and on the main road.
Jeremy (German player) must first roll a die for each of his platoons to determine where each of them will come on. On a roll of 1-4 he consults the map to see which corner they come on. On a 5 or 6 he can chose any corner.
|
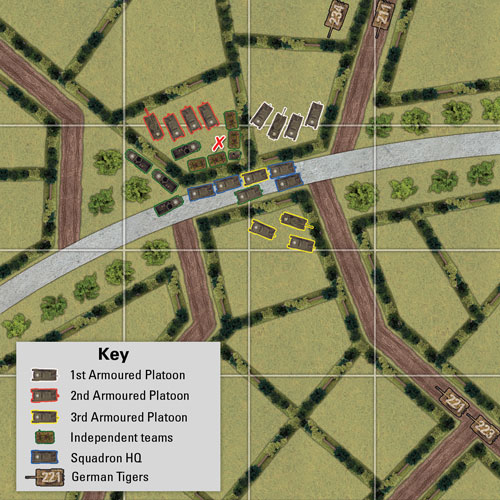 |
For the 1st Schwere SS-Panzer Platoon (211 & 234) he rolls a 6 and selects to bring them on from the road nearest the British Deployment (top left). All German deployment must be on or next to the roads.
For his second platoon, 2nd Schwere SS-Panzer Platoon (221 & 223), he rolls a 4 and they come on from the bottom left corner.
Before the game can begin Jeremy must roll his Tiger Ace skills. The 1st Platoon gets For the Fatherland (2+ Motivation tests) and the 2nd Platoon get Clever Hans (makes un-bogging and rough terrain Skill tests on 2+).
The ambushing Germans get the first turn.
|
 |
|
Jeremy's Pre-game thoughts
Initially, as I planned for the upcoming battle, I thought it would be a breeze...it was not to be.
Being a fan of the big cats, I immediately grabbed the German forces to play with, thinking Kyran would be a bit upset being stuck with the 7th Armoured. He seemed strangely pleased though, which should have given me pause. I had visions of burning Cromwell’s scattering the bocage, and howls of despair from the Kyran - the dirty salesman - echoing through our studio. This was also not to be…
Tactically it seemed like a simple operation – move in, destroy half the Tommies as they had their tea, and mop up the rest. What did I have to worry about; I had the best damn crews in the finest tanks the world had seen. Maybe I should have been a bit more circumspect, and less gung-ho, but where’s the fun in that?
Turn 1 Goals: Remove an entire Armoured Platoon before Kyran even gets a go. I'll split my forces to achieve the goal. It could prove very risky, but worth it if my scheme comes to fruition.
The dice gods laughed at my audacity. And laughed, and laughed, and laughed…
|
|
Turn 1
German
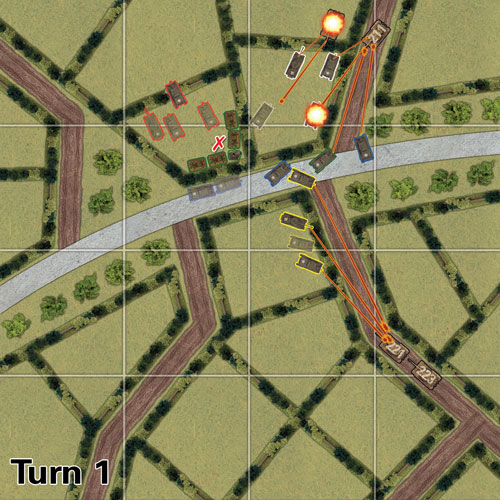
The Tigers arrive at the edge of the table and their first turn is spent moving on. Jeremy manoeuvres Tigers 211 and 234 up the road and positions them to take shots at the British 1st Armoured Platoon.
Meanwhile the 2nd Schwere SS-Panzer Platoon (221 & 223) doubles up the lane towards the main road and the British positions.
Tigers 211 and 234 fire on the 1st Armoured Platoon and knockout a Cromwell IV, failing to pick out the dangerous Firefly.
The British start the game bailed-out or pinned down, so the one casualty on the 1st Armoured Platoon caused the platoon to take a Motivation test for being below half-strength (1 destroyed and none alive, the 3 bailed-out tanks not counting).
|
 |
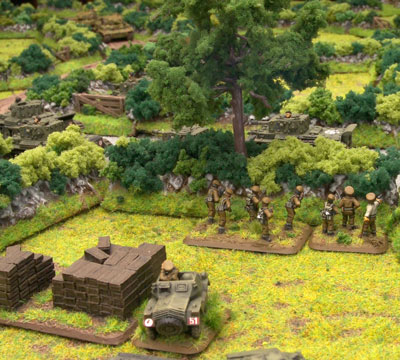 |
The initial Motivation test is failed (the Reluctant Veteran 7th Armoured Division troops require a 5+ to pass). Kyran decided to join Lord Cranley (higher command team) to the platoon as the platoon command to nearby him (one advantage of the set-up) to re-roll the failed test. This time it is a success and the platoon stays in the fight despite their perilous position.
To protect his Tiger from the Firefly if it should recover in the British turn Jeremy makes a stormtrooper move for the 1st Schwere SS-Panzer Platoon (211 & 234) away from the bocage. Now the Firefly can’t see them.
British
Kyran’s first priority is to try and get as many of his tanks recovered from being pinned down as he can. Luckily the independent infantry teams recover automatically. He does have some help from re-rolls however.
|
|
All the Cromwells have Protected Ammo giving each tank a re-roll when bailed out. In addition all 7th Armoured Platoons can re-roll Motivation test to un-pin and recover from bailed-out if they haven’t been hit by shooting in the previous Shooting Step. But of course you can only have one re-roll, so this is most advantageous to the Fireflies and Lord Cranley’s Dingo who don’t have Protected Ammo.
Kyran goes about his many dice rolls and recovers from the 1st Armoured Platoon one Cromwell and the Firefly. From the 2nd Armoured Platoon one Cromwell. From the 3rd Armoured Platoon two Cromwells and a Firefly. From the Company HQ one Cromwell CS. Of the independent tank teams Lord Cranley and the 4th Armoured Platoon’s sole Cromwell also recover.
Kyran removes the M5 half-tracks of the independent MG teams. The M5’s are not much chop in this situation; the half-tracks must use the gates to cross the bocage and present easy kill for the Tigers.
|
 |
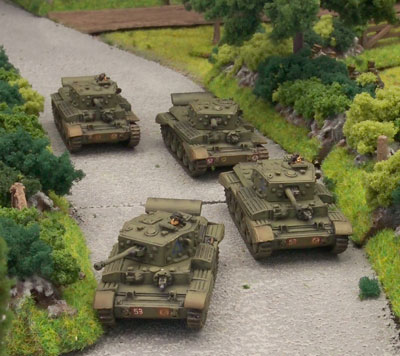 |
Across the road a 3rd Armoured Platoon Cromwell and Firefly move up to the bocage to shot at Tigers 221 & 223. Their command Cromwell takes a position at the intersection to head off the Tigers.
The Squadron Commander also takes-up position at the intersection facing the other way to shoot at Tiger 211. A Cromwell CS and the independent Cromwell from 4th Armoured Platoon join him.
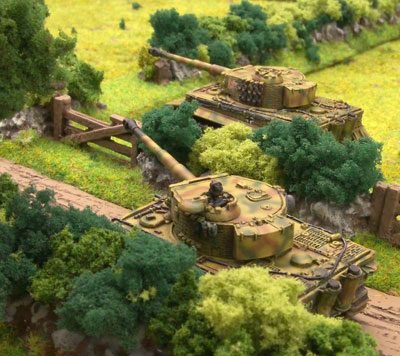
During the Shooting Step Kyran fires his two operational tanks from the 1st Armoured Platoon at Tiger 234. The Cromwell misses, but the Firefly VC hits and penetrates the Tigers thick armour. The German crew leap out and scamper off into the bocage. The Tiger then starts to burn. Jeremy began cursing in what we are assured is German.
A volley of fire comes down the road at Tiger 211 from the intersection. All the shots miss. The Tiger, however, had little to fear from the CS 95mm or the OQF 75mm.
|
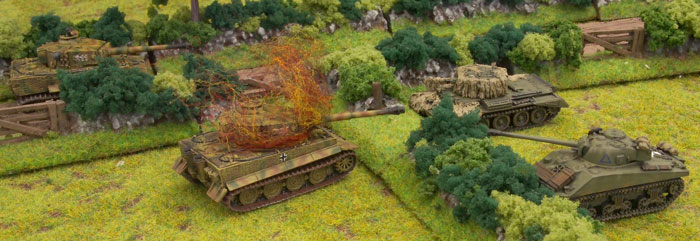 |
The 3rd Armoured Platoon has a better chance against the doubling Tigers of the 2nd Schwere SS-Panzer Platoon. They fire two Cromwells and a Firefly at the front Tiger (221). One Cromwell hits twice, but the armour easily deflects the shots (a Armoured save roll of ‘1’ may cause a bail-out chance), though one hit is a close call, but the Cromwell fails its Firepower. The Firefly has a better chance with its 17pdr gun. It gets a hit, but the Tigers armour protects it once again.
|
Turn 2
German
With the loss of their comrades Tiger 211 decides to remain stationary to take more shots at the Firefly.
At the other end of the road Tiger 223 crosses the bocage with ease (Wide tracks and Clever Hans make it hard to stop!). This allows it to get a better angle of the 3rd Armoured Platoon without Tiger 221 getting in the way.
Tiger 211 fires at the 1st Armoured Platoon, the only two valid targets being the Cromwell and Firefly up against the bocage, the intervening bocage blocks the line of sight to the Command Cromwell. Unfortunately both shots miss and the British tank lives for another turn.
Meanwhile Tigers 221 and 223 fire on the 3rd Armoured Platoon.
|
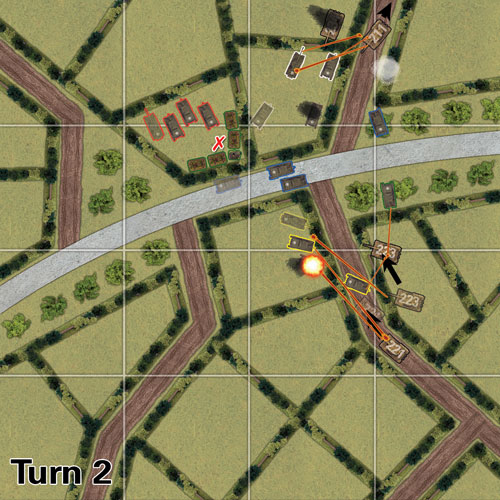 |
| Tiger 233 misses, but Tiger 221 is on target with two hits. To try and
take out the Firefly Jeremy rolls two Gun tank tests (5+). |
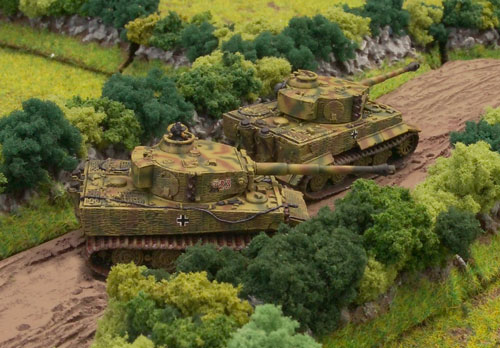 |
He gets one shot on the Firefly; the other hit goes on the nearby
Cromwell. The AT 13 it too much for the Cromwell and the shot goes
straight through and destroys the tank. The Firefly also can’t resist
the big gun at close range, but luck is with the crew, the shot doesn’t
hit anything vital and the crew just bails-out.
Tiger 211 moves back to the edge of the table with a Stormtrooper move. Tigers 221 and 223 use their Stormtrooper moves to move forward. Tiger 223 take up position in the bocage corner by the intersection of the main road and the lanes. Tiger 221 moves down the road closer to the intersection.
|
|
British
Kyran must still try to recover his force from their meeting, and now has to contend with a bailed-out Firefly from shooting. The 2nd Armoured Platoon first un-bog the Cromwell stuck on the bocage.
They also recover the command Cromwell and other Cromwell. The 3rd Armoured Platoon recovers a Cromwell, just leaving the Firefly still bailed-out. The Company HQ gets the other Cromwell CS operational, leaving just the 2iC Cromwell bailed-out.
|
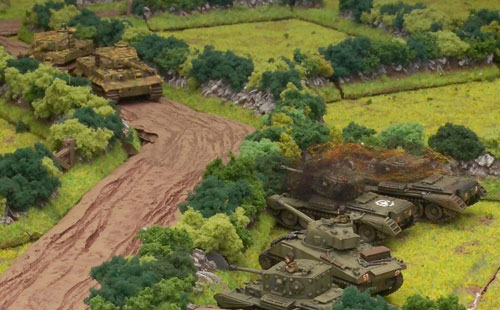 |
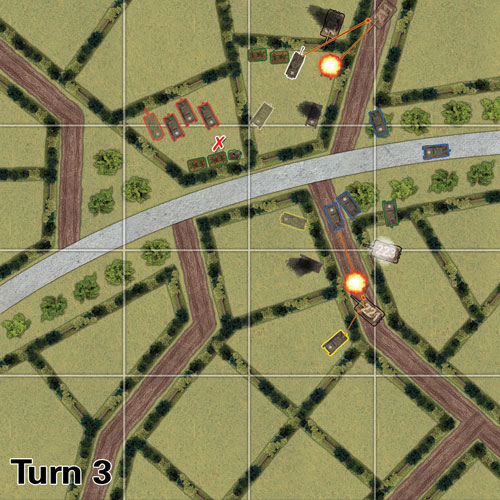
The 4th Platoon’s independent Cromwell moved along the main road on into the tree line up to the bocage to get a side shot at Tiger 223. In an even bolder move the command Cromwell of the 3rd Armoured Platoon moves down the lane towards Tiger 221 with the aim of getting pass Tiger 223’s flank. The first Cromwell CS tank takes cover behind some bocage near the intersection, still facing Tiger 211. The freshly recovered Cromwell CS advances to the intersection.
Two of the independent MG teams begin moving toward the positions of the 1st Armoured Platoon. They hope to take up positions where they can take advantage of any bailed-out results with an assault on Tiger 211.
The second Cromwell CS tank fire smoke at Tiger 223 and hits leaving the front of the tiger obscured. The 3rd Armoured Platoon fires at Tigers 221 and 223 with its two remaining Cromwells. One lucky shot bails-out Tiger 221, but the armour deflects the side shot on Tiger 223. The independent Cromwell joins in with its side shot and misses. The first Cromwell CS attempts to drop smoke on Tiger 211 and misses. The 1st Armoured Platoon fires at Tiger 211, both the tanks miss. The new recruits seem to be assigned to the gunner position!
|
 |
Turn 3
German
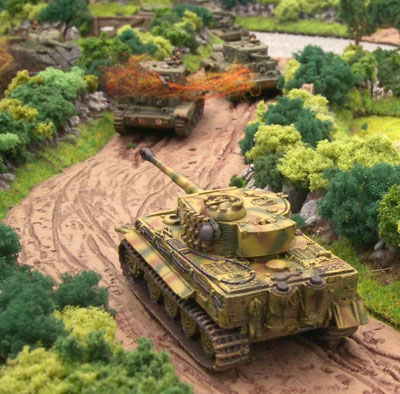
Tiger 221 quickly recovers from its embarrassing bail-out. Jeremy knuckles down and is confident that his tiger with prevail with their superior fire and armour. He decided not to move and gets straight to the shooting.
Tiger 211 fires at the Cromwell and Firefly from the 1st Armoured Platoon. They score a hit, but Jeremy doesn’t make his Gun tank roll to pick out the Firefly. The shot easily destroys the Cromwell.
This will force another Motivation test, as the Platoon is force under half-strength again (2 destroyed, 1 alive and the bailed-out command tank not counting towards the platoon strength).
|
|
Tigers 221 and 223 fire at the 3rd Armoured
Platoon. Tiger 223 has a shocker as Jeremy rolls ‘snake eyes’ (two
‘1’s). Tiger 221 does better with one hit; the shot takes out the
platoon commander’s Cromwell. This also forces a Motivation test.
The 1st Armoured Platoon passes its Motivation test and continues to fight. The 3rd Armoured Platoon has more difficulty, they fail their first test and Kyran is force to attach the Company Command Cromwell to re-roll the test. He rolls a ‘5’ and all is good. If they had failed they would have left the table taking the Company Commander with them. Kyran was willing to take this risk, as Lord Cranley is effectively a spare Company Commander who can take over command of the Squadron.
Jeremy doesn’t take any Stormtrooper moves.
British
The only tank to un-bail this turn is the 2iC. Still bailed-out is the 3rd Armoured Platoon’s Firefly and the 2nd Armoured Platoon’s Firefly.
|
 |
 |
The 4th Armoured Platoon’s independent tank crosses the bocage to move behind Tiger 223, but bellies-up on the thick hedgerow.
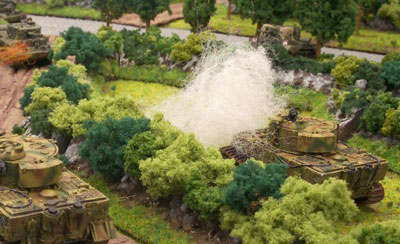
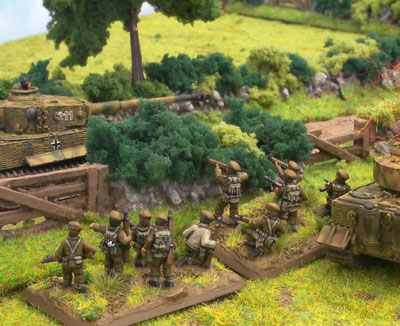
The two independent MG team continue to move towards Tiger 211, one team crosses the bocage and moved up to the wreckage of Tiger 234.
The 3rd Armoured Platoon’s surviving Cromwell crosses some bocage to the next field to get behind the flank of Tiger 221. The second Cromwell CS moves up to the bocage to fire at Tiger 223 while the 2iC Cromwell moves down the lane towards Tiger 221.
|
|
The Company Command tank travels down the main road past the position of the bogged-down independent tank.
The second Cromwell CS fires smoke at Tiger 223, obscuring its visibility and reducing its ability to hit. The 2iC Cromwell fires on Tiger 221 and misses as does the Cromwell from the 3rd Armoured Platoon.
The 1st Armoured Platoon’s Firefly fires at Tiger 211 scoring two hits. One hit penetrates the armour, bailing-out the Tiger.
The independent MG team is still a little to far away to make an assault so the Tiger survives this turn.
|
 |
 |
Turn 4
German
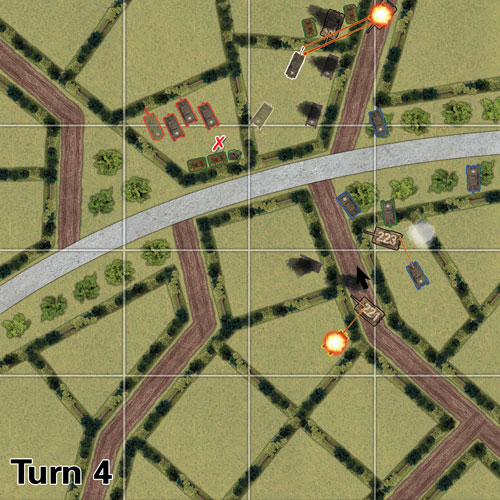
Jeremy is now a little concerned about those lurking infantry team, to save Tiger 211 from possible assault and destruction in the British turn he must rally his bailed-out Tiger. He does this with ease staving off disaster.
He chooses to not make any moves and gets straight to the shooting. Tiger 211 needs to eliminate the Firefly before it destroys or bails him. The Tiger scores a hit and bails-out the Firefly. Not quite the desired effect, but it will do as it causes the 1st Armoured Platoon to take another Motivation test for being under half-strength.
Tiger 223 fire at the bogged down independent Cromwell, they hit their target, but only bail-out the tank.
|
 |
|
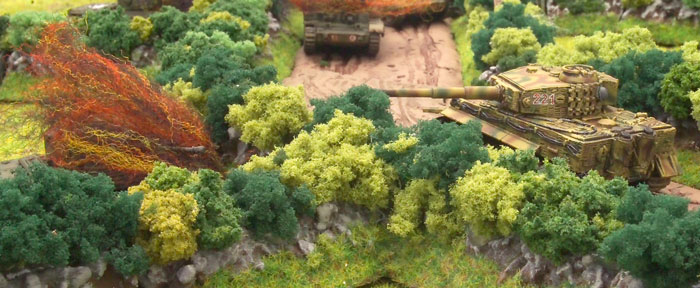
Tiger 221 fire in the other direction at the
flanking Cromwell of the 3rd Armoured Platoon. The Cromwell gets
destroyed and this forces the platoon to take a Motivation test for
being under half-strength.
The
1st Armoured Platoon take the first Motivation test and promptly fails.
Lord Cranley steps in and rallies the wavering troops with a re-roll of
‘6’.
The 3rd Armoured Platoon, now with just the Firefly, fails its motivation test. The platoon retreats off the table.
During the Assault step Tigers 221 and 223 make a Stormtrooper move forward, but Tiger 211 fails to do so.
British
To get the independent Cromwell running again Kyran must first un-bail
it then un-bog it. He succeeds on both accounts. He also gets the 1st
Armoured Platoon’s Firefly operational once more.
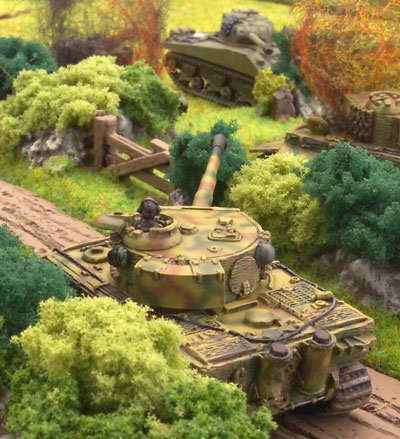
However he once again attempts to cross the bocage with the independent Cromwell and it gets stuck once more. |
 |
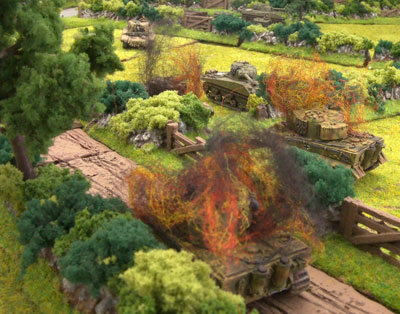 |
A long discussion ensues about stupid France agricultural practices.
The 2iC Cromwell is more successful and cross the bocage from the lane
to manoeuvre behind Tiger 223.
The Company Command tank moves through the tree line up to the bocage,
just one field over from the stricken independent tank and Tiger 223.
The 2iC Cromwell fires at Tiger 223, but the thickly armoured Tiger
makes the Armour save. The second Cromwell CS tank fires smoke at
Tiger 221, but misses the huge lumbering beast.
The 1st Armoured Platoon Firefly fire at Tiger 211, both shots hit and
one penetrates the Tigers armour. The 17pdr round knocks-out the tank
and Jeremy is suddenly down to just two Tigers.
|
| The hoorah from Kyran
and the British supporters was almost as loud as the Germanic cursing
coming from Jeremy. The 1st Armoured Platoon had now accounted for 2
Tigers. |
|
Turn 5
German
Jeremy decided the best bet it to sit tight and kill as many Tommies as he can.
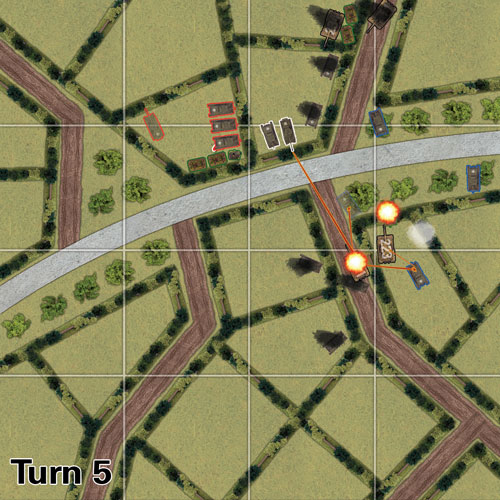
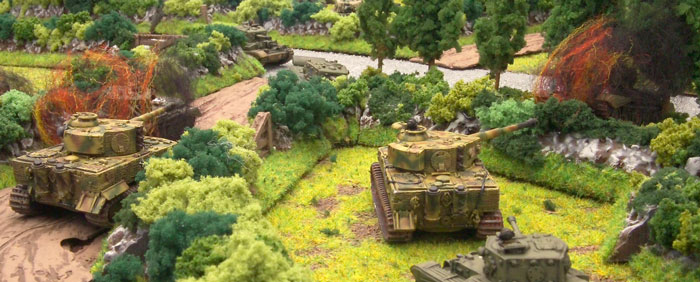
Tiger 223 finally destroys the independent tank with the learner driver. The Tiger puts a round through the exposed under hull of the hung up Cromwell. Tiger 221 fires on the Company HQ tanks to its front. Both shots hit their mark, but the 2iC Cromwell and the second Cromwell CS are only bailed-out.
Just to add to Jeremy’s fantastic run of luck he fails the Tigers’ Stormtrooper move roll.
British
“I’m screwed” Jeremy is heard to comment, and things do look grim for the plucky German player.
|
 |
 |
 |
On the other hand a lot of damage can be done
with two Tigers and he is only facing two Fireflies now, one of which
has so far been bailed-out for the whole game.
Kyran managed to finally recover the command tank of the 1st Armoured Platoon, bringing it back up to two running tanks. With the one Tiger platoon defeated the 1st Armoured Platoon moved to the bocage at the other end of the field to turn its deadly fire on Tigers 221 and 223.
Mean while the Cromwells of the 2nd Armoured Platoon have moved up to the bocage facing the main road in the objective field, just in case the Tigers should appear around the corner from the intersection. Their Firefly is still bailed-out.
The 2iC Cromwell fires at the rear of Tiger 223 and scores a hit. The hit, however, is saved. The 1st Armoured Platoon, just recently moved up to the bocage facing the intersection, fires its one shot at Tiger 221. It hits, then penetrates and destroys another Tiger! That’s three Tigers taken out by one Firefly!
Jeremy groans, and has started do drink heavily.
|
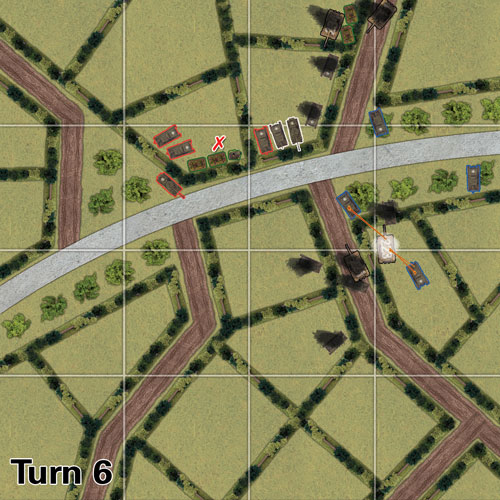
Turn 6
German
Jeremy holds his last Tiger’s position. It fires at the Company HQ platoon and manages to bail-out the 2ic Cromwell. Jeremy has had the most atrocious luck, capped off by an inability to successfully make firepower rolls.
He even fails his Stormtrooper roll.
British
Kyran, on the other hand, make his un-bail Motivation Test on the 2nd Armoured Platoon’s Firefly. He also recovers the 2iC Cromwell and the second Cromwell CS.
The 1st Armoured Platoon, having destroyed all the Tigers it can see, goes to ground.
|
 |
 |
The Company Commander repositions on the corner of the two fields so the gunner can get a shot at Tiger 223.
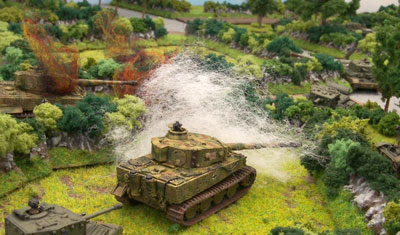
The second Cromwell CS tank fire a smoke round at Tiger 223. It hits making targets that the Tiger fires at concealed, but also making the Tiger concealed. The Company Commander fires at the Tiger and misses. The 2iC fires at the Tigers rear armour, hits, but the Tiger’s armour halts the shot.
|
Turn 7
German
Once again Tiger 223 holds positions and fire out through the smoke at the Cromwell CS tank. The CS tank is bailed-out. This tank seems to be collecting a few holes!
The Tiger then makes a Stormtrooper move up to the corner of the field facing the Cromwell CS tank and moving out of the smoke.
British
The Company Command Cromwell moves across the bocage into the field neighbouring Tiger 223. The tank positions up against the bocage to get a shot at the Tiger. The first Cromwell CS moves across the intersection to support his bailed-out comrade. The independent MG team by the destroyed Tigers move onto the road and head towards the intersection.
|
 |
| The first Cromwell CS misses with a smoke round
at the Tiger. Both the 2iC and Company Command Cromwells fire at the
Tiger, and each scores a hit. The Tigers beaten armour holds out for
another turn. |
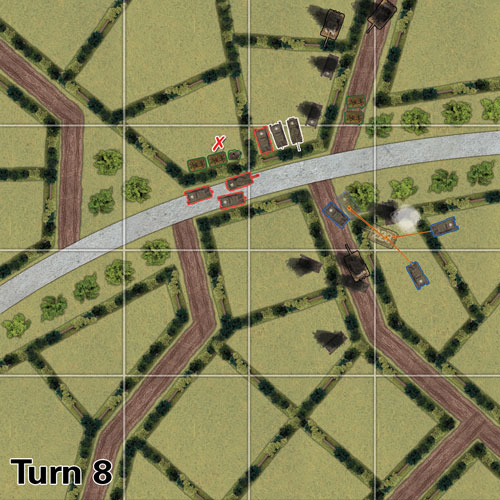 |
Turn 8
German
The German tank holds steady in its new position in the field corner facing the intersection.
The Tiger turns it’s gun towards Company HQ Cromwell CS tanks. Jeremy’s lack of luck holds and he misses!
British
The Infantry continue their advance toward the last Tiger.
The 2nd Armoured Platoon starts to move through a gate out of the field towards the main road.
The 2iC and Company Command Cromwells fire once more on the Tiger side armour. Two shots hit, Jeremy rolls a ‘2’ for one save as a chance of a possible bail-out.
|
| Kyran makes the firepower roll and Tiger 223 is
bailed-out. This mean the platoon is now below half-strength (one
destroyed of a strength of one). Jeremy makes his roll and the Tiger
fights on. |
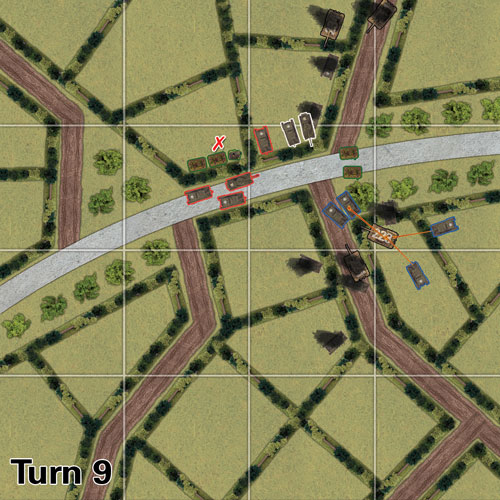
Turn 9
German
Tiger 223 recovers from the shock of being bailed-out and immediately open fire.
Once again the Tiger concentrates on the CS tanks. Jeremy rolls ‘snake eyes’, two ‘1’s, for the second time in the game.
British
Kyran manages to rally his second Cromwell CS tank.
He continues to move his infantry forward just in case Tiger 223 gets bailed out again. The 1st Armoured Platoon Firefly moves towards the field corner to get a shot at the Tiger.
The Tiger is back on form and deflects the one hit the Company Commander and 2iC tanks get on it.
|
 |
 |
Turn 10
German
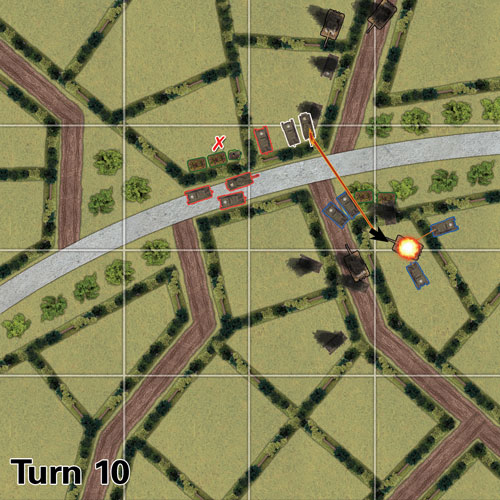
The Tiger takes a shoot at the dreaded 1st Armoured Platoon Firefly, but misses.
To avoid having 17pdr shots whistling their way Tiger 233 make a Stormtrooper move and backs away from the bocage so the Firefly can no longer see them.
British
The independent MG team finally make it to the Bocage facing the Tiger and wait there ready to assault it if it becomes bailed-out. By now the Cromwell of the 2nd Armoured Platoon have moved out of the field on to the road to lend a hand if needed.
The Company Command Cromwell fires first. They hit the side armour of the tiger with one round.
|
|
Jeremy promptly rolls a ‘1’ for his Armour save. Kyran then makes his firepower roll and destroys the last Tiger.
Jeremy goes home…
A British Victory! The British still hold the objective and Point 213 is clear for the advance out of Villers-Bocage.
Jeremy's Last Thought!
From Kyran’s first turn, I was on the back foot. Not something I as a player like. At least I had beer and Kyran was good to play against. It was quite bearable for a loss… next time my Aussie friend, next time!
|
 |
Last Updated On Tuesday, October 2, 2007 by Wayne at Battlefront
|
|
|