|
|
|
|
Products mentioned in this Article
--None--
|
|
|
|
|
|
|
|
|
 |
|
|
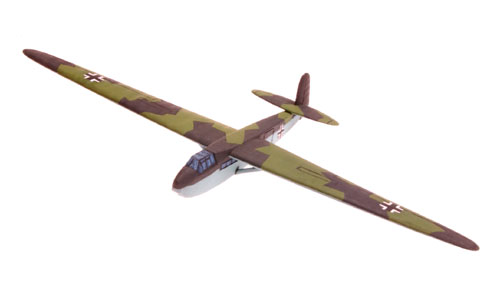 |
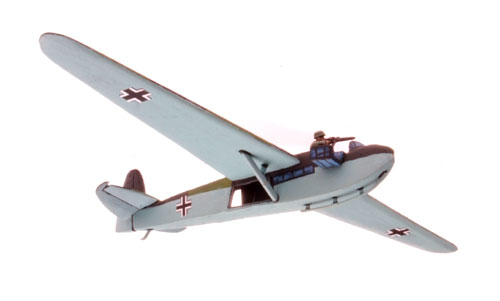
Andrew scratch built some excellent DFS-230 models which have appeared in Diving Eagles and Afrika. In the following instructions he outlines how he made them.
These are the steps I used when making up the DFS230 assault gliders. By all means if you find a shorter or easier way around things take that route instead.
|
|
1. Template making - this stage involves transferring the various glider section profiles onto card so that you can accurately reproduce cutting plans for however many gliders you wish to assemble.
Download Template...
i. Slip your template card underneath the main
wing outline and hold firmly in place. Prick through the page enough
times to reproduce the outline on your template card. Using a thin pen
and ruler (freehand for curved lines) ’join the dots’ to complete the
outline.
ii. Using a sharp hobby knife carefully cut out the shape. Try to cut
cleanly and accurately and keep fingers away from the cutting direction.
iii. Repeat the above steps for the tail plane, dorsal tail, and side (and top) fuselage profiles.
|
| Tip - Corners can become tricky if you don’t cut them properly. Make your first cuts at the corners applying most pressure before continuing down the line. Cut on a perpendicular axis to the template otherwise your drawing edge might become irregular. |
|
|
2. Marking out - this stage requires you to mark out the various sections on respective materials.
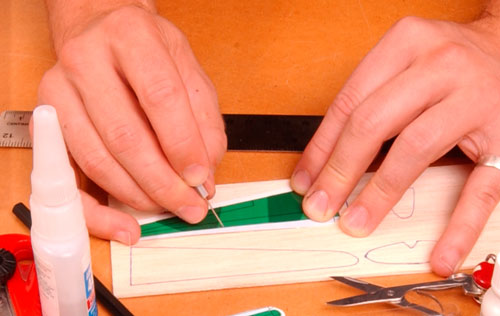
i. With your template, trace the outline of two main wings, the tail plane and the dorsal tail sections onto a 3.5ml balsa sheet.
ii. Select your 8ml balsa board (9.5 is close enough) and trace the outline of the side elevation of the glider.
Tip - A fine pointed ink pen is ideal. When marking out the tail section align the template lengthwise with the grain of the sheet, the section will be stronger as a result.
|
|
|
|
 |
 |
Shaping the fuselage
3. Cutting and sanding - at the end of this stage you will have enough glider sections ready for assembly.
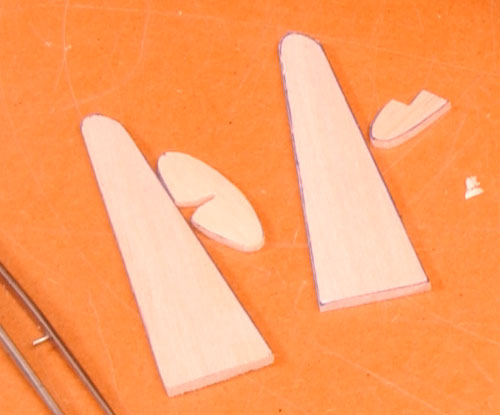
i. Use your hobby knife to carefully cut out the marked components from the balsa sheets and board.
ii. Taking the fuselage section, place the top elevation template over the top of the section (bearing in mind you have the front end of the template at the front end of the cut section, and centred lengthwise as best as you can) and trace the outline. This will become the shape of the glider fuselage looking down and will require some skill to cut accurately.
|
|
iii. The leading edges of both main wing sections should be sanded to less of a degree as the tip and rear edges. They should be more bull-nose and the trailing edges finer. Also with the main wings, sand the top rear edge closer to the underneath of the wing to imitate standard wing design (this can be more pronounced closer to the fuselage and trail off toward the wing tip). Tail sections can be carefully sanded to a ’cutting’ like edge all around.
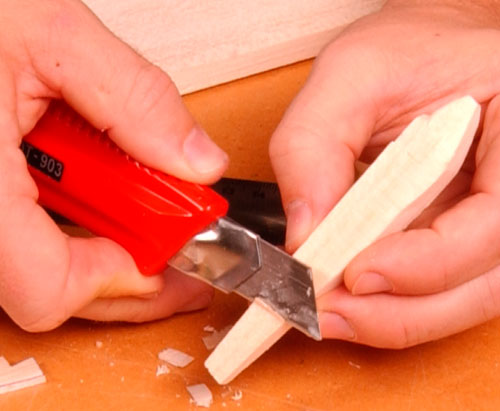
iv. The fuselage requires the most attention to finishing, especially the nose. Use sand paper and a sharp hobby knife to achieve this. Use the diagrams and model photos to establish the angles and curved surfaces required for this area, as words will not readily achieve this.
|
| Tip - Although extreme care is required, the
sharper the knife the better the result will be. Balsa has a tendency
to rip out if not cut cleanly. When cutting the nose (front) of the
glider, do so in a shaving or paring manner and not as one almighty
chop. Scrutinise your progress frequently to remain as symmetrical and
erodynamic as possible. Sand paper will remove waste balsa very quickly
and evenly if done on a flat surface. The knife is more precise and can
shape detail better, but always finish off with fine sand paper. |
|
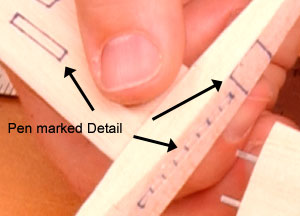 |
4. Adding detail - By adding indicating lines for windows and control surfaces now you can save the difficulty of doing it when the model is complete.
i. Mark along the fuselage the eight port windows and aft door and 4 starboard windows and underwing door.
ii. Mark the flaps on both main wings and the rudder on the dorsal tail.
|
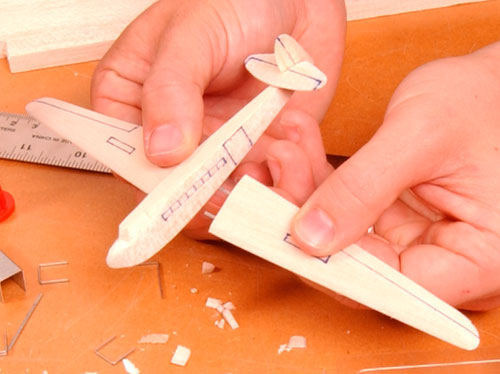
5. Assembly - During each fitting do a dry run (without glue) to test how well your gluing surfaces butt together and will look when finally glued. Additional sanding may be required to allow sections to fit better.
i. Attach the dorsal tail to the rear end of the fuselage. Check by looking back down the Glider, from nose to tail, that you have glued it straight. Any under-hang can be sanded flush with the fuselage underside when the glue has dried.
ii. Attach the tail plane on top of the fuselage and slot back against the dorsal tail, check for symmetry again by looking down the fuselage.
|
 |
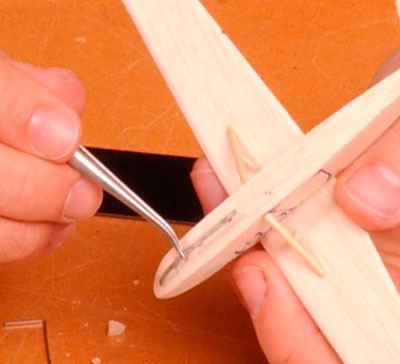 |
iii. Pin each main wing and attach to the
fuselage side. Do dry runs with the pins in to establish exact holes
before gluing. The wings at least have to look right.
iv. Cut each strut and dry fit. Because the angle between fuselage and
wing will differ slightly with every model further sanding will be
required to fit these flush.
v. The landing skid was bent into shape with fingers and small flat
nose pliers. The three supports were cut and pressed into the fuselage
underside. The skid then glued onto these (easier said than done). The
rear tailskid is optional but made the same way.
| Tip - I used Loctite ’Prism’ 406 on this project. It is lightning fast on balsa, which is ideal when you have lots of pieces to adhere consecutively. Wings especially can be held in their correct position until they fix so you can have even dihedral. |
|
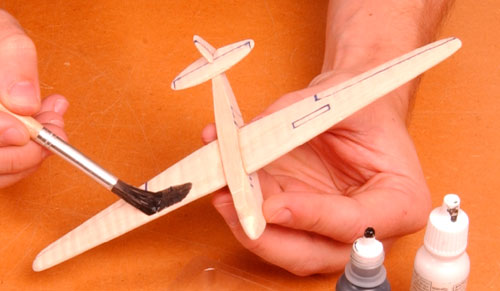
6. Undercoat and Paint - Paint everything matt black.
i. Spray or brush the entire model.
ii. Use the finest sand paper you can find and go over the exposed surfaces. This will firstly remove fine but visible fibres of balsa that have become frozen in the undercoat and secondly provide you with a smooth surface to paint, and use less paint as well.
iii. Use either the combination of colours provided or your own scheme to paint your model. Draw the scheme on lightly with a blunt pencil.
iv. Photocopy and cut out the identification crosses provided and apply as per the diagram.
|
 |
 |
7. Additional detail - Upgrading the model can be fun.
i. Fabric covering the wing sections can be imitated by rubbing grooves parallel to the fuselage across the wing. The diagram gives an idea of how many are needed. The shaft of a ballpoint pen or similar instrument performs the role well. Work the initial groove outwards slightly both ways to meet subsequent grooves.
ii. Inner strut supports can be added as seen in the models. Use suitable cut pieces of balsa and glue.
|
iii. Opened cockpits look great and help create that landed effect superbly. With a very sharp hobby knife remove the canopy section, minus the front windscreen. Carve out the canopy and glue onto the starboard side. All sorts of detail can be added here.
iv. Exit doors can either be shown as indicated, or have removable doors with a darkened interior, or hollowed out.
v. Support gunners can be added by slicing a suitable gunners’
torso in half and fitting a suitable pin
|
 |
|
(the mg gunner from 250/251 ½
tracks is fine for this but you will need to modify his helmet). This can then be added to the model when required.
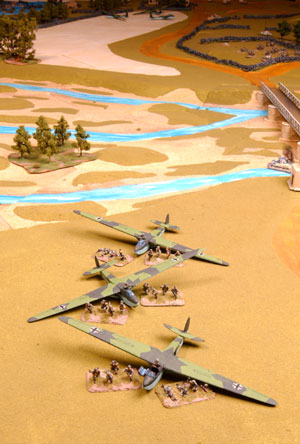
vi. Have a go at setting the model on a small base as a diorama or even represent a glider come to grief as a result of finding difficult terrain when landing.
Final word
Don’t be put off by the thought of making a detailed scale model. Be realistic and tune the amount of work you put into the model by the level of skill you have.
Prove to yourself you can do it…
Andrew
|
Last Updated On Friday, May 28, 2010 by Wayne at Battlefront
|
|
|