|
|
|
|
Products mentioned in this Article
--None--
|
|
|
|
|
|
|
|
|
 |
|
|
 |
Mid-War Monsters
Breakdown Rescue Mission Battle Report
Blake and John play the Breakdown Rescue Mission with German and Soviet forces and Mid-war Monsters. (This article first appeared in Wargames Illustrated 262).
German General: Blake Coster
When I first heard about the Mid-War Monsters project I was very excited. I knew something about the proposed German tank designs from the Late-War period, for example the E-100 and the Maus but my knowledge of their Mid-War counterparts was very limited. Being the keen military vehicle enthusiast that I am, once I got my hands on a copy of the Mid-War Monsters books I was eager to learn all I could regarding these experimental vehicles. Immediately turning to the German section I instantly recognised the Tiger (P) but once I saw the Sturer Emil and the Dicker Max with their enormous guns, I was sold. With most of my experience in Flames Of War essentially being in the Late-War period as a German player, I’m used to relying on the high Anti-Tank rating of tanks such as the Tiger and Panther to get the job done.
|
| So for this game I was eager to field either the
Sturer Emil or the Dicker Max. John and I both love our tanks and I was
positive that he would pick the Soviet KV-5 so with that in mind I
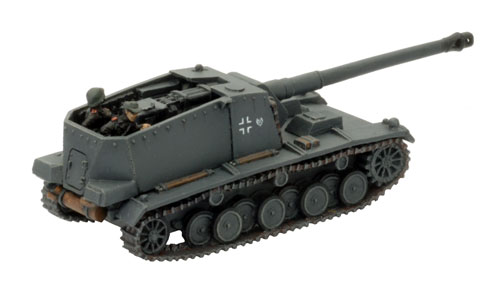
selected two Sturer Emil and a single Dicker Max in my force to support
my Panzer IIIs. John and I decided to play a 1500 point battle and
after a bit of researching in Ostfront (the Flames Of War Intelligence
Handbook for forces on the Eastern Front between 1942 and 1943) I
selected the following force. |
 |
 |
Soviet General: John Matthews
Soviets vs Germans and I get to take Mid-War Monsters into the bargain?
Well that sounds fantastic to me. Time to get planning.
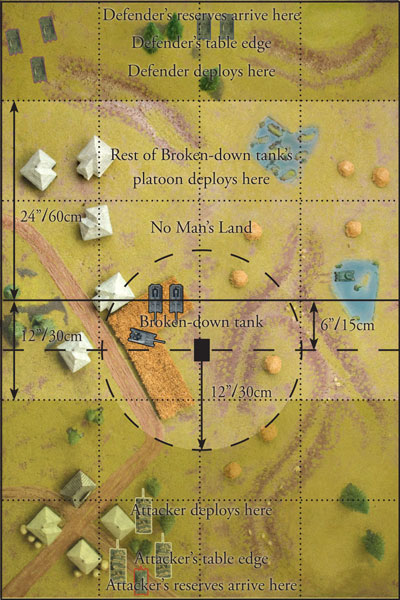
I started off by reading the mission we would be
playing as it is always easier to plan a force for a scenario over
making a balanced force for a tournament.
The main challenge I could
foresee was that I had to roll off to be the attacker or the defender
so I had to design a force that could cope with either situation.
After
a bit of reading through the Mid War Monsters book the choice became
obvious, KV-5s! Initially I only chose one but re-reading the mission
confirmed my thoughts if I was the defender the single KV5 would be out
there all on its lonesome, so I decided to risk a huge points sink and
go with all 3. With a frightening cost of 795 points out of my
available 1500.
I ended up as the attacker which is always my preference and I was
quite pleased until I saw 2 Sturer Emils and a Dicker Max sitting in
the middle of the table. This was definitely not going to be a
one-sided fight!
Download the Breakdown Mission (PDF)...
|
 |
|
German Turn One
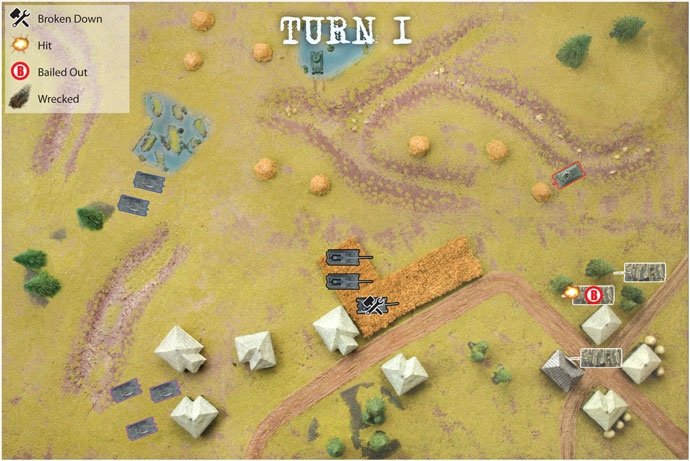
As the Defender, Blake got to take the first turn. He immediately
rushed his Panzer III tanks forward to support his Tank-hunters. With
lady luck smiling on him he managed to get his broken-down Dicker Max
moving back through the cornfield towards the rest of his army. Taking
aim, the two Sturer Emils opened fire on the KV5s scoring two hits. The
first 12.8cm round (anti-tank 18) ricocheted off the frontal armour of
the KV-5 (front armour 15) thanks to John rolling a five to take his
Armour rating to 20, however the second hit equalled the armour rating
causing the Soviet crew to begin bailing out believing there tank was
going to explode.
Soviet Turn One
In a risky move John decided to bring his company HQ T-34/76 tank out from behind the KV-5s. Though armed with a huge gun the Sturer Emils only have a front armour of 5 and John hoped that a lucky shot would disable one of the Tank-hunters.
John’s luck held as his KV-5 crew rallied and climbed back into their tank ready to seek vengeance for their close call. However the KV-5 gunners were not up to the task and all three shots went wide of their targets. John’s turn came to an end with far too many Germans on the table for his liking and Blake grinning in anticipation of his next turn.
|
 |
|
German Turn Two
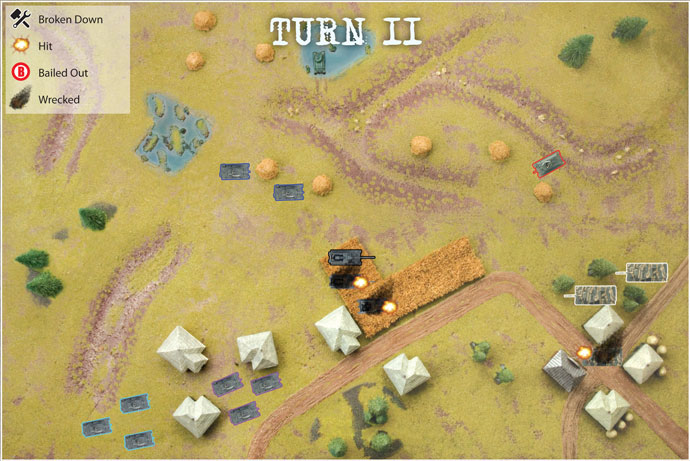
With the possibility of another wave of Soviet tanks arriving this turn Blake decided to consolidate his position around the experimental Tank-Hunter platoon.
Moving his Panzer III J (late) platoon forward he elected to keep as many of his tanks concealed as possible to make it harder for John to target him. Upon successfully rolling his reserves roll (5+ required) Blake was able to bring on the platoon of Panzer III J (early) tanks and moved them into cover behind the buildings. Finally the Tank-Hunters elected to remain stationary allowing them to fire at their full rate of fire of 2 shots each in the hopes of destroying the approaching KV-5s.
Unfortunately the Panzer IIIs proved to be out of range of any viable targets and would have to wait until the next turn before they could fully join the battle. With a large smile Blake picked up his four dice for the Sturer Emils and promptly missed all but one roll. However the one hit proved to be a winner as John rolled abysmally for his armour and Blake easily rolled his 2+ firepower test to blow the KV-5 to pieces.
|
 |
|
Soviet Turn Two
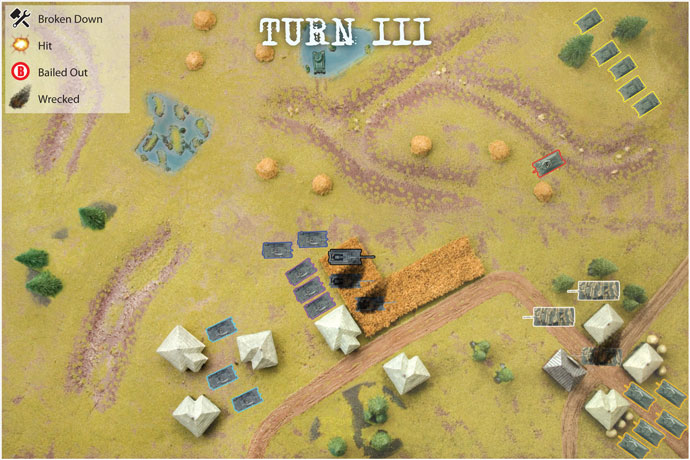
Completely failing his reserves roll, John elected to stay stationary with his KV-5s and, in a moment of insanity, (he will claim insane bravery) he moved his company HQ tank out into the open to fire upon the Tank-hunters.
Opening the shooting with a single shot from the T-34/76 HQ tank John unsurprisingly missed his target, due to range and cover John required a 6 to hit. Blake was feeling confident and had already begun to plan his next turn when the dice gods decided to award John box cars on his rolls to hit the Tank-hunters with his two remaining KV-5s. The gigantic 107mm ZIS-6 gun smashed straight through the armour of the Dicker Max and one of the Sturer Emils causing both Tank-Hunters to burst into flames.
With John dancing around for joy, Blake rolled his Platoon Morale Check for the last surviving Sturer Emil and thankfully rolled a four keeping his Tank-hunter in the fight.
|
 |
|
German Turn Three
With his primary anti-tank capability on fire, Blake elected to refocus on the mission objectives. (According to the Breakdown mission rules the destroyed tanks now act as objectives for the Soviets to capture.)
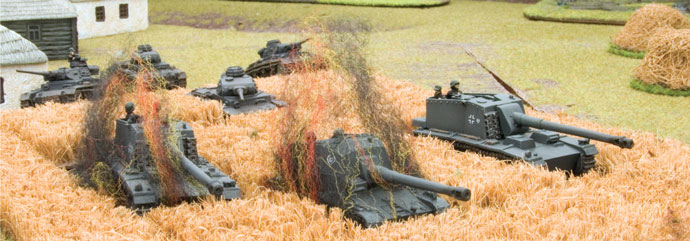
Blake quickly moved his Panzer IIIs forward to ensure they were contesting the wrecks of the Tank-Hunters. The last remaining Sturer Emil remained stationary in the hopes of putting paid to another KV-5.
Unfortunately the Panzer III J (late) tanks proved to be just out of range of John’s insanely brave HQ tank which only left the Sturer Emil to fire. After a small amount of umming and ahhing Blake elected to fire at the KV-5’s and not the T-34/76 HQ tank. However the dice gods continue to send their favour John’s way as Blake missed with both shots.
|
 |
|
Soviet Turn Three
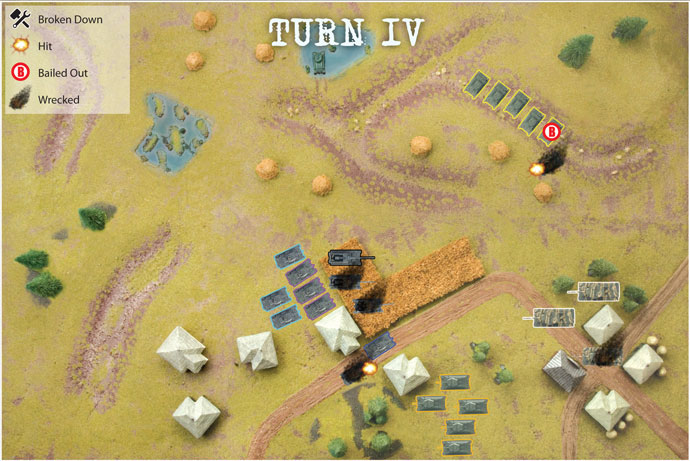
Beginning the turn with two successful reserve rolls John was able to bring the entirety of his force onto the battlefield much to Blake’s disgust.
Showing obvious elation at his previous turn’s success John elected to close on Blake’s now out-gunned force and moved the two KV-5s closer to the last remaining Sturer Emil and its Panzer III escort.
However John’s movement forward proved to be a tactical misjudgement this turn as the Very Slow tank speed of 4”/10cm left his KV-5s still at long range and that, combined with the penalties for moving and firing, and for the Sturer Emil being in cover, resulted in the them being unable to target anything. The T-70 and T-34/76 tanks were also out of range just leaving John’s hopelessly inaccurate HQ tank to fire and miss yet again.
|
 |
|
German Turn Four
With the last remaining Sturer Emil being the only thing in his force capable of destroying the KV-5s Blake adopted plan B which was to hunt down and destroy John’s T-70 and T-34/76 tanks in the hopes of breaking his company.
Moving the Panzer IIIs into better defensive positions, Blake made it clear he was ready to go down fighting.
John’s HQ tank finally drew the firepower it so richly deserved and under a hail of incoming fire he promptly failed its save with a roll of a one and watched as it burst into flame.
The Sturer Emil’s crew again failed to find a hole in the KV-5’s defences as another round bounced from the 170mm thick armour.
|
 |
|
Soviet Turn Four
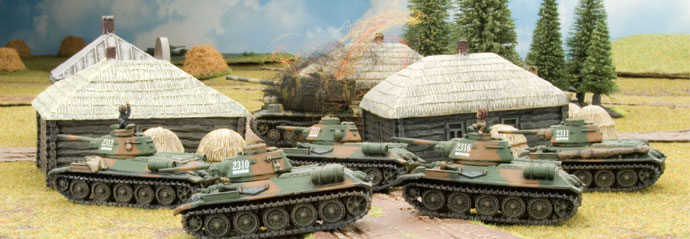
Even with the loss of his HQ tank, John continued his aggressive advance towards the German position. Using the gully for cover he advanced his T-70s towards the burning remains of his HQ tank, however one of the T-70s managed to bog itself in the mud at the bottom of the gully rendering it useless for this turn as the crew climbed out to dig it free.
Deciding to get his T-34/76 tanks into the fight immediately, John elected to double them up his left flank using the building as cover. Unfortunately this meant that they could not fire this turn. The KV-5s remained stationary this turn in the hope of inflicting more casualties.
Firing commenced with the KV-5s, with John strangely electing to target the Panzer III L (HQ) section. The 2IC tank took the hit and fell victim to the dreaded 107mm gun. The Sturer Emil unfortunately proved to be just out of range of the T-70s.
|
 |
|
German Turn Five
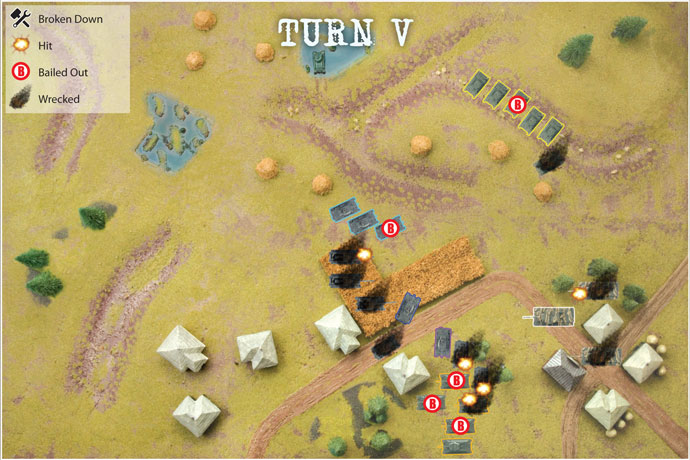
Knowing that the T-70s were just out of range of the Panzer III J (early) platoon, Blake moved up to the edge of the cornfield so that he could shoot at them.
John had moved the T-34/76 platoon at the double so Blake elected to move all of his remaining Panzer IIIs to a position where he could fire upon them. (In Flames Of War, when a platoon moves at the double enemy teams can fire twice their usual number of shots at them). With some careful manoeuvring Blake managed to get his Panzer III J (late) platoon around John’s flanks.
The shooting began with Blake firing his Panzer III J (early) tanks at the T-70s but only managed to cause the crew to Bail Out of one of the vehicles.
On the other side of the battlefield the Panzer III J (late) tanks opened fire, resulting in four of John’s tanks being penetrated, however the low firepower of their KwK38 guns meant that only a single T-34/76 tank was destroyed, and only causing the crews of the other three to Bail Out. Fortunately the single tank killed turned out to be the Platoon commander and, without effective leadership, the platoon would be unable to move for the remainder of the battle.
The Sturer Emil crew rolled beautifully, smashing through a KV-5’s armour and setting the tank on fire. John immediately rolled a five for his Platoon Morale Check and kept his last monster on the board.
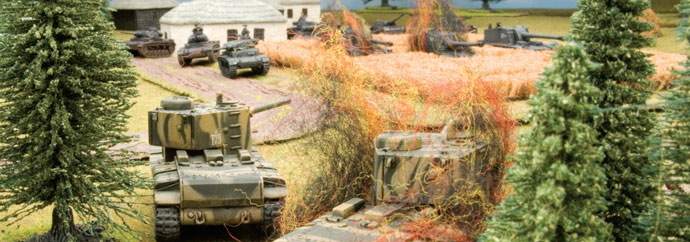
Successfully making a Stormtrooper Move (a free 4”/10cm move that Germans may make on a successful Skill Test) Blake managed to get his Panzer III J (late) and company HQ Panzer into cover prior to the KV-5s opening fire on them.
|
 |
|
Soviet Turn Five
Unable to move the T-34/76s, John elected to keep his entire force stationary in an attempt to blow the Germans to pieces.
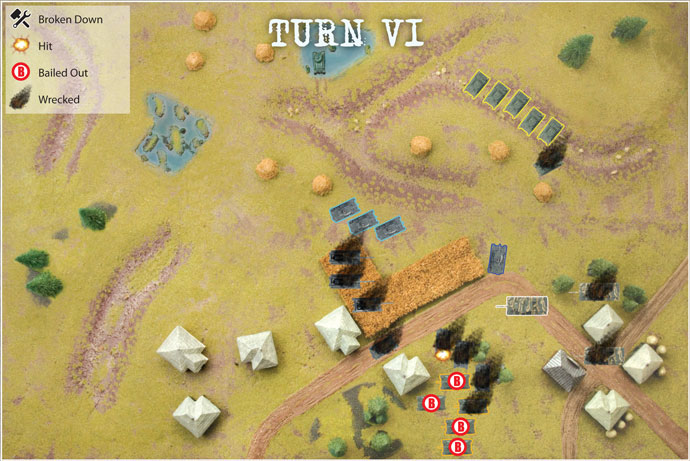
The T-70 tanks opened fire, scoring a single hit on the Panzer III (early) tanks and bailing out the crew. All but one of John’s bailed T-34/76s crews climbed back in to continue the fight, and turned their turrets to the Panzer III J (late) tanks. Rolling six dice, John managed to roll two sixes to hit and successfully blew two of the German tankss to pieces.
Seeking revenge, John turned the remaining KV-5 onto the Sturer Emil. Another two sixes sent the last Tank-hunter to the scrapheap.
|
 |
|
German Turn Six
Having lost the last of his Tank-hunters and only just passing the
Platoon Morale Check on his Panzer III J (late) platoon, Blake knew
that this turn he would need to break John’s army and cause a Soviet
Company Morale Check. To do this he would need to destroy both the T-70
and T-34/76 tank platoons, as he no longer had any weapons which could
hurt the surviving KV-5.
Blake began by moving his HQ Panzer IIIs across the cornfield to target
the T-70s in the gully. The rest of the Panzer III tanks in the force
remained stationary to maximise their shots.
Unfortunately the dice gods again abandoned Blake who, despite hitting
and penetrating three T-34/76 tanks, could not pass any firepower tests
and only succeeded in bailing them out. John easily passed his Platoon
Morale Check and the platoon stayed on the table despite having all its
crews bailed out and hiding.
The curse continued with the firing at the T-70s where, despite rolling
eight dice, Blake only managed a single hit which John promptly bounced
of the armour.
All of Blake’s hopes rested with John’s luck changing for the worse.
|
 |
|
Soviet Turn Six
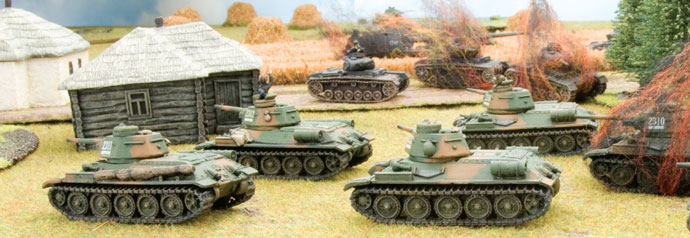
Moving the KV-5 into close range, John quickly prepared to open fire on Blake’s beleaguered force. Three of the four T-34/76 tank crews remounted their vehicles and turned their guns onto the lone Panzer III J (late). John again rolled six dice scoring two hits and the final Panzer in the platoon exploded. This meant that Blake would have to make a Company Morale Test at the end of the turn on a 4+ to stay in the fight.
The KV-5 unfortunately missed its target and the T-70s, though accurate, failed to find any weaknesses in the Panzer III armour.
With bated breath, Blake rolled his Company Morale Check. His bad luck continued and the surviving German tanks fled the field, leaving John victorious.
John’s final statement summed up the battle neatly: “I won this by luck! Blake played a better tactical game using his tanks and the terrain with finesse, where I used mine as a blunt tool to smash the Panzers. Luck was definitely with me though, while it abandoned Blake from the very start.”
“Once again an average plan was proved successful thanks to awesome dice!”
|
Last Updated On Friday, May 28, 2010 by Wayne at Battlefront
|
|
|