|
|
|
|
Products mentioned in this Article
--None--
|
|
|
|
|
|
|
|
|
 |
|
|
 |
Crossing the Drut
With Generals Kyran Henry and Ken Camel
River Crossings and Crossing the Drut Scenario are found on pages 66 to 73 of the Firestorm—Bagration book.
The rivers of Byelorussia are constant obstacles throughout the countryside. They cut through battle lines and lend themselves to formidable defence lines. During Operation Bagration the Drut River presented the Soviet forces with a challenge. Following a massive preliminary bombardment, they had to cross the river quickly and secure the opposite bank so that they could get tanks and other heavy equipment across and into the battle.
|
|
Critical crossing points were identified and special forces were organised to secure the area. However, the Germans also figured out the most
likely crossing points and heavily fortified them. Finally, the Soviets
would sometimes assault the rivers at night to help the vulnerable
troops in the river get across. The battle would certainly not be easy
for either army!
The Crossing the Drut scenario, found in Firestorm—Bagration, represents one of the many river assaults that the Soviets made. The Soviet force is charged with securing the crossing so that the Red Army can sweep behind the German’s lines. The Soviet player has a highly motivated Guards Strelkovy at his disposal along with a healthy amount of high-calibre guns to blast the enemy from the riverbanks. For the Germans, everything depends on the clever deployment of the limited fortifications at their disposal.
Ken Camel and Kyran Henry have volunteered to fight our first Firestorm—Bagration battle report: the Crossing the Drut scenario. We thought it was an appropriate matchup as Ken wrote the scenario and Kyran built the table. Now they would both have a chance to have a play with their creations! Ken took up the Soviet side while Kyran manned the German trenches. With their sides chosen, the players reviewed the scenario, including the new River Assault special rules.
River Assault Special Rules
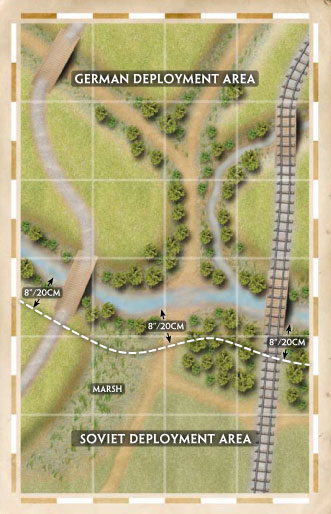
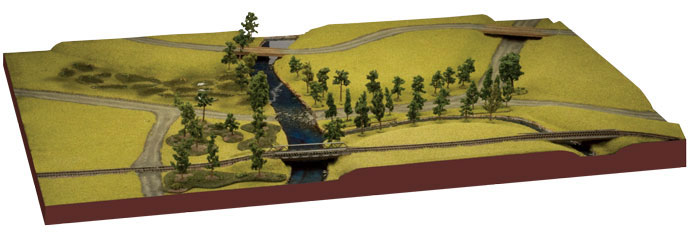
The scenario uses new special rules for crossing large rivers, such as the Drut. The River Assault rules are meant to cover the larger-than-average river on the battlefield—the sort that is to deep or too swift or both for the average infantry team to wade across.
|
 |
|
On the Flames Of War battlefield these rules
cover rivers that are 4”/10cm to 8”/20cm across. The Battlefield in a
Box: Rivers Set is a perfect example of what sort river obstacles use
the River Assault special rules.
Battlefield in a Box - River…
|
 |
|
Here is a quick review on the rules so that you know what is going on in this battle report. Using the River Assault special rules, Infantry and Man-packed Gun teams can attempt to cross rivers. A team that wants to cross the river must begin its movement next to the riverbank. It then enters the river and is placed in the river adjacent to the opposite bank.
While a team is in the river it cannot move, shoot or assault as its busily trying to paddle itself to the other side. Also, while a team is in the river its very vulnerable to enemy fire and there’s no where to hide, so teams get a 5+ save in the river rather than their normal 3+ save. As you can imagine, teams will be doing whatever they can to get across quickly!
When the team begins its movement in the river, it hops out and then moves normally onto the opposite riverbank.
Other Special Rules
The scenario uses Intense Battle, Limited Fortifications, Preliminary Bombardment, Prepared Positions, Reserves as well as the River Assault special rules. For a bit of flavour, Kyran and Ken decided to use the Night Attack special rule to add another challenge to the game!
|
|
219ya Gvardsyskiy Strelkovy Polk
Guards Strelkovy Batalon (Fearless Trained)
Battalion HQ (with Anti-tank Rifle and Sapper Platoons)
Strelkovy Company (with two platoons and two Maksim HMG teams)
Strelkovy Company (with two platoons and two Maksim HMG teams)
Scout Platoon (with two Scout Squads)
Anti-tank Company (with two Anti-tank Platoons)
Assault Gun Company (with five SU-76M assault guns)
Heavy Assault Gun Company (with three ISU-152 assault guns)
Flame-thrower Platoon (with two Flame-thrower Sections)
|
II. Bataillon, 313. Grenadierregiment
Grenadierkompanie (Confident Veteran)
Company HQ (Command team equipped with Panzerfaust, Anti-tank and Mortar Sections)
Grenadier Platoon (with three squads, Command team equipped with Panzerfaust)
Grenadier Platoon (with three squads, Command team equipped with Panzerfaust)
Grenadier Platoon (with three squads, Command team equipped with Panzerfaust)
Pioneer Platoon (with three squads, Command team equipped with Panzerfaust)
Machine-gun Platoon (with two sections, Command team equipped as Panzerknacker)
Anti-tank Gun Platoon (with three 7.5cm PaK40 guns)
Infantry Gun Platoon (with two 7.5cm leIG18 guns)
Artillery Battery (with four 10.5cm leFH18 howitzers)
Reserve
Panzer Platoon (with three Panzer IV H tanks)
Light Anti-aircraft gun Platoon (with two Sd Kfz 10/5 (2cm) half-tracks)
|
|
Onto the Battle Report…
A note from the German commander, Kyran Henry, before the battle:
“I immediately began sizing up the battlefield and working out my defences. I new Ken would have a stupidly large amount of infantry to use against me so my fortification choices would play a key role in my defence. To that end I took all my basic fortifications, barbed wire and trench lines and then selected two minefields and two machine-gun bunkers.
All my troops started the game in Prepared Positions and my artillery started in gun pits. I spread my infantry out across the board holding each of the crossing points and I left my tank platoon and anti-aircraft platoon off table in reserve in the hopes of stemming any initial breakthroughs. With my forces prepared the men hunkered down into their trenches and awaited the inevitable artillery onslaught.”
From Ken Camel, Soviet commander:
“My initial plan is to overrun the right flank with infantry and ISU-152s. If I can isolate the rail bridge then I could pin down the rest of the Germans on the board with my other forces and overrun the right side. ”
|
|
The Preliminary Bombardment
The table was all set up and the time had arrived for the Soviet preliminary bombardment to inflict its terrible toll! Kyran’s troops braced for impact as the Red God of War could be heard firing from well behind the Soviet front lines.
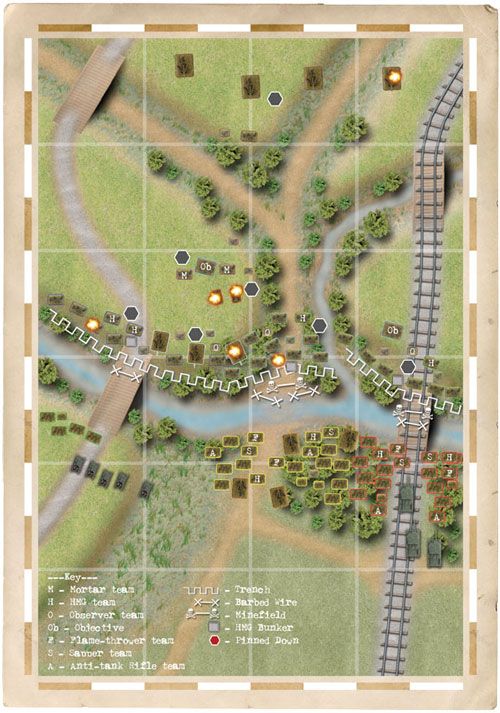
The first shells struck the German front line and shook up the troops. Kyran’s grenadiers lost a team on the left, a PaK40 anti-tank gun in the centre and a pioneer team near the river crossing. He had expected higher casualties from the front line, but thankfully the only effect was that the men were a bit shaken and Pinned Down.
The barrage continued up the table, hitting the centre support platoons. The infantry guns got the worst of it, losing both guns and paralysing the platoon. Finally, the bombardment hit the rear area, destroying a 10.5cm gun and sending the crews into their foxholes.
As suddenly as it had begun, it was over. The German troops were dishevelled but otherwise unharmed. It was now time for the great Soviet assault!
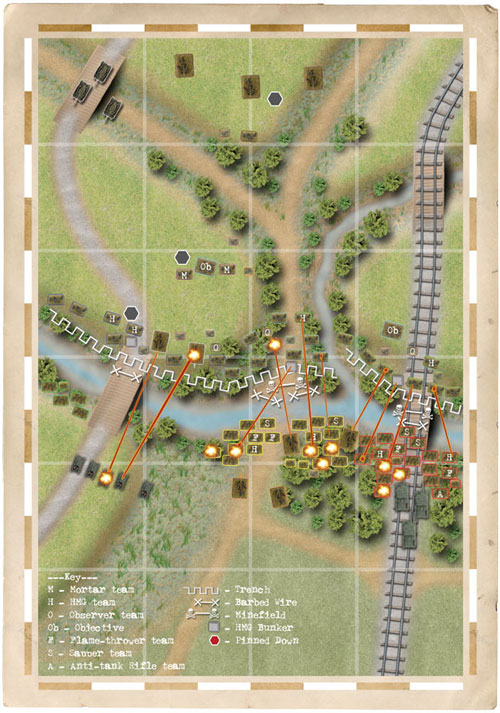
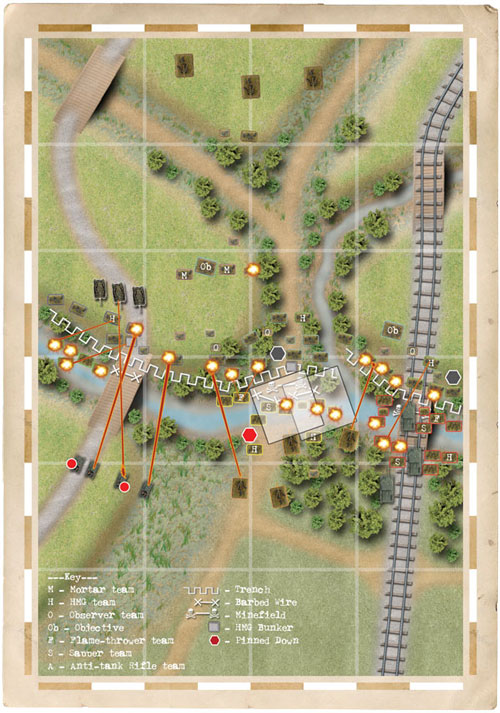
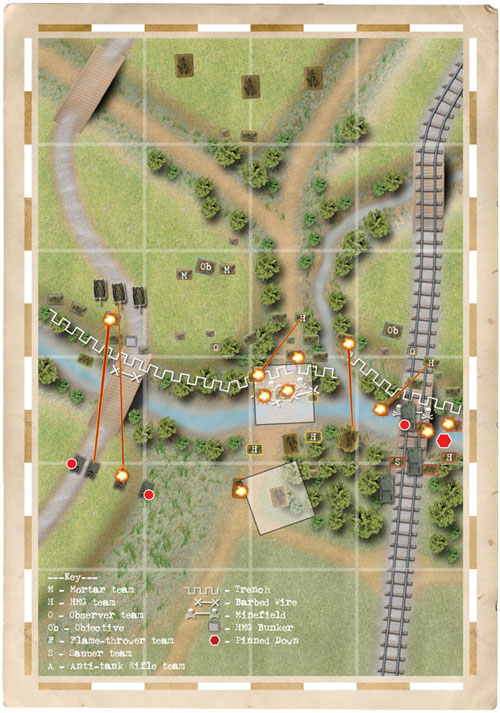
Right: Preliminary Bombardment and setup.
Below: Turn 1.
|
 |
 |
Turn 1
Soviet
Ken’s Soviets got the first turn. He pushed his troops forward up to the river banks, hoping to get as many troops across the following turn as possible. He had ample assault gun support with SU-76 and ISU152 guns.
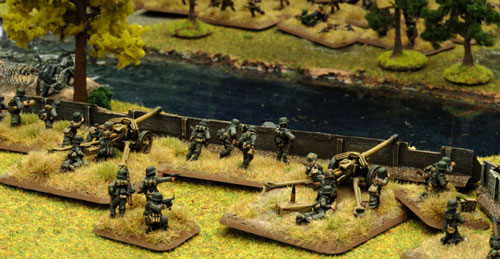
During setup, Ken cleverly deployed the SU-76 assault guns within range of the German PaK40 anti-tank gun line so that he could Volley Fire upon the German anti-tank guns. The SU-76s fired at the PaK40 guns and managed to kill one, leaving one left in the platoon. The heavy ISU assault guns couldn’t see anything in the dark night-time and were forced to hold fire until a target presented itself.
The Soviet Anti-tank platoon took some shots at the enemy infantry and killed a pioneer team on the opposite bank. Meanwhile the rest of the force moved silently toward the river hoping that the Germans hadn’t noticed them crawling forward.
German
At the top of the German turn, many of Kyran’s platoons were still feeling the results of the preliminary bombardment.
|
|
The left flank, mortars and the 10.5 artillery
all remained Pinned Down, despite the CiC’s best efforts. However,
Kyran’s first reinforcements arrived from Reserve and so his troops
were reinforced with three Panzer IV tanks, which moved with caution
(due to the night rules) up the left flank.
The heavy machine-guns on the right flank had no problem finding targets and opened fire on the approaching Russians. The HMG bunker joined in and together they inflicted three casualties
on the Soviet company but failed to pin the advancing troops.
|
 |
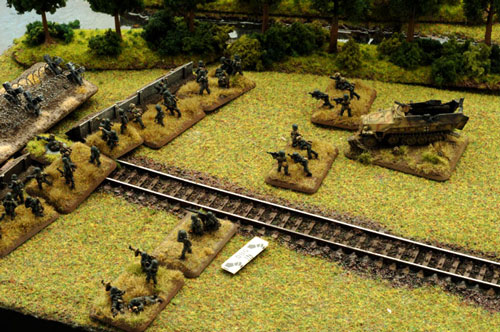 |
In the centre, the pioneer and HMG bunker opened fire on the Soviet company heading for the ford. They destroyed five teams and Pinned Down the centre assault.
On the left, the last remaining PaK40 returned fire at the SU-76 assault guns and easily destroyed one. The infantry, however, failed to see anything further than 4”/10cm away and decided to hold fire.
At the end of the turn, the German infantry settled into their trenches as the Panzers Stormtroopered forward.
|
|
Turn 2
Soviet
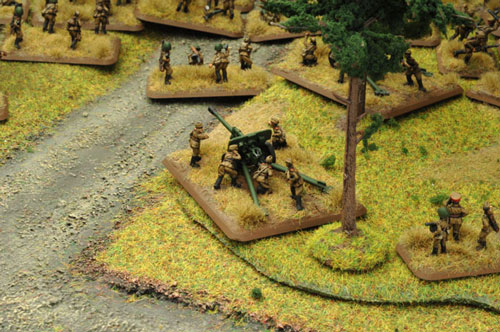
Ken rallied is centre assault and continued to move forward. The centre platoon jumped into the river with reckless abandon. Where possible he made use of the ford over which his infantry wouldn’t have to use the River Assault special rule. However, there wasn’t enough room so a few teams had to break out their assault boats and brave the river.
On the right, the Strelkovy company charged into the river while the scouts on the left moved to the river’s edge. The SU-76 assault guns fires another volley at the poor remaining PaK40, knocking it out.
German
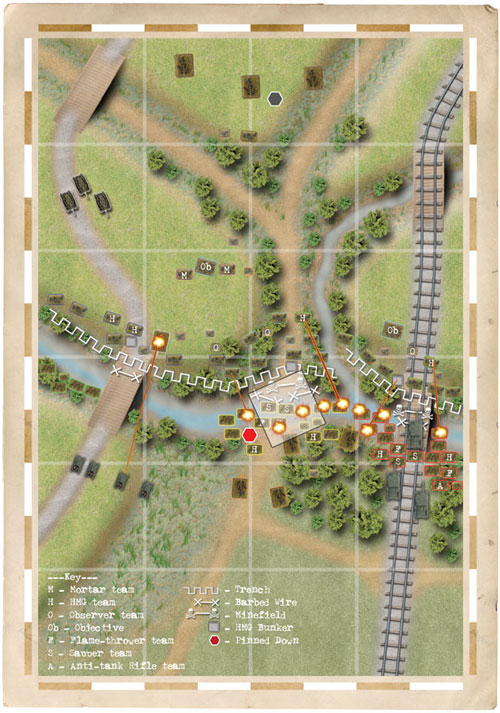
The Germans reacted with another round of withering fire. The Panzers moved up, but couldn’t make out a target. The left flank remained quiet as the grenadiers looked into the darkness and saw nothing. Kyran’s artillery failed to unpin and the dazed artillerymen hid in their foxholes. Meanwhile, on the right flank, all hell broke loose. The pioneers noticed the helpless Soviets in the river in front of them and opened up.
|
 |
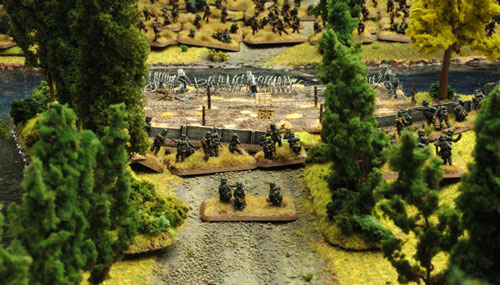 |
His mortars, having unpinned, spotted the enemy
and landed a template over the river’s ford. The Soviet company
suffered five casualties and was thoroughly Pinned Down,
On the right, the HMG bunker and the heavy machine-gun heard the enemy in the water and began firing, destroying four teams struggling to make it across the river.
|
|
Turn 3
Soviet
With his troop count dwindling, Ken knew he had to press the attack immediately. Dawn hadn’t broke yet and he hoped that he could squeeze another turn out of the darkness.
The Scouts moved forward across the river on the left, supported by the SU-76s which targeted the heavy machine-guns facing them.
In the centre the anti-tank guns fired a volley into the pioneers in the middle and the grenadiers on the right with great success. They knocked out a grenadier team and a pioneer team in the middle and two additional grenadiers on the right.
The ISU-152s rolled over the barbed wire and easily destroyed the bunker on the right opening the way for the infantry to attack. The Strelkovy on the right rushed forward into assault positions and used a flamethrower to eliminate some of the enemy on the hill, but only managed to kill a single team.
The infantry in the centre moved forward and used a flame-thrower to
pin the enemy and destroy two teams. The Sappers moved forward to
attempt to clear the minefield while leaving the regular infantry to
tend to the wire.
|
 |
|
Then ken launched his assault against the right flank. He bravely
weathered the defensive fire losing a team in the river, but fought on
with three teams, destroying one German team. The Germans struck back,
killing a team. However, Ken was dismayed when his troops broke off
(his Komissar being the casualty in defensive fire) so he pulled them
back.
|
 |
German
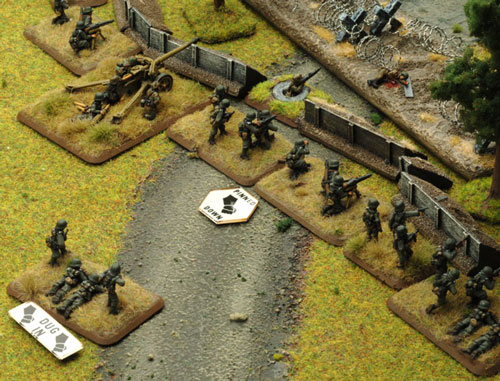
Kyran was left with a dangerous situation on the right, having only three teams and an HMG team defending the objective. But there was nothing he could bring to bear. The 2cm AA trucks were evidently delayed still as they had not arrived from reserve yet. Furthermore the commander of the Infantry Guns failed his last man standing motivation test and fled the field.
But not all the news was bad as the 10.5cm artillery finally rallied from being pinned down the whole game, and contributed it’s firepower to the deluge of fire on top of the assaulting Soviets in the centre.
|
|
Mortars, artillery, HMGs and pioneers focused its remaining firepower
on the Strelkovy in the middle, resulting in three casualties and
forcing them to become Pinned.
To the left, Kyran used the HMG bunker and the
heavy machine-gun team to all but completely destroy the Soviet scouts
at the water’s edge. Four of the five Soviet teams were destroyed in
the river, leaving one leaderless team treading water!
The Panzer IVs were able to spot the SU-76s and fired a few shots at the assault guns, hitting and bailing two of them.
|
 |
 |
Turn 4
Soviet
Daylight breaks! Ken needs to make a big push on the right if the game is to be salvaged. He managed to rally all the troops with the exception of the two bailed out SU-76 assault guns and, unfortunately, the critical infantry on the right. He decided to put as much firepower that could be brought to bear onto the right flank. ISU-152s, anti-tank guns and infantry poured everything they had and managed to eliminate a single infantry team but that was enough to prompt a morale check. Kyran rolled a five, saving the grenadier remnants for another turn.
Two of the SU-76s failed to remount their vehicles, leaving the other two to wipe out the last German heavy machine-gun on the left—albeit a little late!
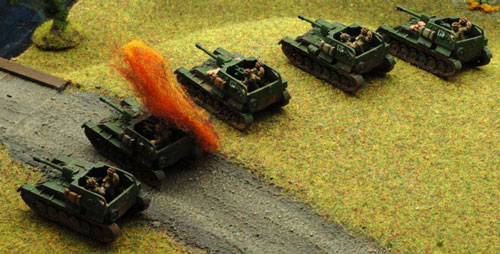
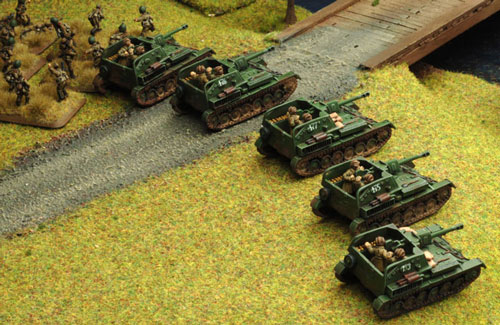
Ken’s options were few and he decided to commit his ISU-152s to the
assault on the right in order to force a result and save the flank. The
heavy assault guns charged forward over the minefield which did nothing
to stop them. The narrow bridge forced the tanks to bottleneck, but all
Ken was looking for was to bounce the infantry back out of their
trenches.
|
|
A super keen Panzerfaust SMG team quickly fired off a round in
defensive fire bailing out the lead ISU and blocking the bridge! Ken’s
hope for a decisive victory was dashed.
Kyran, hoping for a quick
ISU-152 kill in the assault was also disappointed when his infantry
refused to assault the tank and opt instead for a cup of celebratory
coffee.
|
 |
 |
German
Over to Kyran who continued to have bad luck with his reserves, but there was not much need for FlaK trucks at the moment. His Panzers kept firing on the SU-76s and destroyed one, prompting a morale check, which Ken passed.
Kyran’s artillery focused on the Soviet anti-tank guns, hoping to knock a few of them out and got one in the open while mortars and machine-guns cleaned out three more Soviet teams in the centre.
|
|
With his troops well thinned out and little
prospect for victory, Ken conceded the game to Kyran and his German
defenders. The Soviets would have to look elsewhere for a crossing
point!
Wrap Up
A note from the German commander, Kyran Henry, after the battle:
“A victory for the glorious German army!
Though things started badly (I have had my artillery commander court-martialled for cowardice) my Pioneer and Grenadier platoons put up a glorious fight and repulsed the Soviet attacks. The rail bridge got quite scary for a turn or two but thankfully the soldier handling the Panzerfaust new exactly what was expected of him and dealt with the ISU’s accordingly.
The MG bunkers combined with the dug in HMG’s proved to be the backbone of my defence and caused significant casualties each turn as I expected them to. This was the first large-scale game were I had used defences and they definitely add a different tactical aspect to the game.
All-in-all a fantastic game and one I enjoyed thoroughly.”
From Ken Camel, Soviet commander:
“Losing the one ISU-152 and then all the infantry in the assault prevented me from sweeping through the Germans on the rail bridge. Once I lost those two units I was not strong enough to try another assault with the arrival of the German Reserves. Better Luck next time!”
|
Last Updated On Wednesday, February 4, 2009 by Wayne at Battlefront
|
|
|