|
|
|
|
Products mentioned in this Article
--None--
|
|
|
|
|
|
|
|
|
 |
|
|
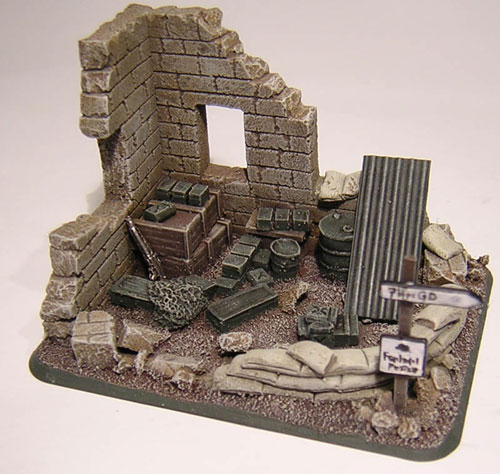 |
Making a Realistic Ruined House Corner
By Giandomenico Cuoghi
With the opportunity of the Diorama Competition, I decided to try a little experimentation in advanced modelling techniques.
The aim was to obtain terrain pieces that were not just useful for wargaming, but also as realistic as possible.
I also considered the chronic lack of time typical for us hobbyists.
The result was a very peculiar application of techniques and materials normally used for plaster mould making, which brought a very nice and realistic piece of terrain with a minimal effort.
|
To make this article, and take step-by-step pictures, I decided to make a simple gaming objective.
The idea was to make a classic ruined house corner used as a small depot, mounted on a large FOW base.
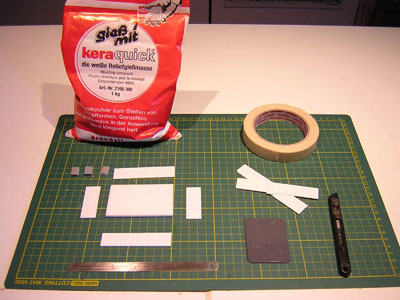
The first step is to provide the materials needed:
• A ruler
• A cutter
• Masking tape
• Plaster moulding compound
• Some strips of plastic card (to
make the mould)
• Old newspapers
• A glass to make the water-plaster
mix
|
 |
 |
A note on the moulding compound: try to find one that is harder than normal plaster. The one I used is something here in Italy called “ceramic plaster”, much harder than the standard plaster.
The cost is anyway minimal, as a kilogram of powder goes about 2-3 European Euros – for this work you will need less than half a normal glass.
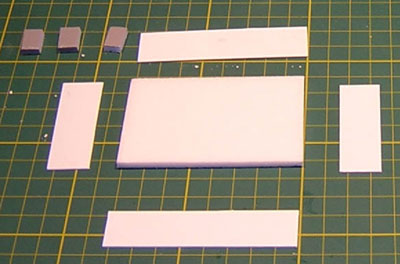
Decide the dimensions of the wall you will reproduce, in this case I took as a reference for the whole length the sum of the long and short sides of the standard FOW large base.
For simplicity, I will cut it in two pieces to form the corner wall
later to fit the base, but this way I will have to make a single mould
for both walls.
|
|
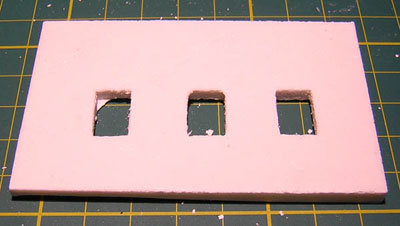
Now, cut the base of the mould of the same dimensions. For my base, I used a small sheet of foam board I found on a Railway modelling store, for the simple reason it has a kind of texture that will add some more realism to the final product.
To make your mould, feel free to use any kind of material you would
like.
|
|
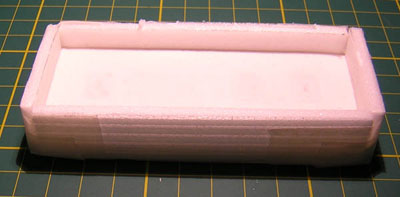
Just be careful it is not made of hydroscopic material (like
paper or cardboard), but any kind of plastic or polystyrene will be ok.
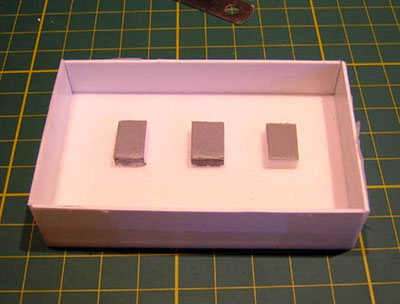
Don’t forget to glue some small rectangular pieces where you will want
the windows to be – it will be very difficult to make them later.
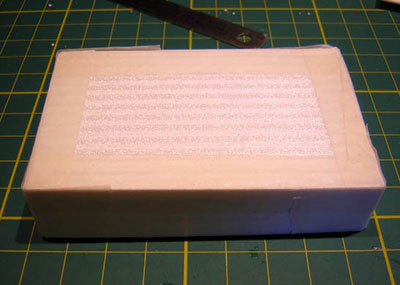
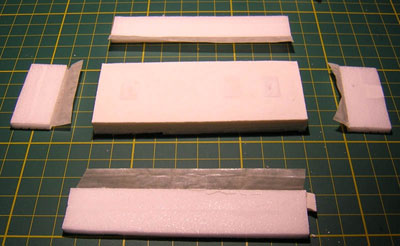
Using the masking tape, attach the plastic strips around the base. Be sure all possible cuts are covered.
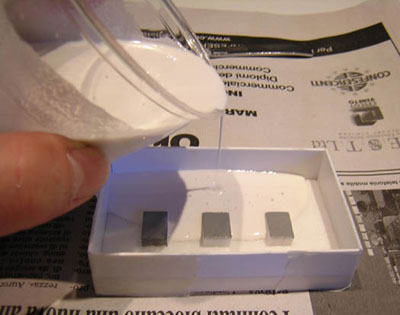
Now it is time to pour the plaster. Mix the powder in a glass with
water (in my case it was about 3 parts of powder, and 1 part of water),
until it becomes the consistency of milk.
Pour it into the mould, being sure to have some newspaper below (water
will pass through the masking tape), and try not to cover the pieces
where the windows will be.
|
 |
 |
 |
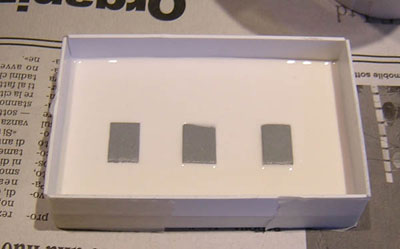 |
Be careful also that the mould is put on a flat horizontal surface,
otherwise you will find your wall will have different thicknesses. This
is exactly what happened to me, so I simply re-poured the mould again.
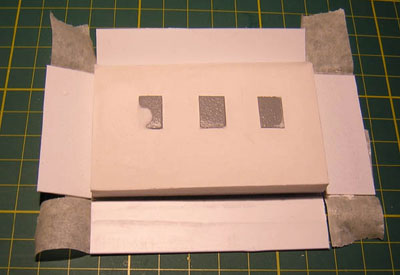
The plaster will harden in about an hour, but as it will retain some
water, it will be best to take it out of the mould and leave it drying
for about a full night – until it becomes perfectly white.
Now it is time to separate the two corner walls.
To cut it, carve a deep straight line using the cutter and the ruler,
then break it carefully with your hands.
|
 |
 |
 |
 |
|
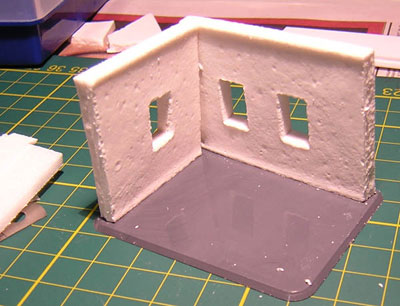
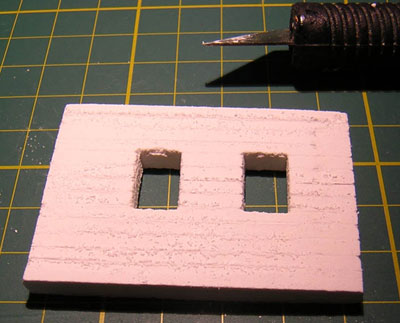
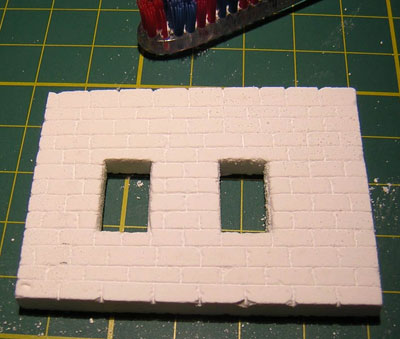
To carve the bricks, simply draw some straight lines, again with the cutter and the ruler. Don’t worry to be too regular, you will not notice that in the final result.
Do the vertical lines simply by freehand, just be careful to alternate them from one row to the other?
As the process is quite messy, keep an old toothbrush to clean the cuts from the plaster.
Keep also aside the big chunks of carved plaster broken in the process; they will be useful in the base to make the debris.
|
 |
 |
 |
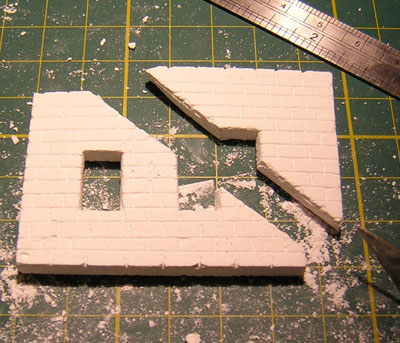 |
Time to give a more ruined appearance to the
wall. Cut at an angle as described above, then carefully carve the
single bricks using the lines you drew for the surface.
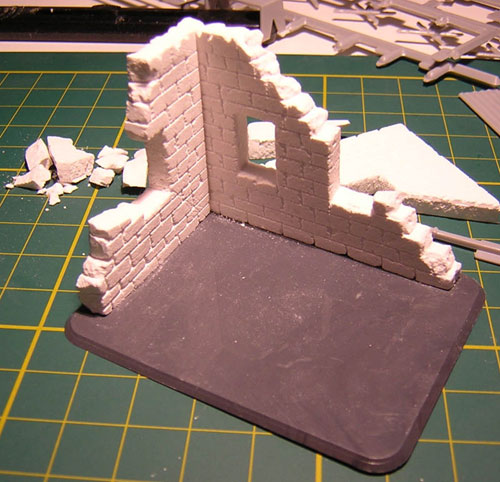
On the other side of the wall – that will be the external part of the house – I wanted also to make it look like the external paint was broken, letting the bricks appear.
This is another very easy thing to do. Simply scrape the wall on the places you want the bricks to appear with the cutter (normally on the borders of the ruined wall), and then carve the bricks as described above.
The effect is very stunning!
|
|
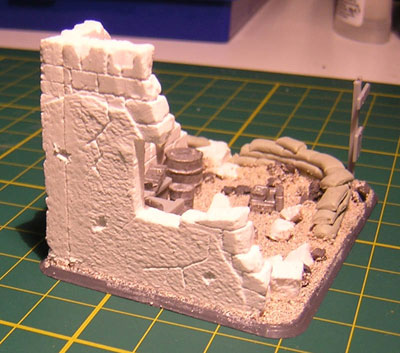
You can also add at this stage cracks and bullet holes.
Here is the final result… not bad!
To finish the objective, I simply added some spare parts I had left in my bits box, and to give it a more “military” feeling I also sculpted some sandbags.
|
 |
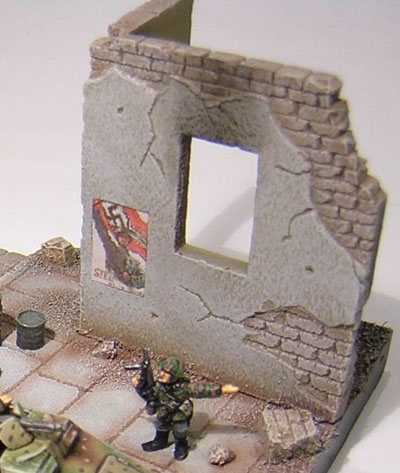 |
To paint the plaster, do it exactly as you would do for normal miniatures – just be careful to give it a good coat of primer.
The technique described works very well also for bigger projects. The base of my diorama for the competition was made exactly in the same way.
I really like the results given by this simple technique, and I’m already planning some other useful features for my gaming table or dioramas, like bunkers, ruined houses, dragon’s teeth, and even dug-in markers!
As it is something I’m still experimenting, I will show you the results in the near future.
Giandomenico Cuoghi |
Last Updated On Friday, May 16, 2008 by Wayne at Battlefront
|
|
|