|
|
|
|
Products mentioned in this Article
--None--
|
|
|
|
|
|
|
|
|
 |
|
|
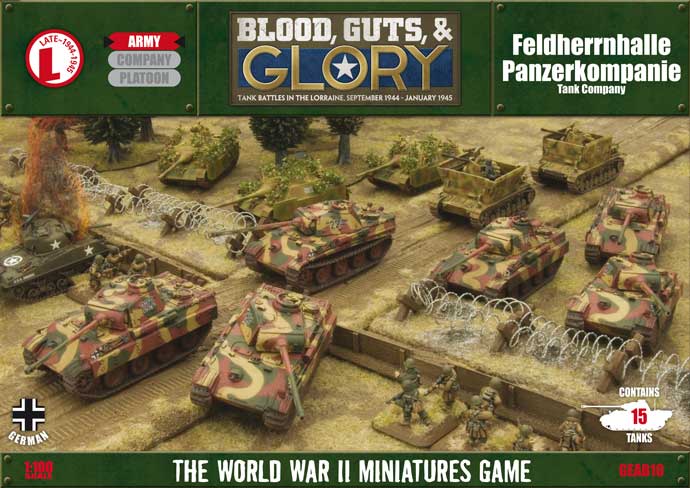 |
Feldherrnhalle Panzerkompanie (GEAB10)
includes one Company HQ with two Panther G, two Panzer Platoons with three Panther G each, one Weapons Platoon with three Panzer IV/70 (V), one Anti-aircraft Platoon with four Möbelwagon, one Panther G Objective Marker, one Panzer IV J Objective Marker, two Tank Commander sprues, six Stowage sprues, one German Token Set, one German Dice Set, twenty four Rare Earth Magnets & two Decal sheets.
This army deal is no longer available |
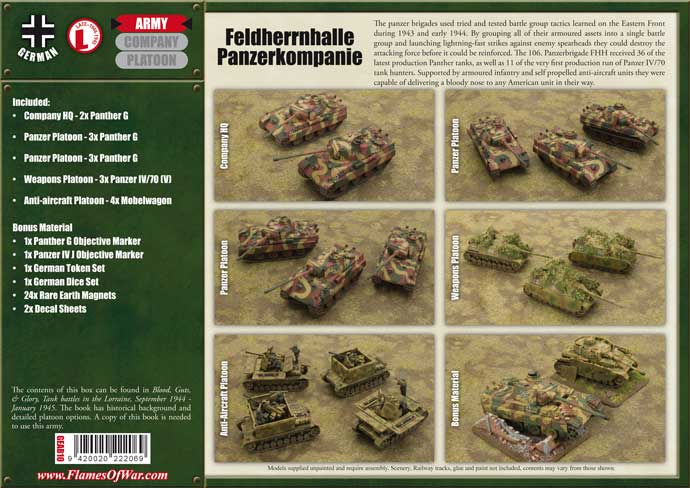 |
The panzer brigades used tried and tested battle group tactics learned on the Eastern Front during 1943 and early 1944. By grouping all of their armoured assets into a single battle group and launching lightning-fast strikes against enemy spearheads they could destroy the attacking force before it could be reinforced. The 106. Panzerbrigade FHH received 36 of the latest production Panther tanks, as well as 11 of the very first production run of Panzer IV/70 tank hunters. Supported by armoured infantry and self propelled anti-aircraft units they were capable of delivering a bloody nose to any American unit in their way.
Designed by Evan Allen, James Brown & Will Jayne.
Painted by James Brown, Blake Coster & Jeremy Painter.
|
 |
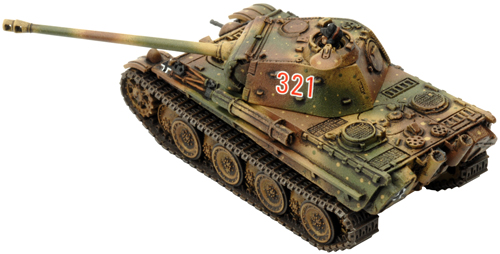 |
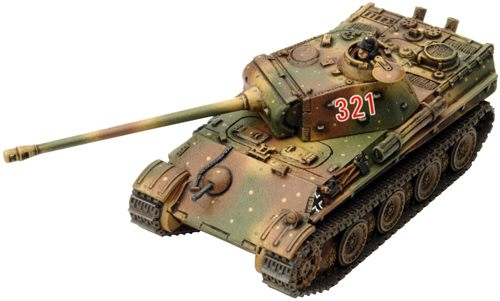
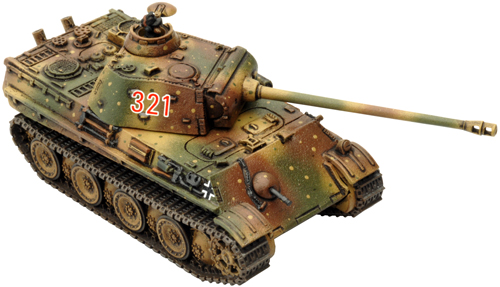
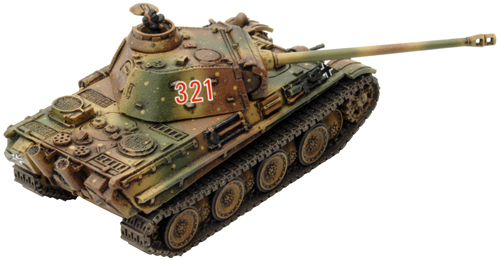
The Panther G in Flames Of War
|
| |
|
|
Armour
|
|
|
Name
|
Mobility
|
Front
|
Side
|
Top
|
Equipment and Notes
|
Weapon
|
Range
|
ROF
|
Anti-tank
|
Firepower
|
|
Panther G
|
Standard Tank
|
10
|
5
|
1
|
Co-ax MG, Hull MG, Wide tracks.
|
7.5cm KwK42 gun
|
32"/80cm
|
2
|
14
|
3+
|
|
|
 |
 |
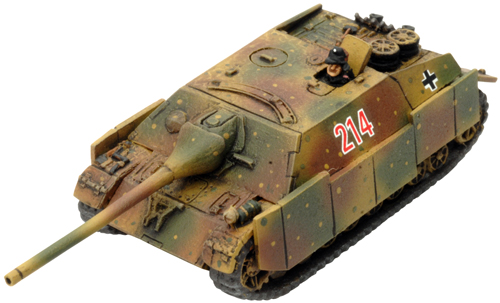
The Panzer IV/70 (V)
|
 |
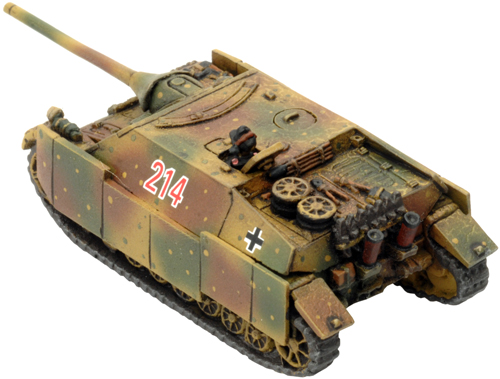 |
The Panzer IV/70 (V) in Flames Of War
|
| |
|
|
Armour
|
|
|
Name
|
Mobility
|
Front
|
Side
|
Top
|
Equipment and Notes
|
Weapon
|
Range
|
ROF
|
Anti-tank
|
Firepower
|
|
| Panzer IV/70 (V)
|
Slow Tank
|
9
|
3
|
1
|
Hull MG, Overloaded, Schürzen.
|
7.5cm PaK42 gun
|
32"/80cm
|
2
|
14
|
3+
|
Hull mounted. |
|
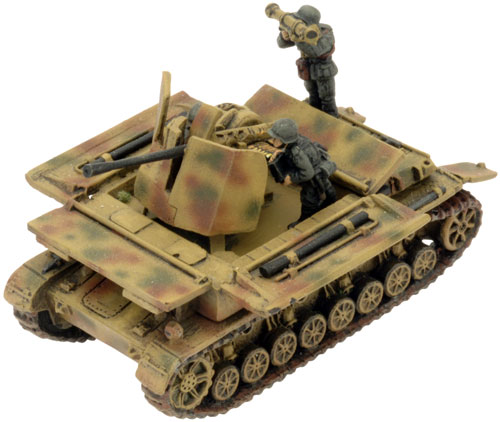
| The Möbelwagon |
 |
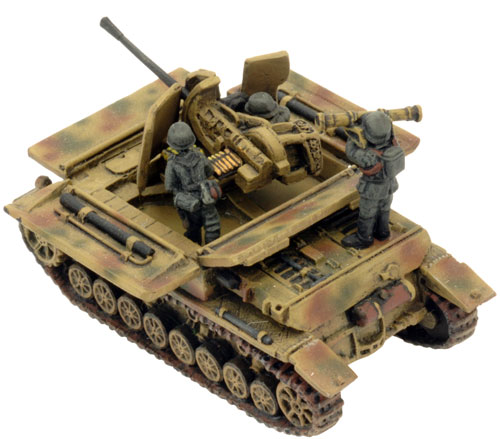 |
The Möbelwagon in Flames Of War
|
| |
|
|
Armour
|
|
|
Name
|
Mobility
|
Front
|
Side
|
Top
|
Equipment and Notes
|
Weapon
|
Range
|
ROF
|
Anti-tank
|
Firepower
|
|
Möbelwagon (3.7cm)
|
Standard Tank
|
0
|
0
|
0
|
|
3.7cm FlaK43 gun
|
24"/60cm
|
4
|
6
|
4+
|
Anti-aircraft. |
|
The Panzer IV J Objective
|
The Feldherrnhalle Token Set
The Feldherrnhalle token set contains 30 full-colour gaming tokens including:
4x Bailed Out tokens; 4x Bogged Down tokens; 4x Dug In tokens; 4x Gone To Ground tokens; 4x Pinned Down tokens; 2x Ranged In tokens; 2x Reorganising tokens; 2x At The Double tokens; 2x Non-Assaulting Team tokens.
|
The Feldherrnhalle Dice Set
Includes 16 full-colour themed dice. |
| The Feldherrnhalle Panzerkompanie Counter-Attack |
| The Contents of the Feldherrnhalle Panzerkompanie Box Set |
| Contact the customer service team at [email protected] if you have any issues with any of the components. |
| Description of Components |
a. 8x Gun cleaning kit tubes.
b. 8x Resin Panther G (Late) turrets.
c. 8x Resin Panther G (Late) hulls. |
d. 8x Plastic Panther tracks sprues.
e. 8x Plastic Panther parts sprues. |
|
The Plastic Panther Sprues
The parts of the new plastic Panther sprues
that are used when
assembling the Panther G (late) are highlighted in green. The parts
highlighted in red are optional and can be used to add some modelling
variety.
Below: The highlighted parts of the new plastic Panther sprues used in the construction the Panther G (late).
|
Assembling The Panther G (Late)
|
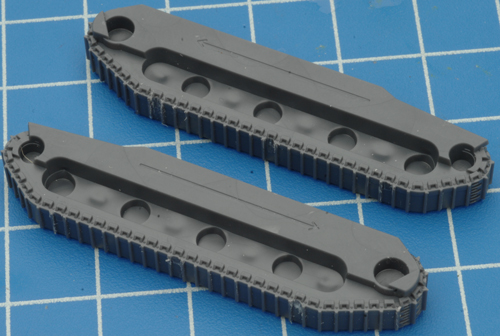
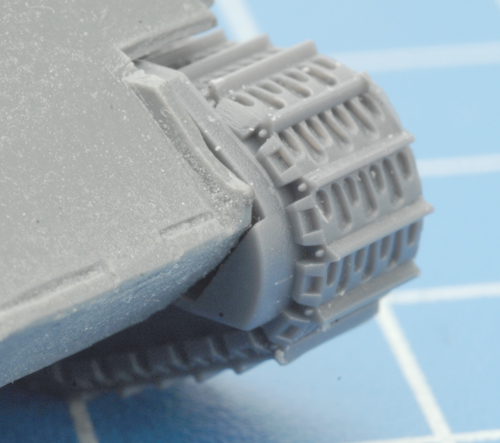
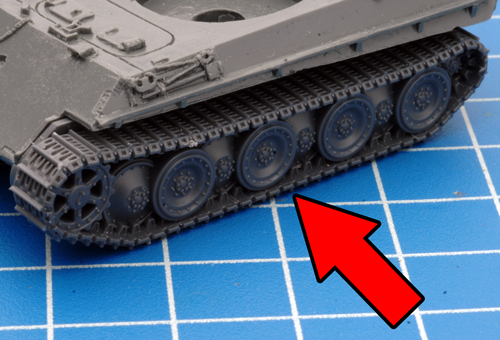
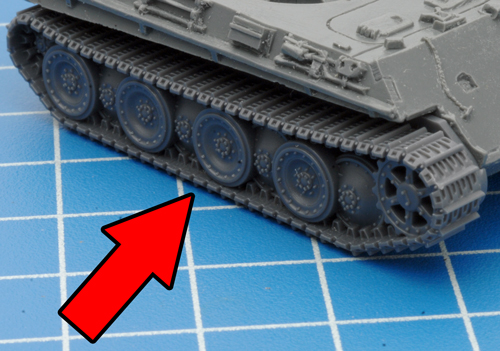
Step 1. Begin assembly by attaching the tracks to the hull of the Panther G.
Note: Each track has an arrow the back that corresponds with the front of the track to aid in correct orientation. Make sure that sits flush with the hull.
|
 |
 |
| Below: The left-hand side track attached to the hull. |
Below: The right-hand side track attached to the hull. |
 |
 |
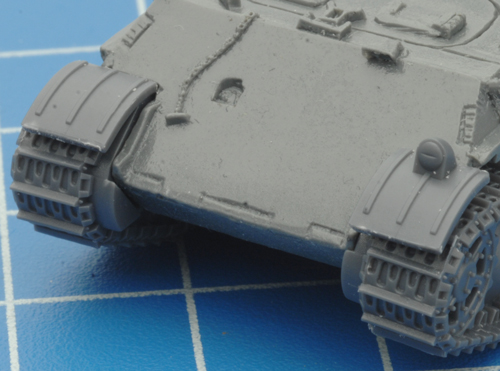
Step 2. Next, attach the front mud guards.
Note: Make sure that the mud guard with the headlight is on the right-hand side of the hull. |
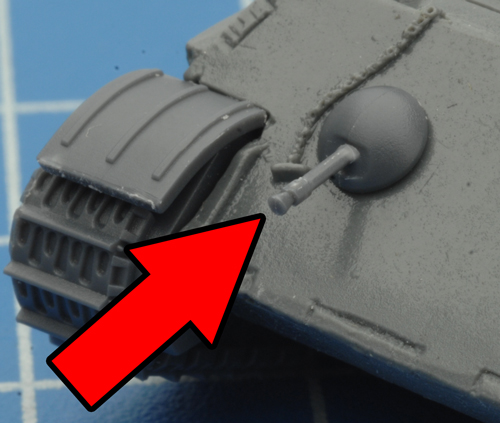
Step 3. Now add the hull MG to the front glacis plate of the Panther G. |
 |
 |
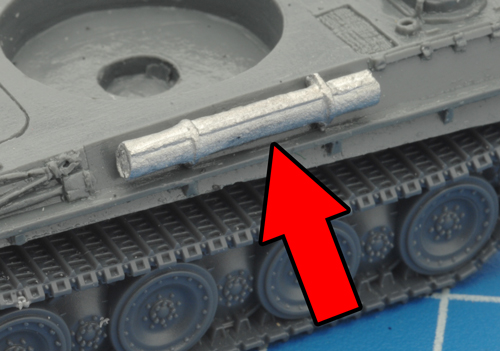
Step 4. Next, attach the gun cleaning kit tube to the right-hand side of the hull.
|
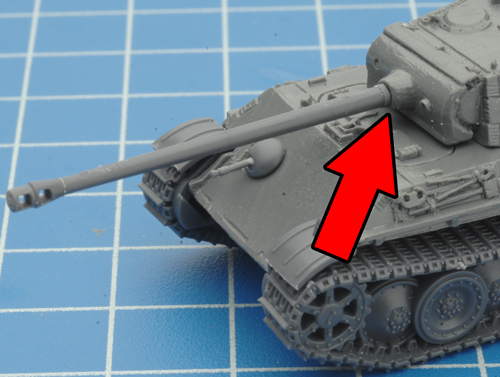
Step 5. Time to move onto the turret; begin by attaching the 7.5cm main gun. |
 |
 |
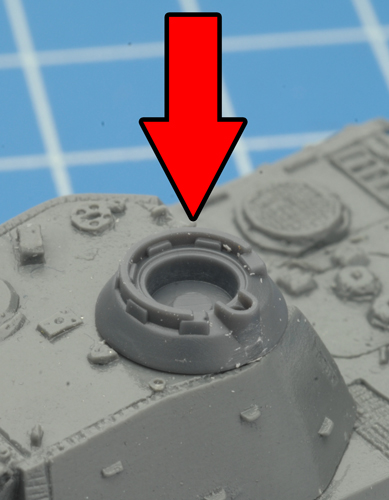
| Step 6. Then its time to add the cupola. |
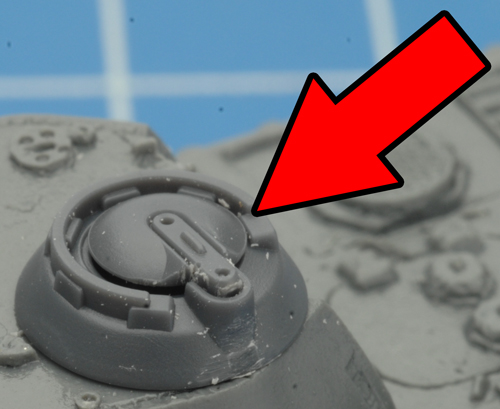
Step 7. Complete the cupola assembly by adding the hatch.
|
 |
 |
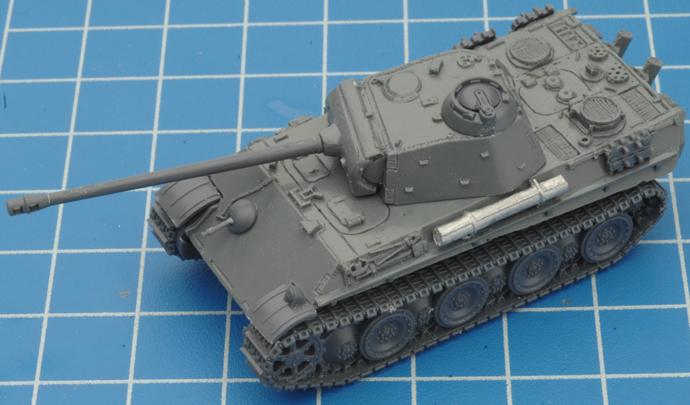
| Step 8. With the cupola in place, the Panther G is ready for painting. |
 |
|
Adding The Extras
Tank Commander
|
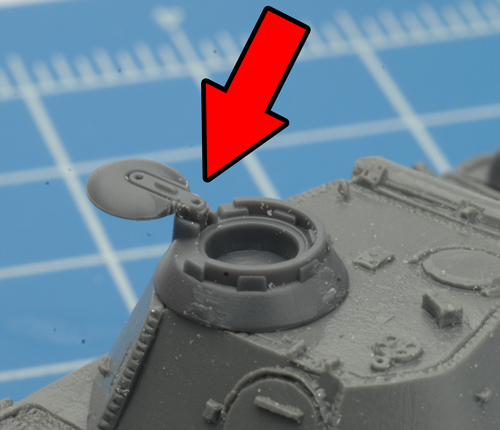
| Step 1. To add a tank commander simply attach the cupola hatch in an open position as shown below. |
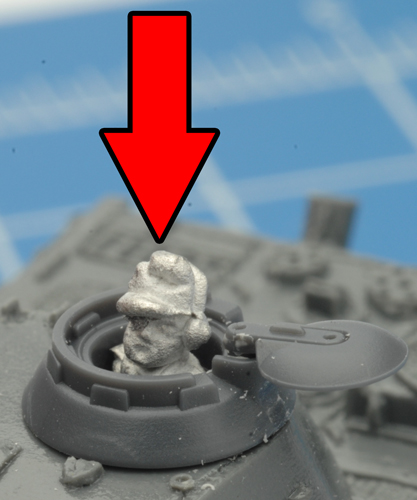
Step 2. Next, add a tank commander to the open cupola.
|
|
 |
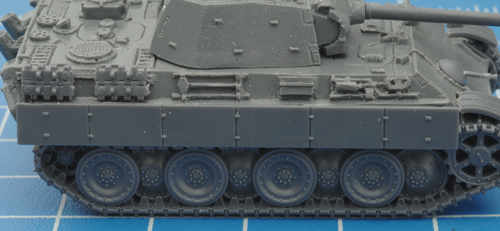
Side Skirts and Spare Track Links
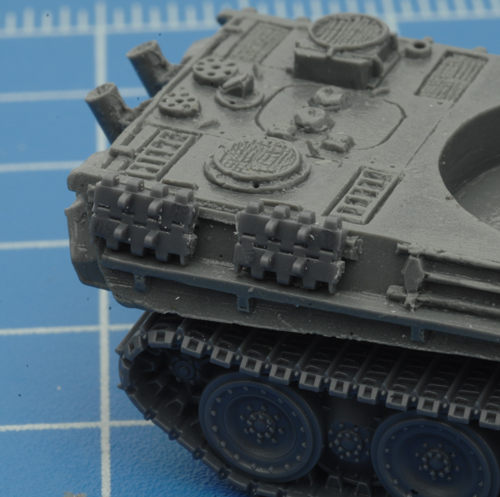
The side skirts and track links are optional and can be added or left off to add some modelling variety to the platoon. As can the stowage sprues included in the box set.
|
| Below: The spare track links attach to the rear of the hull. |
Below: The side skirts attach to the side of the hull.
|
 |
|
Rare-Earth Magnets
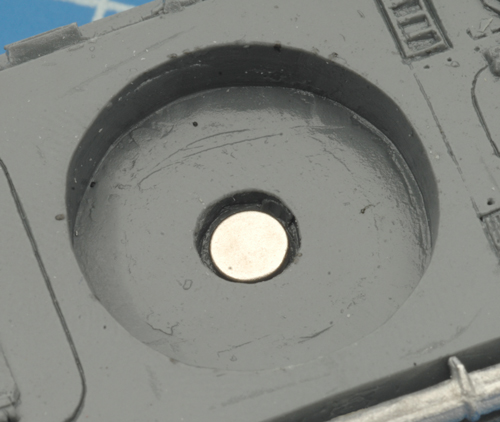
Evan has created a recess for a rare-earth magnet in the hull of Panther G. |
Step 1. The magnet recess complete with magnet.
Read Chris' guide to Rare Earth Magnets here... |
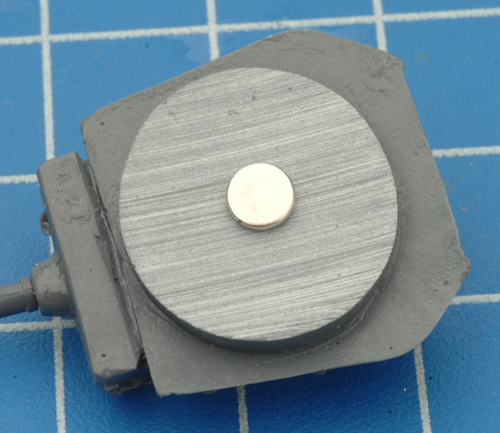
Step 2. Simply glue a rare
earth magent to the bottom of the turret and you have a safe and secure
way of attaching the turret to the hull. |
 |
 |
Tanks Extras
Description of Components
a. 24x Rare earth magnets.
b. 2x Tank Commander sprues.
c. 3x Stowage sprues #1.
d. 3x Stowage sprues #2. |
 |
Assembling Panzer VI/70 (V)
|
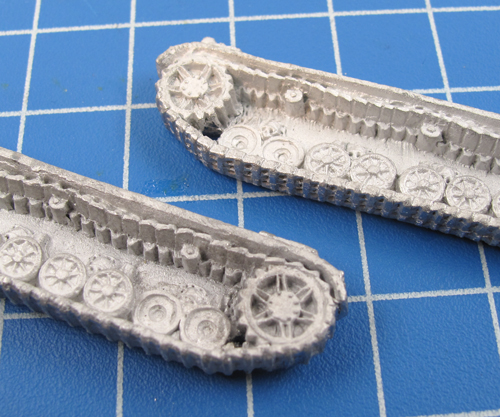
Step 1. Begin assembly with the tracks.
Note: That the two front road wheels on each track is missing.
|
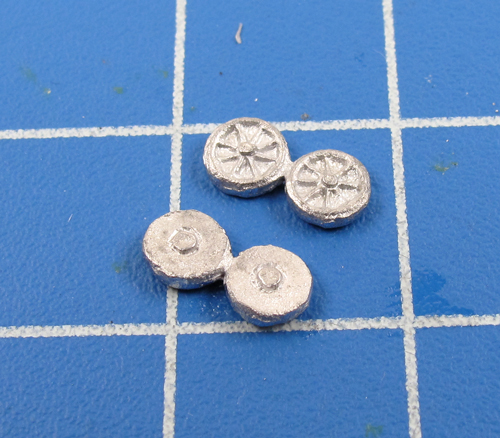
Evan has designed a new set of reversible road wheels for the Panzer IV series. On one side is the rubber-tyred road wheel and on the reverse side, the steel-rimmed road wheel. The Panzer IV/70 (V) was nose heavy due to the size it's gun and the weight of the frontal armour. This caused the rubber-tyred road wheels to fail, therefore the stronger steel-rimmed version were fitted in the first two positions. |
 |
 |
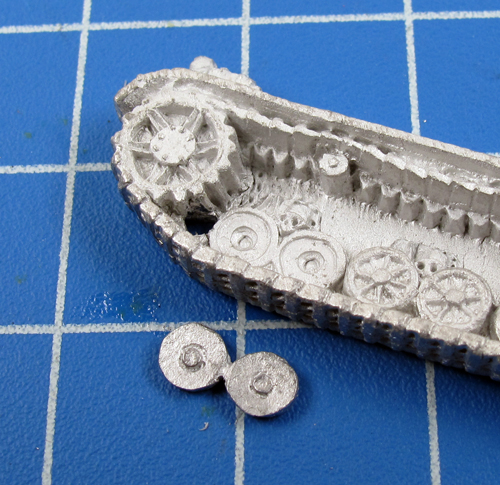 |
Below: Attach a set of road wheels to each track. Ensure that to steel-rimmed version are showing as in the example below.
|
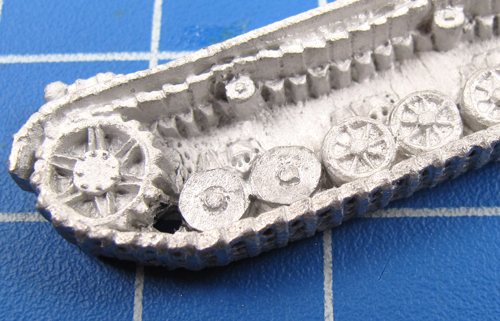
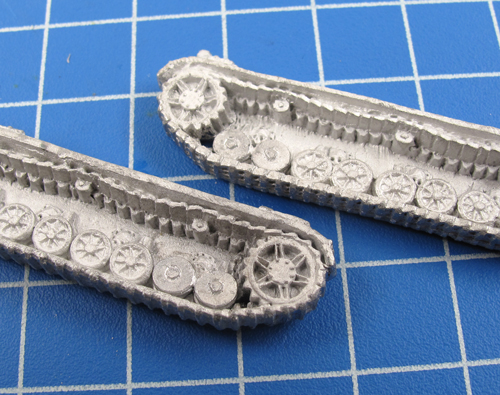
Below: The steel-rimmed road wheels attached to both tracks of the Panzer IV/70 (V).
|
 |
 |
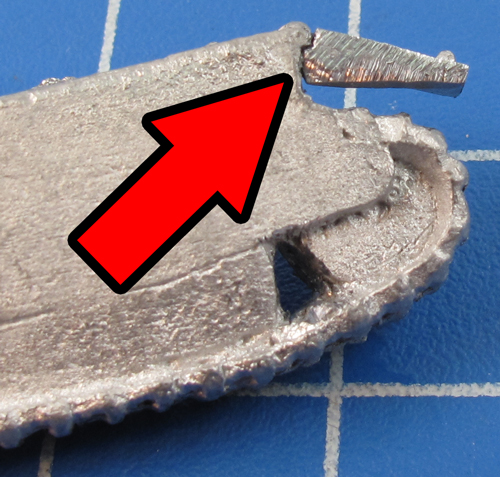
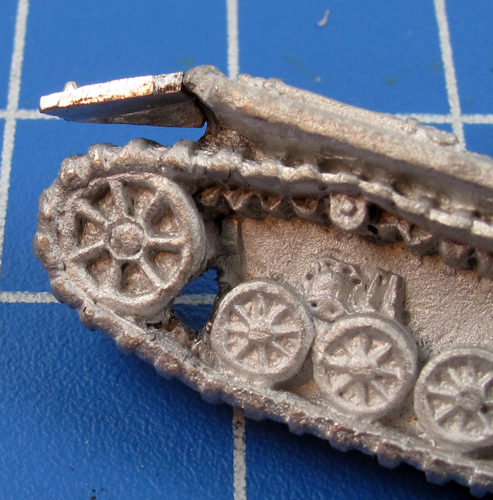
| Step 2. Attach the mudguards to the rear of each track as shown in the examples below. |
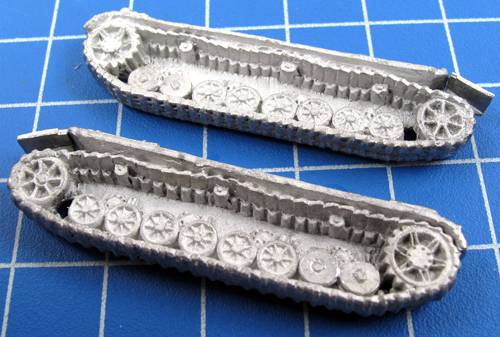
Below: Both tracks fully assembled with the steel-rimmed road wheels and mudguards. |
 |
|
 |
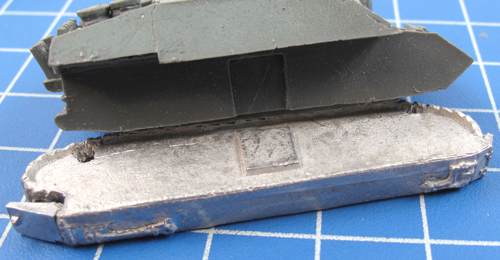
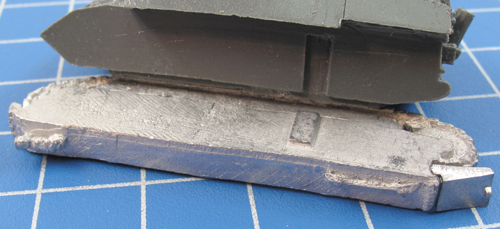
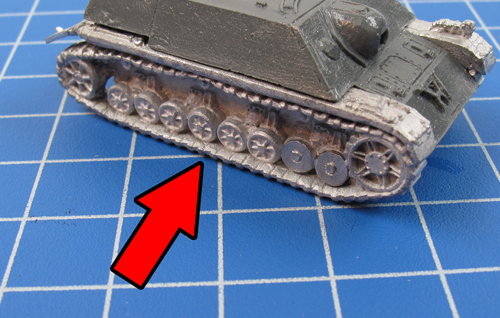
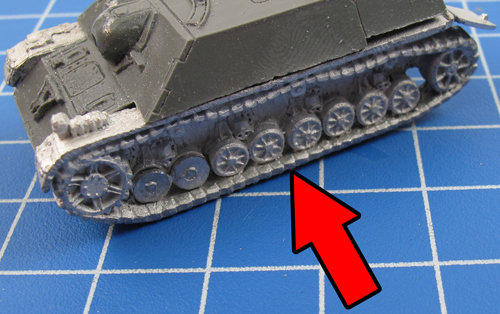
Step 3. With the track assembled, its time to attach the tracks to the hull of the Panzer IV/70 (V).
Note: Each track has a lugs on the back that corresponds with the recesses in the hull to aid in correct orientation. |
Below: The lug on the right-hand side track and the corresponding recess in the resin hull.
|
Below: The lug on the left-hand side track and the corresponding recess in the resin hull. |
 |
|
Below: Attaching the right-hand side track.
|
Below: Attaching the left-hand side track. |
 |
 |
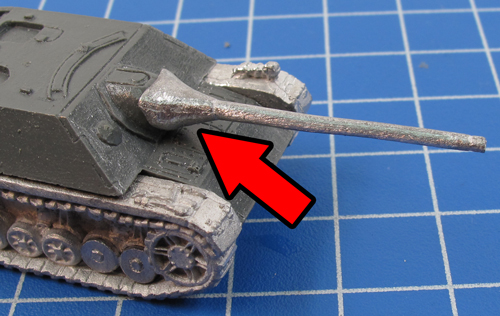
Step 4. Next, attach the main gun to the resin hull.
|
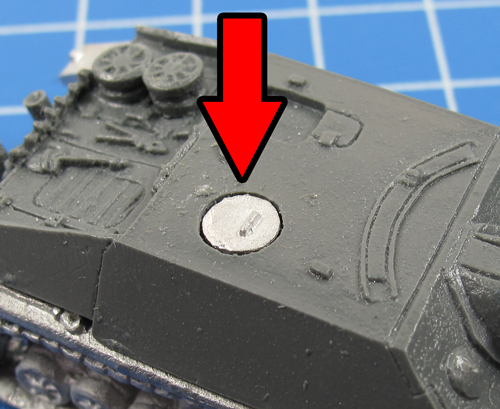
Step 5. Then, attach the loader's hatch as shown in the example below. |
 |
 |
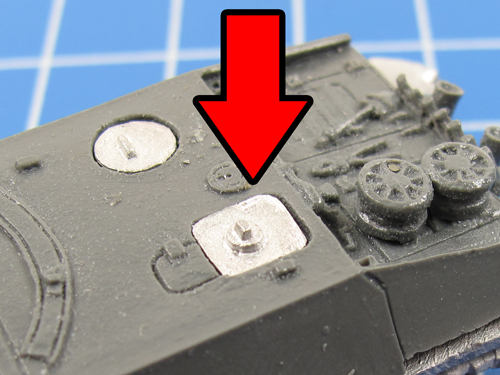
Step 6. Followed by the commander's hatch.
|
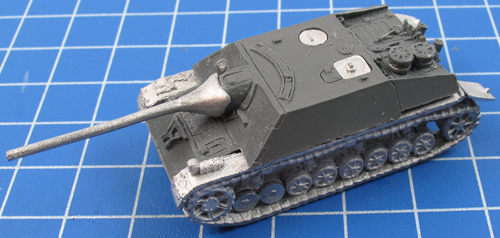
Below: With the hatches in place the basic Panzer IV/70 (V) is assembled and ready to be painted.
|
 |
 |
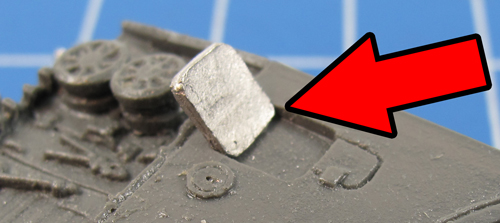
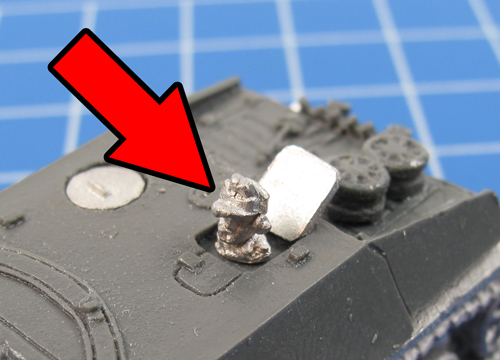
Step 1. When attaching the commander's hatch simply angle it slightly towards the rear of the vehicle.
|
Step 2. Next, attach a tank commander in the now open commander's hatch.
|
 |
|
Adding The Schürzen
The Schürzen is optional and
can be added or left off to add some modelling variety to the platoon.
As can the stowage sprues included in the box set.
|
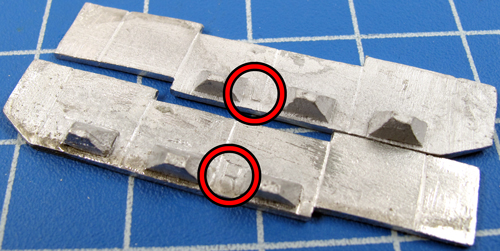
Step 1. There is a left and right-hand side plate of Schürzen for the Panzer IV/70 (V). Each side can be distinguished by the small letter L or R located in centre of each piece.
|
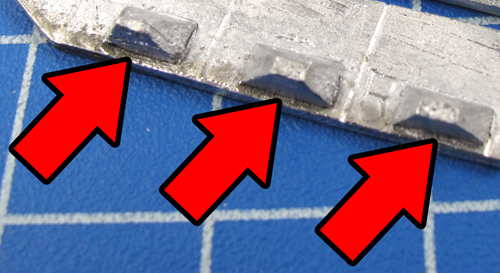
Step 2. To attach the Schürzen, place a small amount of hobby glue to the underside of each of the lugs as shown in the example below. |
 |
 |
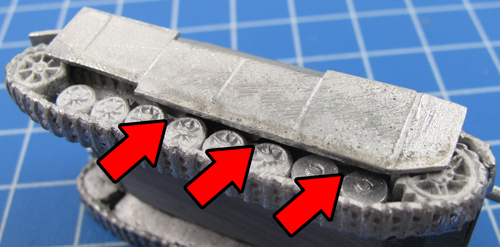
| Step 3. Centre each of the lugs on the bottom of the Schürzen over the first three wheel bogies. |
Below: With the Schürzen place, the Panzer IV/70 (V) is now fully assembled and ready for painting.
|
 |
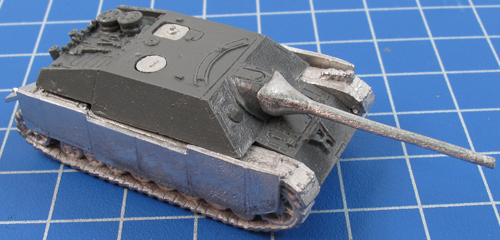 |
| Description of Components |
a. 4x Shield tags.
b. 8x Side shields.
c. 4x Rear shields.
d. 4x Front shields.
e. 4x Rear mudguards.
f. 4x Right-hand side tracks.
g. 4x Left-hand side tracks
h. 4x Resin Möbelwagon hulls.
i. 4x Side gun mounts.
|
j. 4x Ammo clips.
k. 4x 3.7cm guns.
l. 4x Base gun mounts.
m. 4x Large gun shields.
n. 4x Small gun shields.
o. 4x Gunner figures.
p. 4x Loader figures.
q. 4x Ranger finder figures.
|
Assembling the Möbelwagon
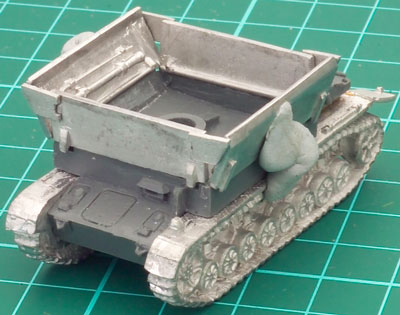
Jeremy demonstrates how to assemble the Möbelwagon with the side shields in three different positions to represent the Möbelwagon in transit, when engaging aircraft and when engaging ground targets or low flying aircraft.
Assembling the Möbelwagon with Jeremy...
|
 |
Assembling the Panther G Objective
|
| To assemble the Panther G Objective, simply attach the 7.5cm main gun into the gun mantlet of the Panther objective as seen in the examples below. |
| Assembly the Panzer IV J Objective |
| To assemble the Panzer IV J Objective, simply
attach the 7.5cm main gun into the gun mantlet of the Panzer IV J objective
as seen in the examples below. |
Last Updated On Tuesday, August 30, 2016 by James at Battlefront
|
|
|