|
|
|
|
Products mentioned in this Article
--None--
|
|
|
|
|
|
|
|
|
 |
|
|
 |
Bloody Omaha Battle Report II
In our second Bloody Omaha battle report Dion and myself thought we’d make up our own forces using the US Assault Company and German Festungskompanie intelligence briefings.
I created an infantry heavy Confident Trained US Assault Company with a full six Boat Sections, an Ammunition & Pioneer Platoon, a DD Tank Platoon and a Field Artillery Battery.
Wayne’s Force
US Assault Company
Company HQ
|
15 points
|
6 Boat Sections @ 145 points
(2 Boat Sections have an LMG team each)
|
870 points |
Ammunitions & Pioneer Platoon
3 A & P Squads
|
135 points |
DD Tank Platoon
5x M4 Sherman DD
|
345 points |
Field Artillery battery
2 Gun Sections
|
145 points |
Total:
|
1510 points |
|
|
Dion went for a Confident Veteran Festungskompanie with three Grenadier Platoons, a Mortar Platoon, Machine-gun Platoon, a Tank-hunter Platoon and a bunch of fortifications.
Dion’s Force
352. ID Festungskompanie
Company HQ 40 points
Upgrade to Command Panzerknacker SMG teams
Add Panzerschreck team |
10 points
25 points
|
Grenadier Platoon 1
3 Squads
Upgrade to command Panzerknacker SMG team |
200 points
5 points
|
Grenadier Platoon 2
2 Squads |
140 points
|
Grenadier platoon 3
2 Squads |
140 points
|
Machine-gun Platoon
3 Sections |
110 points
|
Mortar Platoon
2 Sections |
135 points
|
Tank-hunter Platoon
3 Marder III M |
210 points
|
Anti-aircraft Assault Platoon
2 Anti-aircraft Sections
ROF 3 extra crew |
125 points
20 points
|
Fortifications
7.5cm FK Bunker
HMG Bunkers (open) x4
Barbed Wire x1
Trench Lines x4
Gun Pits x 4
1 Static Rocket Launcher |
100 points
160 points
10 points
20 points
20 points
40 points |
Total:
|
1510 points |
Dion's Introduction
Having not had a chance to playtest during the development of the Bloody Omaha book I jumped at the chance to play this battle report, I loved the idea of fortifications and wanted to give them a go. The first thing that jumped out at me was that the fortifications didn't count as platoons for deployment so I could always have all of them on the table at the start in missions where you use reserves, that led me to choose some decent anti-tank in the form of a bunkered 7,5cm gun and some infantry-mowers in the form of MG Tobruks to try and cover all bases. I also purchased a few gun-pits and trenches and spread them out so i had options to counter Wayne's deployment with my force, and had decent cover to move my reserve platoons into. There was one draw-back to the table, my deployment zone consisted of numerous bocage fields severly limiting the fields of fire from my bunker and MG Tobruks, it is going to be a close and bloody battle!
|
|
For our game we thought we’d really test the metal of the Festungskompanie’s unique abilities by playing a Hold the Line mission. In these standard type missions the Festungskompanie can choose to be a defender and still get fortifications as part of its force composition.
We also thought this would be a great way of representing those battles against the German fortifications a little further inshore.
Set-up:
The game is played just like a normal Hold The Line mission except the defending Festungskompanie deploys all its fortifications before either side places their objectives (page 22 Bloody Omaha).
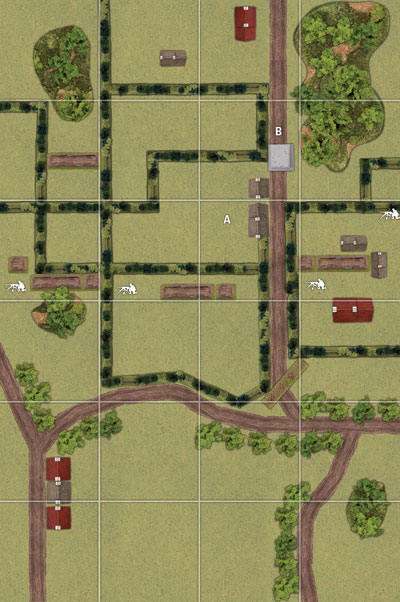
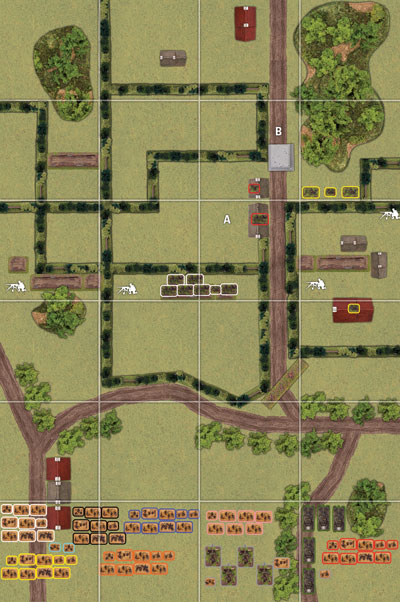
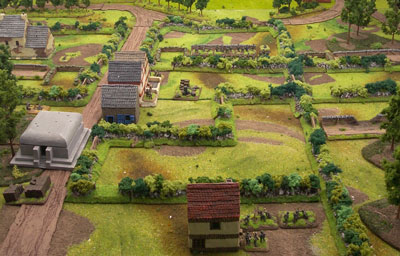
We set the table up to be about 2/3 bocage with an open area leading into it from the “beach” end of the table. The defending Germans set-up in the bocage end of the battlefield.
Dion decided to hold his 2nd and 3rd Grenadier Platoons off in reserve. He’d also created a kampfgruppe from a Mortar Section and his 2iC that was also kept off in reserve. The Anti-aircraft Assault Platoon and the Machine-gun Platoon were held in ambush.
Dion deployed his objective safely behind the 7.5cm FK bunker, while the US objective was placed in a field just behind the positions of the 1st Grenadier Platoon.
|
 |
 |
|
US Units
Boat Section 1
Boat Section 2
Boat Section 3
Boat Section 4
Boat Section 5
Boat Section 6
Ammo & Pioneers
Field Artillery Battery
Tank Platoon
Company HQ
|
 |
German Units
Grenadier 1
Grenadier 2
Company HQ
Mortar 1
Grenadier 3
Mortar 2
Tank-Hunters
-
Machine-guns
|
Turn 1
US Forces
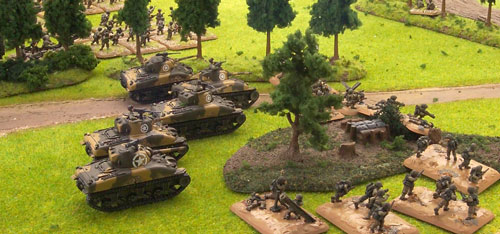
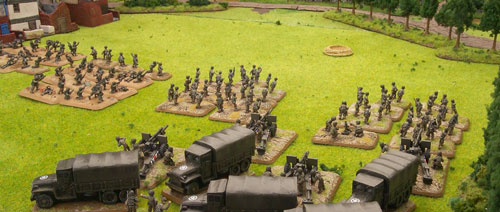
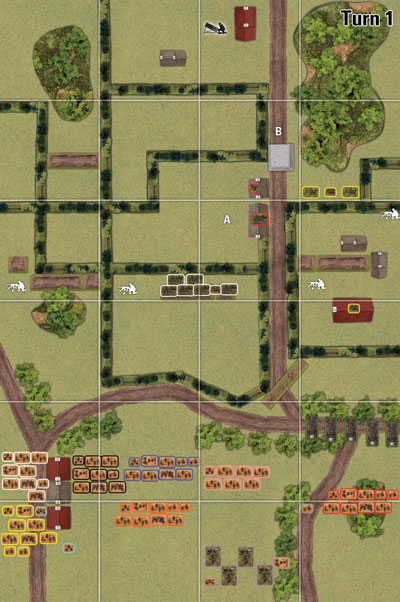
The US force was quite large and there wasn’t much room to spread out during deployment. It would have to be a case of rearranging themselves as they advanced. Once deployed the Assault Company and its supports occupied the whole of the narrow deployment strip facing the German positions.
|
|
All of the platoons, except the Field Artillery
Battery, advanced across the front. Some platoons were funnelled into
certain directions due to the terrain, Boat Sections 1 and 4 went up
the flank between a row of houses and the table side, while Boat
Sections 2, 5, 6 and the Ammunition & Pioneer Platoon pushed up the
other side of the houses towards the table centre.
The DD Tank Platoon
and Boat Section 3 benefited from some tree cover as they advanced up
the opposite flank.
Bucking the general trend was the Field Artillery Battery, who deployed ready to fire next turn.
German Forces
Meanwhile the steely-eyed Germans hold their nerve and wait for the Americans to approach. The US infantry has yet to bring itself into range of the German HMG Tobruk bunkers, so they must wait until next turn.
|
 |
 |
Turn 2
US Forces
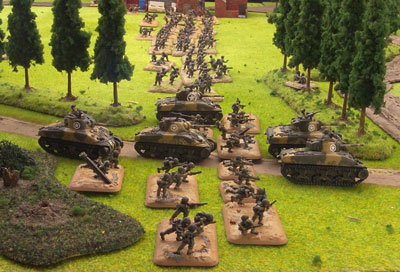
The US forces continued to advance on the German positions. The tanks make it as far as the tree line facing the first bocage hedgerow.
The US forces are yet to get an observer into position for their artillery so the guns are idle for a turn.
German Forces
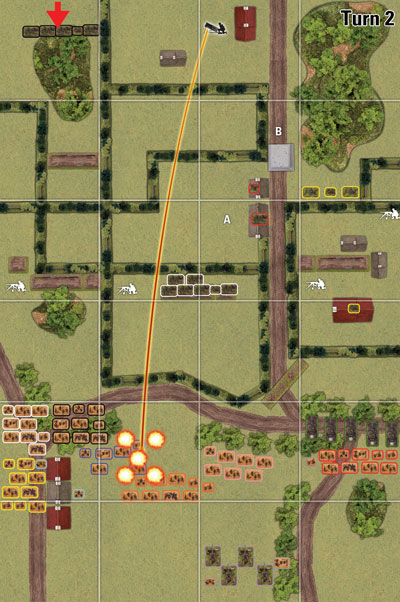
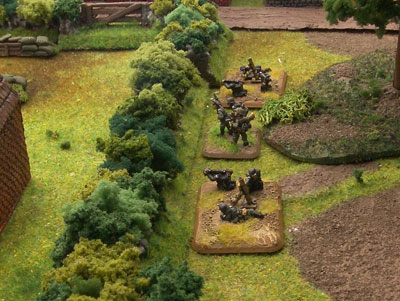
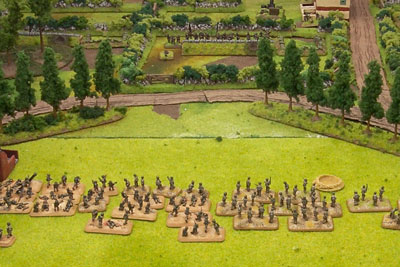
The first of the German reserves arrive and Dion chooses to bring on his 2nd Grenadier Platoon. They arrived at the right rear of his positions and advance towards the front of his positions.
With the advancing Boat Sections still bunched up Dion sees this turn as a good time to drop the Static Rocket Launcher barrage on the enemy. The bombardment ranges in and hits 6 teams, knocking out two of them, including a precious flame-thrower team.
The rest of the on table German forces hold fire and go to ground.
|
 |
 |
 |
 |
|
Turn 3
US Forces
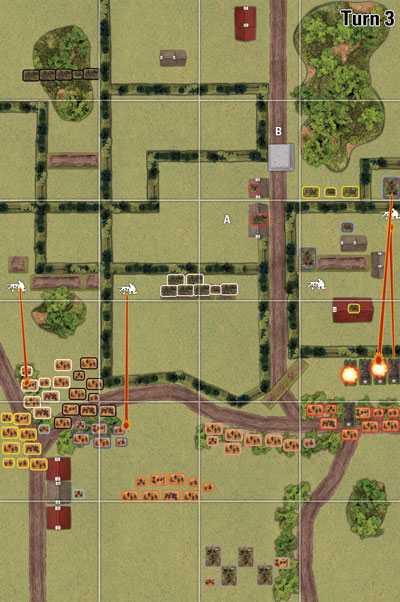
The German rocket bombardment had pinned down Boat Sections 2 and 5. However, both sections rally and continue their advance.
The artillery observer advancing with Boat Section 3 and the tanks takes up position in the tree line with a view of the road leading through the bocage. They can see into the front field through a gate.
The Shermans push through the tree line to close up to the bocage, but one Sherman bogs down. On the other flank Boat Sections 1 and 2 lead the advance followed by Boat Sections 4 and 5. Boat Section 6 and the Pioneers advance through the centre.
The Shermans also fire on a Tobruk HMG bunker positioned to the right of the building in front of them, but are unable to cause any damage.
German Forces
Dion decides this turn to use one of his ambushes and reveals the Luftwaffe 8.8cm FlaK36 guns of his Anti-aircraft Assault Platoon.
His newly arrived 2nd Grenadier Platoon move forward using the cover of a small wood. The rest of the force prepares to open fire.
The advancing Americans of Boat Sections 5 and 6 find themselves under fire from the Tobruk #2 position next to the 1st Grenadier Platoon in the front central field. They destroy 1 team and get several hits.
|
 |
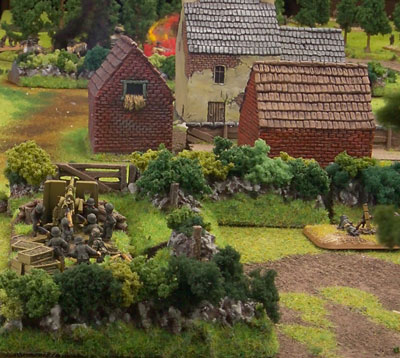 |
Tobruk position #1 also opens up, targeting US Boat Section 1, and also score several hits.
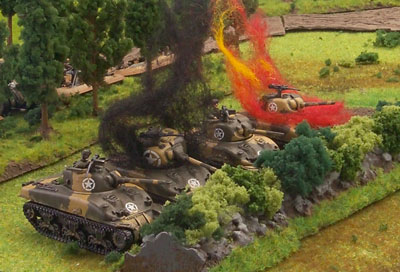
The 88’s are next to fire, lining up on the Shermans through the bocage
hedgerow. Two Sherman are quickly burning. That should give the US tank
commander something to chew on!
|
|
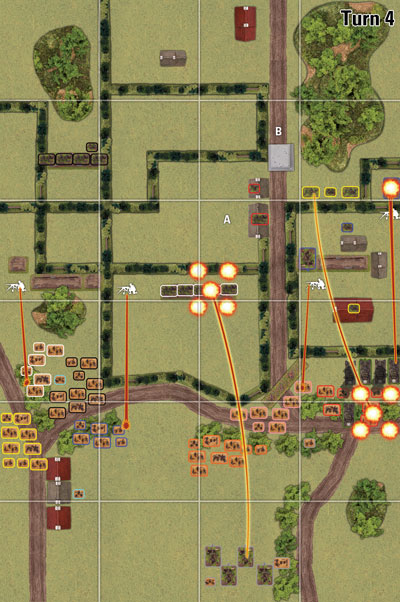
Turn 4
US Forces
The Sherman, that bogged earlier in the tree line, remains hung-up for another turn.
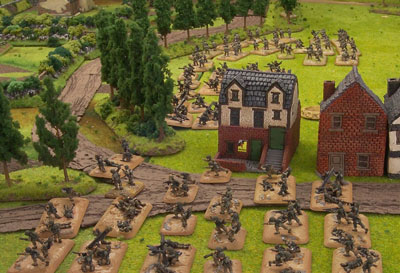
On the German left the machine-gun Tobruks are making a nuisance of themselves. Boat Section 1 moves behind some trees and Boat Section 4 advances on the Tobruk to their front.
The Pioneers advance through the tree line and make for the barbed wire obstacle. Boat Sections 2, 5 and 6 advance. Boat Section 3 follows the Shermans through the tree line.
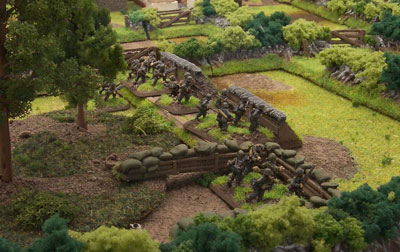
The Field Artillery Battery observer calls his guns down on the position of the German 1st Grenadier Platoon. The guns hit hard and fast and knock out 2 teams before the fire lifts.
Meanwhile the Shermans take revenge on the Luftwaffe 88’s and knock out one gun.
|
 |
 |
German Forces
The 1st Grenadier Platoon rallies from the American artillery
bombardment and goes about reorganising themselves deep inside their
trenches. The 2nd Grenadier Platoon advances into trenches prepared
earlier for them.
The mortar observer, positioned in the house in front of the Shermans
and Boat Section 3, calls down a section of mortars on Boat Section 3.
Five teams are caught under the bombardment, but due to having to
re-roll hits, only one team is knocked out.
|
|
Three of the four machine-gun Tobruk positions fire on the Americans.
On the far right Tobruk #1 destroys two teams from Boat Section 1. The
others cause little damage firing on Boat Section 5 and the Pioneers. |
|
Turn 5
US Forces
The bogged Sherman remains stuck in the tree line.
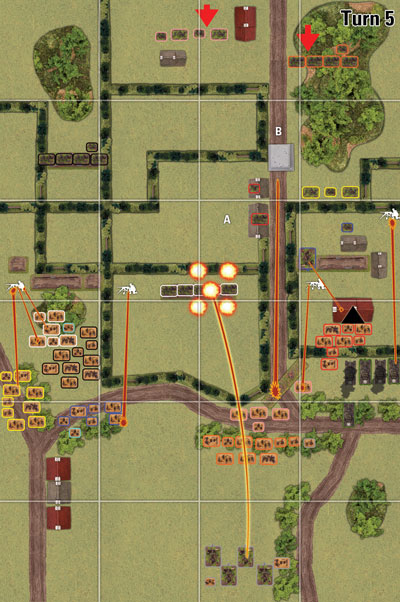
Boat Section 3 moves through a gate in the hedgerow and moves up to the house sheltering the German mortar observer.
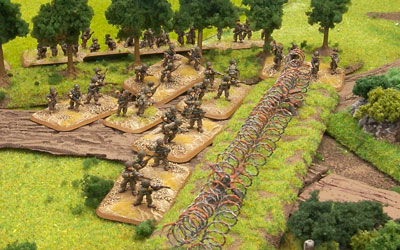
The Pioneers remain stationary and prepare to gap the wire in the shooting step. Boat Section 6 takes up positions in the tree line behind them. Boat Sections 1, 2, 4 and 5 continue to probe up the German right flank.
The Field Artillery Battery drops a repeat barrage on the positions of the 1st Grenadier Platoon and knock out another team.
The Shermans fire on the machine-gun Tobruk on the German far left, but miss. Boat Sections 1 and 4 have the same effect on the far right Tobruk.
In a moment of complete training failure (SNAFU!) the Pioneers don’t clear the barbed wire obstacle.
|
 |
 |
During the Assault Step Boat Section 3 storms
the mortar observer’s house. The observer team is overwhelmed, in a
short fight, and the Boat Section takes the building.
German Forces
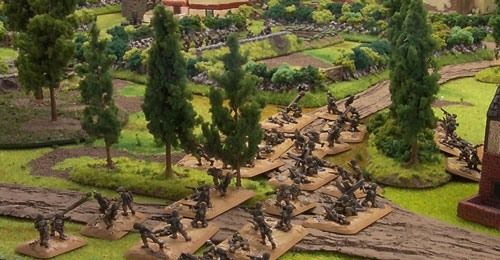
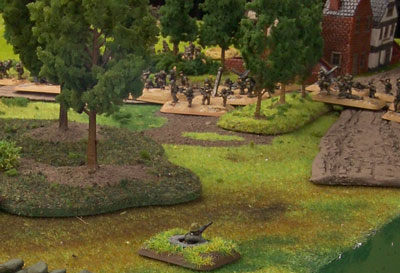
Just as the US attacks seem to have some momentum more German reserves arrive. The 3rd Grenadier Platoon arrives behind the left flank and advances through the woods towards the defensive lines. The other Mortar Section, under the command of the company 2iC, accompanies them. The mortars set up in the rear centre of the table.
|
|
The 2nd Grenadier Platoon leaves the relative safety of the trenches and advances up to the bocage line.
Three machine-gun Tobruks then open fire. Boat
Sections 1 and 5 take fire with no noticeable effects, however, Tobruk
#4’s fire on the American Pioneers knocks out two teams. This fire is
supplemented by the 7.5cm Feldkannon in the bunker. The combined fire
pins down the Pioneers.
The last remaining 88 fires on the building occupied by Boat Section 3, but does little more than keep their heads down.
The 3rd Grenadier Platoon uses the Assault Step to perform a Stormtrooper move.
|
 |
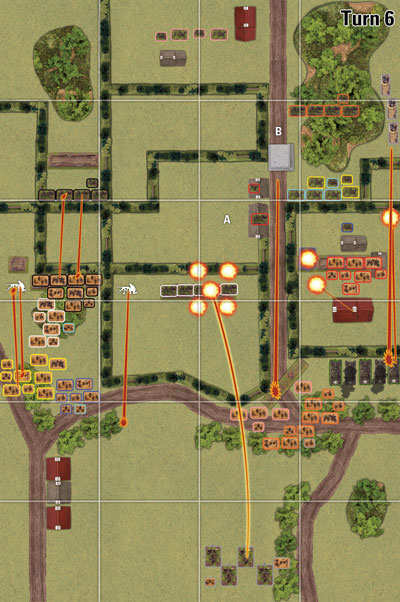 |
Turn 6
US Forces
The Sherman trapped in the tree line finally gets moving, the crew bring it through the trees and it joins its comrades up against the bocage behind Boat Section 3.
The Pioneers don’t rally from being pinned and therefore can’t clear the wire this turn either!
Boat Section 6 moves behind the Pioneers and towards the Shermans and Boat Section 3 to lend their support.
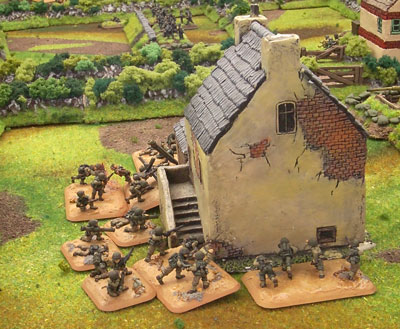
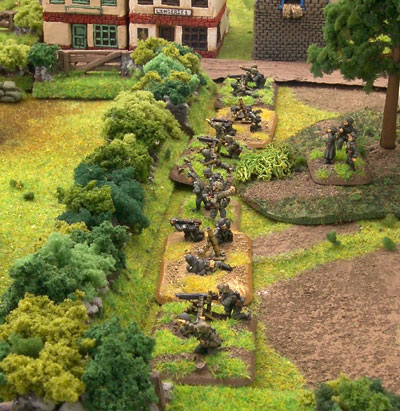
Boat Section 3 fires a few key teams through the farmhouse windows and targets the Germans defences to their front. The boat section’s flame-thrower team knocks out machine-gun Tobruk #4. A bazooka team snaps off a lucky shot against the last 88. The gun is destroyed and the remains of the platoon quit the field of battle.
|
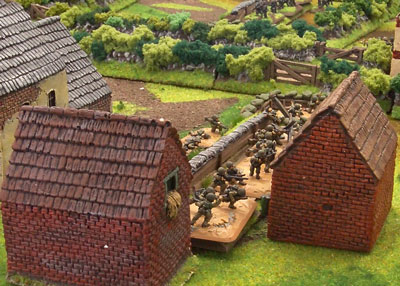
On the other side of the farmhouse the Shermans knock out machine-gun Tobruk #3 with a few well-aimed main gun shots.
The Field Artillery Battery drops a barrage on the German 1st Grenadier
Platoon, but other than keeping their heads down, causes little damage.
Boat Section 2 fires on the 2nd Grenadier Platoon advancing on their
positions with no effect. Boat Section 4 attempts to pin down the
machine-gun Tobruk to their front with rifle and bazooka fire, but are
unable to trouble the German crew.
After a successful round of shooting Boat Section 3 storm into the positions vacated by the Luftwaffe anti-aircraft platoon.
|
 |
 |
German Forces
The 1st Grenadier Platoon remains pinned down in their forward trench positions.
However, it is not all bad news for the German forces. The Tank-hunter Platoon of three Marder III M arrive and advance down the left flank to finally take care of those Shermans. Dion also springs his last ambush, the Machine-gun Platoon, right in front of Boat Section 3. The mortars are suddenly backed up by three machine-guns and their commander.
The 3rd Grenadier Platoon also advances up the table bringing more firepower to bear in the immediate area.
During shooting, the last two machine-gun Tobruks fire on targets to their front. Tobruk #1 destroys a team from Boat Section 4. In the same area the 2nd Grenadier Platoon fires on Boat Section 2 and pins them, but the trenches they now occupy protect them from serious casualties.
The 7.5cm Feldkannon in the bunker continues to fire on the Pioneers, but the specialists are now keeping their heads down.
|
 |
The newly arrived Marders take some long-range shots at the Shermans behind the bocage, but miss the well-concealed tanks.
The Machine-gun Platoon opens fire from concealment at Boat Section 3
occupying the trench lines to their front. They pour a wall of fire
into the enemy, but the German built trenches sheltering the Americans
hold up.
During the assault step the Marders and 3rd Grenadier Platoon make Stormtrooper moves. |
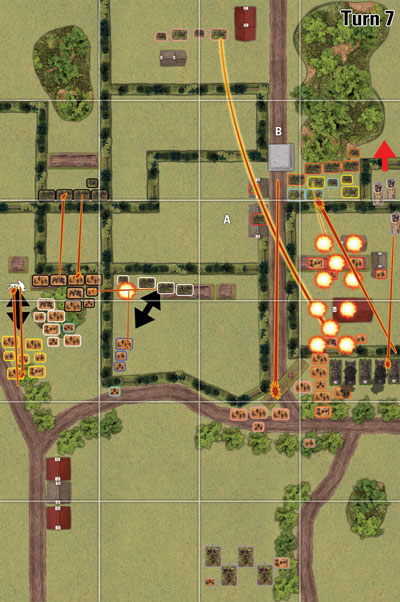
Turn 7
US Forces
Both the Pioneers and Boat Section 2 rally from being pinned from last turn’s shooting.
Boat Section 6 moves into the field behind the farmhouse to back-up Boat Section 3.
On the other flank Boat Section 5 positions itself to push into the field occupied by the 1st Grenadier Platoon and machine-gun Tobruk #2. Boat Section 4 repositions some teams to bring more fire to bear on machine-gun Tobruk #1.
The Shermans fire on the newly revealed Machine-gun Platoon and destroy the team directly to their front. Boat Section 3 joins their fire but doesn’t cause any more casualties.
Boat Section 5 fire its Flame-thrower team at the machine-gun Tobruk, unfortunately they miss. The rest of the platoon fire on the Tobruk and Grenadiers with little effect.
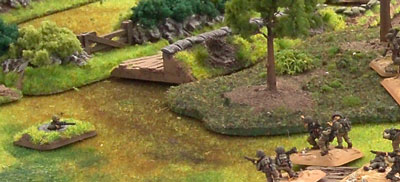
Boat Section 5 then assault the Tobruk and 1st Grenadier Platoon. Defensive fire takes out one assaulting team but the rest continue the fight. After a short exchange the Americans are forced to retreat after losing another two teams, but in exchange they have knocked out one MG team and the Tobruk open machine-gun bunker.
Boat Section 4 also assaults, their target is the Tobruk on the far right. Unfortunately defensive fire holds them off and they become pinned down while losing two teams.
|
 |
 |
German Forces
The 1st Grenadier Platoon quickly rally from the onslaught and move towards the right of their field to head off anymore attempts to break in.
The 3rd Grenadier Platoon finally reach their front lines and take up positions with the Machine-gun Platoon and Mortars facing Boat Sections 3, 6 and the Shermans. The Marders also mover closer, ready to fire at the Shermans again.
|
The 2iC’s Mortar section ranges in on Boat Section 6. The Americans are hit, and pinned but no casualties are inflicted. The other half of the Mortar Platoon, positioned behind the bocage near the farmhouse, drop a barrage on Boat Section 3 also pinning, but not causing casualties. However, the machine-guns are able to knock out two teams from Boat Section 3.
The 2nd Grenadier Platoon, over on the right flank, fire on Boat Section 2 hunkered down in the trenches. Despite the rain of fire they have little effect on the US troops.
The 1st Grenadier Platoon adds their fire from the flank and destroys a team from Boat Section 2.
|
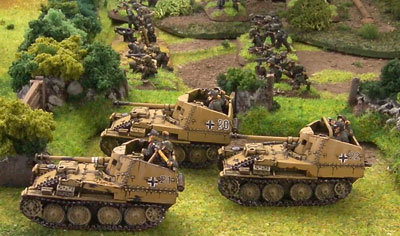 |
The Marders fire on the Shermans again, but totally fail to hit anything.
During the Assault Step the Marders move back behind the bocage for protection. |
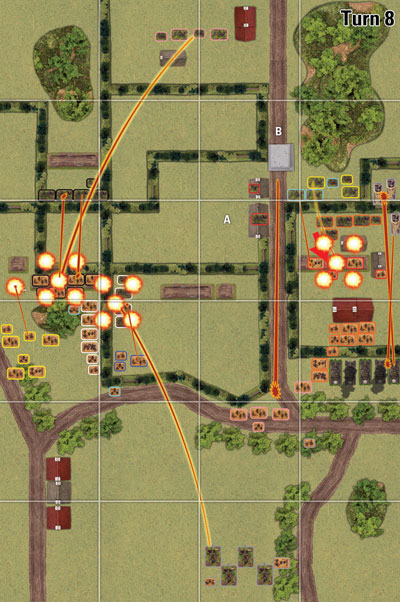 |
Turn 8
US Forces
Boat Section 5 unpins and moves back into the field defended by the 1st Grenadier Platoon; ready to attack it once more. Boat Section 1 moves up to the bocage to support Boat Section 5.
Boat Section 6 moves up behind the farmhouse ready to occupy it next turn.
Boat Section 4 attempts to take out machine-gun Tobruk #1 once again, this time it brings enough firepower to bear and knocks out the open bunker with a bazooka.
Boat Section 5 fires on the 1st Grenadier Platoon, but just gets one hit, which is easily saved. The Field Artillery Battery lends support and drops a barrage on the Grenadiers. Unfortunately they catch part of Boat Section 2 and destroy a Bazooka team. The Grenadiers come out relatively unscathed!
Boat Section 2 fires on the 2nd Grenadier Platoon to their front, scores a few hits, but it doesn’t amount to enough to worry the Germans.
On the other flank the Shermans fire on Marders and the Mortars, but can’t hit any of the German teams.
At the end of the Shooting Step the Pioneers finally remove the wire blocking the main road.
Boat Section 5 assaults the 1st Grenadier
Platoon. They become pinned by defensive fire and casualties push them
below half-strength.
|
|
They promptly fail their Motivation test and head
back to the beach.
German Forces
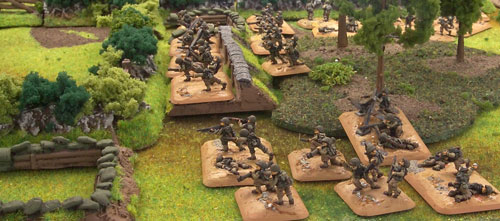
The 3rd Grenadier Platoon moves over the bocage ready to push Boat Section 3 out of the trenches before the farmhouse.
In the centre the 1st Grenadier Platoon moves back into their trenches.
|
 |
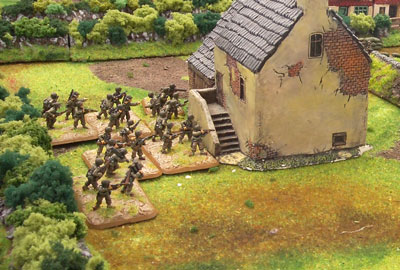 |
The 2nd Grenadier Platoon continues its firefight with Boat Section 2 across the field, both equally protected by bocage. The lead flies to little effect. The 2iC’s Mortars lend their weight but can’t cause any casualties.
The Pioneers continue to attract fire from the 7.5cm Feldkannon bunker surviving the latest volley.
The other flank concentrates its fire on Boat Section 3 with machine-guns, Grenadiers and the Mortar section. Boat Section 3 becomes pinned down, but retains all its teams.
The Marders fire on the Shermans once more, but once again miss!
|
The 3rd Grenadier Platoon assaults Boat Section
3. Defensive fire is ineffective. In the first round of fighting the
Americans lose one team, they fail their Motivation test to fight back
and flee, moving back into the farmhouse. They have been reduced to
under half-strength so are forced to take a Motivation test. They fail
and are removed.
The Marders fail their Stormtrooper move and leave themselves dangerously exposed to the Shermans. |
|
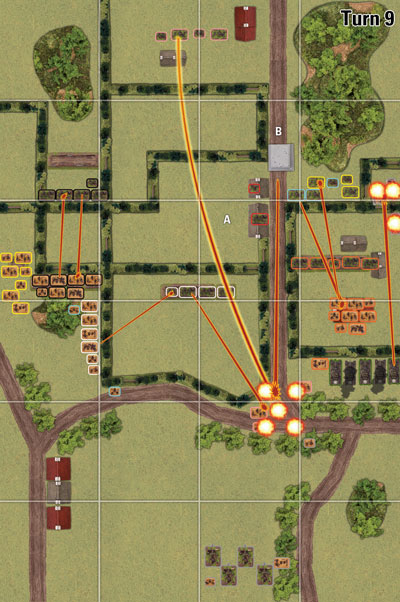
Turn 9
US Forces
Boat Section 4 unpins and can now take advantage of the gap left open by the destruction of machine-gun Tobruk #1.
Boat Section 1 prepares to succeed where Boat Section 5 failed. They move into position to attack the 1st Grenadier Platoon if given the opportunity.
Boat Section 6 moves into the farmhouse previously occupied by Boat Section 3.
Boat Section 1 fires on the 1st Grenadier Platoon with minimal effect.
Boat Section 6’s 60mm Mortar team, rather than following the platoon into the farmhouse, stays behind the bocage and fires a barrage on the defending Germans. They knock out one the German medium mortars. The rest of the platoon fires what it can out the windows but doesn’t improve on the result.
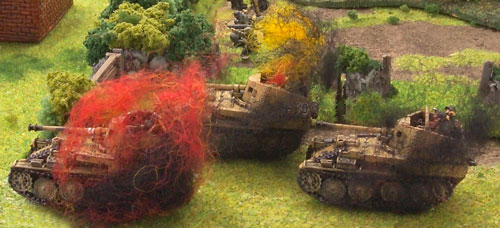
The Shermans finally have the Marders in their sights. They unleash a volley of 75mm rounds and destroy all three Marder III M tank destroyers.
German Forces
The 3rd Grenadier Platoon completes moving its teams into the trench and gun pit.
The 2iC’s Mortars range in on the American Pioneers and pins the platoon. The 1st Grenadier Platoon fires on the Pioneers and knocks out a team
forcing the Americans to take a Motivation test for being below
half-strength.
|
 |
 |
They pass and fight on.
The 2nd Grenadier Platoon continues its fire fight with Boat Section 2 with negligible effect.
The Machine-gun and 3rd Grenadier Platoons fire on Boat Section 6 in
the farmhouse, pinning them down, but not inflicting casualties.
|
|
Turn 10
US Forces
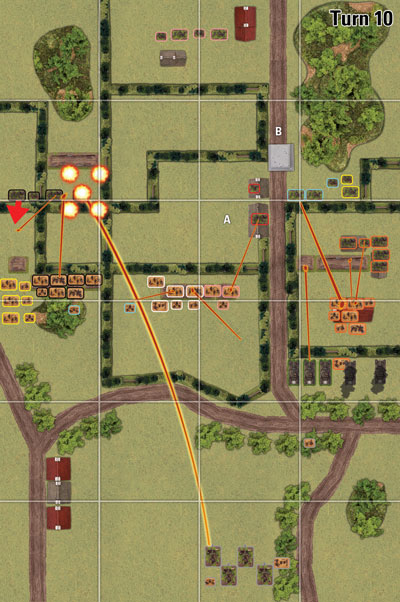
With the threat of the Marders finally removed the Shermans can now add their weight to the infantry fight. They move from their positions on the German left to support Boat Section 6’s fight against the 3rd Grenadier Platoon.
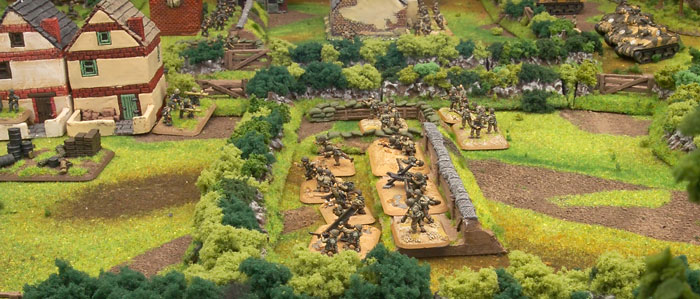
The under strength Pioneers advance into the central field to aid the fight against the 1st Grenadier Platoon. Boat Section 1 advances from the other side of the field.
The Field Artillery Battery ranges in on the 3rd Grenadier Platoon with little effect. The Shermans and Boat Section 6 join them, and the additional firepower pins the Grenadiers.
From their new positions the Pioneers and Boat Section 1 fire on the 1st Grenadier Platoon and knockout their last few teams. This leaves the way open for an advance on the objective in the next field.
The Pioneers and Boat Section 1 take advantage of their too successful shooting and take over the positions vacated by the destroyed 1st Grenadier Platoon.
German Forces
The 3rd Grenadier Platoon rallies from being pinned down and moves from the trenches into the farm’s outbuildings. The 2nd Grenadier Platoon moves some of its teams across to head off Boat Section 4 making a break down their right flank.
|
 |
 |
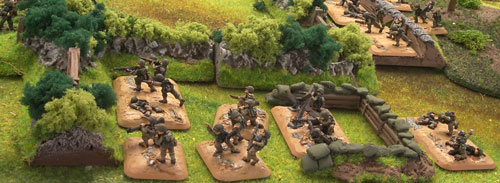
The 2iC’s Mortars fail to range in on the Pioneers. The Panzerschreck team holed up in the house on the main road fire on the Pioneers, but also miss. The machine-guns and the 3rd Grenadier Platoon fire on Boat Section 6 in the farmhouse. The combined fire destroys a team and pins down the platoon.
|
 |
The 2nd Grenadier Platoon fire on Boat Section 4, but does little damage.
Despite their poor fire the 2nd Grenadiers assault Boat Section 4.
Defensive fire destroys one team, but isn’t heavy enough to pin the
Grenadiers. A round of combat destroys another American team. Boat
Section 4 fails Motivation and flees. |
|
Turn 11
US Forces
Boat Section 4 rallies, however, Boat Section 6 remains pinned inside the farmhouse.
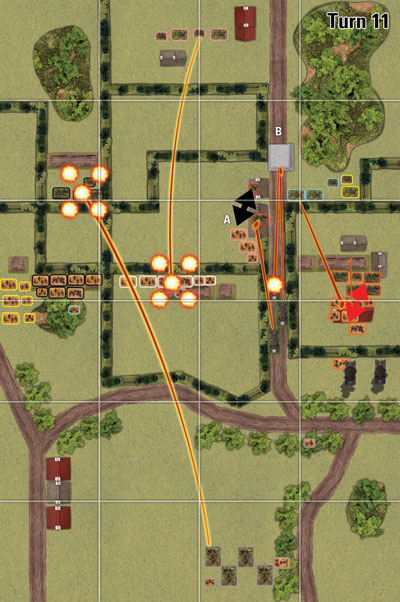
The Shermans move up the main road to lend support to the Pioneers and Boat Section 1. Boat Section 1 moves up to the bocage to cross it next turn. The Pioneers move through a gate and move on to the objective.
A Sherman fires at the houses on the main road and knocks out the Panzerschreck team. The other two tanks fire on the Bunker to pin it and make its shooting less effective.
The Artillery continues to fire on the 3rd Grenadier Platoon, but has no effect against their well-entrenched positions.
The Pioneers then assault the houses hoping to take out the German Company Command team. Unfortunately the SMG armed German officer takes out two Pioneer teams leaving just the command team to fight it out. The Pioneer command fails to hit in his round and is destroyed by the German command team fighting back!
German Forces
The Germans cling on for another turn. The Bunker unpins and is able to return fire against the Shermans.
The 3rd Grenadier Platoon moves up to the farmhouse in preparation for an assault against Boat Section 6.
|
 |
 |
With the objective under threat from Boat Section 1 the Germans decide to move the 2nd Grenadier Platoon back towards the centre.
The 2iC’s Mortars switch to stopping Boat Section 1’s advance on the objective. They range in and pin the Americans.
On the farm flank the machine-guns and the 3rd Grenadier Platoon fire on Boat Section 6, destroy a team and pin down the platoon.
The Bunker’s 7.5cm Feldkannon fires on the Shermans and knocks one out. This pushes the Sherman Platoon under half-strength. The Sherman command passes a Motivation test with ease and the the tankers keep fighting.
|
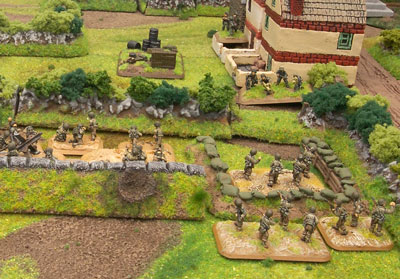
| The 3rd Grenadier Platoon assaults Boat Section
6 in the farmhouse. After a protracted fight around the front door of
the farmhouse Boat Section 6 emerges as the victors. During the fight
the Grenadier Platoon is wiped out and the Americans lose 2 teams. |
|
Turn 12
US Forces
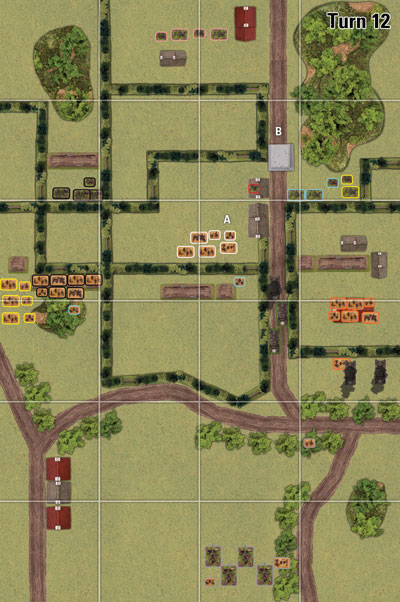
At the start of turn 12 Dion decides to surrender. I had yet to properly take the objective (I shouldn’t have thrown away my Ammunition & Pioneer Platoon trying to nail his Company Command team), but I still had a few Boat Sections in good fighting order, while Dion just had the under strength 2nd Grenadier Platoon left.
Give these forces a go with other standard missions, it turned out to be great fun for us!
Wayne
Dion's Conclusion
What a battle! Carnage everywhere! The battle swung back-and-forth between us with both Wayne and I taking turns having great dice rolls and really bad dice rolls (did my Marders actually do anything!). The MG Tobruks were fantastic at slowing down the American horde and Wayne only just managed to get his force over the half-way mark before turn 6. The Luftwaffe FlaK unit also did well, earning assault badges for their brave ambush on the Shermans, before succumbing to the return fire. It was a great game that could have gone either way right down to the last few turns (darn those bullet-proof engineers!). I think I will be adding a selection of fortifications to my German force so I have the option of fielding them as a Festungkompanie in the future. Isn't there a GT happening here in NZ sometime soon?...
Dion
|
 |
Last Updated On Friday, August 3, 2007 by Wayne at Battlefront
|
|
|