|
|
Battle Badger Bagration Battle Report
|
|
Battle Badger Bagration Battle Report
with Rick Gearheart
This pandemic has put quite the pinch on our favorite pastime. What I’d have previously described as a gaming and modelling hobby, has sort of morphed into a modelling, modelling, modelling and gaming hobby. Thankfully, I’ve got it better than some, as I’ve a regular opponent here in my home. With the coming release of the Bagration German book, my father and I set about stretching our gaming legs with the new ‘Swinging the Sickle’ mission, which can be found in the aforementioned book. We took a few pictures, and some notes on the game, and have dropped in a tiny bit of narrative for your reading pleasure.
|
|
The Board and the Mission
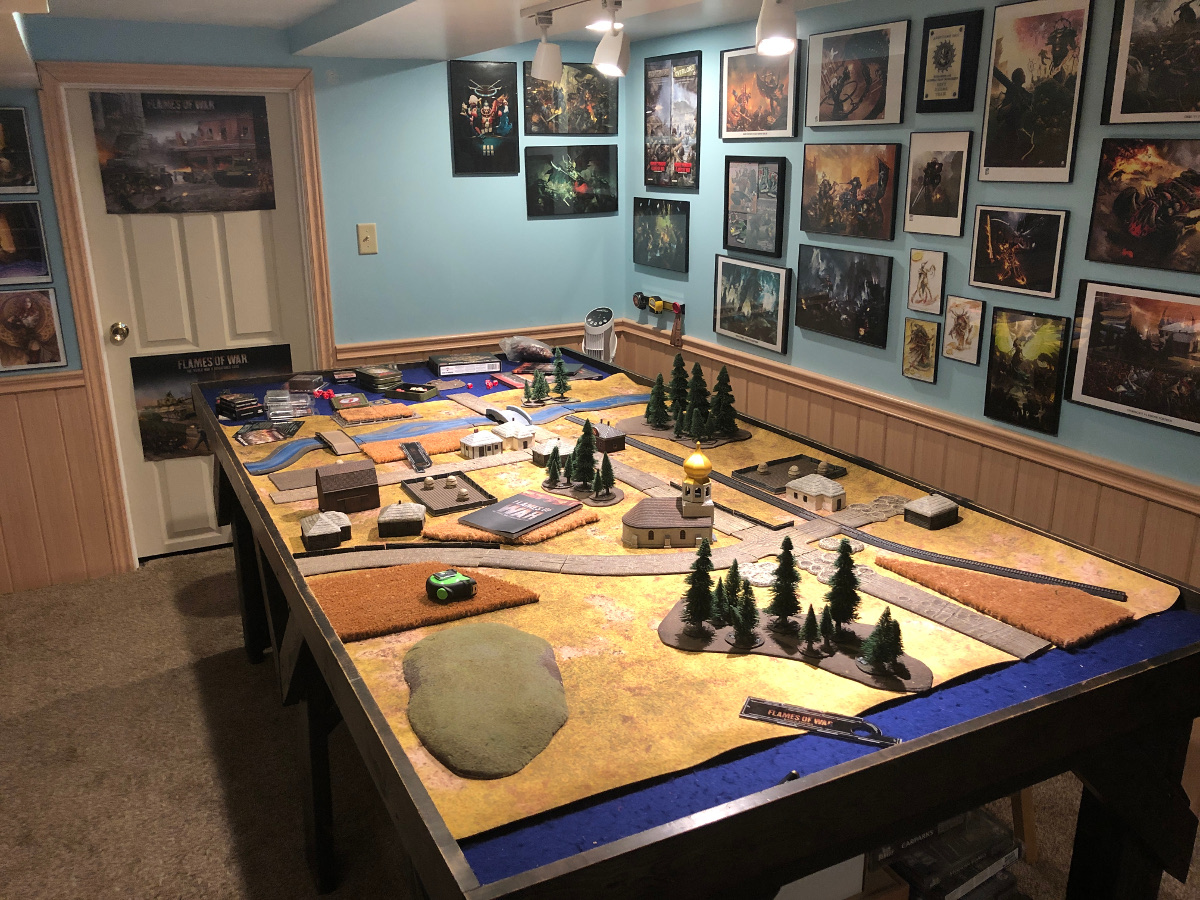
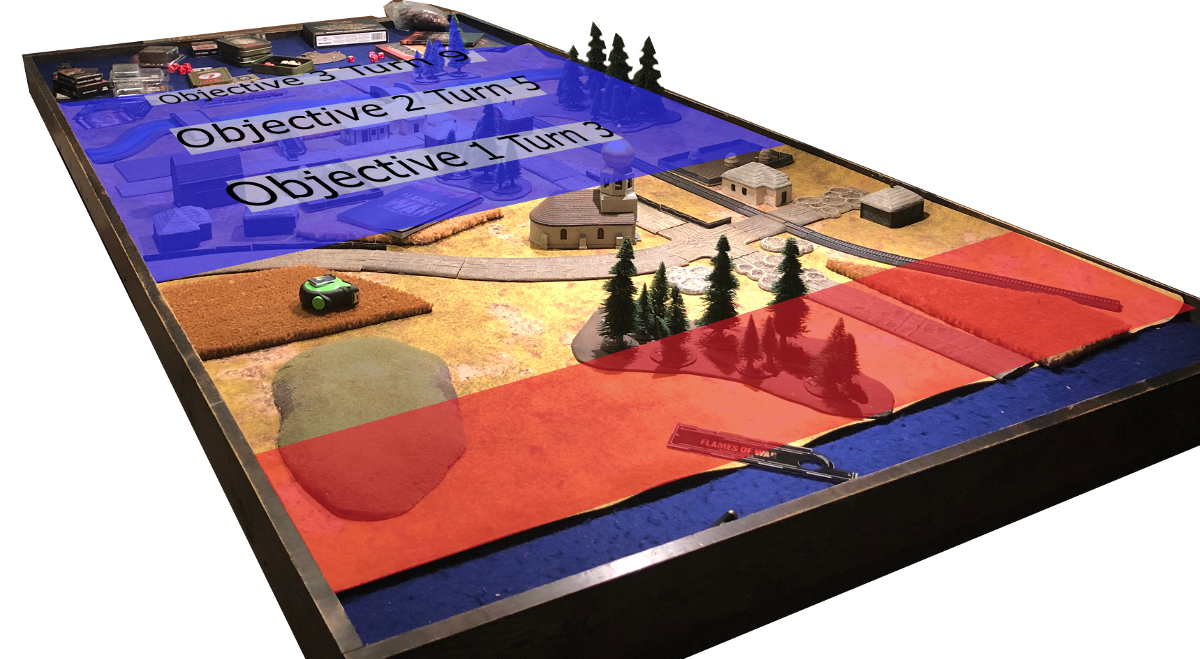
I was quite excited to give Swinging the Sickle a try. After reading the briefing, I felt it presented a much better chance at fighting a desperate defense of a withdrawal than the current Rearguard mission. The turn based rolling back of the front and objectives felt very thematic to me. It presents choices and potential consequences to both players. Does the attacker put it all on the line and try to smash your teeth down your throat in a pair of turns? Do you have enough in position to hold out just long enough on the front objective? Have you put too much there, and left your flank/rear wide open? After a short discussion we both agreed to put together a board and forces that fit the narrative of the mission, a small town on the eastern bank of some river. A few unlucky souls formed into a sperrverband meant to hold off the inexorable Soviet advance just long enough to allow their comrades to make good their escape across the river, and slow the Soviet onslaught by destroying the bridges. With this in mind, I headed down to the Badger Bunker (it’s really just the basement, where we keep our toys, boards, and the libations that go with it), or as my better half affectionately refers to it ‘The Nerdery’, to assemble the board. Here’s what we came up with. As the Germans are on the retreat, we decided to call the riverside of the board West, which has the Soviets coming from the East, the train tracks in the North, and the remaining edge is the South.
|
|
|
 |
|
German Force
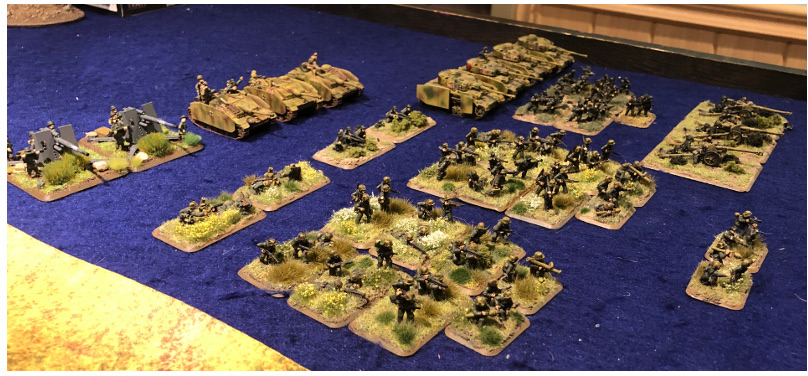
For my sperrverband, I took from the Panzergrenadier list, and supported it with a short platoon of StuGs, and a pair of 88’s. It looked a bit like this:
|
- Panzergrenadier HQ
- Full Panzergrenadier platoon with a panzershrek
- Full Panzergrenadier platoon with a panzershrek
- Short Panzergrenadier platoon
- 7.5 cm Tank Hunter platoon
- Panzer IV Platoon
|
- 8cm Mortar Section
- sMG34 MG Platoon
- StuG Assault Gun Platoon
- 8.8 Heavy AA Platoon
|
|
|
|
I knew the opposition was going to be an IS-2 force, and rather than try to match big armor with big armor, I figured I’d be able to remain true to the narrative and simultaneously do well with enough infantry to cover my front, a few static AT assets to bolster those positions, and a few mobile AT assets to keep my opponent honest. Let’s face it, provided fuel reserves were sufficient to get them out of their not many Tiger companies were left as rearguard. Embarrassingly, my German collection somehow doesn’t include any 88’s (a shortcoming I’ll soon remedy) so I borrowed a pair from another of the Battle Badgers’ Kampfgruppe Schmidt. My thinking with the mortars and the MG platoons was to inflate the size of my formation, and to make for a cheap unit that could be withdrawn quickly whilst having taken a few pot shots at the advance before themselves becoming a liability.
|
|
|
Soviet Force
The attacker for our mission looked like this:
|
- IS-2 Guards Heavy Tank Regiment HQ
- IS-2 Guards Heavy Tank Company
- IS-2 Guards Heavy Tank Company
- Engineer Sapper Company with Flamethrowers
- 76mm Artillery Battery
- Katyusha Guards Rocket Battery
|
- BA-64 Observation Post
- T-70 Tank Company
- Command Card Lucky
- Command Card Make Your Own Luck
- Command Card Under the Cover of Smoke
|
| While they’re big and mean, there’s only 7 tanks in this formation, and they’re slow-firing, in hindsight they shouldn’t have scared me quite as much as they did. I was pretty sure the Soviet plan here was to fix me in place with a wall of IS-2’s, while the Katy’s and 72’s pounded on my grenadiers. Then when I was softened up enough, or when the missions timing demanded it, we’d see the IS-2’s and the Sappers get down to the grim business of an assault. |
|
|
Deployment
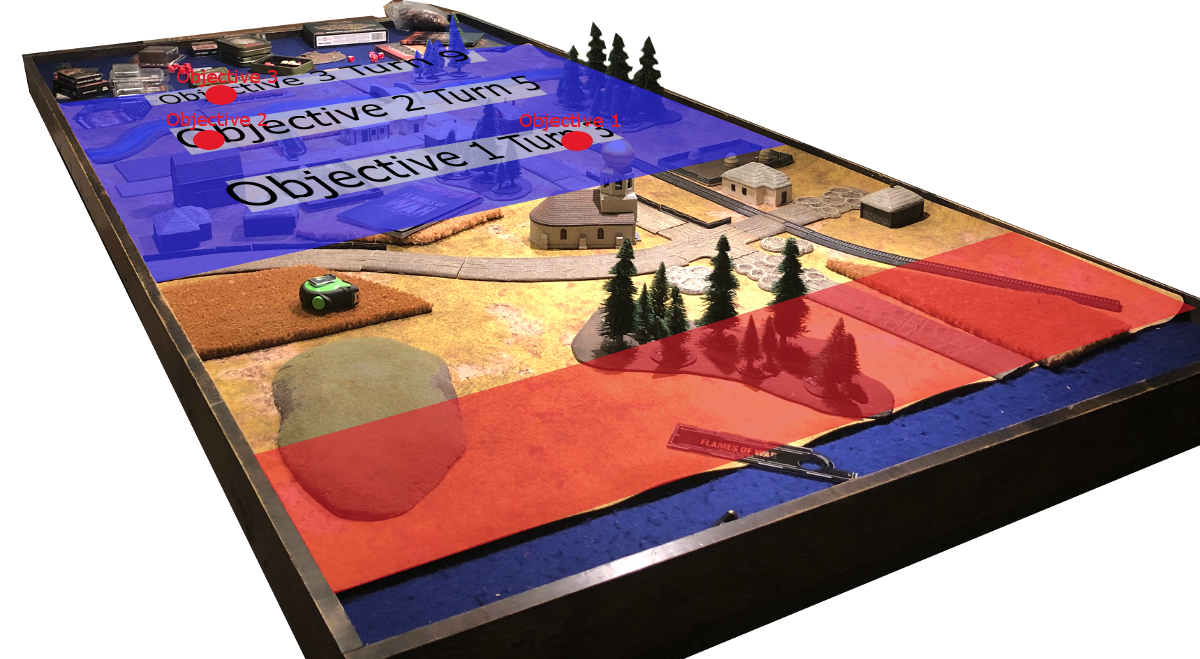
Before our armies hit the table, it was time for objectives and ranged-in markers. The attacker placed the first objective in the Northeast corner of the available area, and the second objective at the foot of the wooden bridge in the Southwest corner of town. I chose to put the third and final objective in the crop field nearer the wooden bridge, allowing myself to defend both pretty easily with the same teams.
|
|
|
|
Looking at the table, the objectives, and the ‘Under the Cover of Smoke’ card my opponent was holding, I fully expected a line of smoke to shut down the approach into town, stretching from the North of the church, to the table edge. Behind this wall of smoke I’d see IS-2’s coming down the road, and Sappers coming through the north farm field. I chose to range in my mortars on where I expected those Sappers to be. As the Soviets set up their markers, my expectations bore out. The 76’s used the ‘Under the Cover of Smoke’ card to shut down the road into town, and the Katy’s ranged in on Objective 1. I was right, I saw it coming! These Soviets are far from subtle… now we’ll just have to see if I can do anything about it.
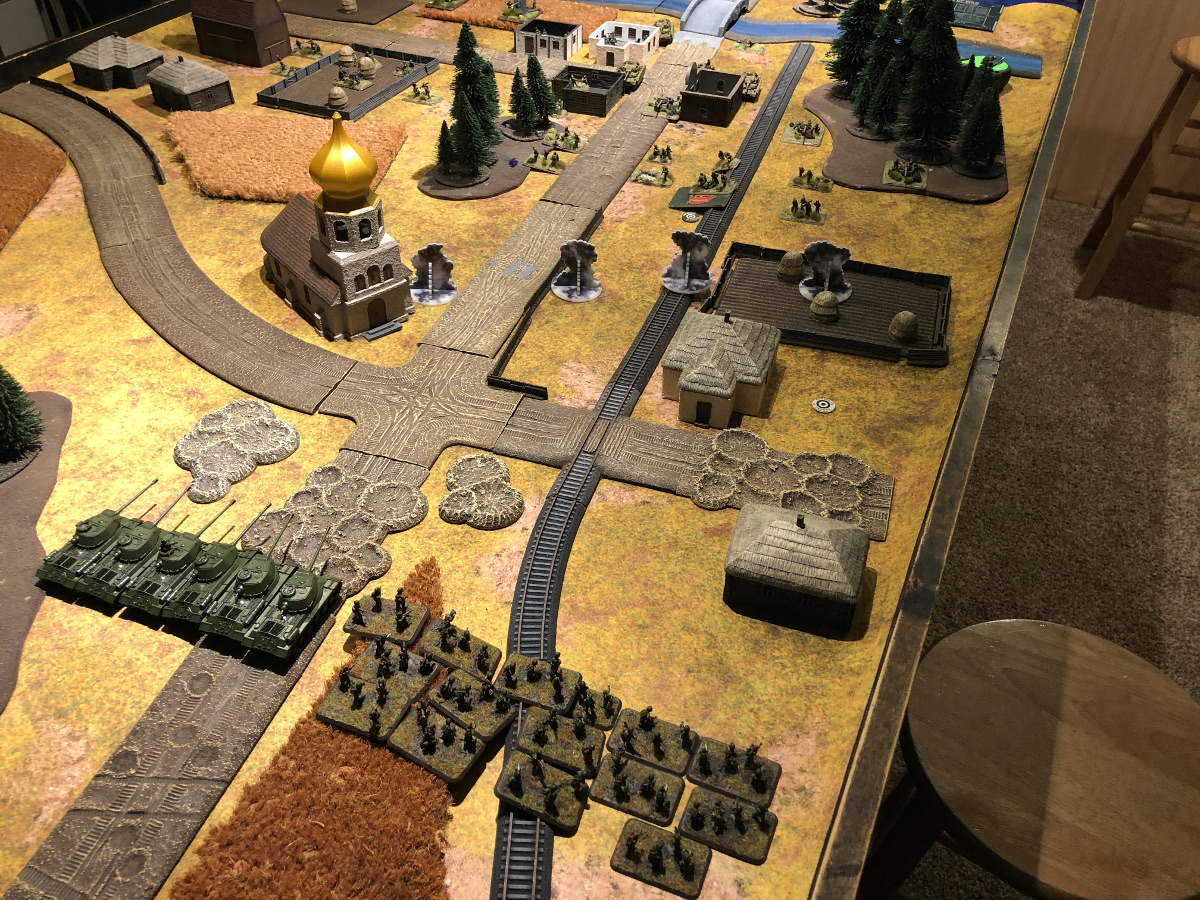
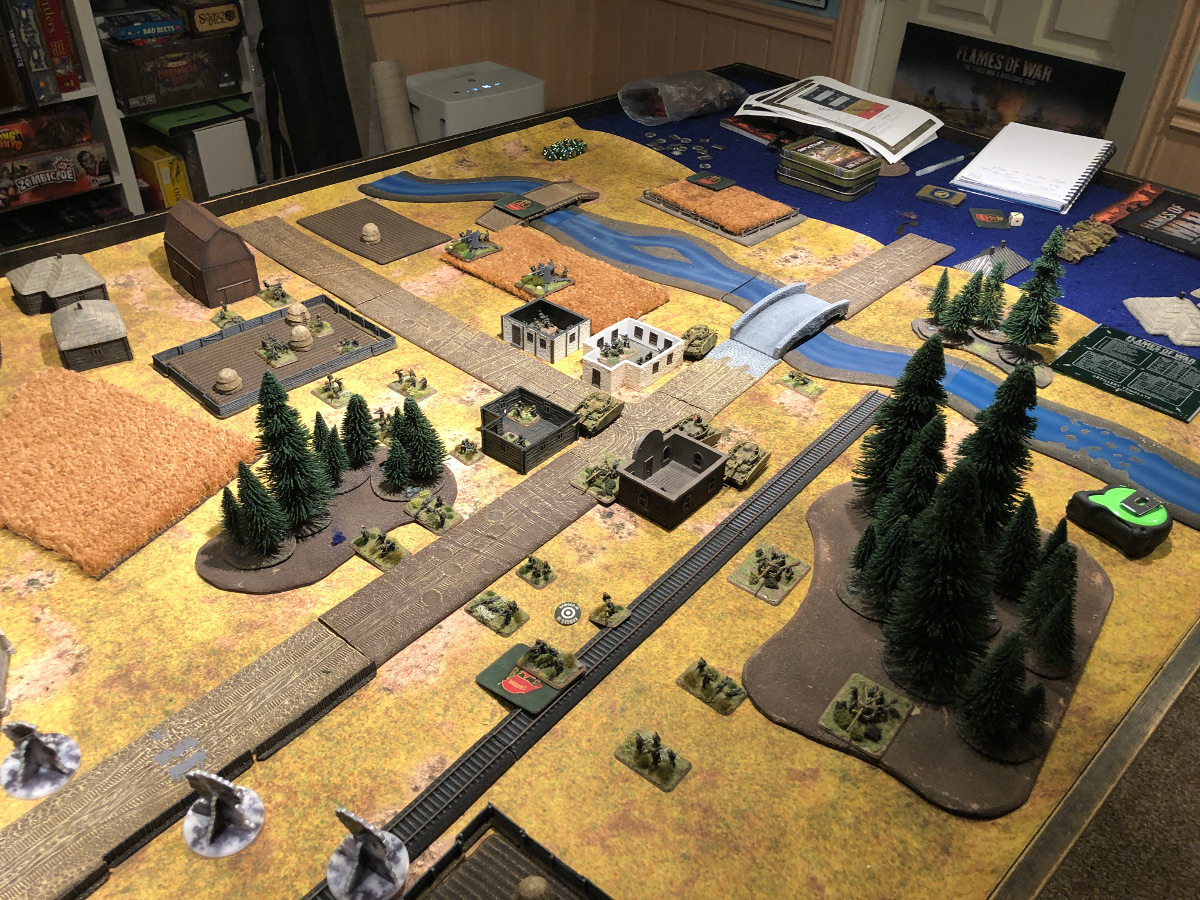
Putting my force on the table, there was unfortunately little for it, someone had to hold that front objective. Not indefinitely, just long enough. 3 Turns, that ought to be doable. I placed a Grenadier platoon in defense of Objective 1, backed them up with the Pak 40’s, and the MG platoon, because of the Salvo template size, I wasn’t able to spare them the danger of the repeat bombardments, without excluding them from Defensive Fire, which I was going to be in dire need of. Well, like I’d said ‘there’s unfortunately little for it’, keep your heads down fellas, it’ll be alright. The second grenadier platoon stretched to the south. The third was in reserve in the town center, ready to reinforce either objective, or form a new line of defense as necessary. My commander set up just outside of the bombardment range, but near enough to help the grenadier platoon commander keep his fellas’ chins up, whilst keeping their heads down. The 88’s went into the crop field behind the second grenadier platoon. On the off chance this particular Soviet commander ended up being the subtle sort (though I’ve not met one yet) I figured they’re higher AT and longer range would suffice to defend the southern side of town. The Panzers took up position in town, hoping to psychologically dissuade the Soviet advance with their fairly ineffective presence to the IS-2’s front. The StuGs went into ambush. I’d not accounted for the T-70’s yet. I expected them to make a run along the southern edge of the board. The ambush was my solution to this, Ideally I’d want to use it to hit some IS-2’s in the side, but the depth of the deployment and position of the objectives didn’t really allow for a solid prospect there.
|
|
|
|
|
The Soviet commander committed to his initial plan. The Katy’s and 76’s took up position behind the forest and on the hill in the Southwest. The T-70’s prepared to run the Southern Flank, and everybody else got ready for the dirty work awaiting them on the other side of the smoke bombardment.
|
|
Soviet Turn One
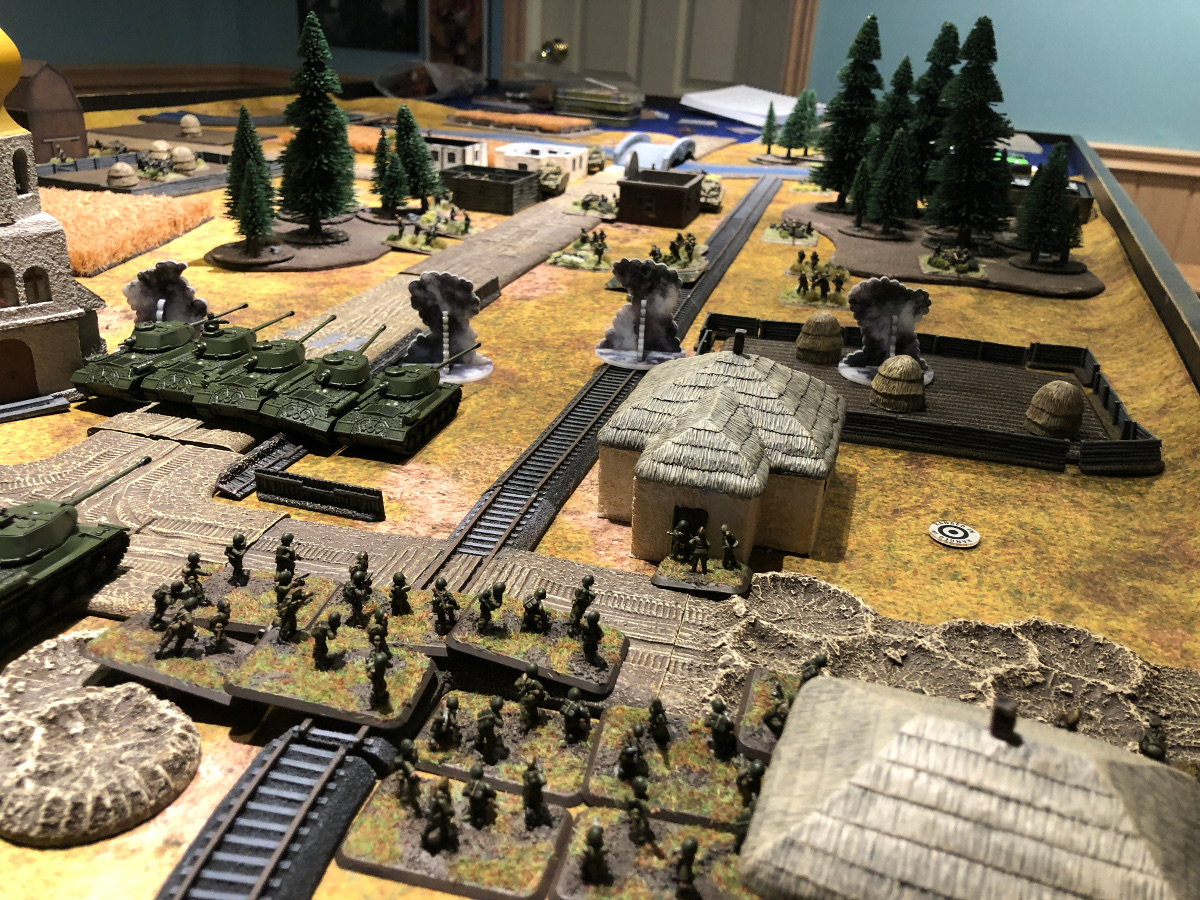
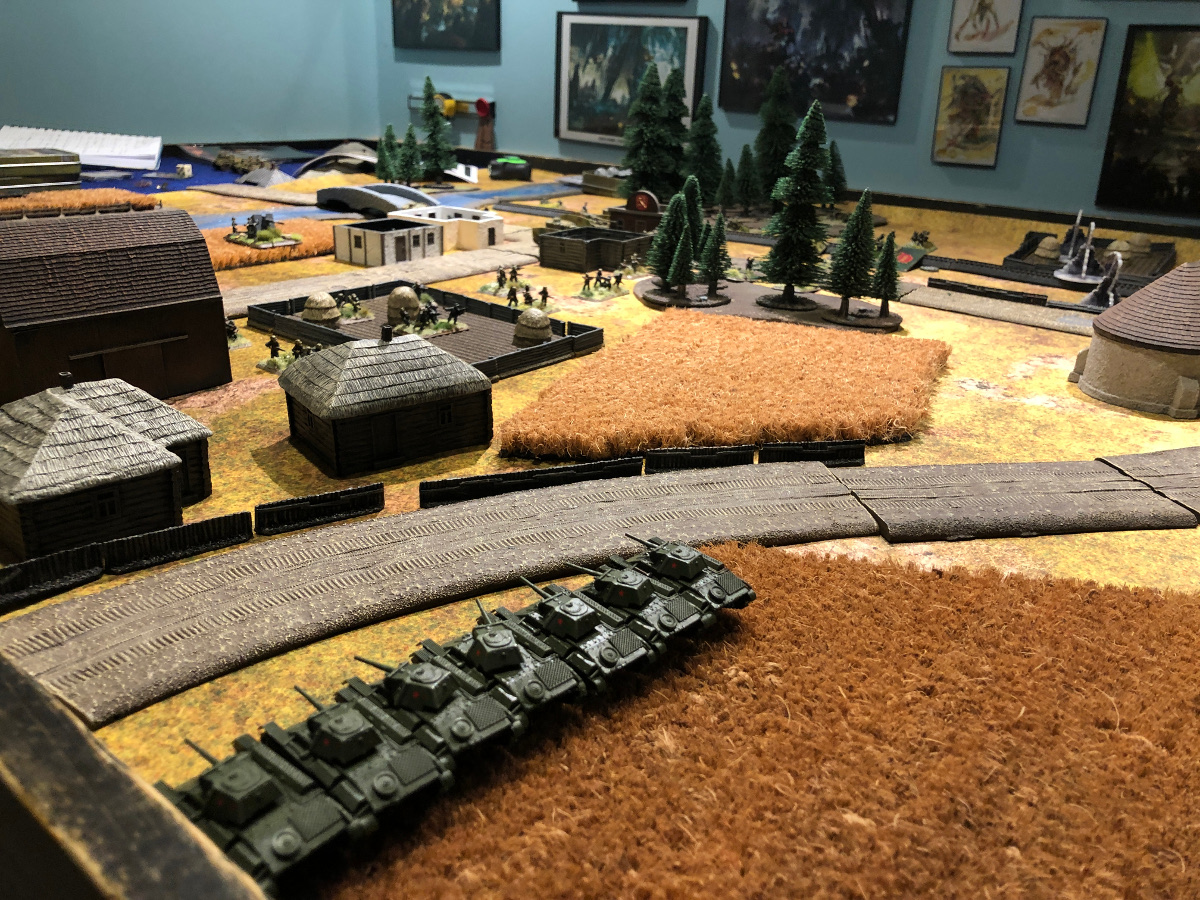
The approach to the town was a quiet one, beyond the clanking of the IS-2’s, and the tread of Soviet boots, there wasn’t a sound, not a single rifle crack. Our comrades and their guns had done an excellent job of blanketing the area in a dense blanket of smoke. The silence was shattered by the song of Stalin’s Organ, as the Katys let loose a barrage of rockets to prepare the way. The rockets found home hitting 4 grenadier stands, the panzershrek failed his save, but was spared by a failed firepower roll. Perhaps it was the sounds of the rockets, or ghostly shapes in the fog, but the Sappers refused to follow their leader across the road, leaving him on his own at the fore of a farmhouse.
In the South, the T-70’s raced across cropfields, looking to fix the second grenadier platoon in place, and keep them from coming to the aid of their soon to be beleaguered friends on the North side of town.
|
|
|
|
|
German Turn One
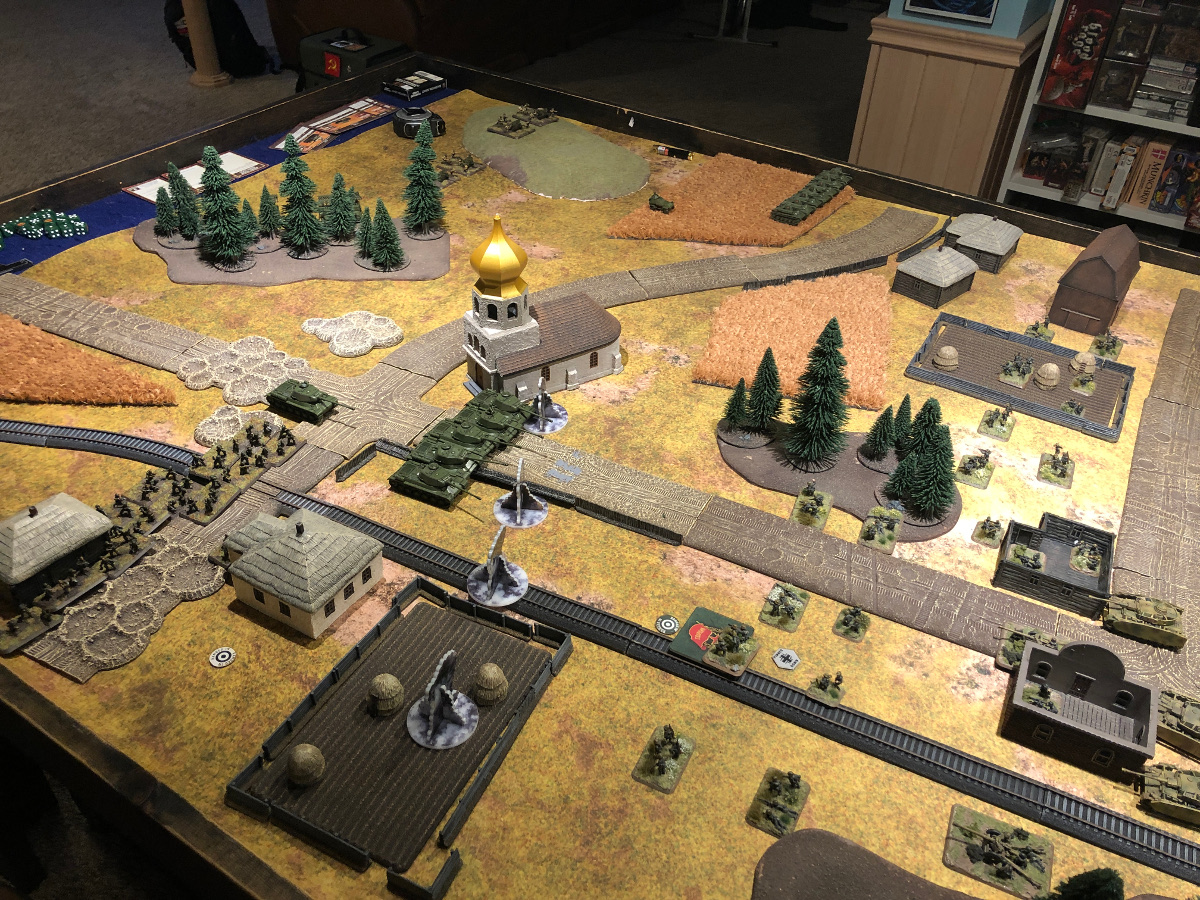
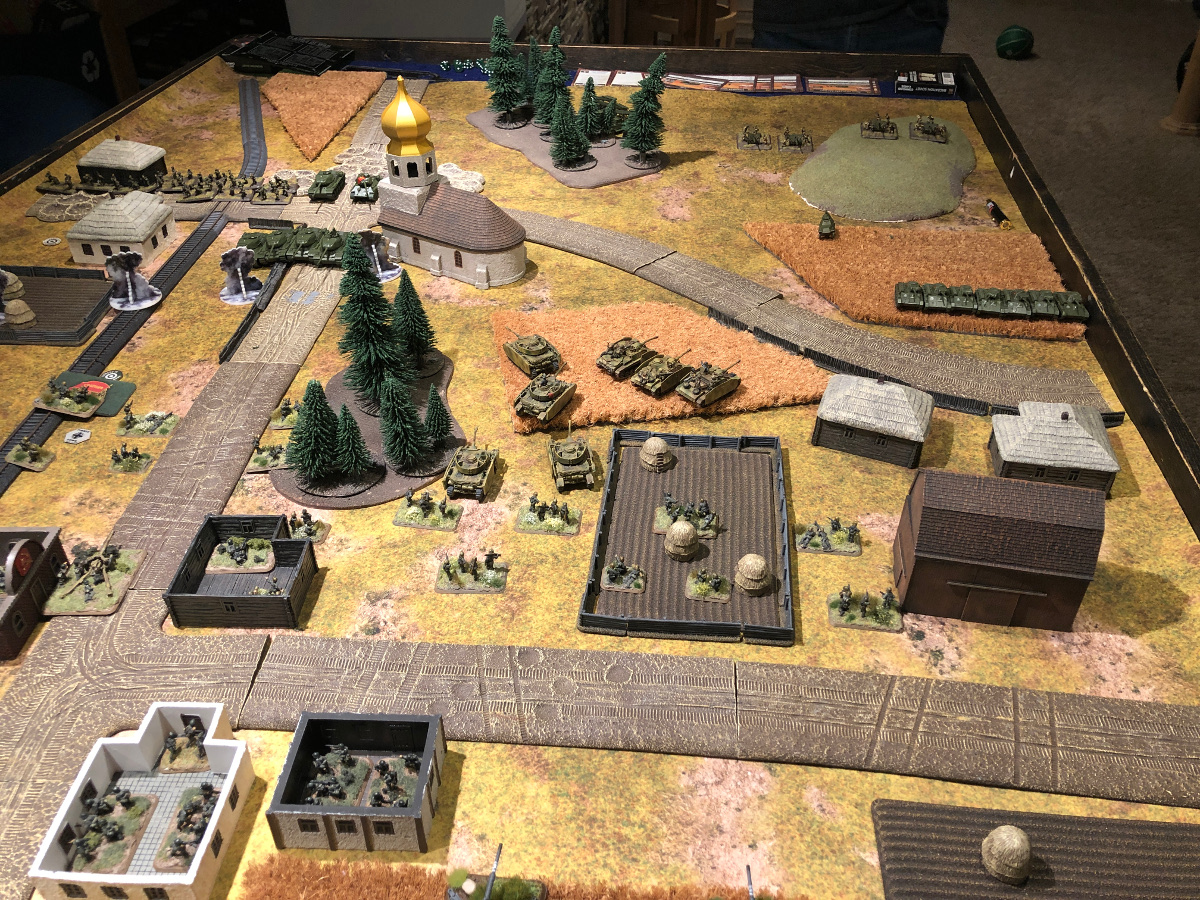
The Grenadiers on objective 1 remained pinned, despite the efforts of the commander. This was the absolute worst, while they could hear the coming advance, and while they were being rained on with rockets, there was nothing for them to do, but to sit in their slit trenches, and prepare for what they all knew was coming.
Now that the IS-2’s had in fact committed to the northern approach, the Mark IV’s raced out of their town positions and moved south of the small copse of trees east of the Church, preparing to flank the Soviet armor as it pushed into town.
In the South, the StuGs broke cover in the crop fields and opened fire on the T-70’s. Destroying two, and bailing a third.
The 88’s attempt to draw a bead on the BA-64 hiding in the crop fields to spot the fall of rounds in town, but are unable to land a shot.
|
|
|
|
|
Soviet Turn Two
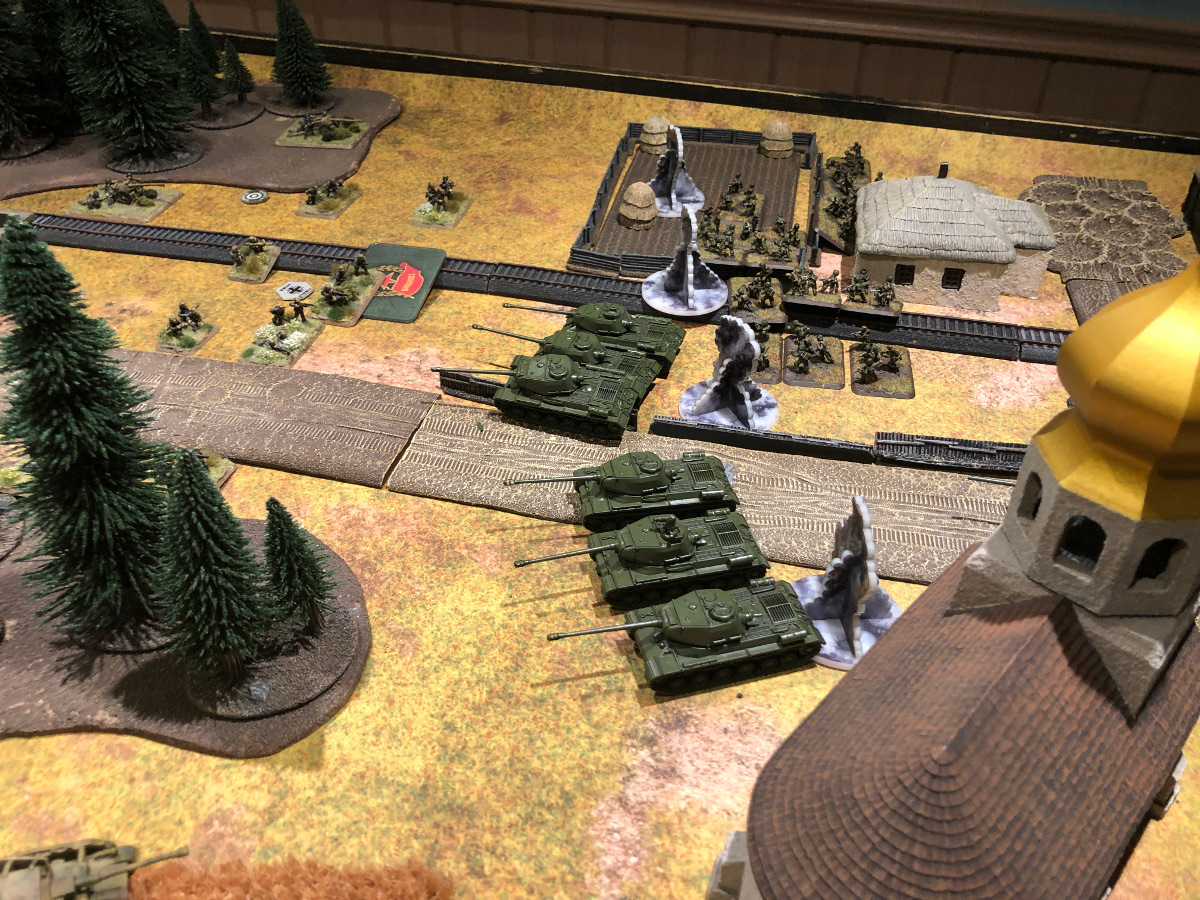
In the North the Sappers creep up to the edge of the smoke screen, leaving the backend of the company under the ranged in marker of the German mortars.
Recognizing the threat the Panzers represent, if not to the tanks themselves, but then to the schedule of the assault, the Soviet Commander uses ‘Make your own Luck’ to guarantee a company of IS-2’s succeed on their blitz check, to move through the smoke screen and meet the threat without suffering from their slow-firing guns. Unfortunately, despite the excellent tactics on display, the IS-2’s fail to find their mark. The second company rolls forward, breaking through the smoke and approaching the objective.
|
|
|
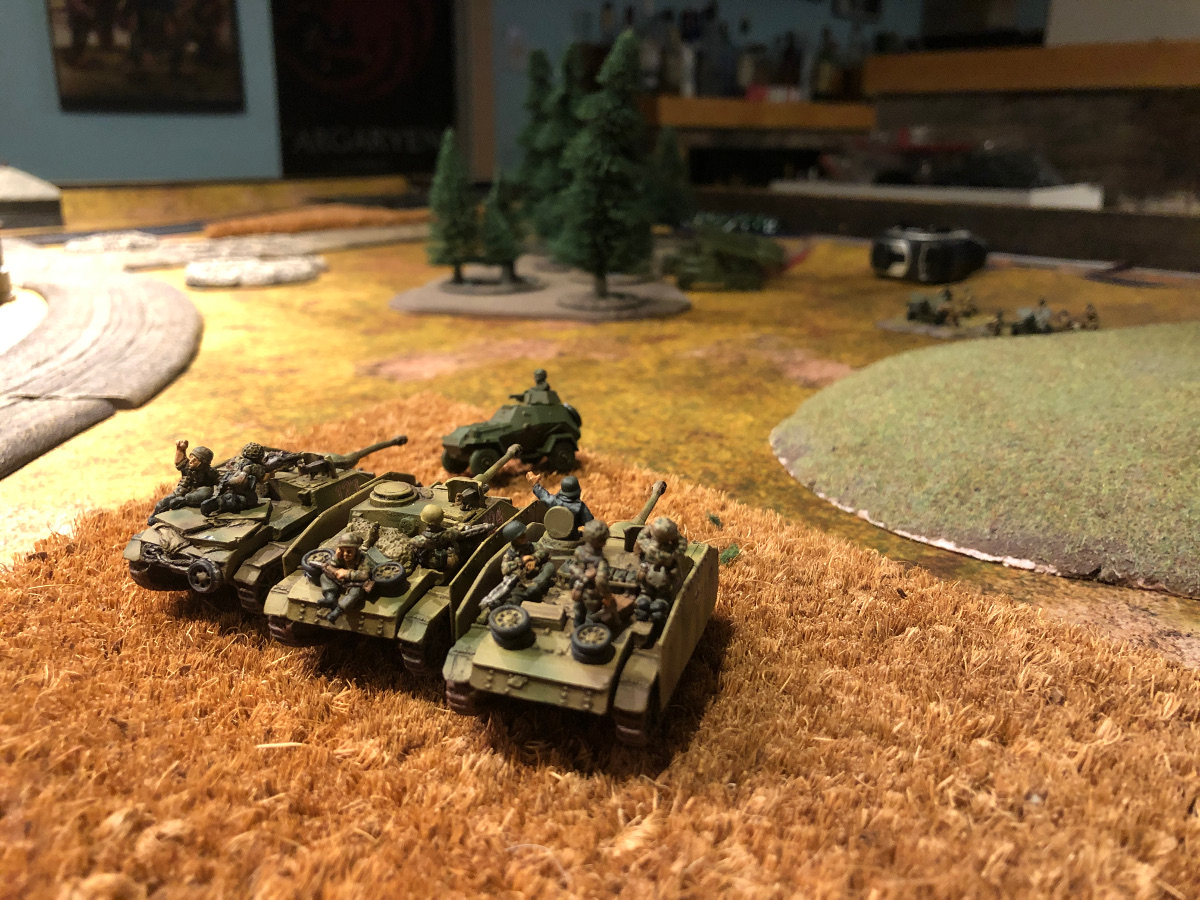
In the South, the T-70’s race further south, hiding from the StuGs whilst remaining an annoyance and potential threat.
|
|
|
German Turn Two
Fixating on the IS-2’s that have just rolled through cover, and the futility of machine guns against such beasts, paired with the mortar teams current ability to hit and potentially pin the sappers, the German commander chooses to withdraw the machine gun platoon.
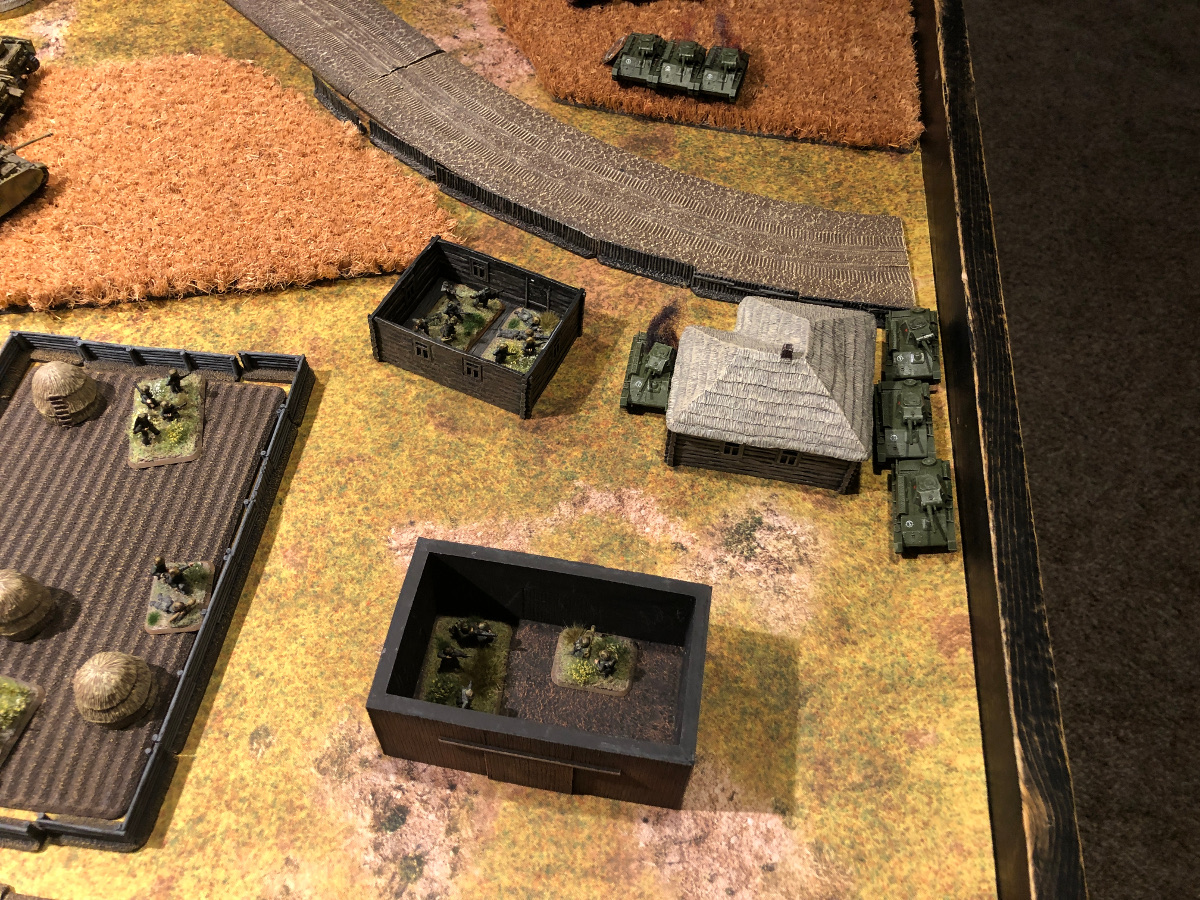
In the South, the second grenadier platoon shifts into the farm to force the issue with the flanking T-70’s. The 88’s choose to lend a hand, with one continuing to pick on the BA-64, and the second taking aim at a single T-70. The scout is untouched, but the poor little T-70 is struck two resounding blows, that somehow do not manage to destroy the plucky little tank. Absolutely convinced that he’s spent every ounce of luck he’d have ever had, and eyeing the advancing grenadiers, the tank commander quits the field. Leaving behind an operational, but severely dented T-70.
|
|
The StuGs push west hunting the Katyushas, hoping to bring an end to the hell they threaten to rain. They find the vile little trucks tucked in behind the forest, and manage to send one up in flames.
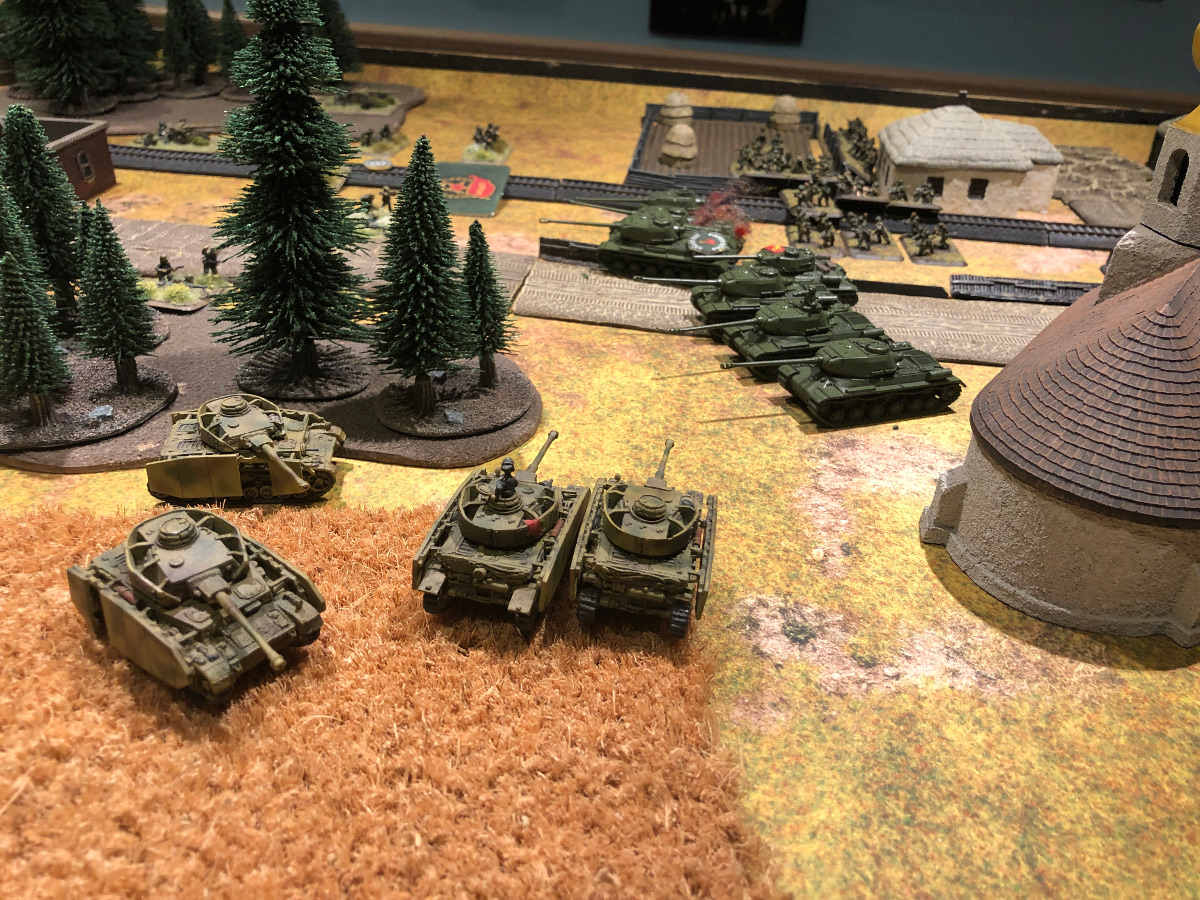
In the center of the board, the Panzer IV’s blitz, putting two teams in position to fire into the side of the IS’2s, and the remaining two to target the bailed out T-70. One IS-2 is bailed out, and the T-70 is destroyed.
|
|
|
 |
|
In the North, the crews of the 7.5cm Pak 40’s are grateful to finally have something to do, even if that something involves the front armor of a company of IS-2’s. Though their guns might not be the best tool for the job, the veteran crews get the job done, landing all 6 shots, and destroying the 2 active IS-2s. What amazing luck! Maybe we’ve got a chance!
The mortars try their luck carpeting the field they’re previously ranged in on, however because they can’t see what they’re shooting at, and because there are only 2 tubes firing, it’s entirely ineffective.
|
|
Soviet Turn Three
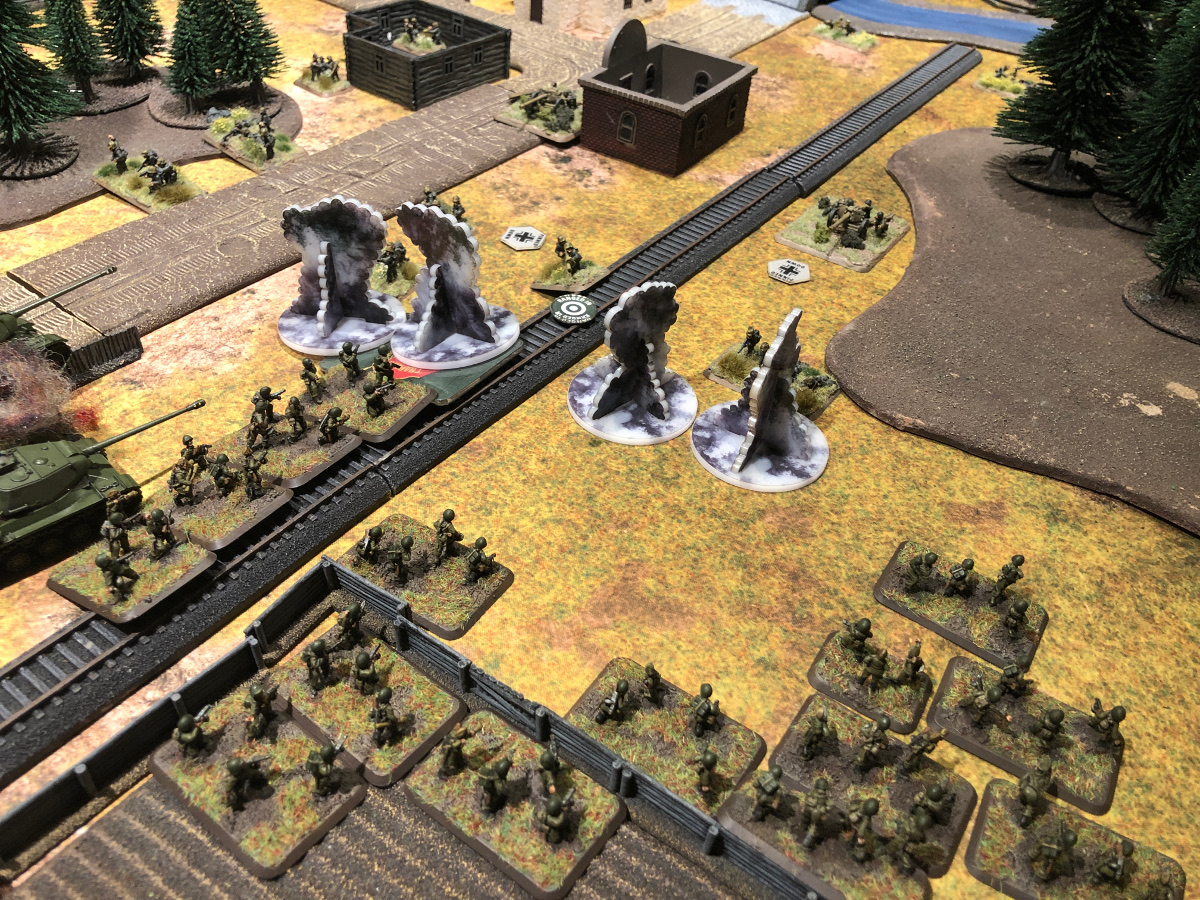
With all of his eggs threatening to hatch in their single basket. The Soviet commander doubles down on his Objective 1 Gambit. The Sappers prepare their assault, with two stands firing smoke, two flame throwers leading the way, and a pile of sub machine guns to see to anything that still needs doing. The IS-2’s pull forward lending their machine guns to the effort. The Katy’s range in further back, to an attempt to pin down the Pak 40’s, and still allow for the assault. Likewise the 76’s make a similar contribution.
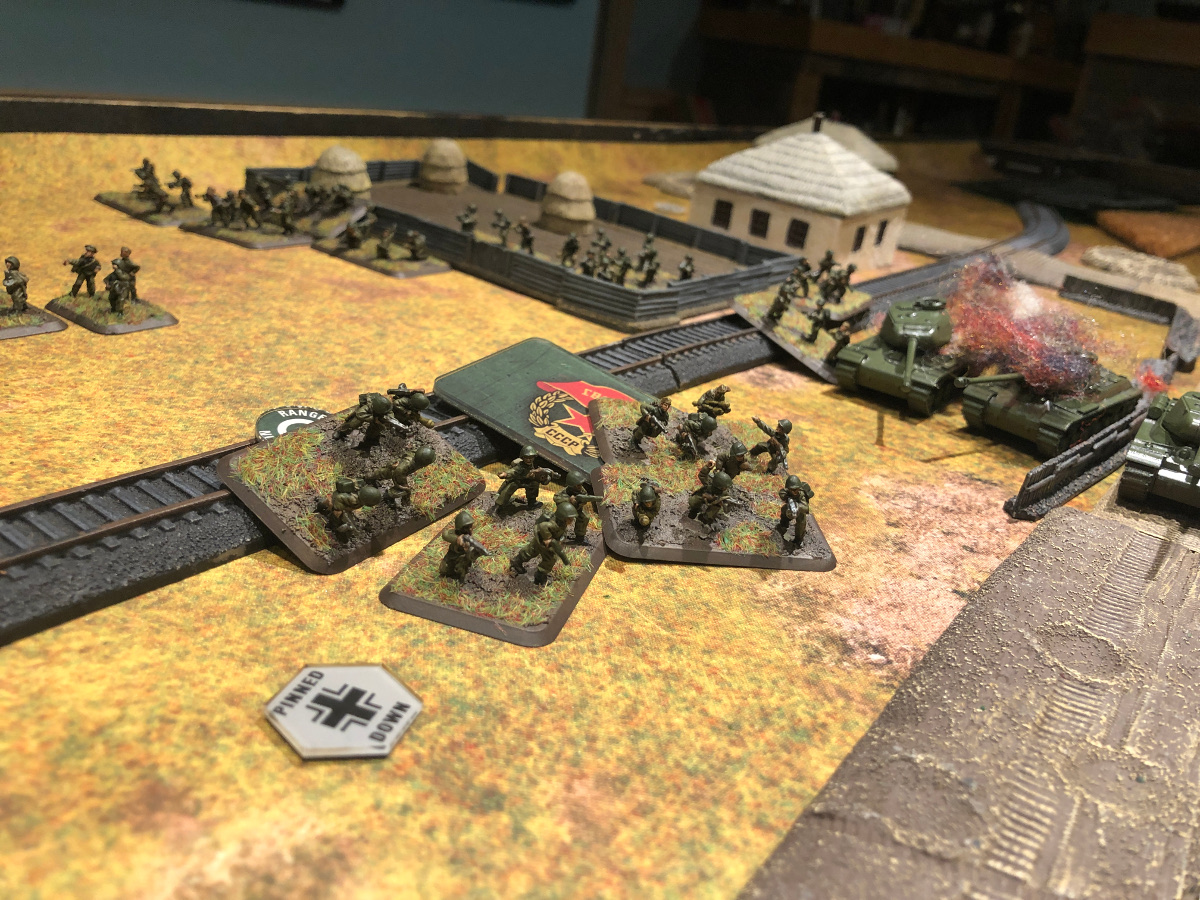
The sappers flamethrowers do great work, coupled with the SMGs and IS-2s, the way is prepared. The German defenders are scarce and pinned. The sappers launch their assault, and while the German defenders are still throwing 14 dice in defensive fire, they’re unable to deliver the sort of fire that’d stop the soviet advance. The German defenders are wiped out, leaving only a single stand in range to counter attack. Realizing that their number is most certainly up, but that they’ve a chance to save the day and the lives of their compatriots by contesting the objective to the beginning of their turn at which point it would be removed, the single stand counter attacks. They charge in and make short brutal work of a team of Soviet sappers. The soviet counter-attack initially fails, perhaps the viciousness of the German counter was too much, but realizing the importance of the situation, the Soviet Commander spends his Lucky card for a re-roll. Passes the check, and 6 stands of soviets see to the remaining German Defender. With the IS-2 company having started it’s turn contesting the objective, and now finishing it’s turn with no defenders on the objective, the day is won. The German defense is routed, the defenders captured, and the bridges are secured. It’s a glorious day to fight in the defense of Mother Russia!
|
|
|
|
|
Conclusion
It seems there’s no need for subtlety when you’ve got numbers, determination, and a willingness to bear any cost to get the job done. There were a few things I could’ve done differently here. Dismissing the mortars and keeping the Machine Guns might have made sense, but I was too fixated on the IS-2’s to realize that at the time. I’d decided early that they were both only there to be withdrawn. I might have robbed myself of the Defensive Fire necessary to stop the Soviet Assault. My opponent also made great use of command cards to ensure that they got the rolls they really needed when they really needed them. Hats off to them, a sound and well executed plan. I greatly enjoyed this game, and this mission. I’m looking forward to playing it more.
~Rick
|
Last Updated On Thursday, April 1, 2021
|
|