|
|
|
|
Products mentioned in this Article
--None--
|
|
|
|
|
|
|
|
|
 |
|
|
 |
Team Barlow’s Raid
By Rob Wubbenhorst
This historical scenario is drawn from the book Army at Dawn by Rick Atkinson.
Background
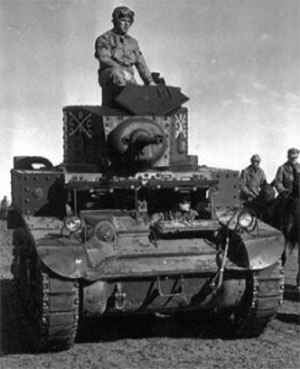
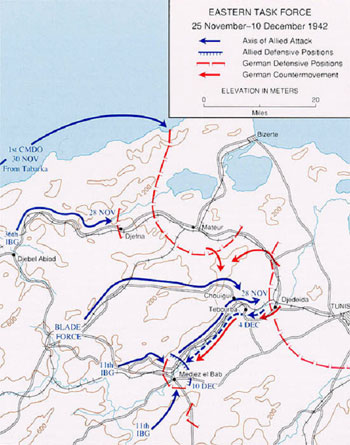
On 25 November 1942 the 1st Battalion of the 1st Armored Regiment was the spearhead of the provisional Blade Force, the center maneuver element of the British First Army’s attack into Tunisia. Blade Force’s commander Lt. Col. John Waters was leading the center of the allied advance in the Tine River valley.
Waters ordered his C Company commander, Major Rudolph Barlow, to reconnoiter a bridge over the Medjerda River to the East of the valley. Upon reaching and overcoming the sparsely defended bridge, Major Barlow took his command across the Medjerda River and pressed on to the Northeast, following the river’s course.
|
|
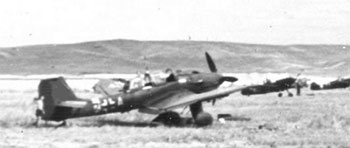
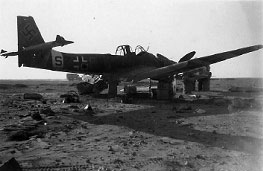
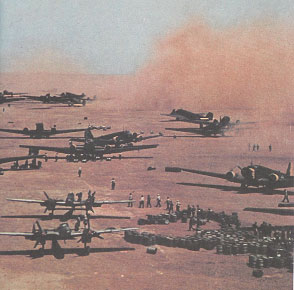
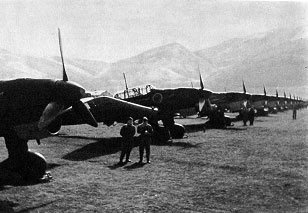
When C Company reached the small village of Djedeida, they discovered a newly constructed forward airfield actively being used by the Luftwaffe to refuel and rearm the deadly Stukas which had been attacking elements of Blade Force all day. This was truly an armored cavalryman’s dream, a surprise attack on a vulnerable airfield!
Upon hearing this report from Barlow, his commander Lt. Col. Waters ordered “For God’s sake, attack them! Go after them!”
The Mission
C Company’s attack is against the German-Italian forces guarding the airfield near Djedeida, and a mixed bag of nearby German and Italian reaction forces who respond to the defenders’ pleas for help.
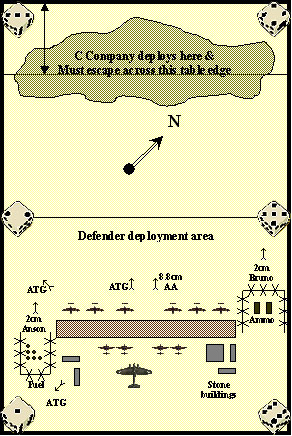
Use the No Retreat mission from therulebook for the deployment and preparing for battle. The Objectives for the US attacker are Aircraft, Fuel, and Ammunition Objective markers. The deployment zones are marked on the provided map.
|
 |
 |
The Battlefield
The battlefield features a ridge in the NW w/ the airfield in an open plain to the SE. The hill and all terrain is easy going.
The airfield has barb-wire enclosures around fuel and ammunition depots. |
|
All AA & AT guns are emplaced as shown for local air-defense in Foxholes.
Aircraft are dispersed at random around the airstrip.
Some local stone buildings are on the East and West ends of the airfield, serving as pilot ready rooms, weather shack, and barracks for the security troops.
This mission uses the Delayed Scattered Reserves, Demolition (See below), Escape (See below), Safe in Rear Areas (See below), and Scattered Reserves special rules.
Do not use the Ambush special rule from No Retreat. The Defender starts with all airfield defense units on the battlefield in their deployment area. All airfield defense units begin the game Pinned Down. Only the AA & ATG platoons have Foxholes. All Luftwaffe Security platoons and HQ do not start in Foxholes, but can deploy in the stone buildings.
The defender’s reaction force enters starting on Defender’s Turn 2 as Delayed and Scattered Reserves. Infantry, Gun, and Unarmoured Tank Units must arrive before Armoured Tank Units. Tank Units arrive last, with the M14/41 Tank Platoon first, followed by the Panzer platoon as the last reserve.
|
 |
|
Additional Special rules
Demolition
It takes explosive charges or failing that a lot of machine-gun fire to turn a truck park, airfield or fuel depot into a raging inferno.
Explosive Charges
The most reliable way to blow up a target is with explosive charges. Demolition experts on foot fix time bombs to the target and then get far away before the resulting explosion.
Infantry Teams equipped with Demolition Charges that are not Pinned Down may attempt to demolish an Objective within 2”/5cm instead of Moving in the Movement Step.
If the Team passes a Skill Test they have successfully planted the explosives which will explode once they get clear. The Objective now counts as demolished.
Gunfire
A quick machine-gun burst hitting the cab or wheels can put a target out of action for the rest of a battle. However, a lot more intense shooting is needed to completely demolish a truck, aircraft, or fuel depot.
Teams can demolish an Objective by gunfire by shooting at it using the normal shooting rules in the Shooting Step. The score required to hit an Objective is 2+, modified as normal for long range, darkness, etc. An Objective never counts as Gone to Ground.
The defending player rolls Save for each Hit on an Objective.
If they roll 5+, the Objective has taken some damage, but is not demolished.
Otherwise, the shot hit something vital and the Attacking player make a Firepower test to demolish the Objective.
|
Escape
When the raiders demolish a target, the enemy will stop at nothing to ensure that they don’t escape to enjoy their success. This makes the raiders’ escape as important as the actual demolition.
Raiding Units may only escape by moving off their own table edge during their Movement step. Units may not escape in any turn during which they have made Dash movement.
Units that escape do still count as being on the table for Formation Last Stand. Teams that escape the table like this do not count as destroyed.
Safe in the rear areas
The defenders know that the enemy is only a small raiding party and that there are plenty of friendly troops nearby. Their main concern is not having to tell HQ why everything they were guarding got blown up and the raiders got away!
The Defender’s Formations are not required to check Formation Last Stand. However, they take Unit Last Stand as normal.
|
 |
The Forces
Allied Forces
C Company of the 1st Battalion, 1st Armored Regiment is independently operating with the British First Army. An option to include the regimental Recon and Assault Gun platoons is included, as they were with Lt. Col. Waters, but did not accompany Maj. Barlow on his raid. |
|
1st Armored Battalion
M3 Stuart Tank Company ~ (page 25, Fighting First)
M3 Stuart Tank Company HQ (MU101)
2x M3 Stuart (37mm) |
4 points |
M3 Stuart Tank Platoon (MU102)
5x M3 Stuart (37mm) |
10 points |
M3 Stuart Tank Platoon (MU102)
5x M3 Stuart (37mm) |
10 points |
M3 Stuart Tank Platoon (MU102)
5x M3 Stuart (37mm) |
10 points |
Armored Recon Platoon (MU107)
2x M3A1 Armored Car
1x Jeep (MG)
1x Jeep (60mm) |
3 points |
T30 75mm Assault Gun Platoon (MU110)
3x T30 (75mm) |
3 points |
Total
|
40 points
|
|
 |
Axis Forces
The Luftwaffe had static security troops and AA artillerymen present to repel the attack. Assuming large numbers of Italians in the area, additional assets are included for historical flavour. |
|
German & Italian Airfield Defenses
(Iron Cross and Avanti)
Grenadier Companie HQ (MG215)
2x MP40 SMG team
Luftwaffe Field Company command card |
2 points
-6 points |
Luftwaffe Security Rifle Platoon
Grenadier Platoon (MG216)
9x MG34 and K98 rifle team |
12 points |
Luftwaffe Security Rifle Platoon
Grenadier Platoon (MG216)
7x MG34 and K98 rifle team |
9 points |
| Support Platoons |
|
Batterie Anson
Sd Kfz 10/4 Light AA Platoon (MG231)
4x 2cm AA Gun
(dismounted as Gun teams with 3+ gun save, Skill 5+, Is Hit On 3+) |
4 points |
Batterie Bruno
Sd Kfz 10/4 Light AA Platoon (MG231)
4x 2cm AA Gun
(dismounted as Gun teams with 3+ gun save, Skill 5+, Is Hit On 3+) |
4 points |
8.8cm Heavy AA Platoon (MG232)
1x 8.8cm AA gun |
6 points |
| Italian Support |
|
47mm Anti-tank Platoon (MI106)
3x 47mm gun |
6 points |
11th Fallschirmpionier Bataillon
(Death From Above) |
|
|
Fallschirm Pioneer Platoon (MG309)
3x MG42 & K98 rifle team
2x Flame-thrower team
|
10 points |
Total
|
47 points
|
|
Reaction Force
Aufklarungsschwadron
(Grenadier Company, Iron Cross)
Grenadier Company HQ (MG215)
2x MP40 SMG teams
Fast Company command card
Softskin Transport command card
(Kubelwagen & Motorcycle) |
2 points
3 points
1 point
|
Aufklarungs Platoon
Grenadier Platoon (MG216)
7x MG34 and K98 rifle team
Softskin Transport command card
(Kubelwagen & Motorcycles) |
9 points
1 point
|
| Support Platoons |
|
Sd Kfz 10/4 Light AA Platoon (MG231)
2x SdKfz 10/5 (2cm) |
4 points |
Panzer Pioneer Platoon
Grenadier Platoon (MG216)
5x MG34 & K98 rifle team
(Cross minefield on 2+, Dig In 2+)
Softskin Transport command card
(Kfz 15 car & x2 trucks) |
6 points
1 point
|
Sd Kfz 221 & 222 Light Scout Troop (MG116)
1x SdKfz 221 (MG), 2x SdKfz 222 (2cm) |
2 points |
Sd Kfz 231 Heavy Scout Troop (MG117)
2x Sd Kfz 231 (2cm) |
2 points |
Panzer III (Mixed) Tank Platoon (MG107)
2x Panzer III (Uparmoured long 5cm)
1x Panzer III (7.5cm) |
24 points |
| Italian Support |
|
M14/41 Tank Platoon (MI104)
4x M14/41 |
9 points |
Total
|
64 points
|
|
 |
Historical Results
Atkinson describes Major Barlow’s leadership of C Company as “suffused with cavalry panache”. Over twenty German planes were destroyed on the airfield as evening drew near. Barlow’s raiders escaped back to the Tine River Valley, suffering only one tank destroyed and two casualties.
As a result of this raid, German high command in Tunis was in an absolute panic, with only a few ditches and two 88mm guns between Blade Force in the Tine Valley and the objective City of Tunis. Certainly, the Allies had the advantage, but didn’t press for the coup de grace.
|
|
The German commander, General Walther Nehring, contacted his superiors in Rome for additional help and consolidated forces in Bizerte to the South in order to close the gap that Major Barlow had unknowingly opened. The battle for Tunisia continued for another five bloody months as a result of the Allies failure to exploit this victory with a quick strike toward Tunis.
Scoring
The US player must destroy each Objective type to gain victory points. 2 points are available for each type of Objective: Aircraft, Ammunition, and Fuel. One point is earned by destroying at least one Aircraft, Ammunition, or Fuel marker. A second point is available if over 50% of the Objective type is destroyed. It is recommended to use 10 Aircraft, and 7 each of Ammunition and Fuel markers.
|
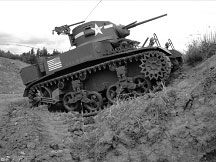 |
Objectives have a (5+) gun save from shooting (need to hit something vital), and destroyed with a successful firepower check. Ammunition and fuel may only be destroyed by shooting. Aircraft can be automatically destroyed by a fully-tracked vehicle (Stuarts only) driving over them, but the ramming tank must take a Cross test. Twisted metal and structural frameworks could work a track loose!
As an option, a bonus objective of a special type of aircraft can be used. Key aircraft such as a Feissler Storch or Ju-52 make great bonus objectives but should be placed farthest from the US entry point. Award a bonus point for the destruction of this bonus objective.
The US player loses points for each Tank Platoon destroyed, and ½ point for each support Unit destroyed.
Game Comments
This historically based scenario is a lot of fun. The US player must hit-fast and run. The Stuarts are the most powerful unit on the table until the German tanks show up, but they still have to escape in order to claim victory points. This is a raid, not a take-the-objective type game.
The Germans do not have to worry about company morale and should be very aggressive with their platoons. Infantry cannot assault full Stuart platoons, but they can lurk and swarm defenseless tanks bogged on aircraft… |
Last Updated On Thursday, January 13, 2022 by Wayne at Battlefront
|
|
|