|
|
|
|
Products mentioned in this Article
--None--
|
|
|
|
|
|
|
|
|
 |
|
|
|
Modelling 653. Schwere Panzerjäger Abteilung
By Michael McSwiney, Ph.D.
The special vehicles of 653. Schwere Panzerjäger Abteilung used in the Summer of 1944 offer several unique modeling opportunities in Flames Of War. Some of the conversions are quite simple while others require a bit more work. The key is to make sure you get all of your research data in hand ahead of time. The references cited for the army list have several drawings and photographs to help you on your way.
For a PDF copy of the Elefants Official Briefing, click here... |
Company Command Tiger (P)
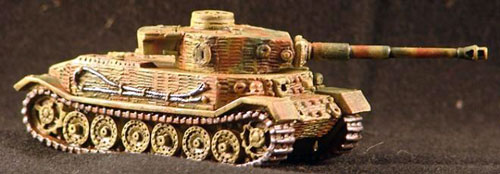
For the Tiger (P) I started with the Mid-War Monster Tiger (P). The version used by 653. Schwere Panzerjäger Abteilung has several modifications from the original which required substantial changes on the miniature. The first and most obvious change is the addition of zimmerit to the vehicle. I ended up just sanding down all of the tools, applying the zimmerit and then re-sculpting the tools upon of the freshly applied zimmerit. |
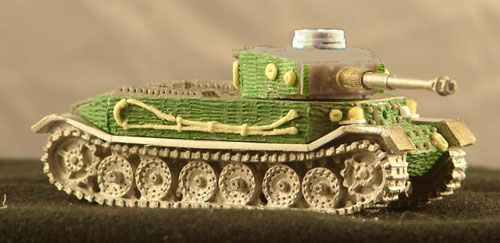 |
| Most of the zimmerit was applied with Green Stuff and textured using a jeweler's screwdriver. I couldn’t get the pattern right on some areas and experienced adhesion problems, so I used 1/72nd scale photo etched
zimmerit for the rest. |
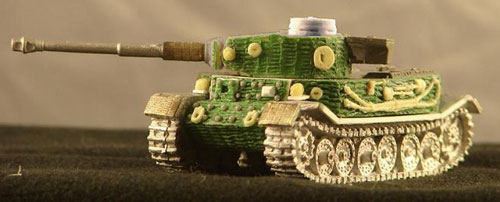 |
The hull also required some changes. The Tiger (P) of 653. Schwere Panzerjäger Abteilung was up-armored in the front like the Elefant. I therefore had to add plates to those sections. The bolts were sculpted on after the zimmerit and replicate the real thing fairly closely. Oddly enough, the bolts on the upper hull plate (with viewport and machine gun) don’t line up vertically.
|
| The turret on 653. Schwere Panzerjäger Abteilung Tiger (P) is also different, at least along the roof – using the later Henschel turret, I shaved the details, added zimmerit, and then re-sculpted the details. I used the distinctive turret basket which I
think is originally from a Panzer III or Panzer IV. Note the photo etched zimmerit on the gun barrel also found
on the original. |
 |
|
The fenders also needed work. In addition to having zimmerit on the front and rear fender flaps, the fenders themselves were straight on the Tiger (P) from 653. Schwere Panzerjäger Abteilung whereas the ones on the Mid-War Monster miniature are flared inward like the prototype. I therefore had to build up the fenders with Plasticard to get them right.
|
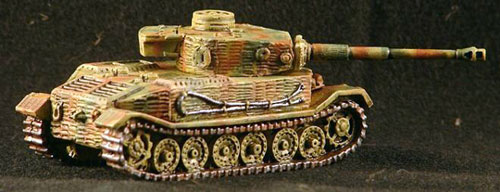
| The pictures above show both the unpainted and painted model. The
markings haven’t been added as I’m still trying to find decals with the
turret number in the correct font. There were two versions of the
marking scheme – one with the turret number (late) and one without
(early). Both versions had at least one of the distinctive
Nibelungenschwert markings on the vehicle. |
Bergepanther with Panzer IV Turret
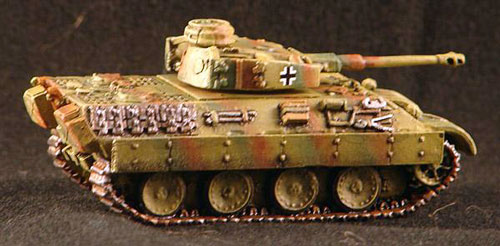
This vehicle has a fixed Panzer IV turret on a Panther chassis. Because the turret is fixed, I removed the turret basket from the Panzer IV turret and the rear armor. A 1/35th scale kit of this vehicle makes the same changes from published artwork. Photos of the vehicle imply that this is correct, but unfortunately no clean shots of the side or rear of the vehicle exist.
|
 |
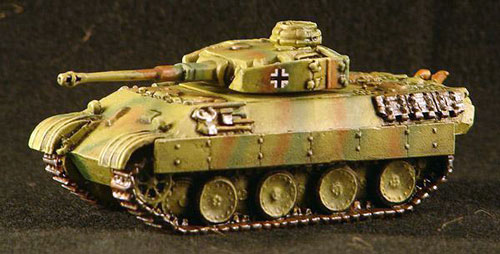 |
I started with a Panther D
miniature and removed the tube for the gun cleaning rod and tow cable. I then used a Panzer IV F turret, made a few corrections, and added the
gun from a Panzer IV G. The schurzen are from a Panzer IV Ausf H, but
are sanded to remove the zimmerit. Or simply use a Panzer IV H turret.
The two painted examples show the vehicle in a three tone scheme. The
vehicle’s markings were sparse consisting only of German crosses and
the Niebelungenschwert on the front glacis plate. |
Bergepanzer Tiger (P)
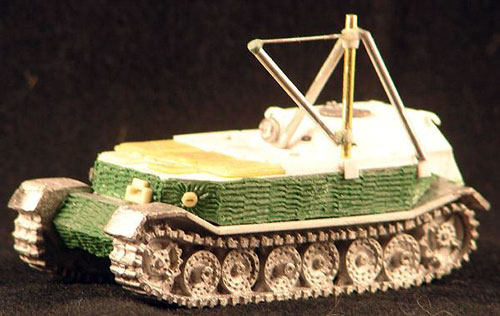
This conversion also started with the Mid-War Monster Tiger (P). I removed all surface details from the miniature and sculpted the engine decking and hatches to match the Elefant miniature. I then built up the armored superstructure found on the recovery vehicle from plans using Plasticard. The width of the Tiger (P) was a little narrow through the center based on my plans, so I had to make adjustments to the upper superstructure. The fenders needed widening just like those on the Command Tiger (P).
|
 |
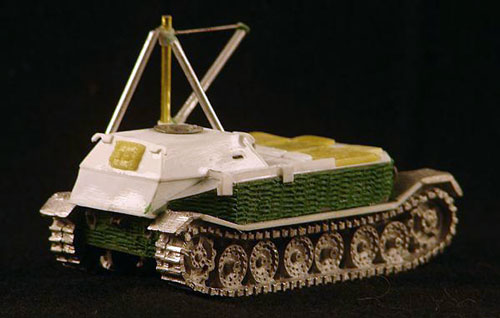 |
The rear hatch was add and the crane was built up from brass and aluminum tubing based on the
plans as well. I ended up using epoxy to hold the crane together for
additional structural strength.
The zimmerit was added in the same way as the command Tiger (P). Once the zimmerit was applied, the surface details were
re-applied. The pictures below show the completed figure ready for
priming. The vehicle will be finished in a normal three tone scheme. Markings on this vehicle were sparse as well consisting only of German
crosses. |
Bergepanther (Quad 2cm)
This vehicle is actually one of the easier conversions. As with the
Bergepanther with Panzer IV turret, start with a Panther D. As before remove the gun cleaning tube, tow cable, and add
the axe to the left hand stowage rack. I then built up a cylinder
using styrene tube, sheet, and some rare earth magnets to serve as a
pivot point for the Flakvierling. I borrowed the Flak gun from a Sd
Kfz 7/1 (Quad 2cm), but there are other sources. For this miniature,
the Flakvierling is built normally and simply dropped onto the
chassis. |
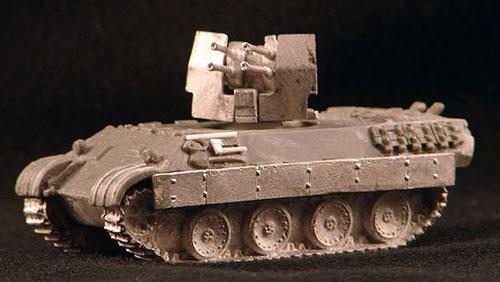 |
I replaced the pin on the base of the mount with a rare earth
magnet which serves not only as a swivel for the weapon, but holds the
assembly onto the chassis as well.
The photo above shows the unpainted/unprimed model. The final model will also be painted in a three tone scheme. I haven’t found any good photos of this particular vehicle, so markings and exact paint scheme are conjectural. I plan on using a couple of German crosses and a Niebelungenschwert.
|
 |
T-34 (Quad 2cm)
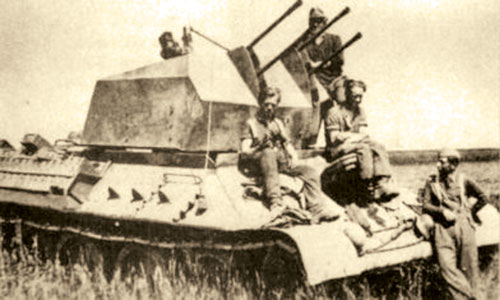
The
mounting and shield on the T-34 Quad is a little different – a custom
gun shield was fabricated for the T-34. I scratch built the shield
using sheet styrene (plastic card) and styrene strips. This is the
most complex part of the conversion as there are few good scale
drawings of the vehicle, though there are ample photographs. The base
plate of the quad mount had to be modified in order to fit into the gun
shield as well.
Left: The actual T-34 with Quad 2cm.
|
As with the Bergepanther Quad 2cm, I built up a cylinder
using styrene tube, sheet, and some rare earth magnets to serve as a
pivot point for the Flakvierling. I then added appropriate stowage and
racks based on photographs.
Editor's Note: Military Modelling has an article featuring the T-34 (Quad 2cm), click here to learn more... |
Markings
653. Schwere Panzerjäger Abteilung had a unique unit insignia that appeared on most of its vehicles. The marking was called the Nibelungenschwert, or Niebelungen Sword. It varied slighted between the companies:
|
References
Münch, Kalrheinz (translated by Bo H. Friesen) Combat History of Schwere Panzerjäger Abtilung 653, J.J. Fedorowicz Publishing, Inc. (Winnipeg, Canada), 1997.
Spielberger, Walter J, Hilary L. Doyle, and Thomas L. Jentz Heavy Jagdpanzer: Development - Production – Operations, Schiffer Publishing, 2007.
|
Last Updated On Thursday, February 25, 2010 by Blake at Battlefront
|
|
|