
|
| |
|
|
|
|
|
|
Products mentioned in this Article
--None--
|
|
|
|
|
|
|
|
|
 |
|
|
Schneider CA.1 (GFBX01)
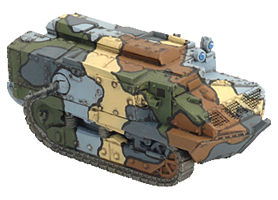 |
Schneider CA.1 (GFBX01)
Includes two Schneider CA.1 tanks
The first French heavy tank, the Schneider CA.1, weighed about 12.6 tons and was armed with a short 75mm cannon and two Hotchkiss machine-guns. The 60hp Schneider gasoline engine of the CA.1 gave the tank a top speed of 8.1kmph (5 mph); however, it normally moved at 2-3kmph due to the difficulty of driving it. While not the best-designed French tank of the war, the CA.1 was used until the final battles in 1918.
Check out the Schneider CA.1 in the online store here...
|
1918 saw great changes in the warfare of the Western Front. Russia pulled out of the war, freeing thousands more German troops to push the Allies back huge distances. The Allied counteroffensives, with the new tanks, evolving tactics, and the arrival of the Americans, forced the Germans back towards their own borders and defeat.
Learn more about Great War here... |
 |
Designed by Evan Allen
Painted by Aaron Mathie |
| The Schneider CA.1 in Great War |
| |
|
|
Armour
|
|
|
| Name |
Mobility |
Front |
Side |
Top |
Equipment and Notes |
| Weapon |
Range
|
ROF
|
Anti-tank
|
Firepower
|
|
|
Schneider CA.1
|
4"/10cm
|
1
|
1
|
1
|
Two side-mounted MG, Landship, Overloaded. |
| 75mm Blockhaus Schneider |
16"/40cm
|
2
|
5 |
3+
|
Side mounted. |
|
| Landships |
|
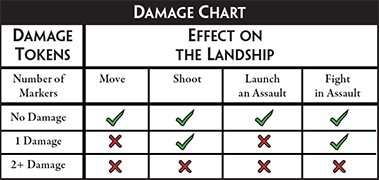
In Flames Of War, some tanks are Landships and use the special rules on pages 6-7 of Great War, in addition to the other Great War Tanks rules.
Most notably, Landships can withstand a lot of punishment and still keep fighting. When shooting or artillery would usually destroy a Landship, a second Firepower Test is made, and if it fails, the Landship is only Damaged, and a Damage marker is placed on the Landship.
Check out the full Landships rules in Great War...
|
 |
Contents & Assembly Guide for the Scheider CA.1
Contact the customer service team at [email protected] if you have issues with any components. |
a. 2x Resin Schneider CA.1 hulls.
b. 4x Schneider CA.1 tracks.
c. 2x MG sprues.
|
Assembling the Schneider CA.1
|
|
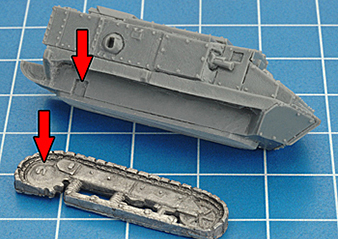
Step 1. Begin by attaching the tracks to the resin hull.
Note: The two track pieces are symmetrical, so you don't have to worry about putting them on the wrong side. Just make sure the large wheel is at the front.
|
Below: The Scheider CA.1 with tracks attached.
|
|
|
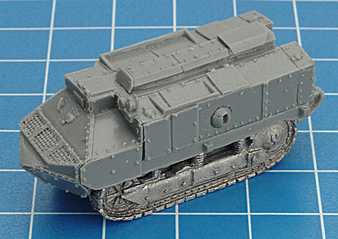
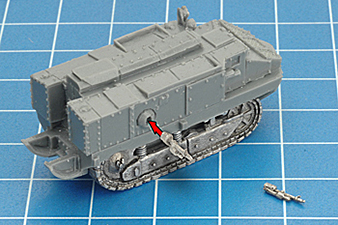
| Step 3: Remove the side-mounted MGS from the sprue using a pair of clippers, and trim any excess metal with a sharp hobby knife or a file. Glue each MG in place in the ball-mount on either side of the vehicle. |
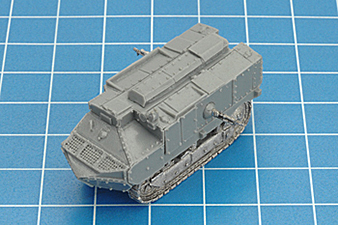
Below: The completed Schneider CA.1. |
 |
 |
Last Updated On Wednesday, October 28, 2015 by James at Battlefront
|
|
|