
|
| |
|
|
|
|
 |
|
|
Fallschirmjäger Camouflage
 |
Fallschirmjäger Camouflage
It’s been quite a while since I last had the chance to put pen to paper, figuratively speaking, and write another painting guide. In keeping with the latest releases this time it’s a few tips to help you achieve a realistic looking camouflage scheme for those hard to replicate Fallschirmjäger jump smocks and helmet covers. As always I’d like to remind you that these are suggestions and my personal preferences so if they don’t do it for you then please feel free to experiment for yourself.
The Fallschirmjäger Jump smock, or Fallschirmkittel, also irreverently known as the "Knochensack" or Bone Sack, came in two main designs and several colour/camouflage patterns.
|
| The "First Pattern" jump smock buttoned down from collar to crotch then had "step –in" legs. This made life difficult if nature called and you had a full set of combat gear on! There were two different styles of this first pattern smock with the Army, or Heer, making their own and the Luftwaffe version. |
|
The Luftwaffe version was the most common and the only obvious difference was the shorter cut leg of the Heer smock, they were both made from the same light olive green material however. This is important to know because this jump smock couldn’t be undone all the way so you shouldn’t really paint any of the Battle Worn Fallschirmjäger Platoon (GE763) with undone smocks in the plain light Army Green colour!
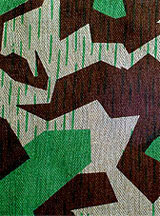
The splinter Pattern material made its appearance in 1941, before Crete, and a small number of the first pattern smocks were made from this but the vast majority were of the “Second Pattern” jump smock design. The main difference between the first and second pattern was that now the smock unbuttoned all the way down the front so it could also be worn open, like a jacket. There was now no need to take the whole smock off before you could remove, or adjust, any of the uniform/equipment under it. The buttons were also quickly replaced by zippers as well.
|
 |
 |
All paints are Vallejo Model Colour.
Step 1
The Splinter pattern camouflage came in a couple of different background colours.
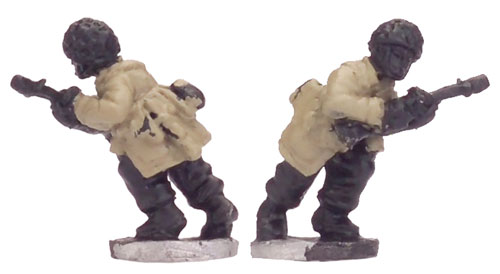
I’ve chosen to try and replicate the “tan dominant” Splinter pattern (the other version had a pale greenish background) and Fig.1 has the smock started with a basecoat of German Cam. Beige (821).
|
|
Step 2
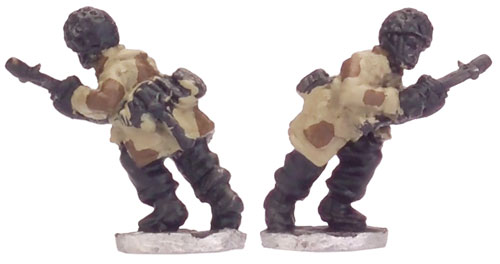
The next step is to add the Brown component of the scheme and for this I’ve used German Cam. Medium Brown (826).
The important tips here are to not cover too much area and concentrate on using geometric shapes like triangles and squares rather than round patches – this is an important technique to master if you want to give the right impression of the hard edged splinter pattern.
|
 |
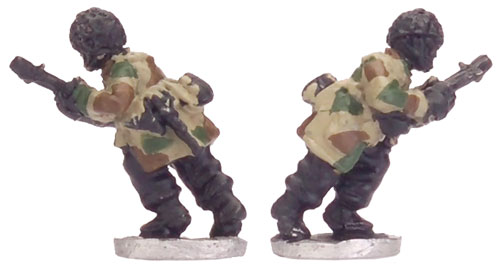 |
Step 3
Next comes the green component. I’ve used Luftwaffe Cam. Green (823) as I thought the extra brightness made it stand out a little better than the German Cam. Dark Green (979) did – a personal choice.
The same points I made for the Brown apply equally as much here, don’t cover too much area and stick to the same straight edged patterns as much as possible. |
Step 4
Finally, using the same Green, add thin strokes over all the exposed areas that still show the original German Cam. Beige (821).
The strokes should be as thin as you can make them and they should go in the same direction. Notice how I’ve done the arms by painting the thin strokes down the sleeves to conform to how the cloth is sewn together to make the smock. |
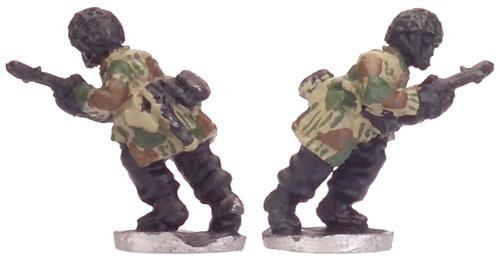 |
|
I’ve also tried to allow for seams in the material that would exist on the real jacket as well, like where the arms attach to the main body etc.
Finally, here is the finished Splinter camouflage pattern on a figure with the smock zipped up this time and the rest of his equipment and uniform painted as per the Colours of War book.
|
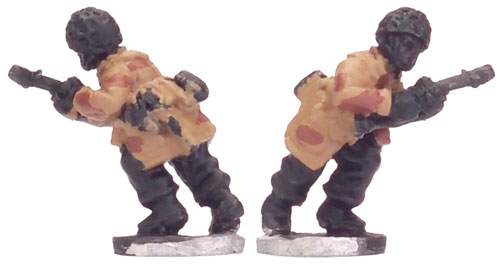 |
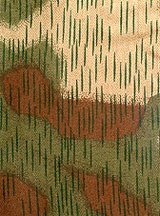
I’ve also included a couple of views of the same figure done in the “Water” pattern camouflage. This camouflage scheme started appearing in late 1943 and came in a couple of different background colours as well.
I’ve used Beige Brown (875) as the base colour and added Flat Brown (984) as the first camouflage colour.
Unlike the splinter pattern camouflage the water pattern was much softer so a more rounded outline is appropriate here.
|
|
But the “less is more” approach to how much you put on is just as important – don’t cover too much.
For the green I’ve again used Luftwaffe Cam. Green (823) as the second camouflage colour. The same rules as for applying the splinter pattern are used here again but with a softer, more rounded pattern for the patches of green and also finishing off with the same thin strokes over any areas of still exposed Beige Brown (875).
|
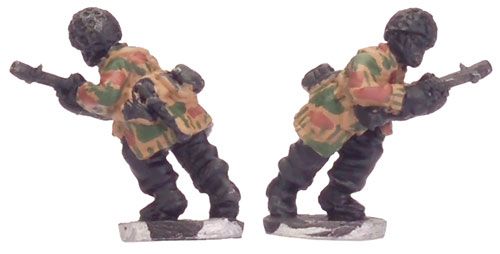 |
| You can see by now that if you cover too much of the base coat with the camouflage patches, straight edged or rounded, then you won’t have much area left over to apply the thin strokes in and you’ll lose the subtle effect of the real patterns. |
 |
The helmets had covers supplied in the same materials as the smocks were made from so feel free to mix and match the camouflage patterns, including a few of the plain green ones as well. The bands around the helmets that helped hold on the covers were either a cloth band with slots in it for adding camouflage or just a plain black rubber band. The plain green colour jump smocks were commonly worn throughout the whole war so feel free to include them as well in an FJ force fighting anywhere in the Mediterranean.
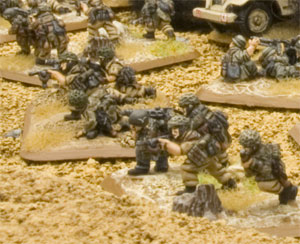
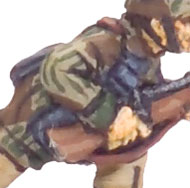
I’ve gone for a ragtag look for my own Fallschirmjäger with Splinter, Water and Plain Green all mixed up with mostly tropical tan trousers and just a few field grey and LW blue trousers for variety.
Another item of FJ equipment that will benefit from the camo treatment are the ammunition bandoliers worn down the chest. They came in an even greater variety with the choice of either camo pattern and plain green like the smocks or even Luftwaffe blue material – I like the LW blue bandoliers over the camouflage smocks just for a good contrast.
|
Well I hope I’ve given you enough help or inspiration to recreate those tricky camouflage patterns without too much trouble. Camouflage painting always takes much longer than plain uniforms, but I think the extra effort is always well worth it when you see it on the tabletop. Good luck with the painting and ….
…An Die Maschinen!
Cheers,
Evan |
 |
Reference:
“Fallschirmjäger” Thomas McGuirl & Uwe Feist
“Hitler’s Sky warriors” Christopher Ailsby
“Green Devils” Jean-Yves Nasse
“Fallschirmjäger Rgt.3 A Pictorial History. Vol.1 & 2” Klaus J Peters |
|
|
|