
|
| |
|
|
|
|
 |
|
|
Added Protection: Using the Sherman Improvised Armor
 |
Added Protection:
Using the Sherman Improvised Armor
with Blake Coster
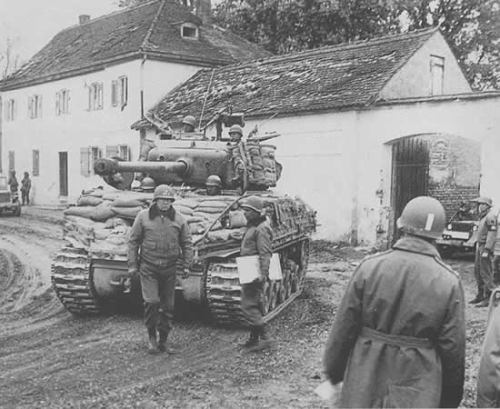
It was not uncommon for tank crews to add their own improvised armour - made of sandbags, tank tracks or whatever they could find - to the outside of their vehicle for additional protection against short-range infantry anti-tank weapons such as the German Panzerfaust or Panzerschreck.
Click here to see the Sherman Improvised Armour in the online store...
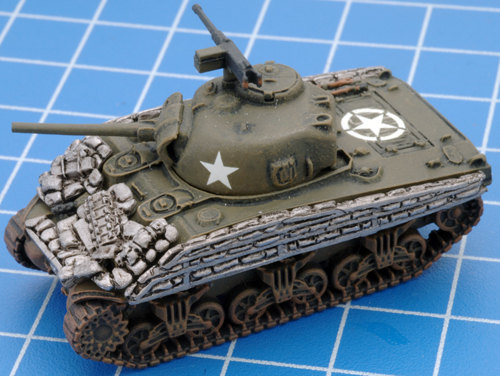
Left: An American M4A3 (76mm) Sherman with improvised armor.
|
In this article I will show you how to model the Sherman tank using the new Sherman Improvised Armor. But before we get started let’s examine why the Allies thought the Sherman required extra protection and what actually is meant by 'Wet' stowage.
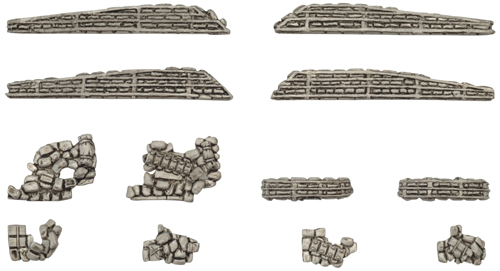
Right: The Sherman Improvised Armor. |
 |
 |
Lights First Time!
By the time the Sherman reached the Normandy battlefields, Allied tank crews discovered quickly that there were vulnerable to almost every Anti-tank weapon that the Wehrmacht could bring to bear. What’s more; the Sherman had a reputation for catching fire once hit by enemy fire. So much so that Allied tank crews nicknamed the Sherman tank ‘Ronson’ after a popular brand of cigarette lighter which had the slogan "Lights up the first time, every time!". The Germans had a more morbid nickname for the Sherman; ‘Tommy Cooker.’
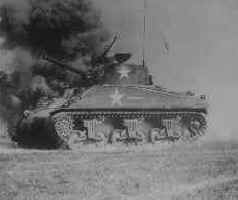
Left: An example of a Ronson / Tommy Cooker. |
|
The common belief for what caused these fires was the US Army’s decision to equip the Sherman with petrol engines rather than diesels. In fact, Ordnance testing revealed the main cause of these fires was the ignition of the Sherman’s internal ammunition stores; it was estimated that 60% - 80% of all Sherman tanks penetrated caught fire. Once an ammunition fire broke out, the crew had little option but to abandon the vehicle as quickly as possible.
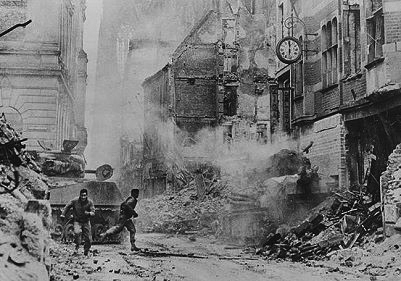
Right: A Sherman crew bail-out.
|
 |
 |
Wet or Dry?
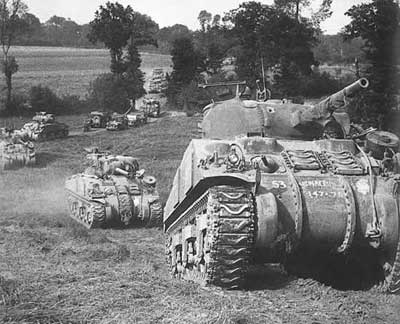
A stopgap measure was the addition of appliqué armour to the sides of the hull where the ammunition bins were located. It was hoped that this would provide additional protection to these vulnerable areas. However, this added protection offered little resistance against incoming fire from the Panther or guns such as the dreaded ‘88.’ What’s more, the location of the appliqué armour alerted German gunners to the vulnerable areas on the Sherman and offered ideal aiming points.
Left: British Sherman V (M4A4) tanks fitted with appliqué armour.
|
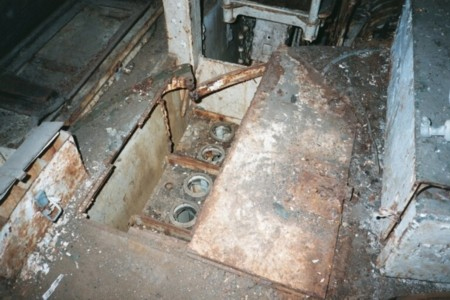
The major advancement in prevention of ammunition fires was the introduction of ‘Wet’ stowage. Ammunition stowage bins were redesigned to be surrounded liquid (a water / glycerine combination). If the bins were penetrated by shell fragments, the liquid would escape and spill over the ammunition either preventing the outbreak of a fire or at least slowing its spread and providing the crew extra time to escape.
Right: An example of 'Wet' stowage that has seen better days. |
 |
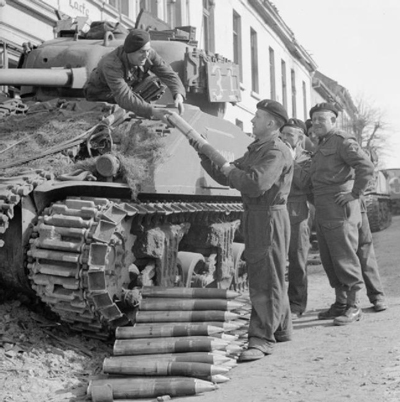 |
A study conducted by the US Army in 1945 found that only 10% -15% of Sherman tanks fitted with ‘Wet’ stowage caught fire compared to the 60% - 80% percentage of those fitted with ‘Dry’ stowage. However, no system was foolproof. Most tankers in World War Two would go into battle with extra rounds of unprotected ammunition stowed inside the tank and therefore negating the protection offered by such stowage systems.
So now that we know what 'Wet' stowage is, how can we tell if a Sherman is fitted with 'Wet' or 'Dry' ammunition stowage? We can't look inside a Flames Of War Sherman miniature but luckily there is another other way to tell.
Left: A British Sherman crew restock their ammunition supply.
|
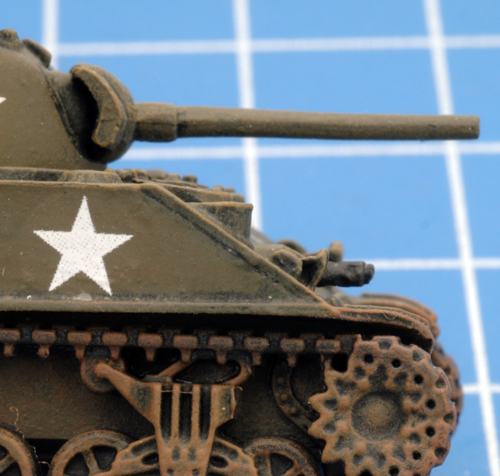
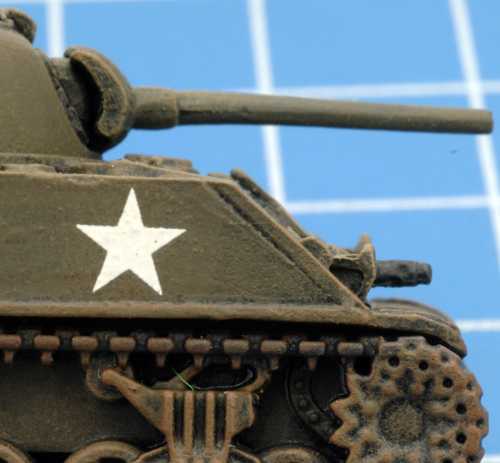
In order to fit the ‘Wet’ stowage system into the Sherman the hull had to be redesigned. The angle of the glacis plate was lowered from 57° to 47° to make room and larger hatches were fitted to aid in a faster escape.
Right: The 57° glacis plate on the M4A3; Far right: The 47° glacis plate of the M4A3 (Late). |
 |
 |
| Modelling the Improvised Armor on a 'Dry' Stowage Sherman |
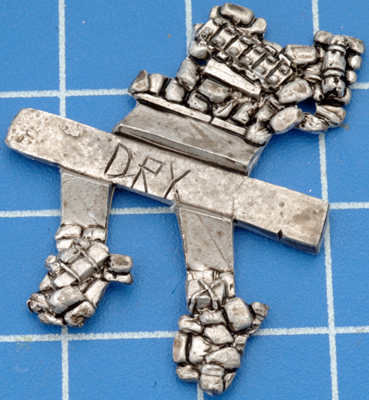
| Step 1. Identify the 'Dry' stowage improvised armor by the word 'Dry' stamped into the sprue. |
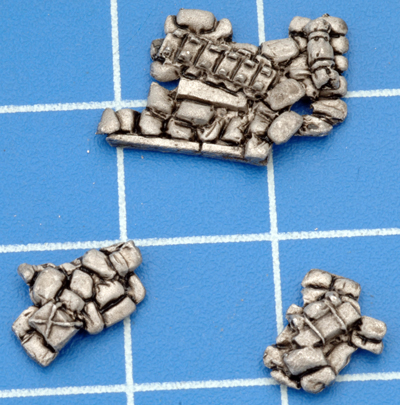
Step 2. Remove each piece of the improvised armor from the sprue. |
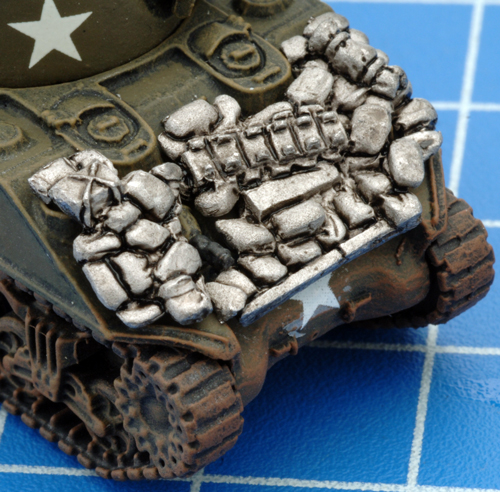
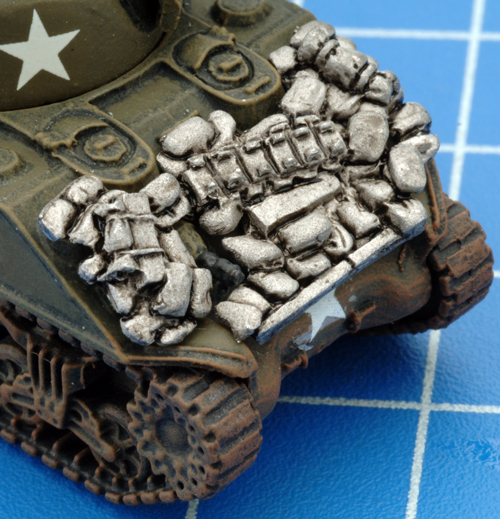
Step 3. Attach the large piece of improvised armor to the glacis plate as shown below. |
 |
 |
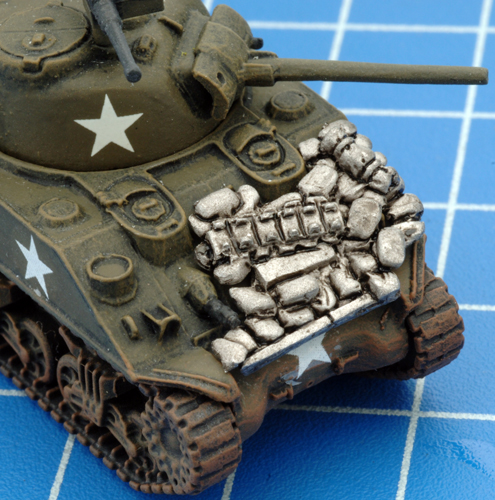 |
Step 4. Next, add one of the smaller piece of improvised armor to the opposite side of the glacis plate.
Tip: Evan has created two different pieces of this smaller piece of improvised armor in order for you to have some variety amongst your models. |
Step 5. Once the improvised armor has been added to the glacis plate, its time to add the sections to the side of the hull.
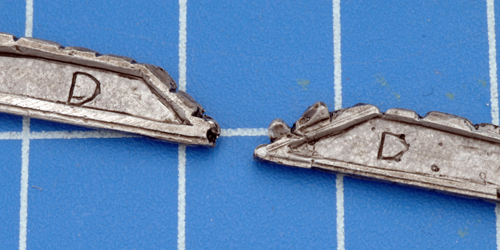
Tip: Evan has marks the these pieces with either a letter 'D' or 'W' to inidate which hull type they are intended for i.e. D for Dry stowage and W for Wet stowage. |
 |
 |
 |
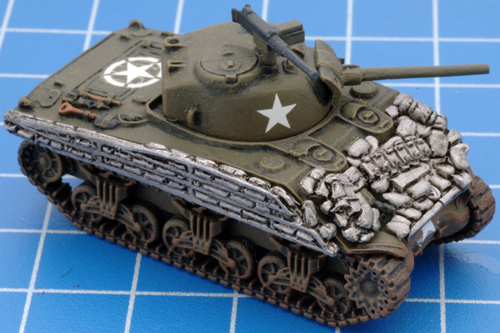
| Step 6. Attach each of the sides pieces of improvised armor to the sides of the Sherman hull. |
Step 7. With both side pieces of improvised armor in place, the crew of this M4A3 Sherman can enjoy a little more protection. |
 |
 |
| Modelling the Improvised Armor on a 'Wet' Stowage Sherman |
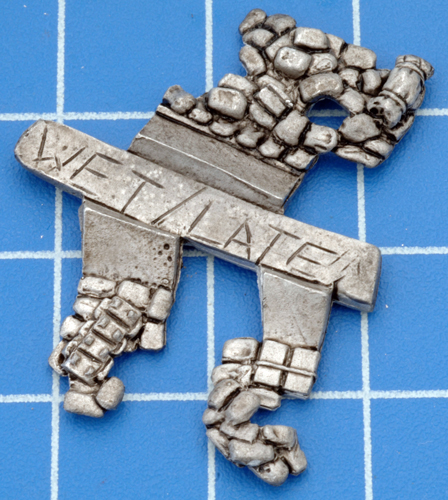
| Step 1. Identify the 'Wet' stowage improvised armor by the word 'Wet / Late' stamped into the sprue. |
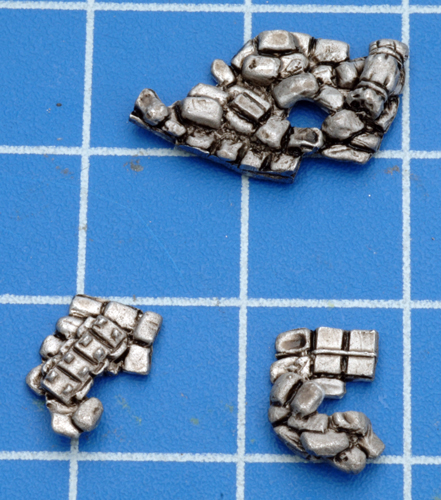
Step 2. Remove each piece of the improvised armor from the sprue. |
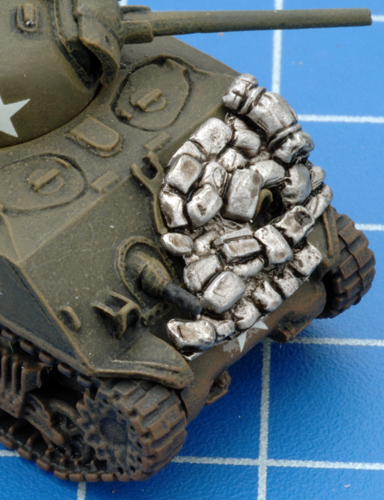
Step 3. Attach the large piece of improvised armor to the glacis plate as shown below. |
 |
 |
 |
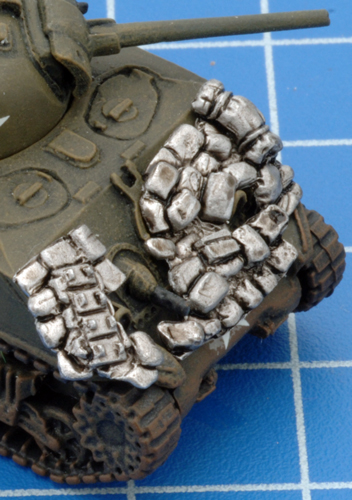
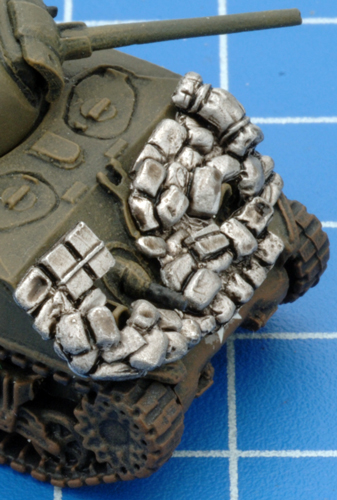
Step 4. Next, add a second smaller piece of improvised armor to the opposite side of the glacis plate.
Tip: Evan has created two different pieces of this smaller piece of improvised armor in order for you to have some variety amongst your models. |
Step 5. Once the improvised armor has been added to the glacis plate, its time to add the sections of the side of the hull.
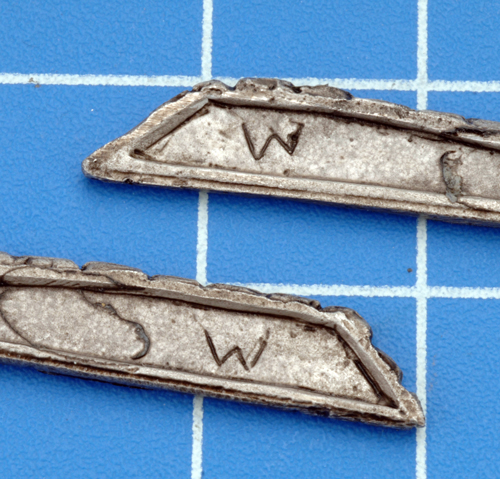
Tip: Evan has marks the these pieces with either a letter 'D' or 'W' to inidate which hull type they are intended for i.e. D for Dry stowage and W for Wet stowage. |
 |
 |
 |
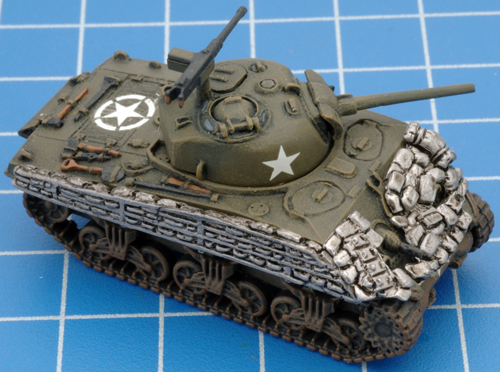
| Step 6. Attach each of the sides pieces of improvised armor to the sides of the Sherman hull. |
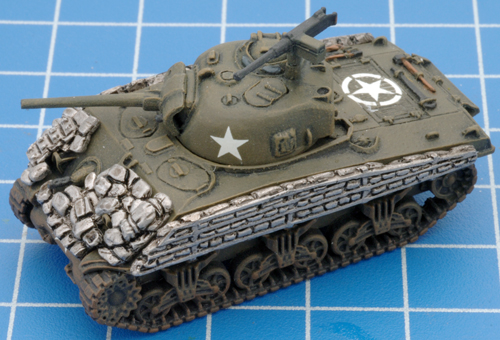
Step 7. With both side pieces of improvised armor in place, the crew of this M4A3 (Late) Sherman can enjoy a little more protection. |
 |
 |
| Modelling the Improvised Armor on a 'Wet' Stowage Sherman (76mm) |
| Step 1. Identify the 'Wet' stowage improvised armor by the word 'Wet / Late' stamped into the sprue. |
Step 2. Remove each piece of the improvised armor from the sprue. |
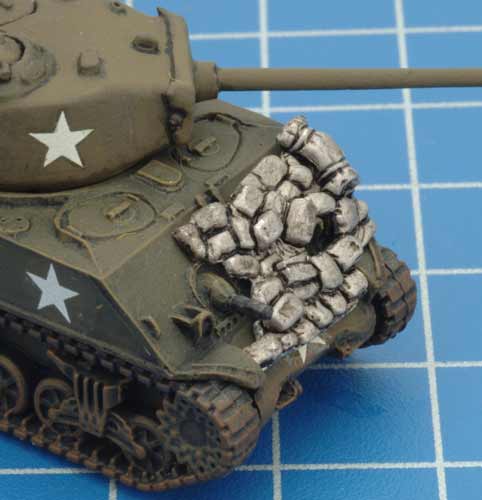
Step 3. Attach the large piece of improvised armor to the glacis plate as shown below. |
 |
 |
 |
Step 4. Next, add a second smaller piece of improvised armor to the opposite side of the glacis plate.
Tip: Evan has created two different pieces of this smaller piece of improvised armor in order for you to have some variety amongst your models. |
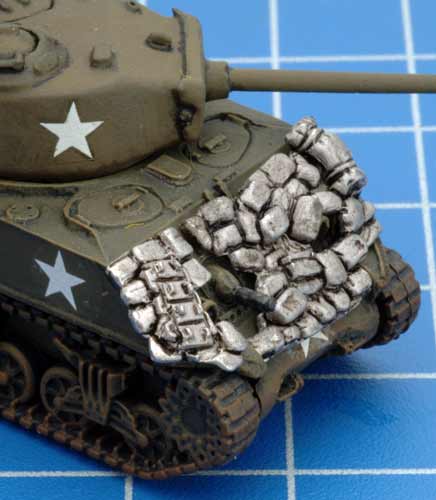
Step 5. Once the improvised armor has been added to the glacis plate, its time to add the sections of the side of the hull.
Tip: Evan has marks the these pieces with either a letter 'D' or 'W' to inidate which hull type they are intended for i.e. D for Dry stowage and W for Wet stowage. |
 |
 |
 |
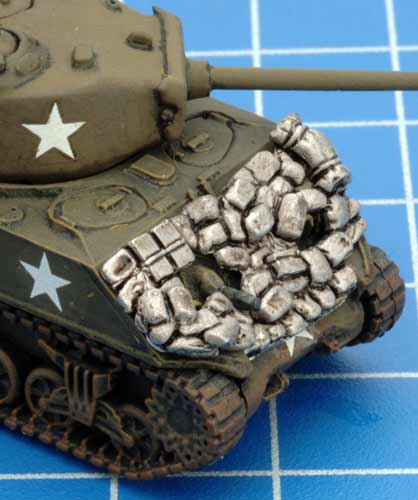
| Step 6. Attach each of the sides pieces of improvised armor to the sides of the Sherman hull. |
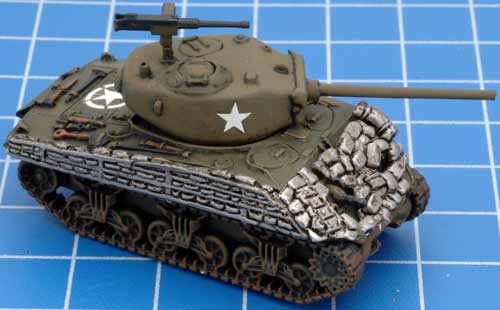
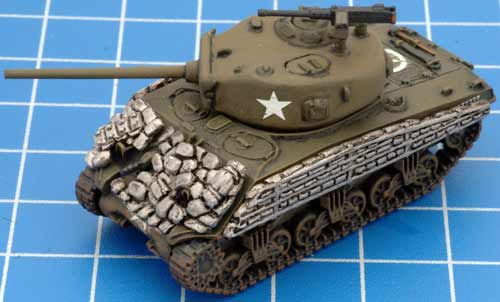
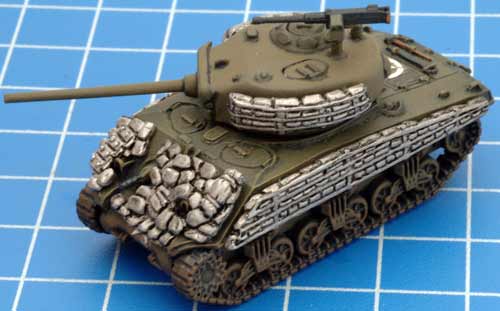
Step 7. With both side pieces of improvised armor in place, the crew of this M4A3 (76mm) Sherman can enjoy a little more protection. |
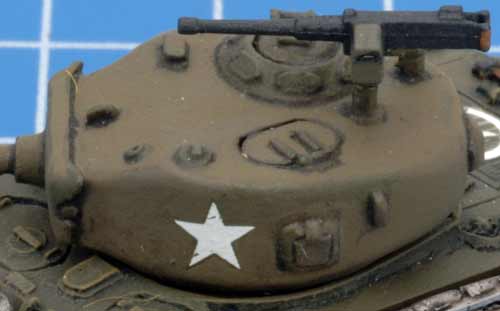
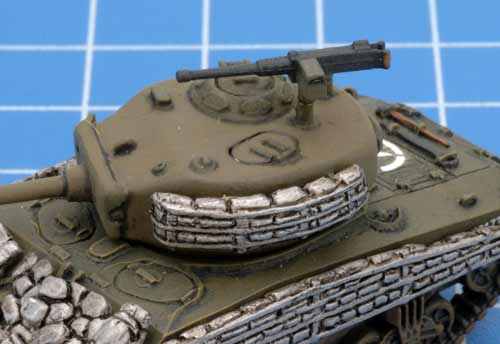
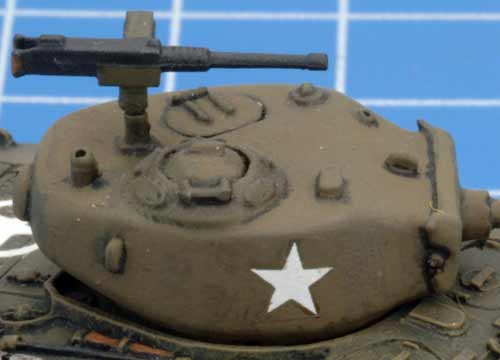
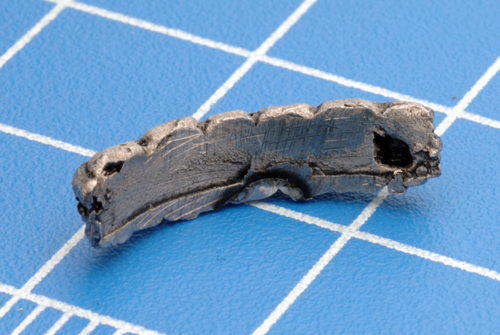
Step 7. The turret improvised armor has been design to specifically match the details on each side of the turret.
Note: Only the Shermans armed with 76mm gun had the improvised armor on the turret. |
 |
 |
 |
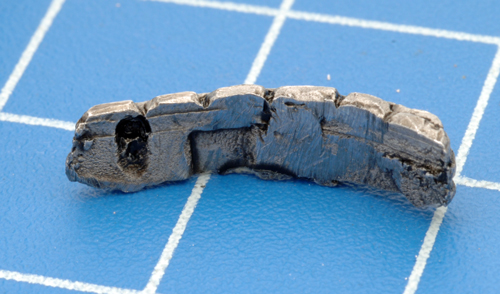
| Below: The turret improvised armor for the left-hand side of the turret. |
Step 8. Once the correct piece of improvised armor has been identified you can attach it to the turret. |
Step 9. Repeat the process for the other side of the turret. |
 |
 |
 |
| Below: The turret improvised armor for the right-hand side of the turret. |
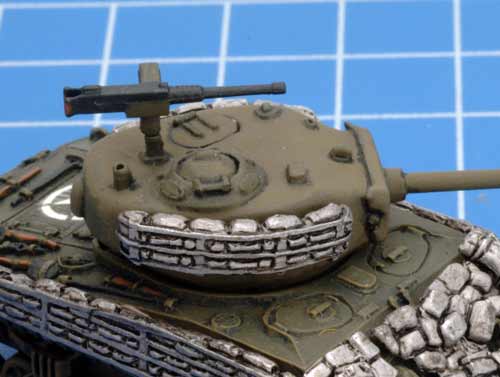
Step 10. Again, once the correct piece of improvised armor has been identified you can attach it to the turret. |
Below: The M4A3 (76mm) Sherman with a complete set of improvised armor. |
 |
 |
 |
|
|
|