|
|
 |
|
|
Painting The Brave: Polish Armoured Train
|
I’ll take you through the steps I’ve used to
tackle this train, but keep in mind it’s all just a guide and handy
tips; it’s all open to your own experimentation. Find what works for you
and most importantly, have fun!
Assembly
The train goes together in a similar way to most Flames Of War tank
kits. The first thing you’ll want to do is clean up the metal components
with a file and a sharp knife. This can be time-consuming but really
pays off in the end.
With the resin, test-fitting the pieces together is a good idea to see
if any areas need to be filed down slightly to ensure a flush fit.
|
 |
The resin can sometimes be quite dusty or powdery, which won’t help when it comes to applying the undercoat. To remove this you can wash the resin in slightly soapy warm water.
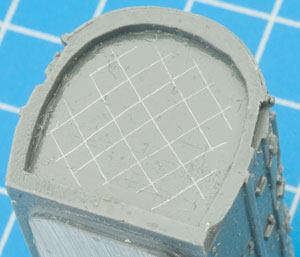
Wait until the resin is completely dry again before assembling. One way to help the superglue bond the resin together is to score the two joining edges with a sharp knife as shown.
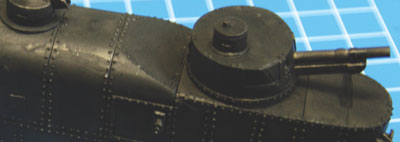
I’ve also chosen to pin the radio aerials to the assault car to make them more sturdy, and I’ve used rare earth magnets (included with the kit) to hold the turrets.
|
 |
 |
Black Undercoat
For my undercoat I chose to use Black (FWP300) watered down to about
1:1. Watering it down a bit more would work fine too, it’s just
important that the undercoat isn’t too thick as we don’t want to lose
any detail. You can be quite sloppy with the brush, just take extra care
to cover the recesses thoroughly in case the spray paint doesn’t get
them. |
|
Spray and Wash
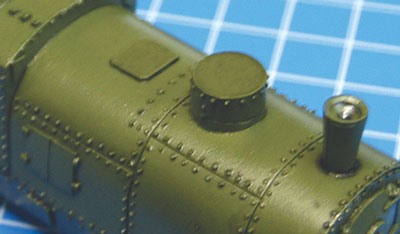
Next, I’ve used Tankovy Green (CWP240) spray. You’ll want to give a nice even coat, but you can also come back and touch up any missed areas once the first coat is dry.
Learn more about the Soviet Armour and the other War Paint Spray cans here...
Then I’ve given the whole train a black wash to define the details and break up the panels. I’ve used watered-down Black (FWP300).
|
 |
 |
1. Brown Camo Base
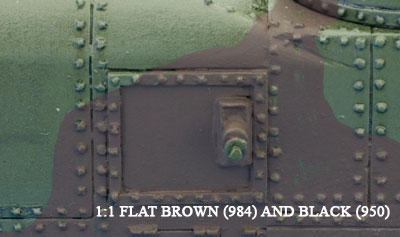
I’ve decided to start with the brown camo first. You’ll want to lay down a good base coat, getting the edge of the patches nice a crisp. Thinning your paint is a good idea as you don’t want a thick coat and only the recesses will be visible by the end.
|
2. Ochre Camo Base
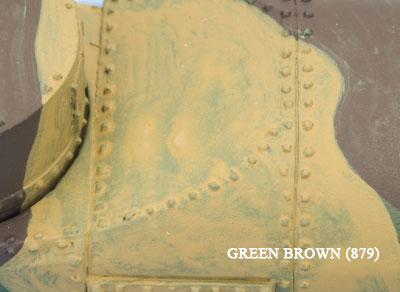
Next I used the same method with the ochre patches. Being a lighter colour, it can come out quite splotchy looking. This is fine as we’ll do the work with the next colour to fix this. Again, just keep the patch edges crisp, and recesses covered well.
|
 |
 |
3. Brown Camo
With this step you’ll want to cover the previous colour completely, but avoid the recesses. This is sometimes known as ‘block painting’. This is a good opportunity to touch up any rough edges to the camo.
|
4. Ochre Camo
Repeat the same method with the ochre patches. It may take several coats to get a nice full and even colour, but the extra time spent will be worth it. Remember: several thin coats are better than one thick coat. Also, picking out the rivets goes faster then you’d think, and really makes them pop!
|
Highlighting & Weathering
|
These techniques here are purely optional to add some extra depth and detail. If you’ve been painting military vehicles for a while, you’ve probably developed your own weathering techniques and these will work just fine here too.
|
Streaks
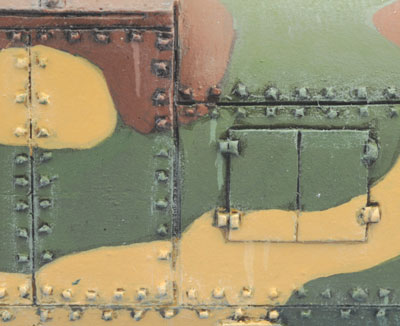
To simulate weathering from rain, I’ve painted thin streaks coming down from rivets and hinges.
To get the right colour I added a small about of Crusader Sand (FWP363) to the respective camo colours. It helps to use a small brush, and thin the paint so it flows nicely.
|
Soot
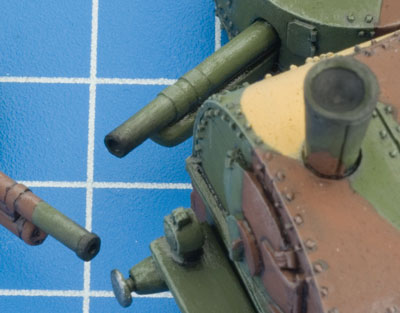
A nice touch to make your big guns draw attention and look realistic is to add soot around the barrels and smoke stack.
All you need to do is a simple drybrush of Black (FWP300) around the ends of the barrels. Greys could be used too, it’s up to you. Also don’t forget to do the smoke stack on the locomotive.
|
 |
 |
Chipping: Pencil
I wanted to show paint wear around key areas such as hinges and edges of door panels. A thin brush would work fine for this but a quicker and easier way is to use a soft, well-sharpened pencil. The colour is up to you, whether it’s a regular drawing pencil (for dark metal), or a silver colouring pencil like I’ve used (for lighter metals).
|
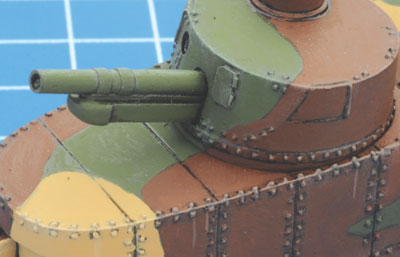
Drybrush Highlight
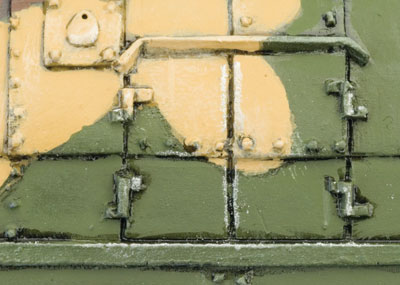
My next step was to bring out and define the edges of the model. Drybrushing is perfect for this and is very simple. I’ve used Dry Dust (FWP364) to lighten each of the three colours slightly and drybrushed each individually. You could alternatively find one colour to do all three camo colours, but this can be hard since the brown, green and ochre are so different.
Keep very little paint on the brush and just lightly dust the raised edges.
|
 |
 |
Chipping: Sponge
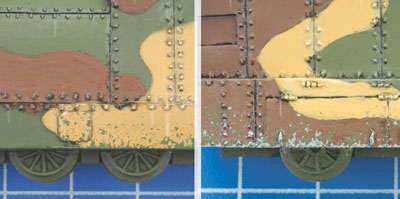
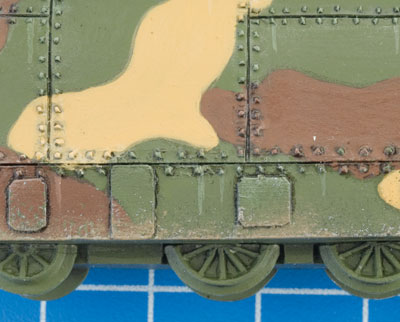
Focusing on just the bottom edges of the train, I’ve tried to replicate stone chips. I’ve just used some old blister foam and ripped off a corner as a sponge.
First you dip the sponge into some paint, and then dab it on to tissue (similar to drybrushing) until most of the paint is gone. Then you can start applying it to the model. I’ve used Army Green (FWP342) on the two camo colours, and then Dark Gunmetal (FWP480) over all three colours.
|
Dirt and Dust
The final weathering touch I’ve done is a light dusting of Wool Brown (FWP328) to replicate dried dirt and dust. Experiment with whichever colours you’d like, and maybe several layers of different colours.
I chose a light brown, as the battle at Mokra was fought in the height of summer. I simply did a very light drybrush along the bottom edges of the cars, only partially covering the chips I made previously.
|
 |
 |
Wheels
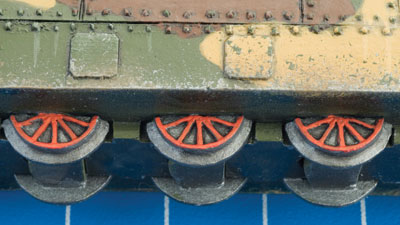
The wheels offer an opportunity for a splash of colour.
Start by covering the wheels with Dark Gunmetal (FWP480), then a generous coat of Black (FWP300). Brown washes could be applied here to give a gritty effect. Lastly, pick out the raised spokes with Artillery Red (FWP380).
|
Guns
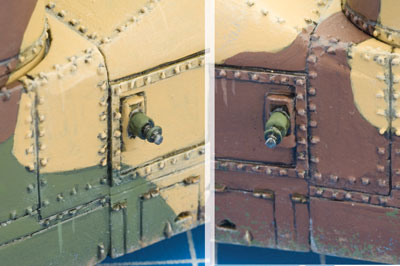
Machine guns were likely to have been supplied separately to the train, and so wouldn’t have been given camo.
I first picked out the barrels with Dark Gunmetal (FWP480), then painted the casings with Army Green (FWP342) before covering both colours with Black (FWP300).
|
 |
 |
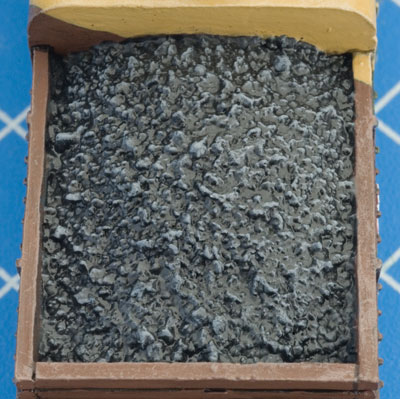
Coal
For the coal, I started with Panzer Grey (FWP303). Next I darkened it with Black (FWP300) before drybrushing with Panzer Grey (FWP303) and Bunker Grey (FWP304). Looking at photos of coal, you’ll notice it can be quite glossy, so I’ve given it a coat of Gloss Varnish (510).
|
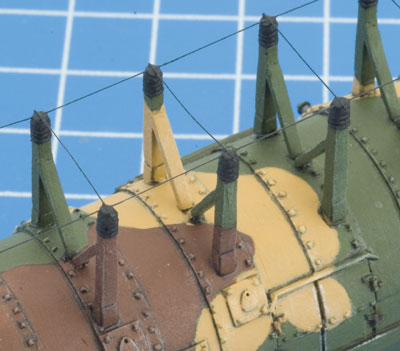
Aerials
This step could be skipped but I think one of the coolest parts of the whole train is the assault car with the massive aerial.
I painted the top of the poles (insulators) Black (FWP300) and then carefully cut some strips of nylon, normally used for model ships. There are many materials you could use, just find one you like. Cut the length longer than you need—we’ll trim them later. Using a toothpick, apply some superglue to the tops of two poles, then place some of the nylon on keeping it quite taut. Repeat this across the whole car. Leave the glue to completely dry, then trim the nylon. To finish, paint the nylon black and paint over any superglue, and gloss varnish the insulators.
|
 |
 |
Badges
The small badges can seem challenging, but remember the size of them makes them quite forgiving. They don’t have to be perfect (just look at my attempts!).
Start by blocking out the areas with Artillery Red (FWP380), then paint the edges with White (FWP301). The artillery cars get the Polish eagle on both sides, and the loco gets an eagle, train type, and train number (use the table earlier in the article to find a train you like the sound of). Again, I’ve used White (FWP301) for these.
|
Lights
The headlights can be painted however you like. I’ve chosen to use Panzer Grey (FWP303) as a base, then adding successive amounts of Bunker Grey (FWP304) I blended the bottom of the domes to be lighter. Leaving then just flat grey would look perfectly fine too. To finish them off, I’ve added a small dot of White (FWP301) to resemble shine, and a coat of gloss varnish.
|
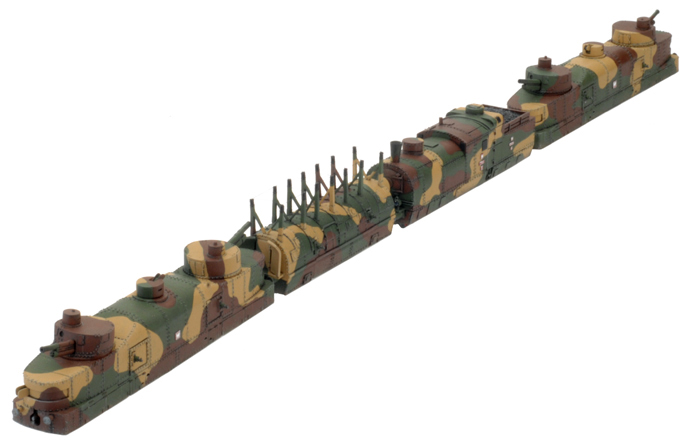
| The Fully Painted Polish Train |
 |
Want To Know More About Blitzkrieg?
Over the past few months we have added a massive range of articles
about Blitzkrieg to the website, to make it easier for people to find a
specific article we have put together this handy place.
Find out more about Blitzkrieg and Early-war here... |
|
|
|