|
|
 |
|
|
Building the Battery of the Dead Table: Part One
 |
Building the Battery of the Dead Table:
Part One
with Mark Hazell.
The Battery of the Dead table was built for a supplemental article for Stalin’s Europe which featured in Wargames Illustrated 278. The table was designed for a scenario written by Wayne and needed to be detailed enough for some nice close up photos of the action.
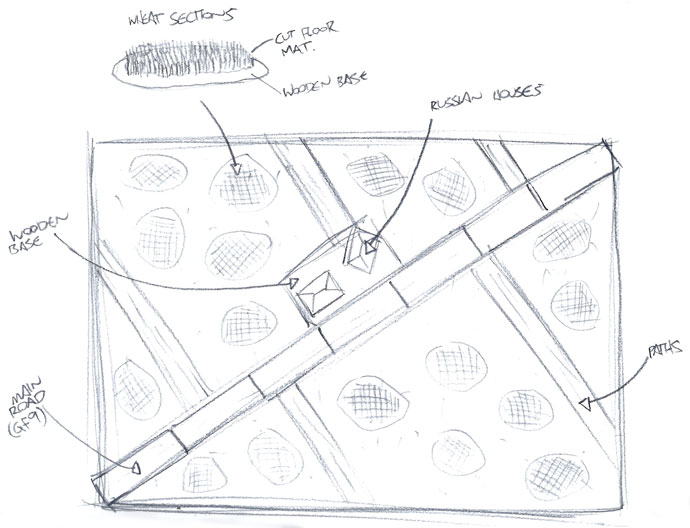
The area where the Battery of the Dead battle took place was a made up dense farm area with wheat crops spread out on either side of a road that ran through the middle. With this description in mind I set about sketching up a rough plan for the table.
Below: The sketched plan of the table.
Learn about the Battery of the Dead scenario here...
Check out Part Two of the building the Battery of the Dead table here... |
 |
Building the Tables
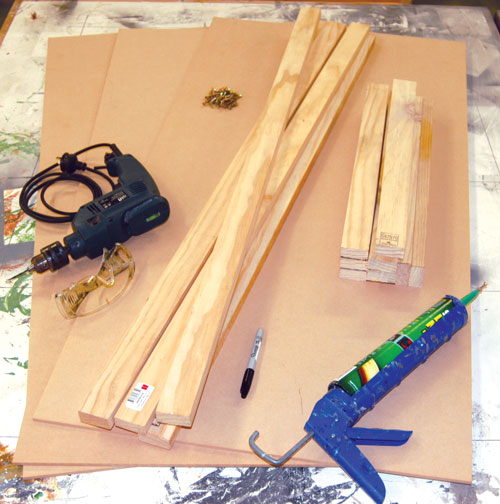
What you will need:
- Three sheets of 3mm thick MDF (Medium-density fibraboard) cut 1220mm x 600mm (4’ x 2”).
- Six lengths of wood cut 1220mm x 45mm x 20mm.
- Nine lengths of wood cut 550mm x 45mm x 20mm.
- One tube of Liquid Nails.
- One bottle of Builders grade PVA.
- 45 Screws 8x¼ counter sink type.
- Sharp Craft Knife.
- Hand Saw.
- Straw Static Flock (GFS002).
- Sand (GFS019).
- Vallejo Flat Brown (VP984)
- Vallejo US Tan Earth (VP874).
|
 |
For the two paint colours I went to my local paint shop with a bottle of each of the Vallejo colours and asked them to mix me up a couple of tins of paint. I got a litre of the Flat Brown and a half litre of the US Tan Earth. (This is enough to finish the project and have enough spare for any touch up work in the future or if you decide to make another set of matching boards.
I also made use of these power tools to speed up the process of building the table:
- A power drill.
- An electric sander.
- An angle grinder.
When using power tools always remember SAFETY FIRST. Always check that you have power cords connected properly and when you cutting or sanding that you have the cords out of the way of where you’re working. Although you never see them in any of the photos I'm always wearing a breathing mask and protective goggles when I’m cutting and sanding. There’s not much point building tables for gaming if you get sick or hurt and you can’t enjoy them!
If you don’t have access to the power tools mentioned above that’s okay, as you can get by with just a sharp hobby knife and a handsaw. |
Framing the Boards
A solid frame around the base of each board section will provide strength to the MDF and stops the table from warping. This step by step process below shows you how I made each board section. Repeat the process to build as many boards as you need. In this case, I made up three board sections to create a 6’x4’ (1800mm x 1200mm) gaming table.
Step One
The first thing you are going to want to do is pre-fit all of the frame sections to make sure they fit snugly together.
Below, left and right: Ensuring the frame is the correct fit. |
 |
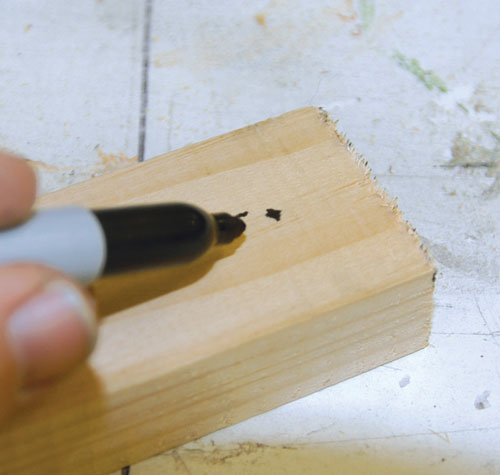
Once you have done this you can mark out the drill holes where you will be putting in the screws. I made a small mark 10mm in from end of each section and another mark dead in the middle as shown on the left.
Below: The framing layout.
|
Step Two
Now that all the sections have been marked get your power drill and drill the holes, this makes it easier for the screws to go into the board and ensures that you won’t slip and end up with the screws in the wrong place.
Right: Drilling the holes. |
|
|
|
Step Three
Once you have checked everything fits together correctly you can glue the frame into place. Start by running a bead of Liquid Nails down the length of one of the MDF boards close to the edge. Once this is done press one of the long wood sections firmly down onto the glue making sure that all the edges are flush with the end of ends of the board. Screw in your first three screws into this long section you have just glued down.
Left: Applying the Liquid Nails. |
Make sure you put the screws in the frame sections underneath the MDF. Starting at one end and working your way down to the other end. (Don’t start in the middle or do the two ends first and then the middle as this will often result in the wood bowing out of shape or bending the MDF base.) Repeat this process by next placing the two outside short sections and then the other long section. Finially, add in the middle section.
Right: Frame out the long edges of the MDF first. |
|
|
|
The one extra step you can take is to add a small amount of Liquid Nails to the areas that will be in contact with to the long edges – this provides an extra bond and will make the table quite durable.
Left: Adding some extra Liquid Nails to ensure a better bond. |
Following this procedure you will end up with three board sections all framed. Place these on top of each other and leave them on a flat surface with something heavy on each corner to make sure the boards don’t try to twist as the glue dries. Leave the boards for about 2-3 hours to ensure the Liquid Nails sets properly before going onto the next stage. (I left these boards overnight as I started the project in the afternoon).
Right: The framing on the board in now complete. |
|
Applying The Texture
Step One: Applying the Sand
Before you start gluing on the sand to the board it is worth taking a few moments to get ready so you don’t end up wasting a lot of your sand. Place sheets of newspaper or a large piece of cardboard under the board section you are working on.
Once you have done this you can start applying a slightly watered down mixture of PVA (I use a ratio of around 10 parts glue to 1 part water) to the front of the boards making sure that you get a nice even coat covering the board. Once this is done spread your sand evenly across the boards and then leave them to sit for about an hour – this will let the glue to set. Once the time has passed you can turn the boards on their side and let all the loose sand fall off. (Now the reason for the paper becomes clear). Make sure to collect all of this loose sand and put it back in your container so you can use it again. In the photo below you can see the stages of no glue, glue and then finally the third board section has the sand on it. (I did this for purposes of the photo below, you should do all three boards at the same time to save you time).
Once all three boards are done let them sit for about another two hours.
Below: The three stages of adding the sand to the table. |
|
|
Step Two: Strengthening the Sand
This next step may seem unnecessary but with use the sand will work its way free from the board. To stop this we apply a second coat of watered PVA over the sand and allow it to dry fully. The PVA glue mixture I use for this is 6 parts glue to 1 part water. Apply this carefully over the boards. Once this is fully set your boards will be very durable and should be able to take years of wargaming punishment.
Left: Adding the extra layer of PVA. |
| I can’t stress enough how important it is to let the glue dry properly before heading onto the next stage. I allowed our boards to dry for a good 10 hours just to be certain that the glue has bonded as well as it can. |
Step Three: Painting the Boards
Once the boards are dry you’re ready to paint them. Using a medium sized house brush I painted all three board sections with my matched Vallejo Flat Earth colour. When this layer is dry apply a dry brush of my US Tan Earth colour.
With three sections built, sanded and painted all that’s left to do is apply the flock, edge the boards and the table is finished.
Right: The table painted with the matched Flat Earth colour. |
|
|
|
Left: The table section now with the dry brush of the matched US Tan Earth colour. |
Step Four: Flocking the Boards
The application of the flock is a very similar process to the first application of the sand. Cover the top of the boards with a PVA glue and water mix (10 parts glue to 1 part water) and cover them all with flock.
Let the boards dry for at least two hours and then tip off all the excess flock. Don’t forget to put this back in your container as you will need it for the add-on terrain pieces that we will be making in the next article. |
| 1. Adding the glue. |
2. Sprinkling the flock. |
3. Tipping off the excess flock. |
Step Five: Edging the Boards
Edging the table is very quick way of finishing off the boards and making them look a little nicer and tidier. Invariably, when sanding and painting the boards, you will have got some paint or glue on the edges of the boards. Edging them is a simple way to hide this.
There are two easy options for edging your boards. The first is simply to paint the edges with black paint. The second option is to use black cloth tape and wrap it around the board edges; this is the option I went for with this set of boards.
Below: The completed finished boards. |
That’s it, three finished boards ready to be played on.
In the next article I will show you how I made the tracks, small farmyard and the wheat fields.
~ Mark. |
|
|
|