|
|
|
|
Products mentioned in this Article
--None--
|
|
|
|
|
|
|
|
|
 |
|
|
 |
A Newbies Guide To British in 4th Edition Flames Of War: Part Three
Painting The Army
with Jonathan Peace
The following guide shows how quick and easy it is to paint your British force and get them on the tabletop ready for battle using the new Desert Rats paint set alongside the Quartermaster paint set. The stippling effect for the camo pattern and weathering was used using two old brushes, with half their bristles cut off (one large for the camo, one small for the weathering). |
|
Step One
Model Assembled
Just like with the Iron Maiden army, I cut out, cleaned and assembled all the models for the army at the same time. Doing this assembly line construction actually speeds up the process. Here the model is all ready for the next stage.
Step Two
Basecoat Primer
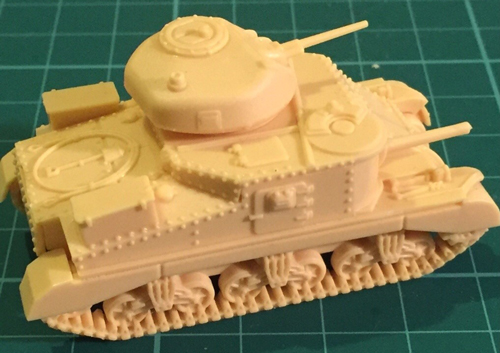
Using the Crusader Sand spray I base coated all the models at once. A few short bursts, as opposed to one thick spray, will ensure you retain all the detail.
|
 |
|
Step Three
Shading Wash
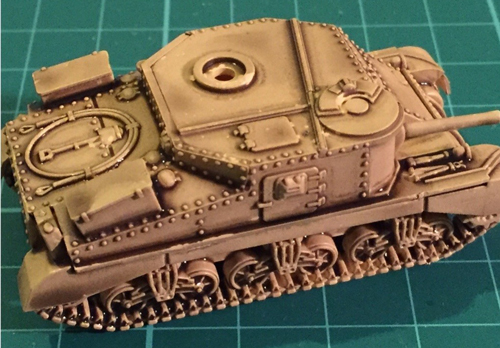
Using Rommel Shade and a large brush, I covered the entire model in this detail defining wash. Be careful to avoid pooling by keeping the model as level as possible, and if any start to show simply remove them by a careful stroke of the brush.
|
 |
Step Four
Drybrushing
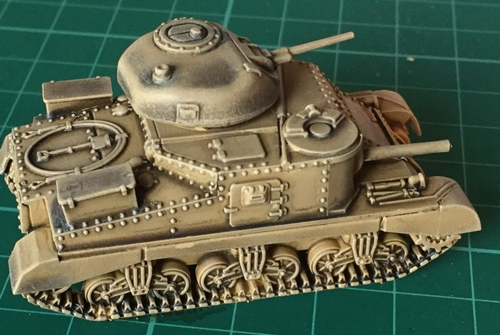
Start with Crusader sand and dry brush across the model to bring the original colour back. Once this has dried, use a dry brush of Dry Dust as a highlight to bring the edge details out.
Step Five
Camo Pattern
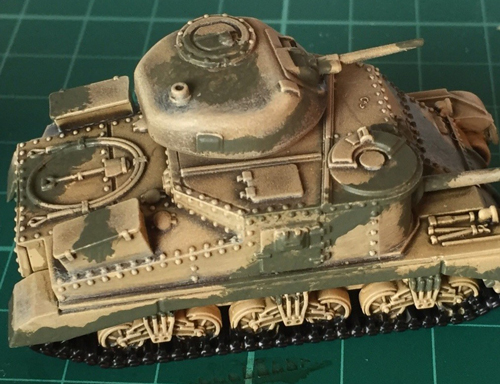
Using a large stipple brush, use Firefly Green to dab on your pattern. This will look quite scrappy at this stage but remember, the goal is to get these ready for your first game. You can always go back and more detail at a later stage (and this is definitely going to be the focus of another article in the future).
|
|
Step Six
Tracks
Paint the tracks in black, keeping it as neat as possible.
Step Seven
Final Drybrush
Once the tracks have dried go over the entire tank with another light drybrush of Dry Dust. This will mute the camo pattern slightly as well as give the tank tracks the appearance of heavy weathering.
|
 |
 |
Step Eight
Matt Varnish
Now the models are done, give them a coat of your favourite matt varnish (I use Army Painter Anti-Shine). This will protect the painting as well as bring all the colours together and provide a good base for when you apply decals.
Once done, these are now ready for their first game. Details such as the cabling, tools, transfers and rivets can be added later. The same techniques also apply to the anti-tank guns. I’ll look at painting the tank commanders and gun crew when I come to paint the infantry.
~ Jonathan.
|
Last Updated On Thursday, March 9, 2017 by Blake at Battlefront
|
|
|