|
|
|
|
Products mentioned in this Article
--None--
|
|
|
|
|
|
|
|
|
 |
|
|
 |
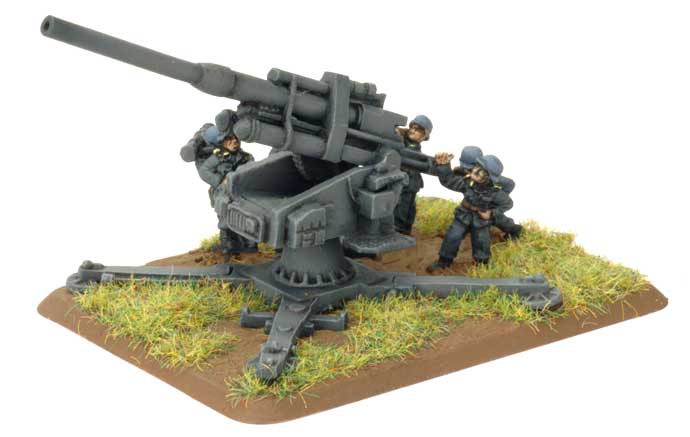
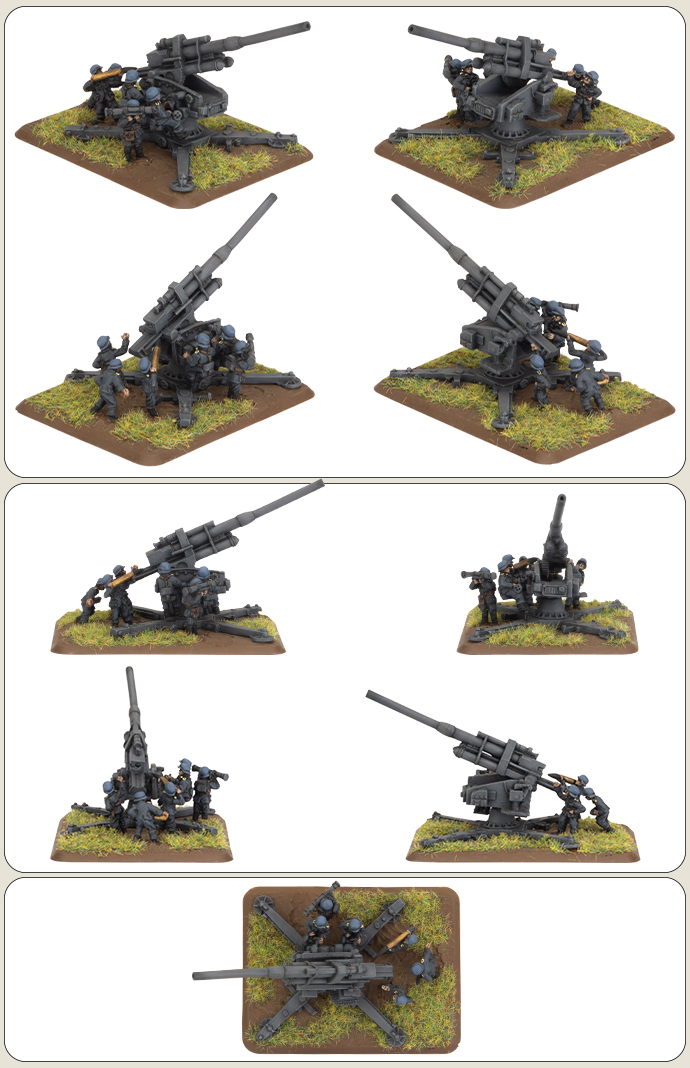
10.5cm FlaK39 (GE552) (Direct Only)
Includes one 10.5cm FlaK39 gun with additional loading crew, trailer and large base.
Not all of the anti-aircraft batteries of Flakregiment 122 were mounted on railway cars. Some heavy batteries were manned by the youths of Reichs Arbeit Dienst (RAD, Reichs Labour Service), who manned both 8.8cm FlaK37 and 10.5cm FlaK39 guns.
Check out the 10.5cm FlaK39 gun in the online store here...
|
|
The British had made substantial gains by nightfall but were stopped by determined Marine resistance at Gross Hauslingen about 6km south of their bridgehead. The next day several British infantry companies from the battalion engaged at Gross Hauslingen bypassed the Marines to attack the town of Altenwahlingen, on the opposite bank of the Aller from the now-captured town of Rethem.
|
Berlin: German
In January 1945 the German Ardennes offensive in the west failed to force the Allies to the negotiating table. The British and Americans are ready to cross into Germany. The newly-raised Panzerdivision ‘Clauswitz’ and troops from the schools and training battalions are thrown into the fight. Every fighting man is utilised in the defence of the Reich. In the east, the Germans traded ground for time, falling back into western Poland and east Prussia and establishing Festerplatz, or fortress cities. An eerie calm settled in for the first few weeks of the new year as both sides prepare. |
 |
| Two companies of Marines were available to defend Altenwahlingen, supported by four 10.5cm Flak39 anti-aircraft guns. The ensuing fight began in pitch black, but British Wasp flame-throwers soon illuminated the battle as they burnt their way through the town, gradually forcing the Marines back. |
 |
 |
|
10.5cm FlaK39 Assembly Guide
Contact the customer service team at [email protected] if you have any issues with any of the components.
Below is a list of everything that you will need to build your 10.5cm FlaK39 gun.
|
|
|
|
|
|
Crew: 2x Operators figures, 4x Loader figures, 2x Support figures
|
| Main Gun: 1x Body, 1x Main Gun, 1x Metal grate, 1x Gun Base 2x Gun Legs, One Large Plastic Base, One Set of Base Plugs |
|
|
Constructing the Main Gun's Body
What you will need,
1x Body
2x Operators
1x Metal grate
|
|
|
|
| Step 1: Glue the Metal Grate to the body, you will find a small gap on the bottom right side that fits the metal tab on the grate, glue the grate there. |
This is how the grate should look when glued. |
|
|
|
| Step 2: Glue an operator u-shaped pole into the left hole on the bottom of the body. |
Step 3: Glue the second operator's u-shaped pole into the right hole on the bottom of the body. |
| The Main Gun Body is now ready for the next step. For this step, you need to grab the Main Gun bit. |
|
|
|
Step 4: The main gun has two contact points that plug into the body, Dry fit this a few times until you figure out what angle you will want the gun to be at, and then glue the main gun into the body. |
|
Once you glue in the gun you will have a good portion of your model finished. Set the main gun aside as you move on to Constructing the Gun's Base.
|
|
|
|
|
|
Step 5: Prep. At this point, I would gather all the remaining gun components you need for the base,
1x Large base,
1x Base Plugs set,
1x The Gun Base,
2x Gun Legs
2 Gun Crew
2 Support crew.
At this point you need to plan where everything is going to be on the base, and figure out what base holes you will need and what ones you will fill.
|
Step 6: Once you have a plan you can move on to gluing in the base plugs. |
|
|
|
| Step 7: Setting aside the Large Base, we move on to building the Gun's Base. Grab your Gun Base and two Leg bits. |
Step 8: Glue in the legs to the Gun base, the Gun Base will now look like a large X. |
|
|
Step 9: At this point, I once again play around with the base and make sure that everything will fit, I will even grab the main gun and make sure it will all go together correctly. After you are sure about the gun placement glue your Gun Base to your Large Base. |
|
|
|
| Step 10: Glue in the troops, if your crew will make it harder to glue your gun in wait to glue those figures in. In my example, I figure I will have two crewmembers that I will want to glue in after I glue in the gun. |
Step 11: Glue in your gun. |
|
|
|
| Step 12: Glue in your remaining gun crew. |
I found that one of my figures did not quite fit the way I would like, so I clipped a bit of his base to get him to fit better.
|
|
We now have a complete 10.5cm FlaK39 gun. When painting your gun team, you may want to wait on steps 11 -12 till after you have painted the model, this gives you easier access to the gun and crew.
If you want to create a Limber token to show that you are adding extra crew follow the instructions below.
|
|
|
|
Gun Limber
In the Blister
4x Wheels
2x Limber Body
1X Hitch
Not Included
1 Medium Base |
|
|
|
|
| Step 1: Grab both of the limber bodies and glue in the wheels making sure that the wheels' flat edge lays flat on the underbody of the Limber. |
This is how the limbers should look when glued. |
|
|
|
| Step 2: on one of the limbers glue the hitch to the upside-down "U" shaped rectangle on its front side. This is only done to one of the two Limber halves. |
This is how this limber should look when glued. |
|
|
|
| Step 3: Since the gun does not come with a medium base you will have to salvage one from your collection, you can however use the remaining base plugs to fill in the extra unneeded base holes. |
After prepping the base I would dry-fit all the comments until you get a base you're happy with. Once glued this token is now ready to paint and show that you added extra Crew to your 10.5s! |
Last Updated On Friday, April 21, 2023
|
|
|