|
|
|
|
Products mentioned in this Article
--None--
|
|
|
|
|
|
|
|
|
 |
|
|
 |
Bags and Rolls
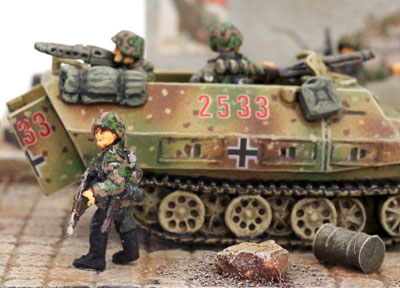
Do you never have enough stowage for your tanks! This is what I thought the last time I assembled a platoon of Shermans from the Flames Of War range…
So, as I ran short on the last stowage blister, I decided to make them myself.
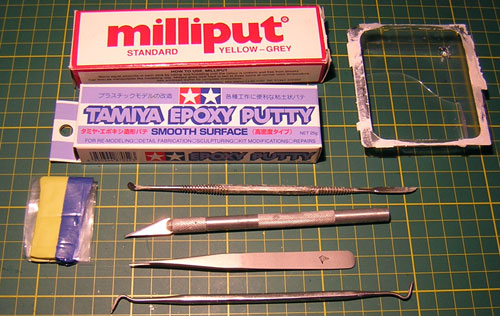
For this job, the best material you can use is two part Epoxy putty – which commercially appears in various names and compositions.
|
|
Here’s a short list of what you need to have a
go yourself at this simple, and very effective, way of personalizing
your platoons:
- Your trusty cutting blade
- An empty blister with some water
- The epoxy putty
Depending on how much you want to sculpt, you may find some other tools useful (I personally prefer a sculpting tool and a pair of sharpened pliers), but for the work I’m going to describe you will just need a sharpened blade.
|
 |
 |
Just remember one important thing: Epoxy putty is STICKY, and every time you work on it you must wet your tool and even your fingers. (That’s why I included the water filled empty blister…)
Keep a tissue near you, in case water on your sculpt becomes too much.
Canvas Rolls
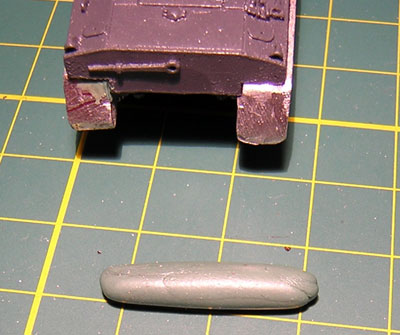
Make a small cylinder of Epoxy simply rolling it with your WET fingers on a flat surface.
The size depends on how big you will want your canvas roll. For this example I exaggerated it for clarity.
Then, again with your WET cutter, cut it to the length you wish, and position it on the tank.
|
|
Then, again with your WET cutter, cut it to the length you wish, and position it on the tank.
|
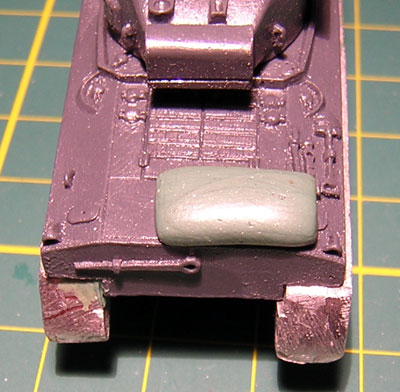
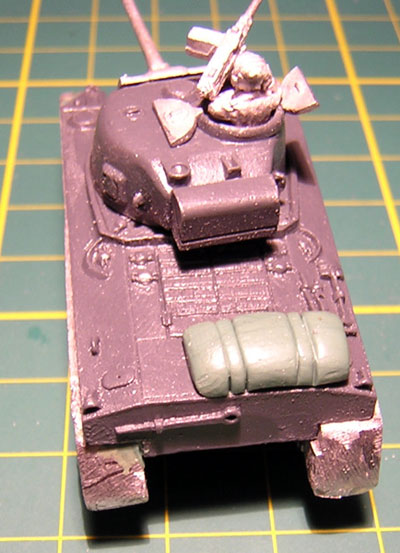
To avoid fingerprints, simply lightly wipe your WET finger across it without too much pressure.
Now, with the cutter’s sharp blade, cut lightly following the profile to simulate the straps.
|
 |
It’s almost done… just reverse the blade, and carefully press the back of it following the sides of the previously made cuts – at random. Just be careful to press it deeper nearer to the “straps” and less far from them.
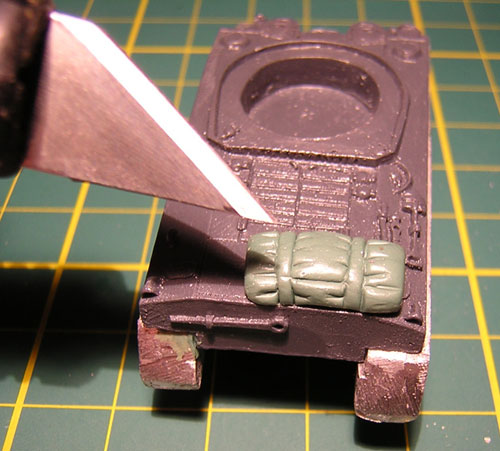
If you wish, you can cut the side of your sculpt so that it resembles more a tent or canvas roll – just make a continuous spiral cut. Retouch it as necessary.
|
|
Bags
Bags and backpacks attached to the side of tanks and halftracks are another common features of armoured vehicles in WWII.
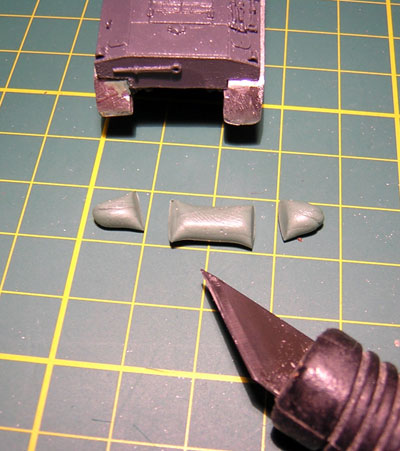
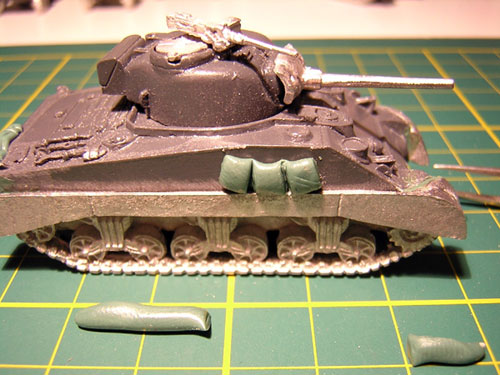
Start exactly like you did for the canvas rolls, make a cylinder of epoxy and cut it to the length you wish.
Then, make some small perpendicular cuts to simulate the shape of the bags.
|
 |
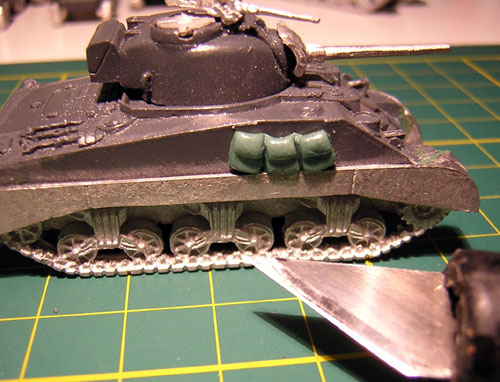 |
Attach them where you want on the tank
(typically the side of the hull or the turret) and with the blade
improve the shape by pressing the blade laterally into the cuts you
previously made.
Then, press the blade flat on half of the “bag” – to simulate the cover.
When you’re happy with the shape leave it to harden.
|
|
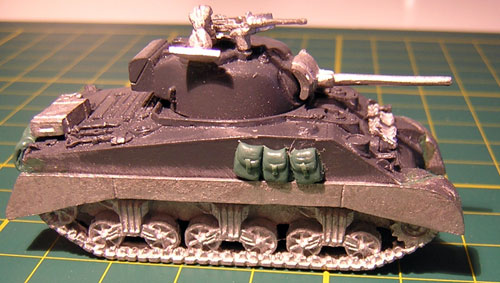
To add the straps, make a very small cylinder of
epoxy, cut it in short sections and with the point of the blade attach
it on the (now hardened) bag.
Flatten it with the side of your blade.
For my tanks, I usually do this work all at once for each single platoon.
|
 |
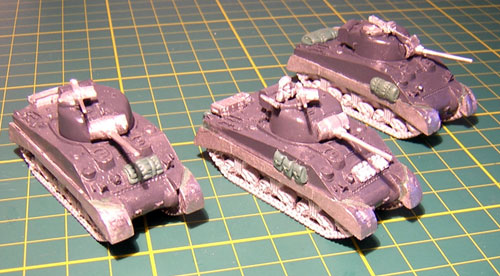 |
Using some references, you will find that with this simple technique
you will be able to personalise a lot your tanks and give them that
“field” appearance that is typical of operational vehicles.
|
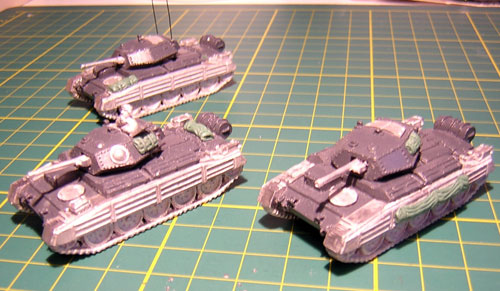
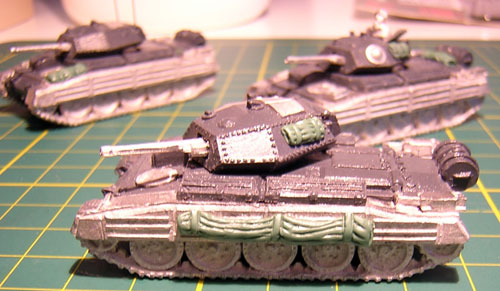
| Here are some more examples below: |
For these, note that I simply “cut” the straps with the blade, rather than waiting for it to harden and then “sculpting” the straps on them. The effect is as good anyway.
All these technique requires a little practice, but the results are very nice and I think they are well worth a little extra effort – especially for those who like to personalise their vehicles.
|
|
 |
And, most of all, it is harder to describe than to do it…
Eventually, if you need some explanations, contact me on the forum!
Gianni Cuoghi |
Last Updated On Wednesday, September 19, 2007 by Wayne at Battlefront
|
|
|