|
|
|
|
Products mentioned in this Article
--None--
|
|
|
|
|
|
|
|
|
 |
|
|
|
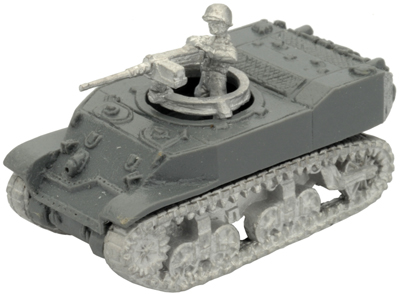
T8E1 Turretless Stuart (USO188)
with five gun rings, five .50 cal MGs & five .50cal Gunners.
During the Cassino campaign, the 760th Tank Battalion supported the Nisei 100th Battalion in the attacks on the Barracks north of Cassino. They were unique in that they adopted the British technique of removing some of the turrets from their Stuart light tanks and arming them with a .50 cal machine gun instead. This tank, designated the T8E1, improved their mobility and allowed them to support the infantry in terrain that would otherwise have stopped them.
Check out the T8E1 Turretless Stuart in the online store here...
|
| "The T8E1 Turretless Stuart is rated as a Light tank. Light tanks can move 16"/40cm on or when going Cross Country allowing them to move 32"/80cm At the Double." |
| "The T8E1 Turretless Stuart has Wide tracks. If it becomes Bogged Down while attempting to cross Rough Terrain,
roll again. On a roll of 4+ the tank immediately frees itself and
continues moving." |
| "Both machine-guns, including the .50cal MG are Hull mounted on the T8E1 Turretless Stuart. The field of fire for these weapons include everything in the front of a line across the front of the vehicle's hull." |
The T8E1 Turretless Stuart in Flames Of War
|
| |
|
|
Armour
|
|
|
Name
|
Mobility
|
Front
|
Side
|
Top
|
Equipment and Notes
|
Weapon
|
Range
|
ROF
|
Anti-tank
|
Firepower
|
|
| T8E1 Turretless Stuart |
Fully-tracked
|
4
|
2
|
1
|
Hull .50 cal MG, Hull MG, Light tank, Wide tracks.
|
Vehicle MG
|
16"/40cm
|
3
|
2
|
6
|
ROF 1 if other weapons fire.*
|
.50 cal Vehicle MG
|
16"/40cm
|
3
|
4
|
5+
|
ROF 1 if other weapons fire.* |
|
| * = One MG fires at full ROF while the other fires at ROF 1. |
| Modelling The T8E1 Turretless Stuart |
| There are two different ways to model the T8E1 Turretless Stuart for Flames Of War. Either as a dedicated T8E1 or using a Stuart Platoon that you've already got painted. Let’s begin with the dedicated T8E1. |
 |
Modelling a Dedicated T8E1
Step One
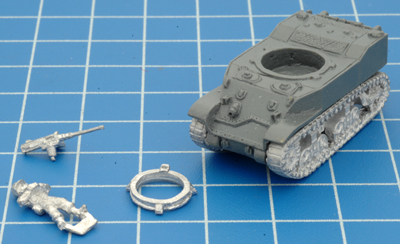
Begin by preparing the required parts; you'll need a M5A1 Stuart (sold separately) and a gun ring, .50 cal MG and a Gunner figure.
First glue the tracks on the M5A1 onto the resin hull.
Learn more on how to prepare a miniature for assembly here...
Left: The required parts.
|
 |
Step Three
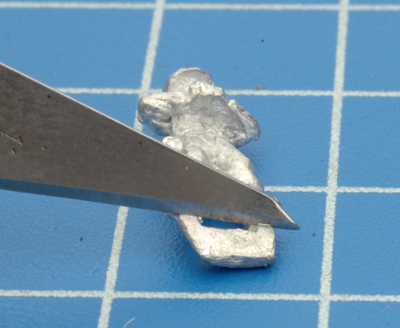
Cut the tab off the bottom of the Gunner figure with a hobby knife.
Left: Removing the tab from the Gunner figure.
|
|
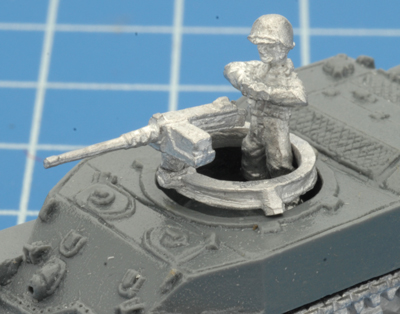
As is, the Gunner figure is too tall and doesn't align with the .50 cal MG correctly. So it’s now time to perform a little battlefield surgery.
Right: The Gunner figure in the turret recess as is.
|
 |
Step Four
Use a sharp hobby knife to cut the feet of the Gunner figure, somewhere between the middle of his boots and the bottom of his pants. If in doubt, cut the feet off at a lower spot as you can always remove any extra later.
|
Below: Cutting the feet off the Gunner figure.
|
Below: MEDIC!!!
|
Step Five
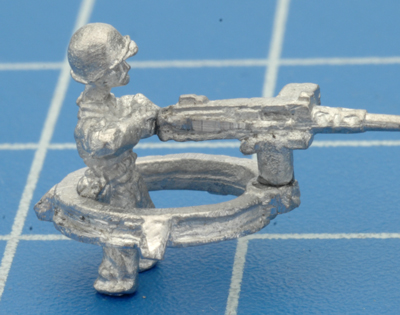
The goal is to have the Gunner's hands in line with the .50 cal MG. Dry fit the gun ring with the attached .50 cal MG with the hull of the M5A1 and the Gunner figure. If he is still too tall, use a file to remove a small amount at a time of the bottom until the correct height has been obtained.
|
| Below: The Gunner figure at the correct height. |
Below: Use a file to obtain the correct height.
|
|
Step Six
Once the correct height of the Gunner has been obtained, glue the Gunner's hands to the end of the .50 cal MG.
Left: Gluing the Gunner's hands to the .50 cal MG.
|
Step Seven
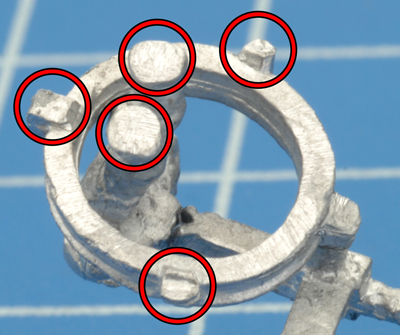
It’s now time to glue the Gunner and the gun ring onto the hull of the M5A1; add a small amount of hobby glue to the areas marked in the example shown on the right.
Right: Add a small amount of hobby glue to these spots.
|
 |
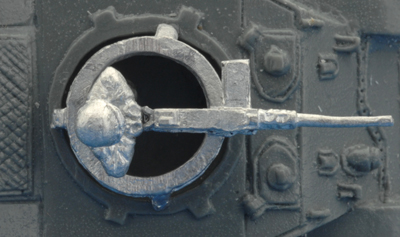 |
Place the Gunner into the turret recess by holding his head, while the hobby glue is curing; gently make any small adjustments needed to centre to the gun ring over the turret recess.
Left: The centred gun ring.
|
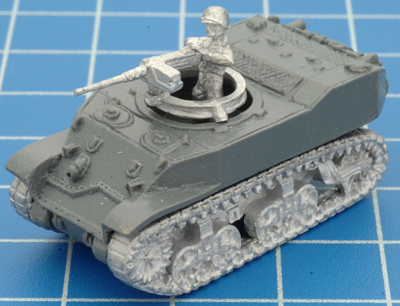
Once the hobby glue has cured, we've completed the assembly of the T8E1 Turretless Stuart. It's now ready to be painted.
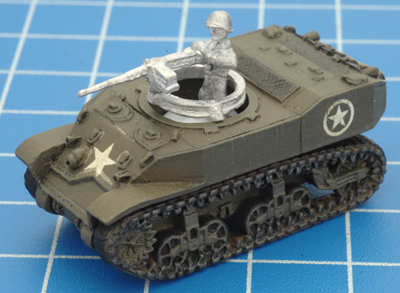
Right: The fully assembled T8E1 Turretless Stuart. |
 |
 |
Using A Painted M5A1 Stuart
If you already have a platoon of M5A1 Stuarts already painted but would like the option to field the T8E1 to save a few points, here's how.
Step One
Repeat steps one to four as shown above.
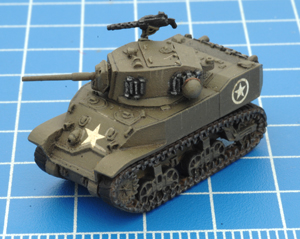
Learn more about the M5A1 Stuart Light Tank Platoon here...
Left: James' fully assembled and painted M5A1 Stuart.
|
Step Two
Once we get to the step where we need to dry fit the Gunner to obtain the correct height, we need to add a small plastic disc to the bottom of the turret recess. The plastic disc will allow for the correct alignment of the gun ring on the hull of the Stuart everytime you decide to field the T8E1 over the Stuart. But first remove the turret and measure to width of the turret recess. |
Below: Remove the turret.
|
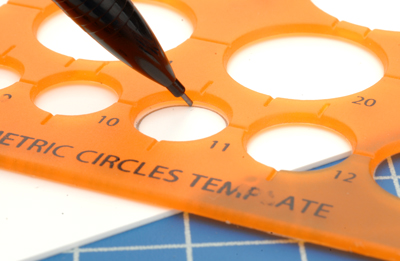
Below: Using a stencil to measure to width of the turret recess.
|
Step Three
Once the size of the turret recess has been determined; use a compass or a stencil to mark out the size on a piece of 1mm thick plastic card. Then cut it out.
Note: I find the somewhere between 10-12mm is about the right size.
Check out the Plasticard Variety Pack in the online store here...
Right: Using a stencil to mark out the shape of the disc.
|
 |
| Below: Cutting out the disc. |
Below: The cut out disc.
|
| The disc needs to fit snugly in the bottom of the turret recess but with enough wriggle room to fall out if the hull is held upside down. |
Below: A snug fit...
|
Below: ...with enough wriggle room to easily fall out. |
Step Four
With the plastic disc in the bottom of the turret recess, dry fit the gun ring and the Gunner to obtain the correct height. Again, make small adjustments using a file if need be.
|
| Below: Place the plastic disc into the bottom of turret recess. |
Below: The correct height for the Gunner figure. |
 |
Step Five
It's now time to glue the Gunner onto the plastic disc. Add a
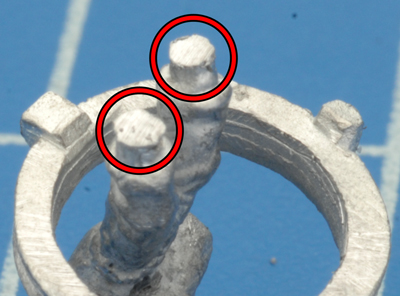
small amount of hobby glue to the areas marked in the example shown on the left.
Left: Add a small amount of hobby glue to these spots. |
|
Place the Gunner into the turret recess by holding his head,
while the hobby glue is curing; gently make any small adjustment needed to centre
to the gun ring over the turret recess.
Right: The gun ring correctly aligned.
|
 |
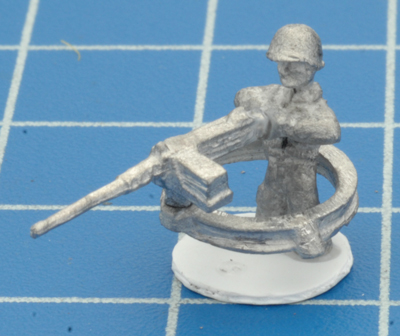 |
Once the hobby glue has cured you can remove the Gunner; what we end up with should look like the example shown in the on the left.
The Gunner and .50 cal MG mount are now ready to paint.
Left: The completed Gunner and .50 cal MG.
|
| Modelling the T8E1 this way is a far more flexible option, not to mention easy to do. So if you’re planning to create a M5A1 platoon from scratch its well worth considering this method.
|
| Below: A T8E1 Turretless Stuart... |
Below: ...or a M5A1 Stuart Light Tank. |
Last Updated On Friday, July 22, 2011 by Blake at Battlefront
|
|
|