|
|
|
|
Products mentioned in this Article
--None--
|
|
|
|
|
|
|
|
|
 |
|
|
 |
144 Pairs of Boots
by Bruce Oberst
Back on 11 March I decided to finally try my hand at playing some Soviets. Having been on the receiving end of these lists often enough, I wanted to see what it was like to be able to blissfully trade teams for terrain and still have plenty left over.
I was starting a small friendly league in
Pottsville Pennsylvania, USA, beginning 21 March. The PBI (Poor Bloody
Infantry) League, as it is called, only allows players to use basic
Rifle, Grenadier or Strelkovy companies out of Fortress Europe (with
restrictions of support options as well) so
this seemed the ideal time. The only
problem I pondered as I finished my 600-point initial company list was
the fact that the games were only 10 days away, and I didn’t even own a
single blister pack of the forces I would need.
|
|
The Army List
Battalion HQ
|
Headquarters Battalion HQ
|
30 points
|
with Anti-tank Platoon
|
45 points
|
Strelkovy Company
|
| 2 Rifle Platoons |
215 points |
with 1 platoon replaced with SMG teams
|
|
with Maksim HMG team
|
25 points
|
| Strelkovy Company |
1 Rifle Platoon
|
110 points |
| with Maksim HMG team |
25 points
|
with Komissar team*
|
15 points |
Heavy Mortar Company
|
2 Heavy Mortar Platoons
|
130 points
|
with Observer Rifle Team
|
15 points
|
Total: 610 points*
|
|
Collecting the Miniatures
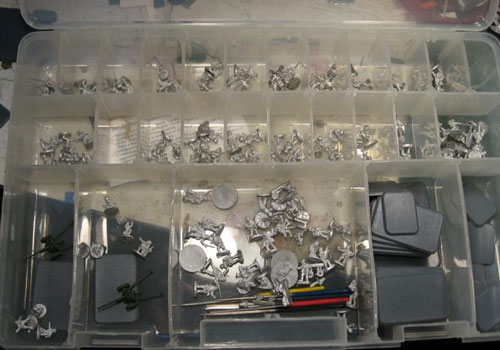
With Cold Wars that Saturday, and a trip to my LGS (Local Game Store) Friday, I felt confident that all the troops would be mustered by my return from Lancaster. That would still give me only one week to complete 144 figures and 6 guns. Anybody who knows my painting style also knows how much time I spend achieving it. One week for me is maybe half a platoon under normal standards, so the task was daunting. Still it was a challenge I looked forward to Friday as I left work and headed to my LGS to start buying.
* = I didn’t realize till rechecking my list on the 20 March that it was 10 points over so I dropped this Komissar but it was still painted.
|
I assumed that I could get at least half, if not more of what I needed, at the store and would just need to pick up a few stragglers at Cold Wars. I got a cold feeling as I discovered that they had only one blister pack of Anti-tank guns and nothing else I could use. This is why you don’t come up with grand plans on such short notice. No problem, Cold Wars would have all I needed and more, I hoped.
|
|
 |
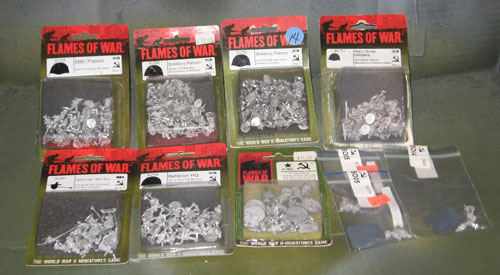
At Cold Wars apparently somebody had heard of my
project and had purchased anything and everything resembling a Strelkovy
platoon the day before. In the dealers room I found the Heavy Mortars,
Battalion HQ and SMG platoon but nothing more. Eventually on my third
or fourth frantic search I stumbled across a pack, hidden deep from
sight, of great-coated Strelkovy and snapped them up along with a
re-closed blister of Komissar BI Vasilevsky which would give me some
more command figures and the HMGs I needed. The last Strelkovy blister
came from the Flea Market, but finally I had assembled the force and
needed only to paint them. |
The Plan
Saturday night I formulated my plan of attack for the next seven days. It did not survive the first contact with the enemy, but never the less here it is:
D-7
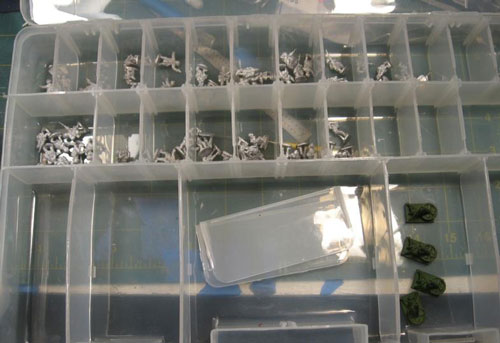
Open, sort, clean, mount for painting, prime and base color all figures and guns (Don’t laugh this is the only day that went as planned!).
D-6 and D-5
Apply shadow colors to all figures, finish all painting on guns.
|
|
Time For Action
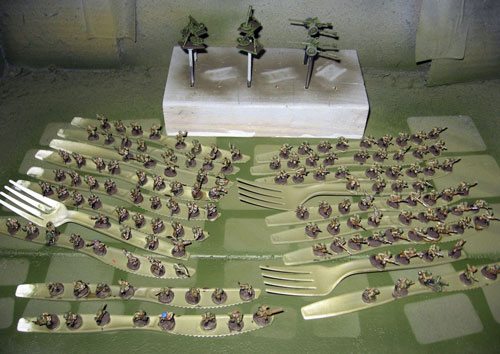
My preferred method of painting figures is to mount each figure on the head of a nail using hot-glue. This gives me unrestricted access to all areas and angles of a figure during painting. However, this method would add time that I did not have, so I decided to try gluing the figures to painting strips or tongue depressors. Neither was to be had in the house or local store (being Sunday) but they did have a box of plastic flatware for picnics so I went with that.
|
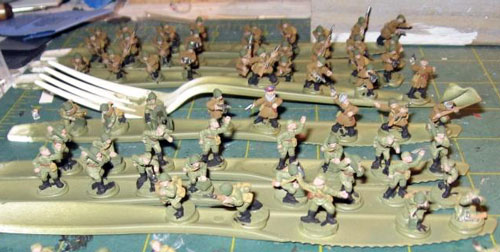
In order to maintain the efforts in organisation I had done earlier I glued each squad to its own knife. Command groups also got their own plastic utensil. I ran out of knives so Platoon leaders (Yes, I know they have no game effect, but they do exist) got forks. Soviet high command was not pleased that some of the figures were getting preferred treatment!
Here is my secret weapon, one that gave me hope
that this whole idea was possible. Recently while helping a friend sell
his soul to Flames Of War and create a British company, I remembered
that for British armor you use Firefly Green.
|
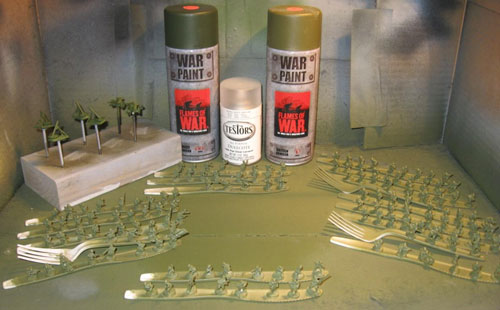 |
With the new War
Paint spray paint Firefly Green it is possible to prime and base
color my Strelkovy in one quick action. I have discovered only one
problem with the War Paint sprays. The finish they leave is very
smooth, which encourages washes, liners, and watered down paints to bead
when applied. A quick covering of Dull Coat corrects that problem
with ease.
Sunday came to a close right on schedule and I over-optimistically
believed it was going to be smooth sailing ahead. |
 |
D-6 to D-4
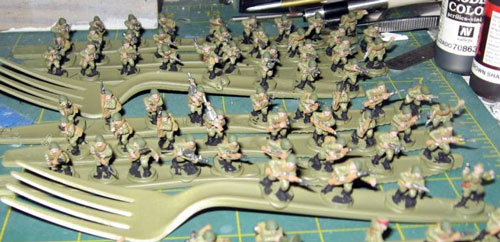
The first complication hit. I had been forced to use a blister of great-coated Strelkovy. The greatcoats are not Russian Uniform, and weren’t a colour I had. So a good hour or more was lost right off the bat repainting the greatcoats before I even started doing shadow colours and base colours beyond the uniform. My biggest miscalculation at this point had been based upon my misunderstanding of the Soviet uniforms. |
| I had assumed that all the webbing, ammo pouches, belts and the like
were the same colour (as with the US troops). Further research among the
photos in several Battlefront books (and
later the internet) showed me my error. Instead of one colour for kit,
one each for boots, flesh, gunmetal and wood, a whole list of different
colours cropped up and demanded to be used. |
 |
|
Bruce's Colour Chart
Location
|
FWP Number
|
Colour Name
|
Helmets, HMGs and Ammo cans
|
FWP341
|
Tankovy Green
|
Belts and Officer shoulder straps, pistol holsters
|
FWP382
|
Oxide Red
|
Shoulder bags and ammo pouches, weapon straps
|
FWP326 |
Comrade Khaki
|
Greatcoats
|
FWP324
|
Battlefield Brown
|
| Wood |
FWP324 |
Battlefield brown
|
| Weapon metal and bayonets |
FWP480
|
Dark Gunmetal
|
HMG ammo belts
|
FWP482
|
Shell Brass
|
144 pairs of boots
|
FWP300
|
Black
|
Extra Colours for Officers and Komissars
|
Fur Trim on hats and coats
|
FWP400
|
Infantry Blue
|
Komissar pants and hats
|
FWP400
|
Infantry Blue
|
Peaked hats
|
FWP380
|
Artillery Red
|
|
Another issue I came up against was the Komissar and officer hats. The pictures hinted at the diversity of colour on each, but I had to finally go to the Internet to get good pictures to work from.
By the end of Wednesday D-4 I was still unfinished with the shadow colours and the chance of success was growing dim. But that is defeatist talk, and comrade Komissar is looking closely in this direction! Forward for the Rodina!
D-3
Now, 2 full days behind schedule, it was push time. If the shadow colours were not finished today all was lost and the Germans would be in Moscow! The last few colours plus some touchups went surprisingly fast and I was finally finished with several hours yet to use in the day.
I took a break to score and paint the bases. It was remarkably therapeutic after all that small work.
As I scored my way through bases, 37 to be exact, the up and coming basing issues came to mind. I used the Russian Armor War Paint spray as the colour. Still with time left I finished my D-5 workload and did a liner wash on all figures. I used dark wash on the guns and mortars.
|
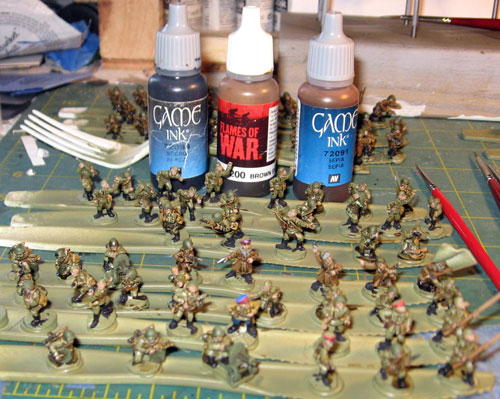
I used a mix of 1/3 water, 1/3 Brown Shade and
1/3 Sepia game ink. I
also added 1 drop of black game ink to darken the mixture down. I
added
more water at need and proceeded to shade the figures. Usually I like
to control this wash so it only is used in the deepest recesses and
around the figures equipment, but this is mass production so the
whole
figure got its yearly bath.
D-2
Friday had arrived and I had to get back on schedule.
If I did not have the figures glued to their bases by the time my
eyes
could no longer function, the Battalion Komissar would be displeased
with my lack of proper patriotism. |
|
|
Bruce's Highlighting Colour Chart
| Location |
FWPNumber |
Colour Name |
| Helmets, HMGs and Ammo cans |
FWP341 + FWP365
|
Tankovy Green + Sicily Yellow (70/30)
|
Anti-tank Gun wheels
|
FWP302
|
Panzer Grey
|
| Highlight for wheels |
FWP304
|
Bunker Grey
|
Shoulder bags and ammo pouches, weapon straps
|
FWP384
|
Tan Leather
|
Greatcoats
|
FWP324 + FWP400
|
Battlefield Brown + Infantry Blue (80/20)
|
Uniforms
|
FWP348 + FWP307 |
Firefly Green + Whitewash (80/20) |
Bayonets
|
FWP481
|
Cold Steel
|
Figure Bases (Ground Colour)
|
FWP320
|
Grease Brown
|
| Extra Colours for Officers and Komissars |
Fur Trim on hats and coats
|
FWP307
|
Whitewash |
Komissar pants and hats
|
FWP401 + FWP307
|
Luftwaffe Blue + Whitewash (80/20) then (50/50)
|
Battalion Komissar’s Coat
|
FWP327 + FWP307
|
Military Khaki then Military Khaki + Whitewash second highlight
|
|
|
The highlight stage went fast. The smaller areas to paint and the fact
that highlights do not often touch other colors so they are easier to
control, this accounted for most of the speed. I finished up and
applied the
first layer of fixative. I like Floquil Flat Finish for my first fix.
It is somewhat glossy but that makes for easy decal applications. It
is
also very strong and actually slightly melts the paint so that colors
blend slightly at the edges. Do not apply this in too heavy of a
coat
or it will actually make the paint run, even dry paint, if you do so.
See
more of Bruce's painting from the Iron Cross painting competition
here... |
I kept the figures in their team-by-team
groupings as I started basing,
only removing one platoon at a time from the plastic knives and forks
so
they would not get mixed up.
With all the bases I tried to keep in mind any
terrain basing I wanted to do as I placed the figures. |
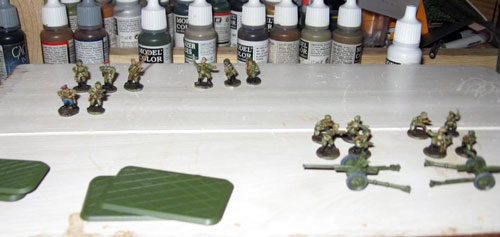 |
In the case of
the Strelkovy teams I took great pains to mix up the formations and
spacing on each base so that they would not look like a parade as
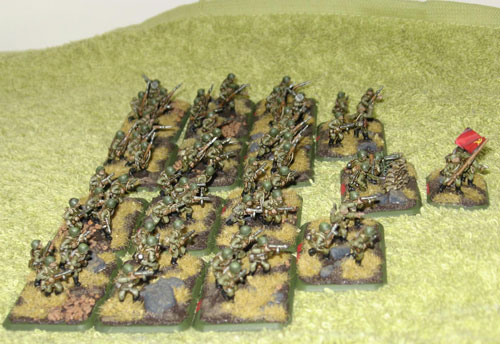
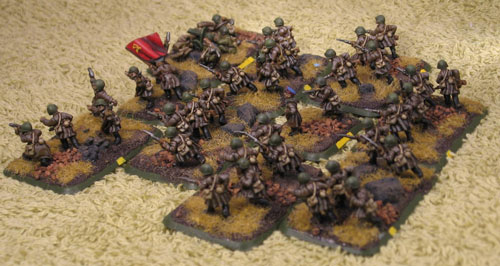
opposed to a determined attack formation. I used an asymmetric spacing of the figures often grouping several at one side of the base with 1 or 2 at the other. In many cases I cropped figure bases in order to get the figures closer together.
|
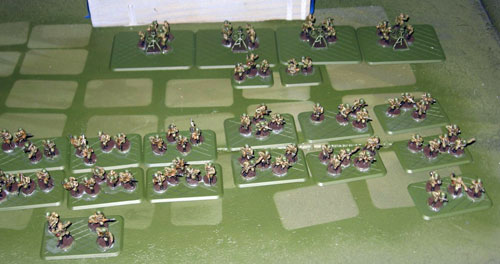 |
Here you can clearly see the different variations
used to make the infantry seem more natural instead of posed. In the
background you can see the Mortar bases grouped tightly together as I
intended to place log lined gun pits on the finished bases. I used
Elmer’s white glue for placing the figures on the bases.
Setting the company aside to dry overnight I finally called it a day,
having finally caught up to my schedule even if I wasn’t going to get
much sleep that night. |
D-1
Saturday, up early, and jumped in with both feet to get this done. First was ground basing. I used Vallejo Grey Pumice. It is great because you can mix your ground color straight into the pumice, saving yourself the step of painting the ground afterwards. This also helps in the fact that pumice is a lot easier to push between closely spaced figures than a paintbrush. Also the pumice is easy to wipe off while still wet with a moistened paintbrush in case you touch one of the finished figures. I like to use a small sculpting tool to push the pumice around. Keep the tool wet by dipping in water often to keep the pumice from sticking to it.
|
 |
As I applied the pumice I have several small containers handy of various sized railroad rocks and ballast. As I finished each base I would apply either small areas of ballast and or a few rocks to the base as well. Make sure to press these additional features into the pumice slightly or they will look like they are floating and lack believable weight. In many cases I let the position of the figures dictate where large rocks would be placed to make it seem as though the soldiers were detouring around these obstacles.
|
After applying the pumice I usually like to allow
it to dry overnight or
longer, but I had today left and only today. I allowed the bases to
dry for a few hours under hot lights until the surface was firm
before
moving forward once more.
|

|
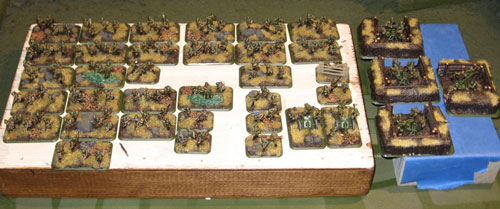 |
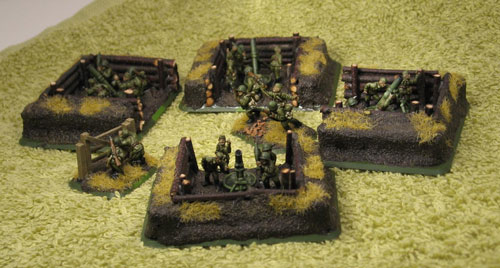
I had not done the 4 mortar teams at this point,
as I had to make the
log retaining walls. The fastest way to do this was to use dead
twigs
cut from some trees that border a field near my house. I found the
straightest I could locate and then cut them into 1½“ lengths. |
| I used Blue Painters tape held sticky side up on a wooden block to hold
the sticks in place while I glued them together. The upright logs were
applied over the glue to hide it and get attached as well. Then this
too needed time to dry. |
| The log walls were dry enough to work with before
the pumice so I went back to them first. I marked out the size of
the
gun pit on each base with magic marker. Then I applied the paint
colored
pumice around the figures out to slightly beyond the gun pit lines. I
used the three retaining walls for each mortar to push inward
slightly
on the still wet pumice so that it rose up slightly against the wall
and
left no gaps. |
 |
 |
Using Stick-tight
the walls
were held in place
while they
dried. I also used some small pieces of Foam Core board painted
black,
cut to size to fill up some of the space that would have to otherwise
be filled in with pumice. This would speed drying and save pumice.
Once the pumice on the rest of the bases was dry
enough to work with, I put the pumice around the outside of the
mortar
pits and went back to the rest of the battalion.
|
| First I painted the large rocks. I used Panzer Grey as the base color
then dry brushed a mixture of Panzer Grey and Sicily Yellow over
top.
Next I dry brushed Wool Brown irregularly around the bases to give
highlights and color variations. Feel free to let the dry brushing
get
on the boots of your soldiers and the large rocks and ballast, as
this
will look like mud and tie all the elements together. |
 |
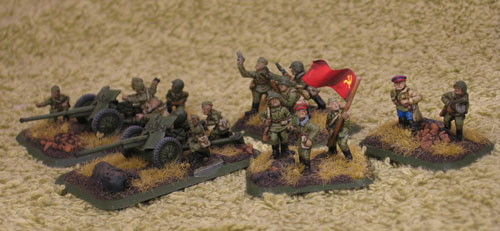
Then I glued the
AT guns on the bases with their crews. I had found a left over fence
gate I had made last year so I put that in front of the Observer team to
give them some cover. They were starting to look like finished models. Having some time to let things dry a bit more I turned my attention to the HMG teams. Wanting them to stand out as well, I decided to make some sandbag emplacements out of green-stuff. This was a fairly simplistic and straightforward addition, but really adds to the base and helps you pick them out when it comes time to fire at the Fascists.
|
 |
Later that evening it was time to apply some
grass to the bases. I had planned (boy I say that a lot in this
article) on using Silfor Fall Buffalo Grass, but after doing just two
bases I realized that was going to take too long. Looking around quite
frantically at this point I found a GF9 tundra basing kit I had won as
part of my prize support from the Iron Cross painting contest. One of
the containers had a wonderful mix of yellow brown static grass mixed
with similar colored flock. |
| Saved by chance and a cluttered workshop, I set out to apply this to the bases. I prefer to apply static grass and flock using slightly watered down white glue applied with an old paintbrush. By old I mean one with bristles that are splayed so you don’t have to worry about ruining it when you mash the glue into crevices and around figure boots. I try and keep the coverage to about 50% or a little more, and irregular in appearance. After the glue is on, I place the base in an opened blister pack and just dump the static grass all over it. Then gently shake the blister back and forth on the table (don’t actually pick it up) until the static grass settles into all the areas you have supplied with glue. Next pick up the base and turning it upside down knock off the excess static grass, with gentle taps on the bottom of the base, into whatever container you are using to collect the extra. I like another blister, as I can just go back and forth using each one in turn as the base holder and grass dumper. Once the excess is knocked off, and while keeping the base upside down, gently blow across the base strong enough to remove any last clinging bits of grass. This will also cause the static grass to stand up. |
 |
Once the rest of the battalion was done I felt the mortars were dry enough to go back to and rock paint, dry brush and static grass. As the mortar base pumice was still very soft I placed them on the blue painters tape cover block while I did this so that I could hold the block and not touch the pumice which would distort under any but the lightest touch. I still had to hold the base gingerly for the static grass application however. After this I had to give them some drying time once more.
Saturday evening and the end was in sight! I just had some details to work through. Most notably were the flags and the sandbags in the HMG teams. Only the greatcoat Strelkovy had come with a pre-formed flag; two of them needed to be made from scratch. The two flags I made out of the foil tops from dessert buckets from Kentucky Fried Chicken. It is a heavy foil and holds its shape fairly well. Any type of heavy foil would work just make sure it does not bent too easily otherwise it will deform the first time you accidentally touch it. To glue them onto the poles I used GF9 super glue and their accelerant. When a fairly large amount of glue is applied to an object and the accelerant applied right afterwards, the glue will dry in a solid mass. By applying a bead of glue along both edges where the flag meets the staff and using accelerant a heavy duty weld is produced. This weld isn’t exactly pretty but it does keep the flag from working around at the join thus keeping the chance it breaks off to a minimum.
|
To paint the flags I first applied Grease Brown. Then using a very watered down Artillery Red I went over the
flag’s raised areas again and again, each time covering a slightly
smaller area than before. This gives the flag both vivid color and
gradual deep shadows. The Hammer and Sickle were hand painted using
Cavalry Yellow (FWP361).
The sand bags I first painted Comrade Khaki and then washed them once
with Devlan Mud from Citadel. After drying I did two highlights,
first
with Comrade Khaki then Tan Leather.
|
 |
The last thing I did Saturday night was paint team ID color tags on the back bevel of all the bases. These IDs tell me Company, Platoon and even Squad organization for each team. These are visible in some of the photos later on from the games on D-Day.
The pumice and glue were still only half dry on most of the bases so I decided to let them dry over night before applying a final coat of Dull Coat. But the company was done and ready to give their patriotic all for the Mother Land and Comrade Stalin!
|
 |
D-Day
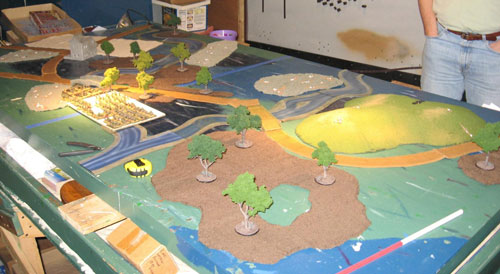
We had 6 players at the opening day of the PBI
League. At this starting
stage the battles are 600 points so we used 4’ x 4’ table areas and a
mission I designed just for the first two levels of the league. If
anybody wants copies of the PBI League format or the ‘Go for Broke’
mission please PM me. We met at Donald’s house and divided the table
into two boards denoted by some tape. Most of the players are new to
the hobby so this is mostly a learning league for right now. |
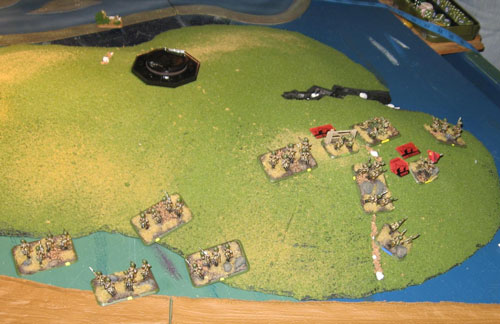
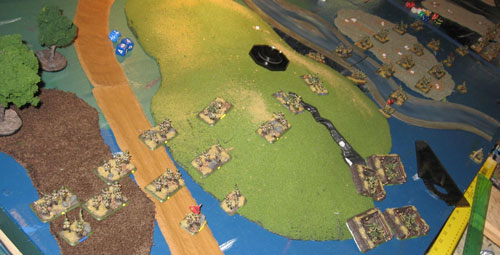
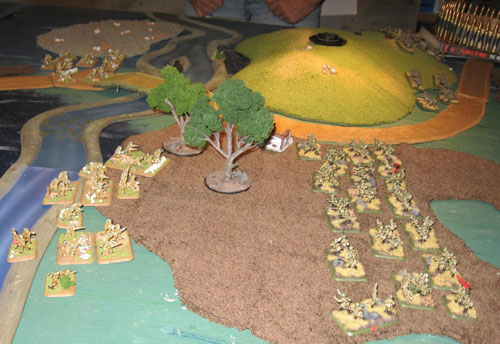
First battle pitted my Strelkovy against a
Normandy British Rifle company.
My 2nd company in the great coats got hit by British mortars and
pinned
for most of the game on the right flank. The observer however
nestled
safely within the disposable ranks of his fellows made bloody work
for
the 120mm mortars. |
 |
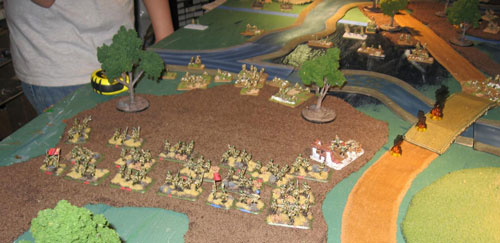 |
The 1st company on the left flank had a very cozy wood to march through
toward the objective. The three burning pillars mark the resting
places
of a Carrier Patrol that lost a duel with a gun from the battalion AT
company. Here you can clearly see the different team markings on the
back of the bases. Blue is Battalion, red is 1st Company one mark
first
platoon and position on the base denotes squad. Really not necessary
but I’m like that. |
British platoon moves in to contest the
objective. They tried to assault, but the SMGs, now to the front
threw,
them back with ease.
After the counter assault on my next turn the battle was all but
over.
The next British platoon made a brave and unavoidable go at
assaulting
the Soviets from their woody home (couldn’t quite get within 4” with
the
move), but once again the SMG’s raw firepower was too much for Tommy. |
|
|
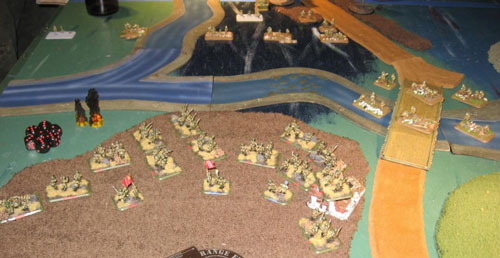
The second battle went similar to the first. I
was up against
Americans, no Axis players as I was not being German as is my norm,
and
the battle was once more decided by blunt force trauma. This is my
deployment after the first move of the second game. Same board as
the
last battle, it is just going a different direction.
~ Bruce. |
Last Updated On Tuesday, July 7, 2015
|
|
|