|
|
Becoming a Storyteller: Weathering a BMD-2
 |
Becoming a Storyteller: Weathering a BMD-2
by Rubén Torregrosa
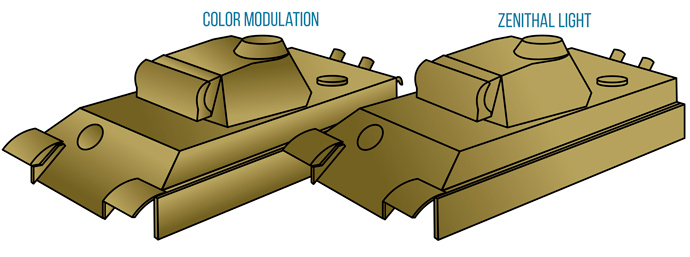
In the previous tutorial, we explored an interesting highlighting technique called color modulation, which, despite its unreal nature, yielded remarkably appealing results when applied to a 1/100 scale vehicle. In this continuation of our tutorial series, we delve deeper into the art of storytelling through the application of weathering effects (for instance, applying mud effects will convey the impression that our tank has endured combat on muddy terrain, while incorporating heavy battle damage will suggest a seasoned veteran crew).
|
|
We will learn how to elevate our basic paint job by incorporating various weathering techniques and utilizing a combination of modeling products, including acrylics, enamels (or oils), and pigments. While some of these techniques have been previously discussed in our articles (realistic mud effects and painting with oils), we will now introduce a couple of new options to further enhance our storytelling capabilities.
|
|
It is worth noting that while the color modulation technique may initially appear too striking, particularly due to the lightness of the final highlight, it is essential to consider that after applying weathering effects, the overall tone of the miniature will darken. Therefore, starting with brighter colors than the desired final shades is crucial. Although these initial colors may seem bold initially, they will eventually blend seamlessly into the overall finish of the miniature.
|
|
|
|
As we have covered in previous tutorials, it is essential to distinguish between acrylics and enamels/oils. Acrylic paints dry rapidly in seconds, are non-toxic, and can be easily manipulated with water. Conversely, enamels and oils have a much longer drying time (hours), are toxic, and require the use of specific organic solvents such as White Spirit, turpentine or Enamel Odourless Thinner A.MIG-2019. Understanding these differences is crucial for selecting the appropriate materials and handling them safely during the painting process. Pigments are not paints per se; rather, they are finely ground colored powders.
|
|
Step 1: Dark Wash
|
|
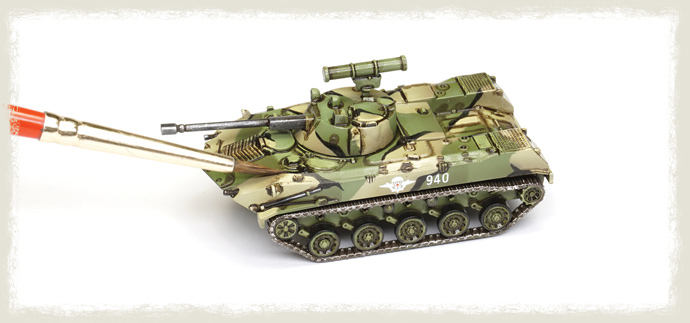
Taking advantage of the glossy varnish we applied in the last step of the previous tutorial, the first weathering effect we will apply is a dark wash. The wash easily flows through the polished varnished surface, accumulating in the recesses. While its primary purpose is to accentuate all the recesses and details, it also contributes to creating dirt and streaking effects passively (and this is why we can consider the “wash” as a weathering effect too). For this, we use an enamel wash, such as Dark Brown Wash for Green Vehicles A.MIG-1005, applying it carefully only onto the recesses using a thin brush. Do not worry if you apply too much.
|
|
|
|
Step 2: Removing Excess Wash
|
|
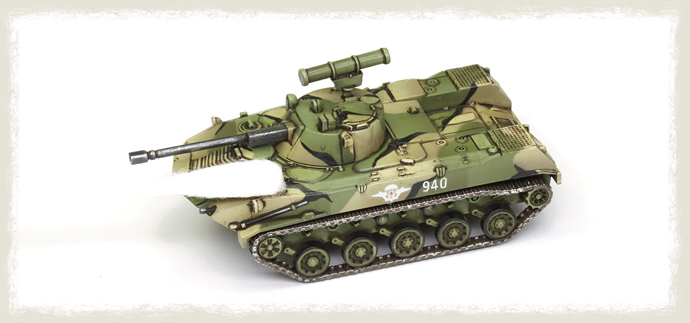
After allowing the wash to dry for 30-60 minutes, we can proceed to remove the excess using a cotton swab or brush moistened with Enamel Odourless Thinner A.MIG-2019. Gently rubbing the surface with the moistened tool will effectively eliminate the excess wash, leaving it only in the recesses and around the details. This capability is unique to enamels, highlighting their superiority over acrylic washes for this particular technique. Unlike acrylic washes, which dry in minutes and cannot have excess removed afterwards, enamels offer the flexibility to adjust and refine the application even after drying. While there are some acrylic specific options on the market that still allow for this adjustment, enamels remain the preferred choice among many modelers for achieving precise weathering effects. We let it dry at least for another hour before continuing.
|
|
|
|
Step 3: Sealing with Flat Varnish
|
|
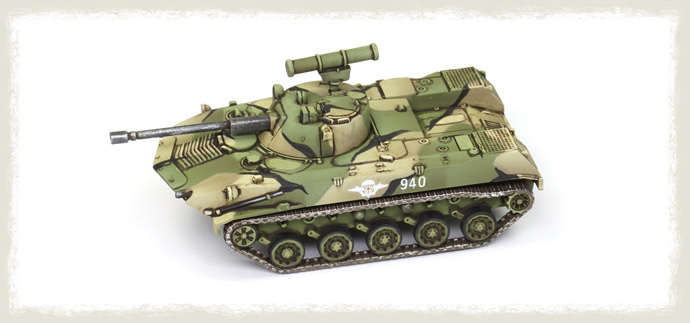
In principle, the only technique that benefits from the glossy varnish is the wash. Once applied, we can remove the glossy effect by applying a few thin layers of flat varnish using an airbrush and an acrylic matte varnish, such as Ultra-Matte Lucky Varnish A.MIG-2054.
|
|
|
|
Step 4a: Filter
|
|
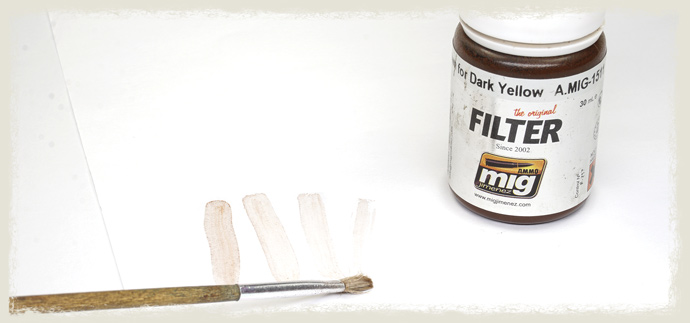
Another common weathering technique is the filter, also known as glazes in the miniature painting world. A filter involves using a very thinned paint (typically a ratio of 1 part paint to 10 parts thinner) to subtly alter the color of a surface. Filters can be employed to create various weathering effects, such as simulating dust or a general accumulation of dirt. They can also be used to adjust or recover certain colors. For instance, a common issue encountered with color modulation technique is the desaturation of colors during the highlighting process, where excessive use of white can result in a muted or greyish appearance. To address this, we can apply a filter to restore the vibrancy of the original colors. In this case, we aim to apply a dark brown filter, such as the enamel filter Brown for Dark Yellow A.MIG-1511, to restore some of the dark yellow hue to the camouflage, while also slightly darkening the green areas.
|
|
After shaking the bottle, we take a small amount of paint with a flat brush and then brush of part of it onto a piece of paper or cloth. When applying a filter, only a small amount of paint is needed, as the goal is to create a very thin layer (it is the opposite of a wash!). Since this is an enamel product, it can be thinned using Enamel Odourless Thinner A.MIG-2019. For greater control over the effect, the filter can be diluted with 50% thinner to achieve a more transparent layer.
|
|
|
|
Step 4b: Applying the Filter
|
|
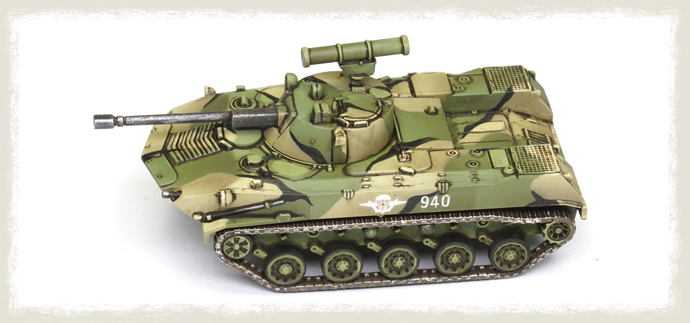
With only a small amount of paint on the brush, we gently apply the filter across the entire surface. Whenever possible, we aim to brush in the direction of gravity to passively create subtle streaking effects. If necessary, multiple layers can be applied, with approximately 10 minutes of drying time between each application.
|
|
Step 4c: Evaluating the Results of the Filter
|
|
Once completed, we may observe a subtle yet noticeable change in the colors: they now appear more vivid. It is important to bear in mind that we are aiming for a nuanced difference rather than something striking. In this instance, we have applied the filter across the entire surface. However, we could also focus on specific panels to create points of interest and even use different filters in each case.
|
|
|
|
Step 5: Superficial Chipping Effects
|
|
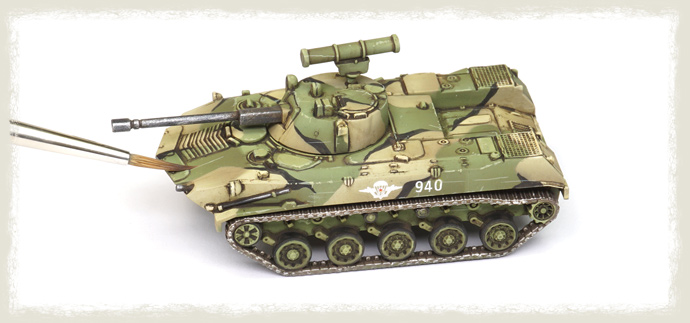
We can achieve a dynamic effect by creating both superficial and deeper chipping effects on the surface. In superficial chipping, the original paint is scratched, while in deeper chipping, a more significant impact has peeled off the paint, revealing the bare metal underneath. Typically, we start by creating superficial chipping effects.
|
|
To determine the base color for a camouflaged vehicle, we can choose the predominant factory color, which in this case is green. Therefore, we prepare a very light mix consisting of 25% Dark Olive Green ATOM-20072 and 75% Dunkelgelb DG III ATOM-20005, which is diluted with 20% water. Using a thin brush, we strategically create scratches here and there, focusing on areas where this effect is commonly found, such as hatches, handles, and especially along the edges. In fact, we can use the body of the brush, rather than just the tip, to easily create chipping effects across edges.
|
|
|
|
Step 6: Deeper Chipping Effects
|
|
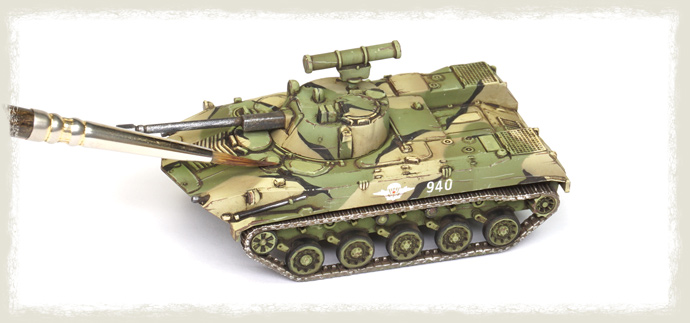
Next, we utilize a dark brown color, such as Chipping ATOM-20064, to simulate more severe damage. We follow the same procedure as before, focusing on creating deeper effects within or around the superficial ones. It is crucial not to completely cover the superficial chipping effects, as this will contribute to a more three-dimensional appearance. Additionally, we do not need to cover every single superficial impact. Introducing variation in the chipping effects will enhance the overall realism of the model.
|
|
The two crucial aspects of chipping effects are the size, which should be very small, and the number, as we should apply only a few rather than covering the entire tank.
|
|
|
|
Step 7: Dust Effects
|
|
The easiest, fastest, and most realistic method to create dust effects is by using pigments, as we described in a previous tutorial. To begin, we select several pigments that are suitable for the environment we have in mind. Combining various colors will enhance the final results. After mixing the pigments together, we add 50% Enamel Odourless Thinner A.MIG-2019 to create a wash, and mix it well.
|
|
Step 8: Applying Wet Pigments
|
|
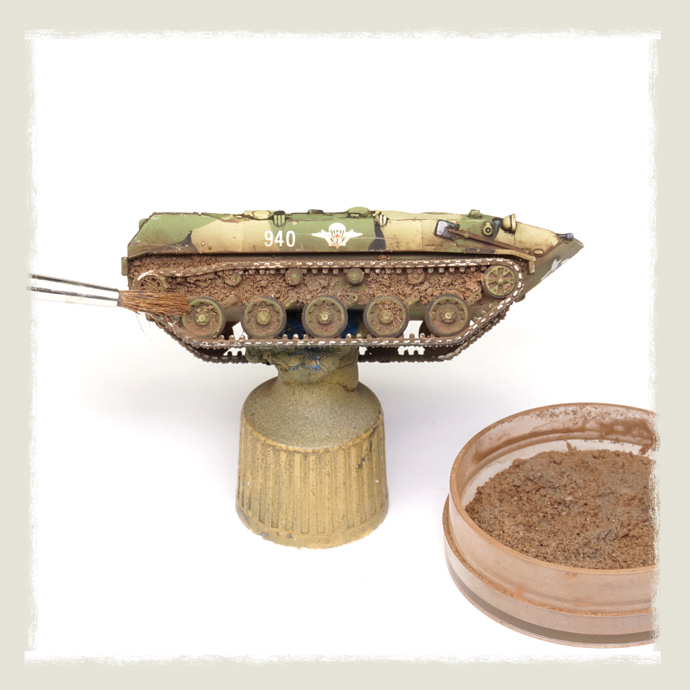
We apply the pigments wash onto the tracks and lower part of the tank using an old brush. While our goal is to accumulate pigment on the tracks to simulate heavy dust buildup, we can apply the wash onto the sides of the tank in a stippling motion. This stippling technique will not only deposit pigment but also create a textured appearance, enhancing the realism of the dust effects.
|
|
Step 9: Removing Excess Pigment
|
|
After applying the wash, we allow it to dry completely, which can take several hours. To accelerate the drying process, we can use a hairdryer. Once dry, we use a clean brush to gently remove the excess pigment by softly rubbing the surface. It is important to note that we can safely remove the excess pigment because we used Enamel Odourless Thinner for the wash instead of "pigment fixer". The former semi-permanently fixes the pigments, allowing for adjustments, while the latter permanently sets them in place.
|
|
Step 10: Evaluating the Dust Effects
|
|
This simple way to create dust is very effective, but also the results are a bit simple. We can use pigments to create also accumulations of dry mud on the lower part of the tank, specially on the tracks area.
|
|
Step 11: Creating Dry Mud Effects
|
|
To create dry mud effects, we utilize the same mixture of pigments as before, but this time we apply them dry. Using an old brush or a small spatula, we meticulously accumulate dry pigment on the lower part of the vehicle. It is beneficial to incline the tank so that the pigment remains in place during application.
|
|
Step 12: Fixing Heavy Accumulation of Pigments
|
|
To permanently fix the pigment in place while maintaining the texture we created, we apply a small amount of Pigment Fixer A.MIG-3000 using capillary action. To do this, we use a plastic pipette to carefully apply the fixer without directly touching the surface of the model. This ensures that the pigment remains securely attached to the model, preserving the realistic texture of the dry mud effects.
|
|
Step 13: Enhancing the Dry Mud Effects
|
|
Optionally, while the Pigment Fixer is still wet, we can enhance the effect by adding more dry pigment. Carefully deposit the additional pigment on top of the wet areas without directly touching the surface to avoid disturbing the texture we have created. This step allows for further customization and depth in the dry mud effects.
|
|
Step 14: Evaluating the Mud Effects
|
|
After applying the Pigment Fixer, we allow it to dry completely for several hours. If necessary, we can use a hairdryer to speed up the drying process. The resulting dry mud effects are astonishingly realistic, achieved with minimal effort. If desired, we can further enhance the model by adding additional nuances using enamels to create various effects such as wet mud areas, grease or oil effects, or splashes. These additional touches can add even more depth and realism to the overall appearance of the model.
|
|
Step 15: Final Details
|
|
To complete our vehicle, we can add an aerial using a nickel-silver rod with a diameter of 0.2mm (NSR01, Albion Alloys Ltd), painted in black to mimic its appearance. Additionally, to represent the glass effects of the different lenses, we can apply a thin layer of glossy varnish over an initial layer of black paint. This will create a realistic shine and enhance the overall authenticity of the model.
|
|
Conclusion
|
|
And with this, our tiny tank would be ready to roll. In this tutorial, we have elevated the quality of the final results compared to our previous tutorials. This naturally required additional time, particularly due to the color modulation steps. However, we have not reached the pinnacle just yet. Further improvements can still be made by adding more layers to the color modulation and incorporating additional weathering effects, such as streaking effects or utilizing oils to accentuate certain areas, as demonstrated in previous tutorials.
|
|
~ Rubén
|
|
|