
|
| |
|
|
|
|
 |
|
|
Lumpy Paints Rettemeier
 |
Lumpy Paints Rettemeier
Facing the Facts
By Andrew 'Lumpy' Salisbury
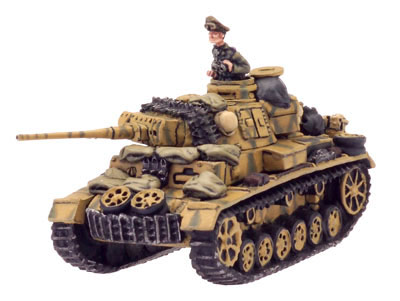
Painting faces is often a task that gets overlooked or placed into the ’too hard’ category when it comes to presenting your finished masterpieces to your opponent for subsequent obliteration. Well this week I’m going to show that you can achieve the results you want reasonably quickly with my pick of the week, Oberst Rettemeier (GE886).
Roll out!
|
|
"First things first, but not necessarily in that order" - Doctor Who
I set up our friend the tank commander in a pin-vice using the tab that was handily attached to his bottom and got him primed in black. I just brushed on thin black paint for the primer making sure I got all the gaps (like in his binoculars). You can use a spray can or airbrush if you’d rather, and you don’t need to use black either - but I find it easier.
This kind of set-up was really handy because I quite literally had a handle on the little guy. If you try to fix him to your beautifully adorned tank after you’ve painted it and then intend on painting him you’ll be tearing your hair out all too quickly as your fingers rip paint off your lovingly painted Panzer with Spiderman-like ability.
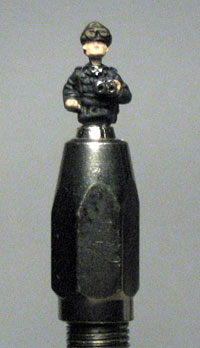
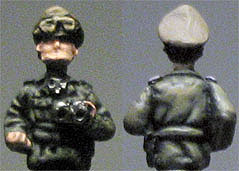
The picture to the right has been taken after the first stage of painting - which I’m about to move onto - so don’t worry if your undercoat doesn’t magically pick out medals or give a flawless Mediterranean complexion on your first go.
Stage 1
We start off with a bit of Panzer Grey over his uniform. We hit pretty much all of it except for where the folds are deep like on his arms.
|
 |
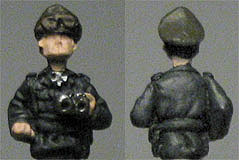 |
We follow with your mid-tone choice of flesh (there’s so many!) and we cover all parts required. Oberst Josef-Wilhelm had black hair as far as I know so I’m going with that as well. The hat I did with a thin coat of Military Khaki and a mid-tone brown for the goggles.
We pick out the details like his medal and binoculars now with a suitable metal pigment paint. It’s good to hit your metal stuff early because slip-ups with metallic paint show up easily.
|
|
Stage 2
With a good basecoat down we build on from that. I added some Sicily Yellow to my Panzer Grey and started bringing some volume to his uniform. It’s kind of an odd colour but by keeping the paint thin you can make his jacket look well-worn. His goggles are hit with a thin grey to pick out the high-spots.
Grab your shading colour for your skin and apply
it in between the fingers and around the ears, under the nose and
cheeks, and around the base of his neck.
|
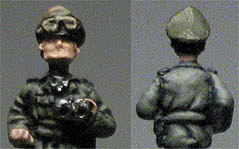 |
| With this done I applied a
very thin wash of a muddy brown to add shadows to his eyes and jaw line. |
 |
Stage 3
With our Sicily Yellow we thin it out and apply some final highlights to the uniform. Try and hit the higher areas that catch the most light and would be most weather-worn. We tone the hat down with a thin mid-tone brown.
Grab your flesh mid-tone colour that you started with and touch up any areas that may need it, then follow it up with a lighter flesh colour on the most pronounced features like knuckles and fingers, nose, chin, ears, and maybe cheekbones.
|
|
With the major parts done go back and add some
details like the pink and grey shoulder pads for a tank commander, or
unit and theatre insignia if you know it. These little touches can
often really bring the final piece to life.
Wrapping Up
"Look, it’s been swell, but the swelling’s gone down." - Tank Girl
If your shade for your flesh colour is too dark you can end up with a cartoon character instead of a World War II hero. You’ll probably be surprised at how subtle you can go... the shape of the miniature does half of the work for you!
If detail work is proving to be tricky because of an unsteady hand, try and keep your elbows tight to your body - it’ll provide a stable platform. If this still doesn’t work for you try and lean onto a table and see if that helps (but if someone bumps the table, it was them not me! Nicht schießen!).
Tune in next time as we unite man with machine and cover the tricks of adding camo to Panzers in Africa without the use of an airbrush in: Hiding in the Open...
|
|
|
|