
|
| |
|
|
|
|
 |
|
|
Assembling the Brummbär (Mid) with Schürzen Pinning Guide
The Contents
Check out the Brummbär in the online store...
Let's begin by taking a look at the contents of the blister for the Brummbär (Mid), contact the Customer Service team at [email protected] if you have any issues with any of the components. For more information regarding what information to include in your customer service request, click here. |
|
Assembling the Metal Components
The Gun Barrel
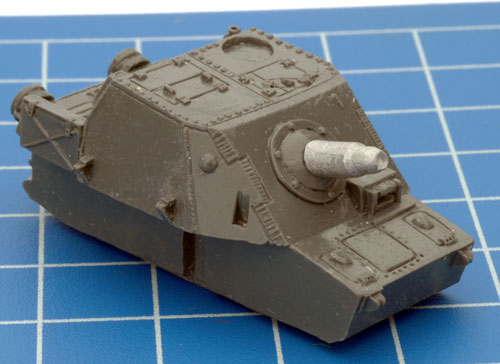
With such a low part count, assembling the Brummbär is fairly simple. Begin by cutting all the parts off the sprue and cleaning them up i.e. removing mould lines etc (the GF9 ranges of hobby tools will aid you in this process, see the entire range of GF9 hobby tools here). Begin by gluing the gun into place as shown with your GF9 Hobby Glue; the gun is angled at the base to ensure the gun points in an upwards direction as shown.
Right: Gluing the gun barrel into place.
|
 |
|
Useful Tip: If you find your glue doesn't want to cure, trying washing the resin in warm soapy water to remove any chemical residue from the moulding process. Or try using the GF9 Rapid Cure.
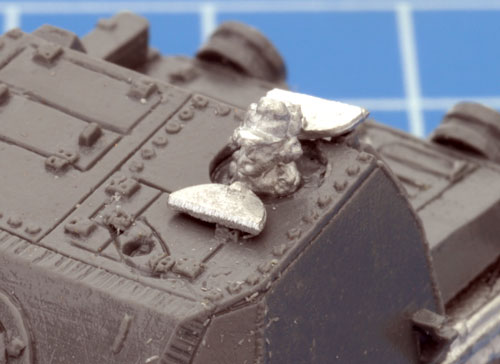
For variation, cut the hatch in half with your hobby knife (be sure to use a cutting mat) and glue the commander included on the sprue into the hull. This also helps to differentiate the platoon commander for the remainder of the platoon. Handy in the heat of battle!
Right: Using the command figure for modelling variation.
|
 |
The Mudguards
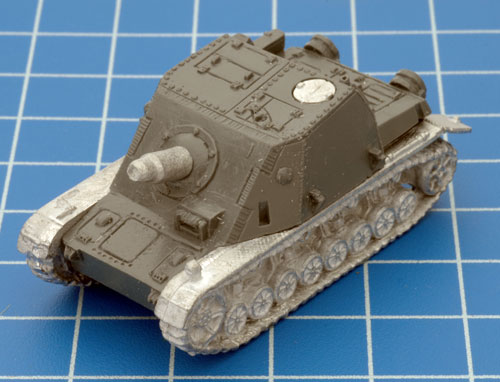
Next, glue the mudguards to the back of the tracks. The mudguards are side specific, use tweezers to glue the mudguards as shown in the photos below, make sure that the notch is orientated correctly as shown.
Below: Gluing the mudguards in place.
|
 |
The Tracks
Once the tracks are glued into place, all of the metal components have been assembled. Again, this is fairly simple as the tracks and hull have lugs and hotches to ensure correct alignment.
Left: The tracks glued into place.
|
The Plastic Schürzen
Jeremy has some tips on assembling the plastic schürzen for the Panzer IV H:
Click here to discover Jeremy's tips...
With the Brummbär, Evan has done half the work for us, as he has sculpted four of the mounting brackets as part of the model. That just leaves you needing two of the smaller mounting brackets and the two longer ones. In addition to the two mounting rails and of course, the two schürzen pieces themselves.
|
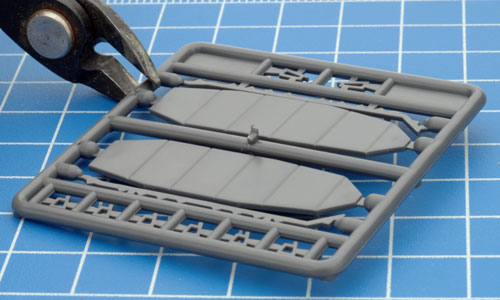 |
Useful Tip: Phil advises to cut the entire plastic sprue into pieces to start with using your cutters. This helps to relieve the tension on the parts reducing the chances of breaking any of the brackets.
Above: Cutting the plastic sprue into pieces.
|
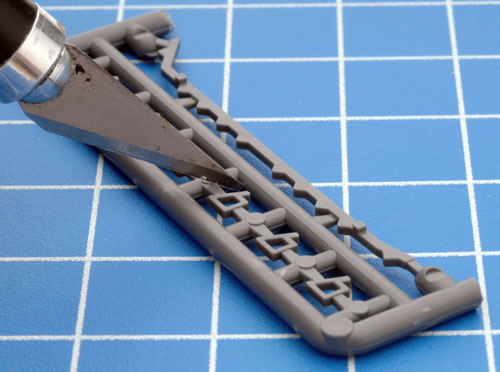 |
Once in pieces, use a sharp hobby knife to cut the brackets off the sprue at the base of the tab. This method helps to prevent the bracket from pinging off to places unknown. It also helps to use a cutting mat and not have grey carpet in case one of your brackets does find its way onto the floor.
Left , Below Left and Below Right: Cutting the mounting brackets off the sprue.
Bottom: The required parts cut from the sprue successfully.
|
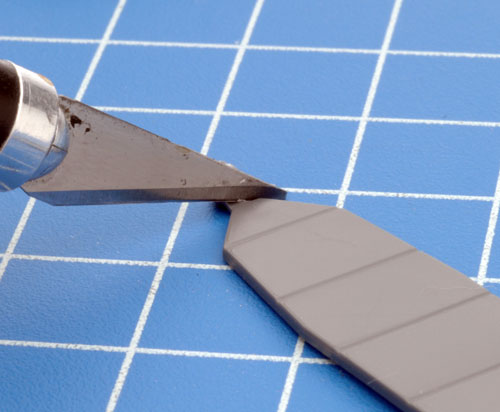
Remove the sprue tabs from the schürzen using your hobby knife. Any remaining traces can be removed with a file.
Right & Below Left; Center; Right: Cleaning up the schürzen parts. |
 |
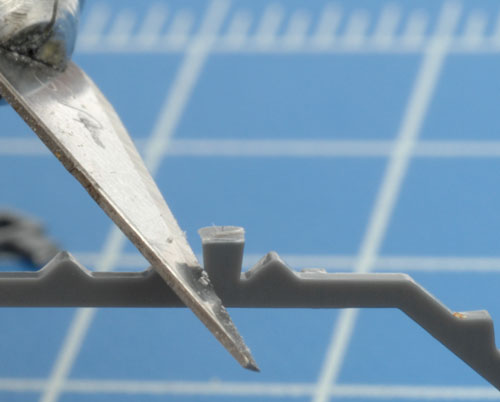 |
The tabs on top of the mounting rail can be a little more problematic. The best solution is to use your hobby knife to scoop out the tab before tidying the area up with a file.
Left: Scooping out the sprue tab from the mounting rail.
Below: The cleaned up schürzen parts.
|
|
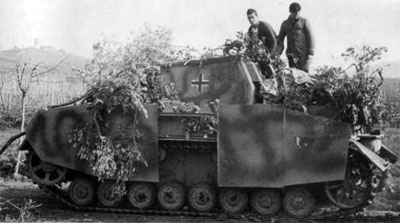
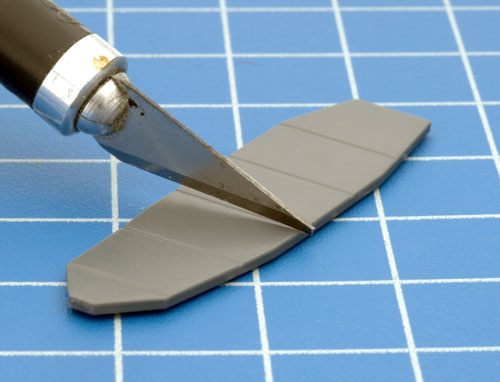
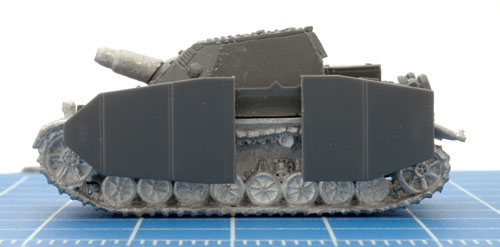
It was quite common for sections of schürzen to be missing on German tanks. This can add variation and character to your models and is as simple as cutting a section out using your hobby knife before mounting on the rail.
Right: A Brummbär with a missing schürzen section.
Below left: Use your hobby knife to create the missing section.
Below right: The schürzen with its missing section mounted on the Brummbär.
|
 |
 |
|
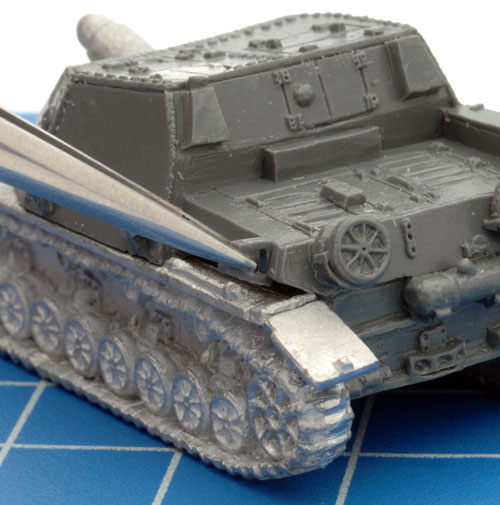 |
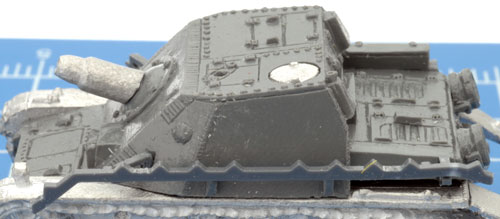
When the time comes to attach the mounting brackets, start with the rear smaller brackets first. Use a small amount of hobby glue and tweezers to make the job a little easier. While the glue is curing, you can make the needed adjustments to ensure that the brackets are level.
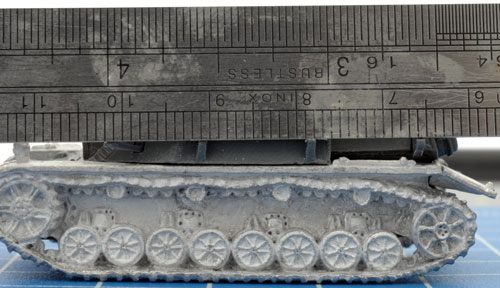
This is where the two brackets that are part of the model come in handy. Use a small metal ruler or the mounting rail to make sure the brackets are level with each other.
Left: Using tweezers to attach the small mounting bracket.
Below left: Using a metal rule to ensure the brackets are level.
Below right: Using the mounting rail to ensure the brackets are level. |
 |
 |
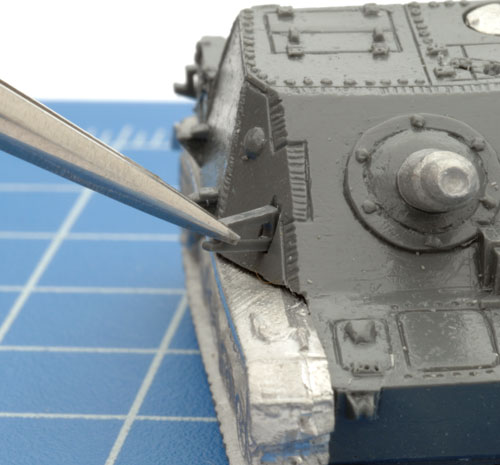
When it comes to mounting the longer mounting bracket to the front of the Brummbär, be sure to use the mounting rail to ensure you get the correct angle. Again, make use of tweezers and a small amount of hobby glue while making adjustments before the glue sets.
Useful Tip: Once you're happy with the position of the mounting brackets, use a small amount of GF9 Rapid Cure to fix the bracket into place.
Right: Attaching the long mounting bracket, tweezers make this job so much easier.
|
 |
 |
Pinning The Schürzen
While the schürzen on the Brummbär and the Panzer IV H for that matter look great when attached, it does have one flaw. Attached as is, the schürzen is vulnerable to inwards/downwards pressure if picked up on the sides. Therefore, it is a good idea to pin the schürzen to help prevent any damage to your models in the future.
Editor's Note: This is one method I have used successfully with my Panzer IV Hs, it is not a be all or end all guide for pinning and I'm sure some of you have other methods to accomplish the same results. For example, Phil just uses a piece of the plastic sprue squared off and glued between the road wheels and the top of the tracks.
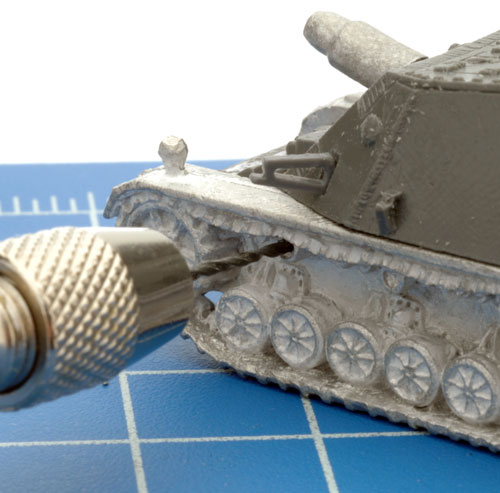
Begin by drilling a small hole in the first track return roller to accommodate the pinning wire.
Left: Drilling the hole for the pinning wire in the first return roller.
|
Useful Tip: The best tool to use for this is the GF9 Model Pinning System and the Model Pinning Drill Bits and Pins Refill kit. In this example, I've used the smaller gauge wire and drill bit from the Refill kit.
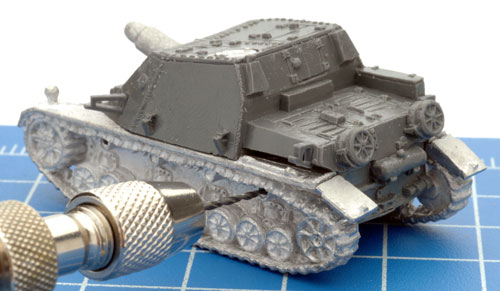
Next, drill a second hole in the last return roller for the second section of pinning wire.
Right: Drilling a hole for the pinning wire in the last return roller.
|
 |
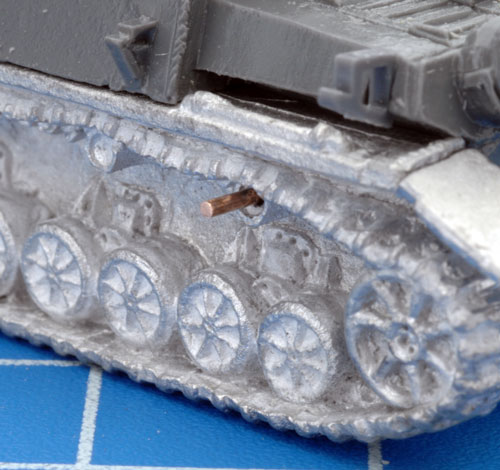 |
Once the holes for the pinning wire have been made. Cut a small piece of smaller gauge pinning wire from the GF9 Pinning Refill kit and insert it into the freshly drilled hole.
Useful Tip: The good thing about the GF9 Pinning Refill kit is that it includes the drill bits the same size as the pinning wire.
Make sure that you've filed the end of the pinning wire that protudes flat so it will sit flush with the schürzen when it come time to secure it using your hobby glue.
Left: Inserting the pinning wire, be sure not to glue it into place until your happy with the position the schürzen is sitting (see below).
|
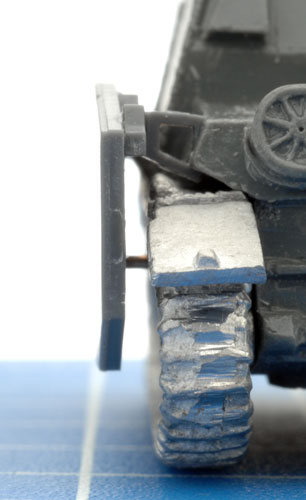
You will need to dry fit the schürzen to make sure it sits flush with the pinning wire. If its sitting at a weird angle, simply file the pinning wire down a little till you achieve the desired result. Try and start with a slightly longer piece of pinning wire than you need before making small adjustments. Once everything is sitting flush, use a small amount of hobby glue to glue the wire into place. Repeat this process for the other track.
Right: The schürzen sitting flush with the pinning wire. |
 |
 |
Once your happy that everything is sitting flush.You can glue the mounting rail and schürzen to the mounting brackets attached to the model.
You can either glue the mounting rail directly to the mounting brackets.
Left: The mounting rail glued directly to the mounting brackets.
|
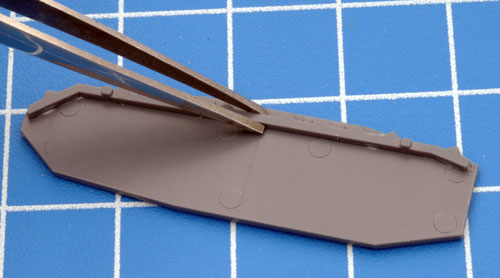
Or alternatively, you can glue the mounting rail directly to the schürzen before gluing it onto the mounting brackets.
Put a small amount of hobby glue on each of the mounting brackets and the ends of the pinning wire before carefully positioning the schürzen to the correct position and hold in place while the glue cures.
Right: Gluing the mounting rail directly to the schürzen.
|
 |
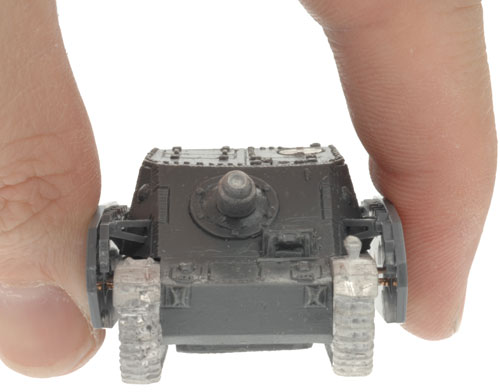 |
While a little more time consuming, once you've completed the pinning process the schürzen is a lot stronger and is capable of handling a the dreaded inwards/downwards pressure.
Left: Brummbär undergoing some stress testing. |
Job Done
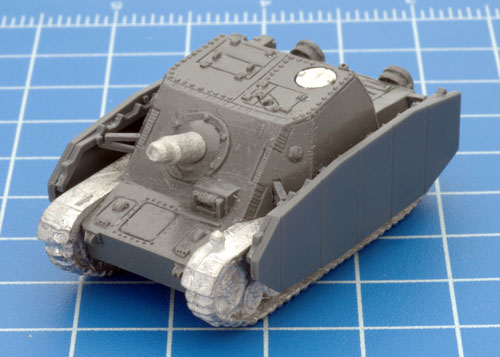
With all the metal components glued to the hull and the schürzen now attached and pinned the model is ready for painting.
Right: The fully assembled Brummbär.
|
 |
|
|
|